Thingiverse

2U Rack Mountable Raspberry Pi Holder for Raspberry Pi Super Computer
by Thingiverse
Last crawled date: 4 years, 3 months ago
Here it is, the 2U rack mountable for 21 Raspberry Pi 3B+. This the rack that held the 1024 Raspberry Pi at CodeOne San Francisco 2019 in the Raspberry Pi Super Computer.
You will need the following:
(21) Tapered Heat-Set Inserts for Plastic, Brass, M2.5 x 0.45 mm Thread Size, 3.4 mm Installed Length, Packs of 100. I ordered 94180A321 from McMaster-Carr
(21) Button Head Hex Drive Screw, Passivated 18-8 Stainless Steel, M2.5 x 0.45 mm Thread, 5mm Long, Packs of 25. I ordered 92095A457 from McMaster-Carr
(4) 10-32 3/8in long screws with flat head. I ordered 91253A001 from McMaster-Carr
(1) 18" 80/20 Seris 15 .5in x 1in https://www.amazon.com/gp/product/B00IWZFPCS/ref=ppx_yo_dt_b_search_asin_title?ie=UTF8&psc=1
(21) Raspberry Pi
(21) 90 degree micro USB cables
(1) 24 port or larger switch
(1) 24 port or larger 5v USB power supply, for example: https://www.amazon.com/gp/product/B07MB12XZ4/ref=ppx_yo_dt_b_search_asin_title?ie=UTF8&psc=1
And various tools
NOTE: Before ordering the items above, please double check to verify everything looks good, it was a while ago when I ordered these and while I went back through my receipts and I'm confident these are the items, there could be some mistakes. If there are, or there are questions, please let me know.
Steps:
Print (21) of the Pi2UHolder.stl files
Print (1) of Pi2ULeftBracket.stl
Print (1) of Pi2URigthBracket.stl
Insert a threaded insert into each of the holes in the Pi2UHolder.stl
Put the Raspberry Pi on top of the Pi2UHolder.stl, push on the 2 bottom holes and insert the bolt through the top hole and tighten into the threaded insert.
The 18in 80/20 is a little too long. You need to cut off 16.35mm. The most accurate way of doing this is with a mill.
Tap the 2 holes on either side of the 80/20 to 10-32.
Push the 80/20 into Pi2ULeftBracket.stl, and bolt in the two 10-32 bolts
Slid on (21) Pi2UHolder.stl with Raspberry Pi attached from step 5 above
Push the Pi2URigthBracket.stl onto the remaining bit of 80/20
Viola!
Similar models
3dwarehouse
free

eyebolt, 0.25 inch hole, 8-32 thread, McMaster-Carr 9489T512
...lt, 0.25 inch hole, 8-32 thread, mcmaster-carr 9489t512
3dwarehouse
eyebolt, 0.25 inch hole, 8-32 thread, mcmaster-carr 9489t512
thingiverse
free
Stacked Raspberry Pi Zero Case (Pi, USB-Hub, ePaper HAT) by Simonmicro
...ple case for a raspberry pi zero (w), with all his ports still accessible and a additional space for the epaper hat by waveshare.
thingiverse
free
Raspberry Pi Enclosure for Pelican Case Vault V100 by loganpettit86
...mp;psc=1
raspberry pi 4 4” screenhttps://www.amazon.com/gp/product/b07xbvf1c9/ref=ppx_yo_dt_b_search_asin_title?ie=utf8&psc=1
thingiverse
free

Pneumatic Engine by TheReedGraff
...ps://www.amazon.com/gp/product/b07dksn46t/ref=ppx_yo_dt_b_search_asin_title?ie=utf8&psc=1
1 pen spring (any should work fine)
thingiverse
free
Raspberry Pi Retrogaming Case by Eguin
...for use in future projects, and if you have similar things already can be used in their place. in...
3dwarehouse
free

screw, shoulder, 0.1875 in. dia. x 0.375 in. long, socket drive, 8-32 thread, McMaster-Carr 90298A15
...-carr 90298a15
3dwarehouse
screw, shoulder, 0.1875 in. dia. x 0.375 in. long, socket drive, 8-32 thread, mcmaster-carr 90298a152
thingiverse
free

Rack for Raspberry PI B on a modular system 19" 2U by pfml
... system 19" 2u
by krapozok, dedicated to "old" raspberry pi model b (especially revs 1 without hole for fixation).
thingiverse
free

Raspberry Pi Monitor Border by rmvallance
...reen 5" monitor found here:
https://www.amazon.com/gp/product/b07fdyxpt7/ref=ppx_yo_dt_b_search_asin_title?ie=utf8&psc=1
thingiverse
free

PoE Pi Zero Stackable Case by egrims
..._title?ie=utf8&psc=1
magnets:https://www.amazon.com/gp/product/b07873zcy4/ref=ppx_yo_dt_b_search_asin_title?ie=utf8&psc=1
thingiverse
free

Modular CNC Controller by AsynchronousEngineering
...er motor driver
amazon
ramps v1.4 shield
amazon
arduino mega clone
amazon
model sources
raspberry pi 3 b+
ramps v1.4
arduino mega
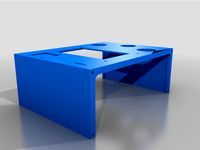
2U
3ddd
$1

Favourite 1305-2U
...vourite 1305-2u
3ddd
favourite
модель потолочного светильника favourite 1305-2u. в архиве файлы в 2011 и 2014 версиях и obj-файл.
3ddd
$1

Кузнечный станок "Мастер -2У"
...3ddd станок , кузнечный текущая модель станка мастер-2у сайт производителяhttp://master-1.ru/text_group/show/master-2uamp;nbsp; ...
thingiverse
free

1.25u & 2u oem by Andrew_Saw
...1.25u & 2u oem by andrew_saw
thingiverse
1.25u & 2u oem
3d_sky
$8

Favourite 1305-2U
...favourite 1305-2u
3dsky
favourite
model downlight favourite 1305-2u. the archive files in 2011 and 2014 versions and obj-file.
thingiverse
free

Insulation Test 2U by Brad34
...tion test 2u by brad34
thingiverse
cubesat test 2u .5mm gap and 1mm gap for insulation in walls. inner dimensions are identical.
thingiverse
free

2U Rack Ear Bracket by kinggeekuk
...ack ear bracket by kinggeekuk
thingiverse
2u gear rack mount ears. you will need to drill the inner side to suit your equipment.
thingiverse
free

Rack for Ubiquity USG on a modular system 19" 2U by its_Blackpoint
... modular system 19" 2u by its_blackpoint
thingiverse
rackmount for a ubiquiti usg to mount it in a 2u 19" modular rack
thingiverse
free

2U Rackstand
...s not been testet.
maybe i do a updated version with support for cagenuts to stop them from spinning when screwing the switch on.
thingiverse
free

2U Rack Mount Bracket by colanabo
...er a desk/ table or vertical on wall.
you will need 4 m6 nuts, 4 m6 screws and screws to mount the brackets to the table or wall.
thingiverse
free

Cherry ML Vertical 2U Keycap by richardhopton
...keycap ml.stl file, but if you have older keys that are 19mmx19mm then go for the 2u keycap ml (original 38x19).stl file instead.
Mountable
turbosquid
$10

Mountable Building
...3d model mountable building for download as 3ds, obj, and fbx on turbosquid: 3d models for games, architecture, videos. (1285672)
turbosquid
$10

Bridge Mountable
... available on turbo squid, the world's leading provider of digital 3d models for visualization, films, television, and games.
turbosquid
$10

nvg mountable horns
...royalty free 3d model nvg mountable horns for download as stl on turbosquid: 3d models for games, architecture, videos. (1329386)
thingiverse
free

Wall Mountable Soap Dish
...wall mountable soap dish
thingiverse
wall mountable soap dish.
thingiverse
free

gopro mountable clamps by montygo
...gopro mountable clamps by montygo
thingiverse
gopro mountable clamps made in tinkercad
thingiverse
free

Mountable Racking Aid by PSomeone
...le racking aid, use a https://www.mcmaster.com/5862k163/ glued into provided holes to keep weapon secured during non use periods.
thingiverse
free

Wall mountable version by nastonrp
...wall mountable version by nastonrp
thingiverse
wall mountable version of main model.
quick and easy print.
thingiverse
free

Mountable Wine Rack by Bracyst
...mountable wine rack by bracyst
thingiverse
mountable wine rack able to hold wine glasses upside down.
thingiverse
free

Bearing (Mountable) by kovaloid
...id
thingiverse
just my test of mountable bearing.
size (inner/outer/height): 13/33/10 mm
maybe i will make different sizes later
thingiverse
free

mountable mask by ecasade2
...mountable mask by ecasade2
thingiverse
mask for little printers
Raspberry
3d_export
free

raspberry
...raspberry
3dexport
3d model of a raspberry. i tried to make it realistic.
turbosquid
$27

Raspberries
...y free 3d model raspberries for download as max, obj, and stl on turbosquid: 3d models for games, architecture, videos. (1354176)
turbosquid
$14

Raspberries
...y free 3d model raspberries for download as max, obj, and fbx on turbosquid: 3d models for games, architecture, videos. (1364663)
3d_export
$5

raspberry pi
...raspberry pi
3dexport
carcasa para la raspberry pi
turbosquid
$99

Raspberry
... available on turbo squid, the world's leading provider of digital 3d models for visualization, films, television, and games.
turbosquid
$10

raspberries
... available on turbo squid, the world's leading provider of digital 3d models for visualization, films, television, and games.
archive3d
free

Raspberries 3D Model
...raspberries 3d model archive3d raspberries raspberry raspberries n300911 - 3d model (*.3ds) for interior 3d...
3d_export
$5

raspberry fruit
...raspberry fruit
3dexport
3d_export
$5

raspberry
...y different sizes. their color ranges from light burgundy to pink. there are formats: obj, 3ds, blend, dae, fbx, mtl.<br>:)
evermotion
$12

raspberries 23 am130
...evermotion raspberries 23 am130 evermotion key 23 food fruit raspberry fruits am130 raspberries highly detailed 3d model of raspberries...
Pi
design_connected
$11

Pi
...pi
designconnected
ligne roset pi chairs computer generated 3d model. designed by thibault desombre.
3d_export
$5
raspberry pi
...raspberry pi
3dexport
carcasa para la raspberry pi
turbosquid
$18

pied
... available on turbo squid, the world's leading provider of digital 3d models for visualization, films, television, and games.
3ddd
$1

Emme pi light
...emme pi light
3ddd
emme pi light
люста emme pi light
3ddd
$1

Emme pi light
...emme pi light
3ddd
emme pi light
бра классическое emme pi light
3ddd
$1

Emme Pi Light
...emme pi light
3ddd
emme pi light
3ddd
$1

Emme Pi Light
...emme pi light
3ddd
emme pi light
design_connected
$16

Pi-Air
...pi-air
designconnected
living divani pi-air lounge chairs computer generated 3d model. designed by harry & camila.
3d_ocean
$15

Manneken Pis
...picting a naked little boy urinating into a fountain’s basin. (wikipedia) the model was sculpted in blender 2.70a rendered wit...
3ddd
$1

Emme pi light
...emme pi light
3ddd
emme pi light
люстра классическая фирма: emme pi light
артикул: 3595/5/cot/12/wh
Rack
archibase_planet
free
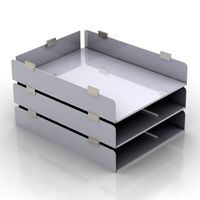
Rack
...ack
archibase planet
rack paper rack rack for paper
rack 6 office n060914 - 3d model (*.gsm+*.3ds) for interior 3d visualization.
archibase_planet
free
Rack
...ack
archibase planet
rack paper rack rack for paper
rack 3 office n060914 - 3d model (*.gsm+*.3ds) for interior 3d visualization.
archibase_planet
free
Rack
...ack
archibase planet
rack paper rack rack for paper
rack 5 office n060914 - 3d model (*.gsm+*.3ds) for interior 3d visualization.
archibase_planet
free
Rack
...ack
archibase planet
rack paper rack rack for paper
rack 7 office n060914 - 3d model (*.gsm+*.3ds) for interior 3d visualization.
archibase_planet
free

Rack
...for magazines rack for notebooks notebooks notebook
rack notebook n120614 - 3d model (*.gsm+*.3ds) for interior 3d visualization.
archibase_planet
free

Rack
...rack
archibase planet
rack umbrella umbrella rack
rack n180811 - 3d model (*.3ds) for interior 3d visualization.
archibase_planet
free
Rack
...rack
archibase planet
rack book rack stand
rack - 3d model (*.gsm+*.3ds) for interior 3d visualization.
archibase_planet
free

Rack
...rack
archibase planet
rack rack for glasses
rack 1 - 3d model (*.gsm+*.3ds) for interior 3d visualization.
archibase_planet
free

Rack
...rack
archibase planet
rack rack for glasses
rack 2 - 3d model (*.gsm+*.3ds) for interior 3d visualization.
3d_export
free
rack
...rack
3dexport
rack
Super
3ddd
free

super impossible
...super impossible
3ddd
kartell , super impossible
cтул super impossible фирмы kartell
3d_ocean
$19

Super market
...ean
chain shop large super market 3d model low poly market low poly super market shop super market
low poly model of supermarket.
3d_export
$15

super mario
...r mario.<br>superstar, super mario superhero.<br>сheerful and courageous.<br>new exciting adventures await him.
3d_ocean
$30
Super Hero
...hero mask ninja super hero sword zbrush
super hero created in zbrush 4.0 hero body—6 division levels 1.668 poly to 1.705mil poly.
3d_export
$25

super promotion
...super promotion
3dexport
3d_export
$5
super sledge
...super sledge
3dexport
...
3ddd
$1
Longboard Super Sonic
...longboard super sonic
3ddd
лонгборд
longboard super sonic
turbosquid
$60
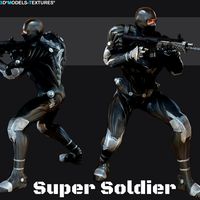
Super Soldier
...quid
royalty free 3d model super soldier for download as fbx on turbosquid: 3d models for games, architecture, videos. (1211725)
turbosquid
$60
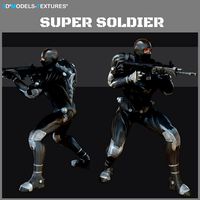
Super Soldier
...quid
royalty free 3d model super soldier for download as fbx on turbosquid: 3d models for games, architecture, videos. (1207493)
turbosquid
$55
Super Hero
...squid
royalty free 3d model super hero for download as blend on turbosquid: 3d models for games, architecture, videos. (1387035)
Computer
3d_export
$6
computer
...computer
3dexport
high-tech computer, for space environment #computer
3d_export
$5

Computer
...computer
3dexport
it's just a computer
3d_export
$5
computer table
...computer table
3dexport
computer table, computer cabinet, table, cabinet, wooden computer table
3d_ocean
$10
computer desk
...computer desk
3docean
computer desk
high computer desk for in showrooms
turbosquid
$10

Computer
...bosquid
royalty free 3d model computer for download as blend on turbosquid: 3d models for games, architecture, videos. (1242095)
turbosquid
free
Computer
...urbosquid
royalty free 3d model computer for download as c4d on turbosquid: 3d models for games, architecture, videos. (1234779)
turbosquid
$45

Computer
...d
royalty free 3d model computer for download as obj and fbx on turbosquid: 3d models for games, architecture, videos. (1300432)
3d_export
free

Computer
...computer
3dexport
turbosquid
$4

computer
...ty free 3d model computer for download as blend, fbx, and obj on turbosquid: 3d models for games, architecture, videos. (1703278)
turbosquid
$3

Computer
...alty free 3d model computer for download as obj, stl, and fbx on turbosquid: 3d models for games, architecture, videos. (1664791)
Holder
archibase_planet
free

Holder
...holder
archibase planet
holder toilet paper holder
holder paper n070712 - 3d model (*.gsm+*.3ds) for interior 3d visualization.
archibase_planet
free

Holder
...e planet
holder rack toilet paper holder
holder toilet roll n240715 - 3d model (*.gsm+*.3ds+*.max) for interior 3d visualization.
archibase_planet
free

Holder
...holder
archibase planet
pen holder support prop
pen holder - 3d model for interior 3d visualization.
archibase_planet
free

Holder
...holder
archibase planet
pole post holder
сhurch cross pole holder - 3d model for interior 3d visualization.
archibase_planet
free

Holder
...holder
archibase planet
holder bathroom ware
shower holder - 3d model (*.gsm+*.3ds) for interior 3d visualization.
archibase_planet
free

Holder
...oilet paper holder
holder paper devon&devon; time black n241113 - 3d model (*.gsm+*.3ds+*.max) for interior 3d visualization.
archibase_planet
free

Holder
...holder
archibase planet
holder hanger hanger for towel
holder 7 - 3d model (*.gsm+*.3ds) for interior 3d visualization.
archibase_planet
free

Holder
...holder
archibase planet
holder hanger hanger for towel
holder 3 - 3d model (*.gsm+*.3ds) for interior 3d visualization.
archibase_planet
free

Holder
...holder
archibase planet
holder towel rack towel-horse
holder - 3d model (*.gsm+*.3ds) for interior 3d visualization.
archibase_planet
free

Holder
...lder
archibase planet
holder hanger hanger for towel
holder towel n250912 - 3d model (*.gsm+*.3ds) for interior 3d visualization.