Thingiverse
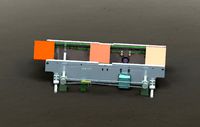
Z9M3 Rear belt Alignment and Tensioner CoreXY by gallaghersart
by Thingiverse
Last crawled date: 3 years, 1 month ago
Z9M3 Rear belt Alignment and Tensioner CoreXY (OLD)
** Zonestar now has a metal part for this
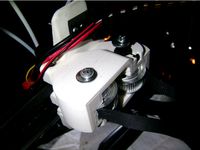
**As of Aug. 6th 2018 I’m printing new and better versions of this, so as long as no print failures I’ll post those in @40+ hours. Teaser picture included of new "Dial it in" beta…
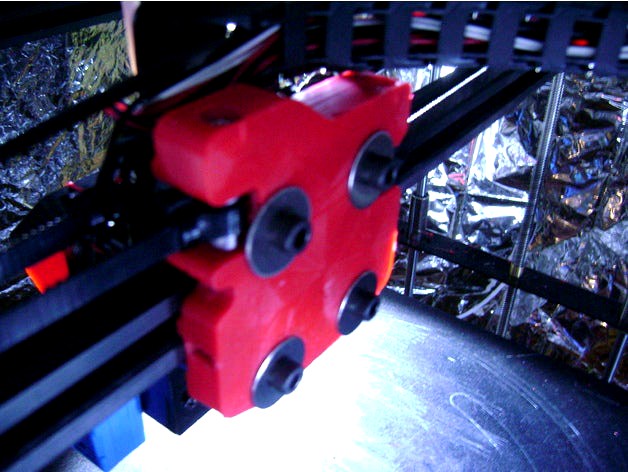
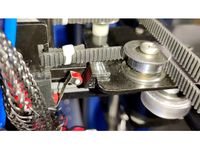
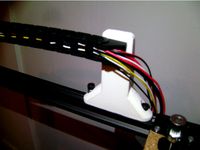
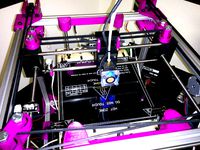
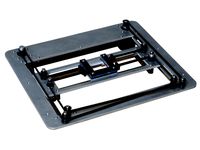
Working with what I have, My goal was to be able to leave 5m belt uncut and only the ends that attached to front of hotend carriage would be damaged from zip ties and cut if need. The other ends wrap around spacers then into a belt tensioner. Any excess belt can be wrapped around tensioner and left uncut. I also wanted to be able to fine tune the tension, Zip ties around object basically only gave you the resolution of a single belt tooth to work with. This allows very small changes thought out @10--15mm of belt movement with a turn of a screw
Right know I do not have the funds or ability to do the metal work to make this smaller, for the time being I damaged some LEGO brinks to give me some more space in the back to extend the Y end stop. To give way to over large belt tensioner
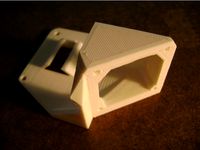
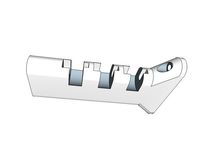
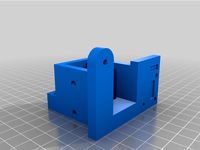
Ideally unit would be half as big. The 2 aluminum belt bocks would be cut @ the 40% mark and have nuts welded to the larger parts, so once made only the bolt, belt and belt blocks would need space cut out for them.
Currently the bolt lays at the bottom and pushes up the blocks as the bolt is turned. So the hole cut out is rather big and includes all parts in single hole. With cut belt block and welded nut on top, the only holes needed for each part needs made. And with that a more stable and smaller unit.
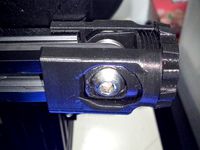
Currently this tension needs to work with my Z9M3 back end and belt alignment. As the large washers on the bolts that attach to the back of hotend carriage, are the placement of the belt tensioner screws. As the belt tensioner is held in place with tight belts the bolt that applies the pulling force lays on top of the washers. Without washer I would think the bolts would just go thought the belt alignment module.
So how to use it.
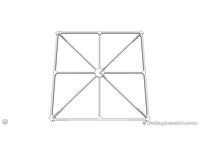
1St CoreXY unit needs to be square, and I mean it.
Once all screwed sown parts are in place, take long 5m 6mm (worked for my 300mmx300mm) and feed belt equally though back of belt tensioner.
Run belts though correct layout of your unit.
Place front ends of belt though their locations that they will be ziptied to. Leave very little though the hole about as much as you need to tighten belt as before.
Pull excess belt though the back of the belt tensioner
You want unit to basically be loose tight. Mark with non damaging marker the location of the belts on the back of tensioner.
Remove ends from front unit to give you some space to work with
Carefully pull belt out while marking or keeping track of location, one belt at a time.
Pull a belt out long enough to apply the belt blocks and bots and nuts. One nut at bottom and washer / locknut above belt blocks. The idea is once you slide all parts back into place the belt will be at a location that very little loss of belt will take place on the front.
Do the other belt as above.
Make sure belt tensioner is lined up and flush with belt alignment module.
You should not be able to pull any additional belt from the back.
Now pre tight the belts.
Now for the fun part.
My lower belt is the left of the nozzle.
Tight temporally with your hands with each belt and notice how your square drive carriage will go out of alignment as you tighten a belt. In the end the unit needs to be square.
SO with the lower belt tighten to a loose belt, not something you would want to print with. Clip it and notice carriage should be 5-10mm off on one side.
Now tight the top belt so unit is as square as you can get it. As you tight the top belt the lower belt will also get tighter.
Basically tighten the belts so they end up as square and all most as tight as you want it, BUT not too tight. As the belt tension can only tighten.
Now with your hand move the hotend around the bed (should have motor cabled discounted already). Makes sure things move easily. Personally, I like steel cables and things tight, and I Also changed my XY motors to some more powerful and 400spteps.
With the unit at the back and center with your hand in the center of the unit as not to favor a side. Move the drive carriage to the very front. With my unit I measure the distance between Y carriage’s and front support on both sides.
If the Space is same on both side you’re done, lucky you! Skip to verification steps
If not..
Now again with your hand pull on a belt and make it tighten to see one side shrink in distance. The goal is to only tighten one belt.
Once you know what belt needs tightening, unlock bolt from turning as you screw top screw to make room for belt blocks to raise up, I used lock nuts for this part. Slowly adjust this single bolt, if you go to far you will have to push alignment block and belt back in and then pull on belt outside of carriage to get slack back.
Move carriage around and re measure, repeat until square.
Once all is good tighten down the locknuts on the back of the belt tension to keep unit secure. Wrap uncut /unused belt around belt tension, tie off with ziptie to secure it. Move carriage around again to make sure things are still square.
Print of a skew test to verify if you want, and then tighten belts to correct the print. I did a 250mm x 250mm test and was unable to see any difference that would show unit is out of alignment or askew. The idea is not to modify software or firmware to correct askew alignment.
** Zonestar now has a metal part for this
**As of Aug. 6th 2018 I’m printing new and better versions of this, so as long as no print failures I’ll post those in @40+ hours. Teaser picture included of new "Dial it in" beta…
Working with what I have, My goal was to be able to leave 5m belt uncut and only the ends that attached to front of hotend carriage would be damaged from zip ties and cut if need. The other ends wrap around spacers then into a belt tensioner. Any excess belt can be wrapped around tensioner and left uncut. I also wanted to be able to fine tune the tension, Zip ties around object basically only gave you the resolution of a single belt tooth to work with. This allows very small changes thought out @10--15mm of belt movement with a turn of a screw
Right know I do not have the funds or ability to do the metal work to make this smaller, for the time being I damaged some LEGO brinks to give me some more space in the back to extend the Y end stop. To give way to over large belt tensioner
Ideally unit would be half as big. The 2 aluminum belt bocks would be cut @ the 40% mark and have nuts welded to the larger parts, so once made only the bolt, belt and belt blocks would need space cut out for them.
Currently the bolt lays at the bottom and pushes up the blocks as the bolt is turned. So the hole cut out is rather big and includes all parts in single hole. With cut belt block and welded nut on top, the only holes needed for each part needs made. And with that a more stable and smaller unit.
Currently this tension needs to work with my Z9M3 back end and belt alignment. As the large washers on the bolts that attach to the back of hotend carriage, are the placement of the belt tensioner screws. As the belt tensioner is held in place with tight belts the bolt that applies the pulling force lays on top of the washers. Without washer I would think the bolts would just go thought the belt alignment module.
So how to use it.
1St CoreXY unit needs to be square, and I mean it.
Once all screwed sown parts are in place, take long 5m 6mm (worked for my 300mmx300mm) and feed belt equally though back of belt tensioner.
Run belts though correct layout of your unit.
Place front ends of belt though their locations that they will be ziptied to. Leave very little though the hole about as much as you need to tighten belt as before.
Pull excess belt though the back of the belt tensioner
You want unit to basically be loose tight. Mark with non damaging marker the location of the belts on the back of tensioner.
Remove ends from front unit to give you some space to work with
Carefully pull belt out while marking or keeping track of location, one belt at a time.
Pull a belt out long enough to apply the belt blocks and bots and nuts. One nut at bottom and washer / locknut above belt blocks. The idea is once you slide all parts back into place the belt will be at a location that very little loss of belt will take place on the front.
Do the other belt as above.
Make sure belt tensioner is lined up and flush with belt alignment module.
You should not be able to pull any additional belt from the back.
Now pre tight the belts.
Now for the fun part.
My lower belt is the left of the nozzle.
Tight temporally with your hands with each belt and notice how your square drive carriage will go out of alignment as you tighten a belt. In the end the unit needs to be square.
SO with the lower belt tighten to a loose belt, not something you would want to print with. Clip it and notice carriage should be 5-10mm off on one side.
Now tight the top belt so unit is as square as you can get it. As you tight the top belt the lower belt will also get tighter.
Basically tighten the belts so they end up as square and all most as tight as you want it, BUT not too tight. As the belt tension can only tighten.
Now with your hand move the hotend around the bed (should have motor cabled discounted already). Makes sure things move easily. Personally, I like steel cables and things tight, and I Also changed my XY motors to some more powerful and 400spteps.
With the unit at the back and center with your hand in the center of the unit as not to favor a side. Move the drive carriage to the very front. With my unit I measure the distance between Y carriage’s and front support on both sides.
If the Space is same on both side you’re done, lucky you! Skip to verification steps
If not..
Now again with your hand pull on a belt and make it tighten to see one side shrink in distance. The goal is to only tighten one belt.
Once you know what belt needs tightening, unlock bolt from turning as you screw top screw to make room for belt blocks to raise up, I used lock nuts for this part. Slowly adjust this single bolt, if you go to far you will have to push alignment block and belt back in and then pull on belt outside of carriage to get slack back.
Move carriage around and re measure, repeat until square.
Once all is good tighten down the locknuts on the back of the belt tension to keep unit secure. Wrap uncut /unused belt around belt tension, tie off with ziptie to secure it. Move carriage around again to make sure things are still square.
Print of a skew test to verify if you want, and then tighten belts to correct the print. I did a 250mm x 250mm test and was unable to see any difference that would show unit is out of alignment or askew. The idea is not to modify software or firmware to correct askew alignment.
Similar models
thingiverse
free
Z9M3 Rear belt Alignment and Tensioner CoreXY by gallaghersart
...d bought spacer from local hardware store)
2x 60 toothed 5mm bore pully
2x m5 bolt
2x 20 toothed pulley
some washers
enjoy!
`mike
thingiverse
free
X-axis belt clamp'n'tension by carbonoid84
...ting the belt is a bit awkward.
note 2: you may need to turn your x-axis limit switch to stop it catching on the tensioner block.
thingiverse
free

BLV Ender 3 Y-axis belt clamps by alexdg
...ng it with pliers. fully tighten this end afterwards and adjust the final belt tension with a tensioner or anything else you use.
thingiverse
free

X5S MGN12 - H Linear Rail Mod by DKDaigle
... the x carriage before attaching them in the front.
the hurricane mount will match up to the front end of the v6 mount for sure.
thingiverse
free
x axis Belt Tensioner by lonnie77
... fan mount with the new mount. attach the belt and secure with wire ties. tighten cap screw as needed. align pulley on the motor.
thingiverse
free

10mm GT2 Belt Tensioner by CoolNamesAllTaken
...ilable with the tooth grooves oriented on either side). tighten the m3 bolt into the nut until the belt has the desired tension.
thingiverse
free
Ender 3 X axis short belt tensioner (Stock Parts only)
...ioner bolt allows tightening of the bolt onto the bearings with no issue
-stronger bolt
-different bolt and case alignment method
thingiverse
free
Tarantula Z-Carriage Stabilizer by KLWN
... plate.
quick note, it's a quite tight fit, so i would recommend using 1-2% upscaling if you want a slightly moore loose fit.
thingiverse
free

Belt Tensioner for OpenAstroTracker by DWilbourn
...ot.
you can use a tensioner on either or both sides, one should be enough though as you need only slacken/tighten from one side.
thingiverse
free
Quicklock with offset by Zapperke
...belt.
to try the tension, pull back the filament while holding the big gear.
iff you have to pull real hard, thats what you want.
Z9M3
thingiverse
free
ZONSTAR Z9M3 BL/3D Touch bracket by YuTR0N
...r z9m3? there you go!
https://s.click.aliexpress.com/e/_a4lhj8
3d touch for z9m3 is here
https://s.click.aliexpress.com/e/_9jc9ge
thingiverse
free

Zonestar Z9M3 Chain Holder by YuTR0N
...tps://twitter.com/yutr0n/status/1312745522998902784?s=20
updates 2020/11/27
added rev2 version for 2 and 3, added youtube link...
thingiverse
free
Zonestar Z9M3 / Z9M2 endstop switch fix by MaNwE
...his is fix for endstop switch zonestar z9m3/z9m2
otherwise switch can go under the metal and make much noice witch stepper motors
thingiverse
free
Z9M3 2nd Filament Hotend Fan by gallaghersart
... my part fan over to the other side and set it up as a second filament cooler fan.
i left room for auto level module
enjoy!
`mike
thingiverse
free

Zonstar Z9M3 X end stop by YuTR0N
...ning.
if your printer's x limit switch is not pushed because of the tie, try this.
this will make the build space about 10mm.
thingiverse
free
Bed knobe for Zonestar Z9M3 / Levelling Knopf für Zonestar Z9m3 oder ähnlich by Finder-2018
...into the button.
i preferred the tough elastic material from extrudr "green tec" to pla.
"happy 3d printing!"
thingiverse
free
Belt tensioner X-Y axis Zonestar Z9M4 - Z9M3 by duegi
... get better equipment and services which enables me to make better quality projects, more frequently. thank you for your support!
thingiverse
free

Hotend Mounted Endoscope Camera for Z9M3 by gallaghersart
...cheapest i could find.
i expect at some point the cables will give out, but would be simple to solder good cables in their place.
thingiverse
free
Z9M3 Rear belt Alignment and Tensioner CoreXY by gallaghersart
...d bought spacer from local hardware store)
2x 60 toothed 5mm bore pully
2x m5 bolt
2x 20 toothed pulley
some washers
enjoy!
`mike
Gallaghersart
thingiverse
free
20xx Cable Chain riser by gallaghersart
...ame nuts.
i made this to allow for more room on my modified z9m3 corexy larger belts and custom rear belt alignment.
enjoy!
`mike
thingiverse
free

US Flag by gallaghersart
...ded also
they are designed to be printer with .4mm nozzle with a .3mm first layer height, remaining layers are .2mm layer height.
thingiverse
free
20xx Filament spool handles by gallaghersart
...ent spins easily, wish i did sooner. i’m also using clips to hold different size spools on support.
3x wheels
3x m5 15mm
1x clip
thingiverse
free
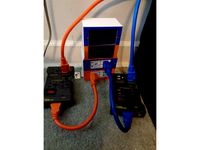
Duet 7i Handheld housing and mount by gallaghersart
...s for the handheld.
parts
• m3 tap/ bottom tap
• 8x m3 heat insets (holes are 5mm)
• 6x m3 bolt
• 2x m3 bolt
enjoy!
`mike
thingiverse
free

Duet 7i Screen Handheld housing and mount by gallaghersart
...s for the handheld.
parts
• m3 tap/ bottom tap
• 8x m3 heat insets (holes are 5mm)
• 6x m3 bolt
• 2x m3 bolt
enjoy!
`mike
thingiverse
free
Dual circuit 4 gang box cover with meters by gallaghersart
...r if smoke alarm is set off.
parts
• 2x gfi
• 2x meters
• 1x 4x gang box metal with metal brackets on “bottom”
enjoy!
`mike
thingiverse
free
Z9M3 2nd Filament Hotend Fan by gallaghersart
... my part fan over to the other side and set it up as a second filament cooler fan.
i left room for auto level module
enjoy!
`mike
thingiverse
free

Refrigerator wall spacers to keep food from freezing by gallaghersart
...s later they are still holding. and freezing food has ended, and a more stable constant temperature can be achieved.
enjoy!
`mike
thingiverse
free
Marlin CoreXY skew test 200mm x 200mm remix by gallaghersart
...re precise areas to measure.
no type markings to speed up prints, just one coroner is different. this should be “a”.
enjoy!
`mike
thingiverse
free

Flag of U.S. State of Ohio by gallaghersart
...he wall count no less than 2 (.8mm) so that the 1.2mm borders on 2nd layer end up being only parameters and no fill.
enjoy!
`mike
Corexy
thingiverse
free

CoreXY by Kaz_tech
...corexy by kaz_tech
thingiverse
this is the model of corexy platform. i separately put the parts on this place.
thingiverse
free

corexy plotter by tjwan
...corexy plotter by tjwan
thingiverse
parts for corexy mill inspired by http://der-frickler.net/technik/corexyportal
thingiverse
free
ScribbleJ CoreXY Beta by ScribbleJ
...j/corexy-v1https://github.com/scribblej/corexy-v1#corexy-beta
full gallery of development photos here: http://imgur.com/a/donun
thingiverse
free
CoreXY Emblem by emkajot
...by emkajot
thingiverse
an emblem for your corexy printer.
size: 100mm x 38mm x 2mm.
update: added a version with a proper mount.
thingiverse
free

SolidCore CoreXY Carriage by shanehooper
...olidcore 3d printer. this design could be used in other corexy 3d printers.
also see:https://3ddistributed.com/corexy-3d-printer/
thingiverse
free
CoreXY 3D Printer Model by ReginaFabricam
...bricam
thingiverse
this is an original design of a corexy printer.https://www.tinkercad.com/things/jggr9qk4s4p-3d-printer-corexy
thingiverse
free

coreXY Upper structure Left
...corexy upper structure left
thingiverse
my customized corexy 3d printer upper left parts
thingiverse
free
CoreXY by frankie
...ing machines, etc. the design is described in greater detail at http://www.corexy.com . a video is at http://vimeo.com/40914530 .
thingiverse
free

Endstop block for CoreXY carriage by svkeulen
...endstop block for corexy carriage by svkeulen
thingiverse
endstop for corexy carriage
thingiverse
free
X carriage for the CoreXY MGN12 by hackerbijay
...x carriage for the corexy mgn12 by hackerbijay
thingiverse
x carriage for the corexy frame
Tensioner
3d_export
$5

adjustable tension lock
...adjustable tension lock
3dexport
adjustable tension lock
turbosquid
$5

tension ring
...oyalty free 3d model tension ring for download as fbx and stl on turbosquid: 3d models for games, architecture, videos. (1553452)
turbosquid
$3

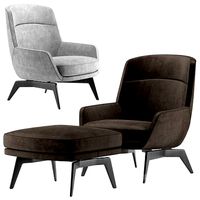
Tension Chair
...free 3d model tension chair for download as obj, c4d, and fbx on turbosquid: 3d models for games, architecture, videos. (1251503)
3d_export
$5
transformador de tension
...transformador de tension
3dexport
transformador de tension entrada 460vac salida 220vac marca audax
turbosquid
$20
Motorbike Chain Tensioner
...y free 3d model motorbike chain tensioner for download as stl on turbosquid: 3d models for games, architecture, videos. (1428322)
turbosquid
$25
TENSION-WOOD-CHAIR
... available on turbo squid, the world's leading provider of digital 3d models for visualization, films, television, and games.
turbosquid
$25

tension-bentwood-chair
... available on turbo squid, the world's leading provider of digital 3d models for visualization, films, television, and games.
turbosquid
$19

Tension engagement ring
...n engagement ring for download as obj, fbx, 3dm, dwg, and stl on turbosquid: 3d models for games, architecture, videos. (1491631)
3d_export
$10

Ruby Tension set Ring 3D Model
...ruby tension set ring 3d model
3dexport
tension set ruby ring in 18k
ruby tension set ring 3d model rehansheikh 25254 3dexport
turbosquid
$20
Superficial Tension Exp. Image.max
... available on turbo squid, the world's leading provider of digital 3d models for visualization, films, television, and games.
Alignment
3d_export
$5
orthodontic aligners
...aligners are plastic replicas of your teeth. wearing them puts gentle pressure on the teeth, ever-so-slightly repositioning them.
3d_export
$15
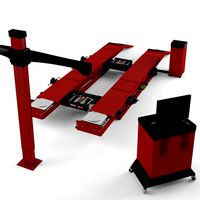
Wheel Alignment Lifts 3D Model
...heel alignment lifts
wheel alignment lifts 3d model download .c4d .max .obj .fbx .ma .lwo .3ds .3dm .stl poothian 108990 3dexport
3d_export
$99

Alignment Systems
...dimensions. -ideal for your auto service project. -scene for 3ds max 2012 and v-ray 2.0 !!!in file only 3d model without light!!!
turbosquid
$85

Film laser alignment cutting machine
...ng machine for download as 3ds, max, ige, obj, fbx, and sldas on turbosquid: 3d models for games, architecture, videos. (1423482)
3d_export
$159
Alignment Systems with Car Lift
...dimensions. -ideal for your auto service project. -scene for 3ds max 2012 and v-ray 2.0 !!!in file only 3d model without light!!!
3d_export
$15

modular rpg game environment - low poly - pbr - gameready
...aligned). textures folder(all pbr textures) other formats modular pieces (dae obj stl fbx ) modular environment (dae obj stl fbx)
3d_export
$5

bookshelf
...g unit a well-thought-out and solid look. the shelves align perfectly with the frame to create a strong and uniform expression.
3d_ocean
$4
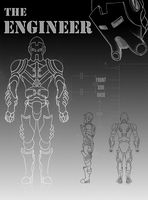
The Engineer
... to model: front view back view side view / both left and right with and without arm composite psd file of all views each imag...
3d_ocean
$25

Stationary Presentation Kit
...st to the biggest, all beautifully aligned and positioned and ready to render. here’s what the scene contains: 1. single-fold ...
vizpark
$15

HDRI Skydome 30
...images were manually adjusted and corrected with dust removal, alignment and chromatic abberation...
Belt
turbosquid
$9
Belt conveyor belt
...t conveyor belt for download as 3ds, ige, obj, stl, and sldas on turbosquid: 3d models for games, architecture, videos. (1226546)
3d_export
$6
belt
...d then comes off and fastens at the front of the seat. version: 2015 units: millimetres x-form: yes polys: 120 950 verts: 163 944
3d_export
$7
belt grinder
...belt grinder
3dexport
belt grinder
3d_export
$5
Belt conveyor
...belt conveyor
3dexport
belt conveyor
3ddd
$1
column belt
...column belt
3ddd
колонна
column belt
turbosquid
$5
Belt
... available on turbo squid, the world's leading provider of digital 3d models for visualization, films, television, and games.
3d_ocean
$5
Leather Belt
...ather belt is created in 3dsmax 2011 and rendered with vray 1.5 and it has all the texture included with the multiple obj format.
3d_ocean
$5

Belt Ring
...belt ring
3docean
belt jewelry ring
belt ring 3d model. total weight 3.5 gram & 1.1 stone size. 3dm and obj file format.
design_connected
$11
Belt Round
...belt round
designconnected
meridiani belt round computer generated 3d model. designed by parisio, andrea.
design_connected
$11
Belt Oval
...belt oval
designconnected
meridiani belt oval computer generated 3d model. designed by parisio, andrea.
Rear
3d_export
$48
engine case rear
...re efficient as it eliminates the need for the propeller shaft while the differential merges with the transmission to save space.
turbosquid
$39
rear rim
... available on turbo squid, the world's leading provider of digital 3d models for visualization, films, television, and games.
3d_export
$5
Rear Suspension 3D Model
... suspension 3d model
3dexport
rear suspension spring sport car disc brake chasis
rear suspension 3d model bayazoff 30675 3dexport
turbosquid
$20

Rear sport wheel
...del rear sport wheel for download as ige, obj, stl, and sldas on turbosquid: 3d models for games, architecture, videos. (1227527)
turbosquid
$99

Rear tyre set
... available on turbo squid, the world's leading provider of digital 3d models for visualization, films, television, and games.
turbosquid
$49
Wet Rear tyre
... available on turbo squid, the world's leading provider of digital 3d models for visualization, films, television, and games.
turbosquid
$49
Hard rear tyre
... available on turbo squid, the world's leading provider of digital 3d models for visualization, films, television, and games.
turbosquid
$49
Medium Rear tyre
... available on turbo squid, the world's leading provider of digital 3d models for visualization, films, television, and games.
turbosquid
$49

Supersoft Rear tyre
... available on turbo squid, the world's leading provider of digital 3d models for visualization, films, television, and games.
turbosquid
$39
tractor rim rear
... available on turbo squid, the world's leading provider of digital 3d models for visualization, films, television, and games.