Thingiverse
Yet Another Lack Table Enclosure by Hagster
by Thingiverse
Last crawled date: 3 years ago
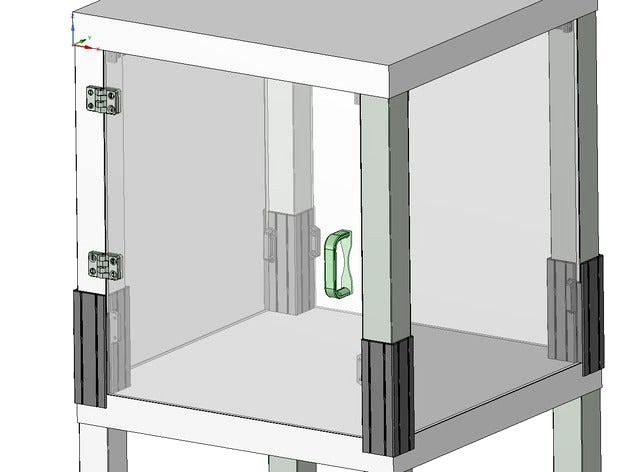
Yet Another Lack Table Enclosure. Inspired by the many great designs out there.
I maximised this to give me as much height as I could manage on my printer.
It includes mounting points for acrylic sides (~445mm wide x 520mm tall).
I am currently awaiting delivery of some twinwall 4mm polycarbanate for the back and sides and regular acrylic for the front. The twin wall is fairly cheap and should provide excellent insulation.Hopefully it should bounce the light round inside a bit too. For anyone in the UK I am using plasticsheets.com as a fairly cheap supplier. Many companies seem to charge a lot for delivery which bumps up the price a lot. Slightly dissapointed that the twinwall came with a blue canvas tape binding the open edges. This tape is practically impossible to remove. Its not hugely noticeable when fitted but I may get some white tape to cover it up so it matches the table legs. The 4mm wirks well for the sides, but going with 6mm would be better if you have the choice. The 4mm acrylic is also a little too thin, but still works nicely.
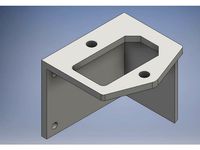
The mounting brackets are designed so 6mm (I am using 4mm) sides fit flush with the edge of the table. The leg 'stilts' have a screw mounting hole in the central shaft so they dont fall off the when lifted.
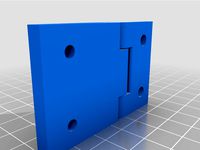
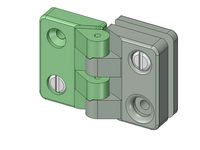
Door Hinges - Pick either left or right hand mounting. Pesonally I printed 2 left hand countersunk hinges to screw to the table legs and 2 left hand pan head hinges along with the back plate to bolt to an acrylic front panel. The hinges are base on a remix of airald's design. I have added a designspark mech CAD model here if you need to modify any dimensions. http://www.thingiverse.com/thing:1933479.
The door handle is designed to print on its side with a back plate that minimises stresses on the acrylic door.
The original stilt raises the table by 120mm(print is 170mm tall) I have also uploaded a shorter 80mm stilt as well as a taller 140mm stilt in case your needs vary. You will need to subtract 40mm or add 20mm when sizing the side panels and doors in this case.The Designspark Mechanical(free) CAD model is included too if you need to make other alterations.
21/01/2017 - Added a locating spigot that can be screwed to the base Lack table to help keep all the legs in line. Before assembly use on of the Stilts to measure the correct location of the spigot. Drill a pilot hole and use a shot countersunk self tapping wood screw to attach.
I maximised this to give me as much height as I could manage on my printer.
It includes mounting points for acrylic sides (~445mm wide x 520mm tall).
I am currently awaiting delivery of some twinwall 4mm polycarbanate for the back and sides and regular acrylic for the front. The twin wall is fairly cheap and should provide excellent insulation.Hopefully it should bounce the light round inside a bit too. For anyone in the UK I am using plasticsheets.com as a fairly cheap supplier. Many companies seem to charge a lot for delivery which bumps up the price a lot. Slightly dissapointed that the twinwall came with a blue canvas tape binding the open edges. This tape is practically impossible to remove. Its not hugely noticeable when fitted but I may get some white tape to cover it up so it matches the table legs. The 4mm wirks well for the sides, but going with 6mm would be better if you have the choice. The 4mm acrylic is also a little too thin, but still works nicely.
The mounting brackets are designed so 6mm (I am using 4mm) sides fit flush with the edge of the table. The leg 'stilts' have a screw mounting hole in the central shaft so they dont fall off the when lifted.
Door Hinges - Pick either left or right hand mounting. Pesonally I printed 2 left hand countersunk hinges to screw to the table legs and 2 left hand pan head hinges along with the back plate to bolt to an acrylic front panel. The hinges are base on a remix of airald's design. I have added a designspark mech CAD model here if you need to modify any dimensions. http://www.thingiverse.com/thing:1933479.
The door handle is designed to print on its side with a back plate that minimises stresses on the acrylic door.
The original stilt raises the table by 120mm(print is 170mm tall) I have also uploaded a shorter 80mm stilt as well as a taller 140mm stilt in case your needs vary. You will need to subtract 40mm or add 20mm when sizing the side panels and doors in this case.The Designspark Mechanical(free) CAD model is included too if you need to make other alterations.
21/01/2017 - Added a locating spigot that can be screwed to the base Lack table to help keep all the legs in line. Before assembly use on of the Stilts to measure the correct location of the spigot. Drill a pilot hole and use a shot countersunk self tapping wood screw to attach.
Similar models
thingiverse
free
One piece hinge - print in place - for Ikea Lack enclosure by mariuschirita
...lic door.
bigger holes take 4mm countersunk wood screws.
you need to print it in one go without using supports. i used white abs.
thingiverse
free

3D printer case with Ikea Lack Table with natural wood feet. by Pyrostan
...wood screws for the legs and the floor,
use 4mm screws with 4mm nut to fix the walls panels.
the door must be mounted with hinges
thingiverse
free

Prusa ENCLOSURE -Ikea Lack table 5mm, 4mm, 4.5mm door hinges by mklauser
...
thingiverse
i had some 5mm acrylic laying around and modified the door hinges to fit.
edit:
added two new sizes.
4mm and 4.5mm.
thingiverse
free

3D Printer enclosure hinge (for 4mm acrylic)
...or a 3d printer enclosure.
it's made for a 4mm acrylic door
i used wood screws cuted to length to screw the door in the hinge
thingiverse
free

Acrylic Glass Holder and Door Hinge (IKEA Lack Enclosure) by Agent_Cain
...ounting method for the acrylic glasses. so curtly i made some simple ones for my needs.
designed to work with m5 screws and nuts.
thingiverse
free

Acrylic panel bracket for Ikea Lack Prusa I3 MK2 enclosure by mariuschirita
...chirita
thingiverse
smaller hole takes m3 screws to hold the acrylic side panels.
bigger holes take 4mm countersunk wood screws.
thingiverse
free
hinge, Autoclose remix by Hagster
...t and right handed versions. the left hand version is designed to mount on the left side of a door (with it opening towards you).
thingiverse
free
Power Input mount by David576144
...is is being mounted on the back left leg of the enclosure, but can be mounted anywhere really. all that is needed is 5 m3 screws.
thingiverse
free
Ikea Lack Case for 4mm acrylic glass by Kde47
...x acrylic windows 500x445x4 mm
1x acrylic door 500x445x4 mm
write me if you need the holder for thinner or thicker acrylic glass.
thingiverse
free

Lack enclosure for Wanhao i3Plus by TorgeirN
...and some hinges for the door. it is very similar to other enclosure designs here on thingiverse, but made...
Hagster
thingiverse
free

Star Wand by Hagster
...star wand by hagster
thingiverse
a wand.
thingiverse
free
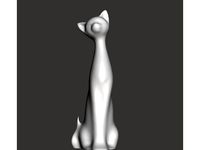
Elegant Cat by Hagster
...elegant cat by hagster
thingiverse
meeeeooowwww!!!!! print me meeeeoooowwww!!!!
thingiverse
free
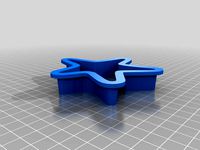
Starfish Cookie Cutter by Hagster
...starfish cookie cutter by hagster
thingiverse
a starfish cookie cutter
thingiverse
free

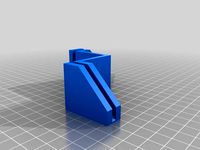
sellotape dispenser fix by Hagster
...sellotape dispenser fix by hagster
thingiverse
fix for a broken sellotape dispenser.
thingiverse
free

Fox Scan by Hagster
...fox scan by hagster
thingiverse
this is a scan of a fox statue.
i have included a colour obj file with texture.
thingiverse
free
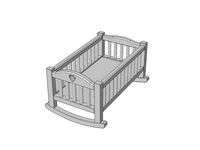
Rocking Cot by Hagster
...ing cot by hagster
thingiverse
a rocking cot.
this will need support to print.
original cad files included if you want to remix.
thingiverse
free

Trophy by Hagster
...rint' version if you dont want to mess with support material.
you can use microsoft 3d builder to emboss words on the plaque.
thingiverse
free

Tudor House by Hagster
...agster
thingiverse
tudor style house
stl files supplied as full merged model; model with separate roof; all components separate.
thingiverse
free

bucket and spade cookie cutter by Hagster
...bucket and spade cookie cutter by hagster
thingiverse
bucket and spade cookie cutter
thingiverse
free

Tractor Cookie Cutter by Hagster
...tractor cookie cutter by hagster
thingiverse
a tractor cookie cutter including stamp for inner.
designed for my sons birthday.
Lack
3d_export
$5

LACK LACK Coffee table white 90x55 cm IKEA
..., white, 90x55 cm ikea<br>https://www.ikea.com/ru/ru/p/lack-lakk-zhurnalnyy-stol-belyy-50449907/?ysclid=l8zshj49w6656165430
turbosquid
$4

Ikea Lack
... available on turbo squid, the world's leading provider of digital 3d models for visualization, films, television, and games.
3ddd
$1

IKEA Lack Coffee Table
... кофейный
ikea lack coffee tablehttp://www.ikea.com/gb/en/catalog/products/00104291
turbosquid
$5

IKEA Lack Table
...ack table for download as blend, blend, unitypackage, and fbx on turbosquid: 3d models for games, architecture, videos. (1623135)
turbosquid
$10

Ikea Lack Set
... available on turbo squid, the world's leading provider of digital 3d models for visualization, films, television, and games.
turbosquid
$3

IKEA Lack Library
... available on turbo squid, the world's leading provider of digital 3d models for visualization, films, television, and games.
turbosquid
$1

IKEA LACK TABLE
... available on turbo squid, the world's leading provider of digital 3d models for visualization, films, television, and games.
turbosquid
free

IKEA Lack Shelf
... available on turbo squid, the world's leading provider of digital 3d models for visualization, films, television, and games.
turbosquid
$9

Ikea Table 5 Lack
... available on turbo squid, the world's leading provider of digital 3d models for visualization, films, television, and games.
turbosquid
$5

IKEA Lack Side Table
... available on turbo squid, the world's leading provider of digital 3d models for visualization, films, television, and games.
Enclosure
3d_export
free

electrical enclosure
...l enclosure where electrical devices like (relays, contactors, busbars ) are kept in order to protect from hazardous environment.
turbosquid
$100

GPU Enclosure
...yalty free 3d model gpu enclosure for download as obj and stl on turbosquid: 3d models for games, architecture, videos. (1381061)
3d_export
$5

Electrical Enclosure
...ed. also has tower lights attaced on the top.<br>file format that are available:<br>.step<br>.obj<br>.stl
archive3d
free

Enclosure 3D Model
...closure 3d model
archive3d
shower enclosure-acquarius- 3d model for interior 3d visualization.
archive3d
free

Enclosure 3D Model
...enclosure 3d model
archive3d
shower enclosure-omega- 3d model for interior 3d visualization.
archive3d
free

Enclosure 3D Model
...enclosure 3d model
archive3d
shower enclosure-vega - 3d model for interior 3d visualization.
archive3d
free

Enclosure 3D Model
...enclosure 3d model
archive3d
shower enclosure-zenith - 3d model for interior 3d visualization.
turbosquid
$20

shower enclosure
... available on turbo squid, the world's leading provider of digital 3d models for visualization, films, television, and games.
turbosquid
$14

Dumpster Enclosure
... available on turbo squid, the world's leading provider of digital 3d models for visualization, films, television, and games.
turbosquid
$25

3d printer enclosure
... model 3d printer enclosure for download as ipt, skp, and fbx on turbosquid: 3d models for games, architecture, videos. (1634310)
Another
turbosquid
$15
ANOTHER BATHROOM
...quid
royalty free 3d model another bathroom for download as on turbosquid: 3d models for games, architecture, videos. (1171460)
turbosquid
$24

Another World
... available on turbo squid, the world's leading provider of digital 3d models for visualization, films, television, and games.
turbosquid
$39
Another Red Curb
...ee 3d model another red curb for download as ma, obj, and fbx on turbosquid: 3d models for games, architecture, videos. (1182913)
turbosquid
$9
Another Deberenn Sofa
...model another deberenn sofa for download as max, obj, and fbx on turbosquid: 3d models for games, architecture, videos. (1497850)
turbosquid
$2
Another picnic table
... model another picnic table for download as max, obj, and fbx on turbosquid: 3d models for games, architecture, videos. (1426381)
turbosquid
$15

door to another world
...oor to another world for download as 3ds, obj, fbx, and blend on turbosquid: 3d models for games, architecture, videos. (1334842)
3d_export
free

another hacksaw
...another hacksaw
3dexport
. . . 3d model of a hacksaw. 3d model files: - 3ds max 2017 (scanline) - obj (low poly) . . .
turbosquid
$12
Another Country Side Table
... another country side table for download as max, obj, and fbx on turbosquid: 3d models for games, architecture, videos. (1496053)
turbosquid
$29
Furniture - "Another country" modern sofa
...another country" modern sofa for download as obj and c4d on turbosquid: 3d models for games, architecture, videos. (1186189)
3d_ocean
$29

Another Tron Light Cycle with the Rider and Trail
...ther tron light cycle with the rider and the light trail. high quality 3d model,all the materials and lights are included. the...
Table
3ddd
free
Table
...table
3ddd
table
table
archibase_planet
free
Table
...table
archibase planet
table glass-table round table glass table
table n240311 - 3d model (*.3ds) for interior 3d visualization.
archibase_planet
free
Table
...e
archibase planet
table dining-room table dinner table round table
table - 3d model (*.gsm+*.3ds) for interior 3d visualization.
3d_export
$5

table
...table
3dexport
table classic-table
archibase_planet
free
Table
...se planet
table glass table round table glass-table
table tonin habitat n280111 - 3d model (*.3ds) for interior 3d visualization.
archibase_planet
free

Table
...table
archibase planet
table dining-room table dinner table
table - 3d model (*.3ds) for interior 3d visualization.
archibase_planet
free
Table
...table
archibase planet
table coffee table glass table
table - 3d model (*.gsm+*.3ds) for interior 3d visualization.
archibase_planet
free
Table
...table
archibase planet
table glass-table coffee table
table - 3d model (*.gsm+*.3ds) for interior 3d visualization.
archibase_planet
free
Table
...table
archibase planet
table writing table office table
table - 3d model (*.gsm+*.3ds) for interior 3d visualization.
3d_ocean
$5
Table
...table
3docean
dining table furniture home kitchen table
simple wooden table.