Thingiverse
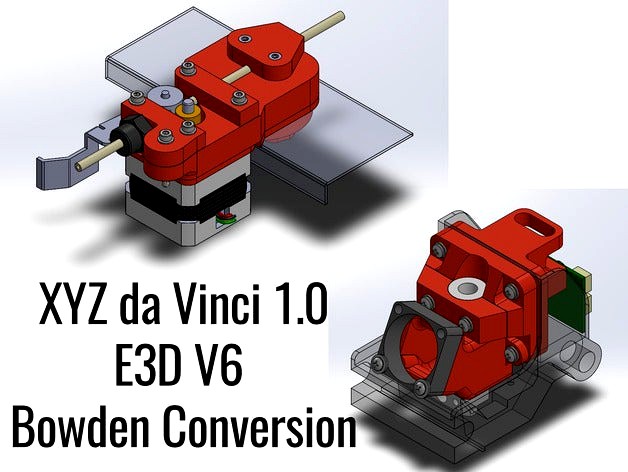
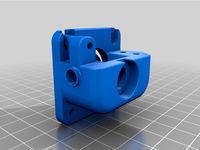
XYZ da Vinci 1.0 E3D V6 Bowden complete conversion (no drilling, no cutting) (updated 3/8/17) by AndrewT111
by Thingiverse
Last crawled date: 3 years ago
UPDATE!
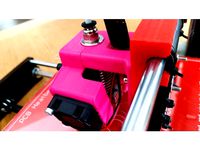
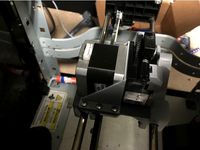
3/8/2017: I added an updated version of the hotend_base file, called "hotend_base_v2." After struggling with some part corner lifting (more than I would have thought, even with ABS) I did some flow visualization and determined that a slight amount of air was blowing across the print bed and the printed part. This air was circulating around the underside of the carriage below the rear side of the heat sink fins. The new hotend_base file shrouds the rear of the heat sink, leaving a duct for the air to escape through the original stepper motor bore hole and onto the top side of the carriage, away from the print bed. While this is an improvement in restricting airflow, it didn't make things air tight (to my eye anyway), so I wrapped the underside (between the fan duct/base of the heat sink and the hot end heat block) in a little aluminum foil, secured with some electrical tape (far from the hot parts), to make sure no air was escaping and blowing onto the print bed. I've run the printer for about 15 hours so far on three medium-large solid infill parts and it seems to have reduced some of my curling problems, even for these challenging parts.
hotend_base_v2 is a drop-in swap for the original design, so if you're already running this Bowden conversion you should be able to print the new part in 20-30 minutes and swap it out pretty easily.
I will probably redesign this entire hot end assembly at some point and post it as a new thing. It has always bothered me that the fan duct isn't securely attached to the hotend base before installation, it makes removing and reinstalling this thing pretty fiddly, and I usually feel like I need three hands to do a good job. Aside from that I intend to design a layer cooling fan mount and duct that is easily removable with thumbscrews (so you can quickly remove that extra weight and bulk when not printing PLA). I'm hoping to be able to make one that doesn't have the belt passing through it (like another design does on Thingiverse), as I think that makes installation and removal a huge PITA. I'll also put more consideration into how I vent the hot end heat sink cooling airflow, probably leaving a larger exit hole through the original stepper motor bore hole and forcing it to blow straight up.
Original summary
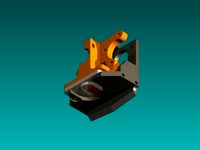
This is an all original design for converting an XYZ da Vinci 1.0 to use an E3D V6 1.75mm hot end and a Bowden style extruder. It does not require any drilling, bending, or other permanent modification, except you may have to draw a 12V line from the power supply to drive the stock always-on E3D V6 fan that blows over the heat sink. You should be able to install this mod without removing the carriage, cutting up any plastic panels, or anything similarly inconvenient. Note that this mod will require you to run another firmware like Repetier, as it will require you to reverse the extrusion axis direction (easy to change in the Repetier configuration header file). The hardware side of the mod is completely reversible, although I don't personally know of a way to reflash the stock da Vinci firmware if you decided you wanted to go all the way back.
I designed this to be made of mostly small parts that are easier to print successfully on a marginal setup (like my da Vinci with the stock extruder and clog-prone hotend). The only real challenging part to print is the main extruder mount chassis, which has three areas requiring supports and a fairly long footprint that can be prone to lifting. Because a lot of these parts are under considerable compressive stress when assembled, I suggest printing this with a very high infill percentage. A sparse infill can lead to internal wall buckling that'll make the part fail. I printed mine as solid infill, as I do with any serious structural part.
This mod would technically work in a da Vinci 1.0a, but the 1.0a has holes drilled for a dual Bowden extruder mount on the top shelf of the chassis. You could do a more compact build by using the other Bowden extruder mount on Thingiverse (http://www.thingiverse.com/thing:846434). Despite the title that user posted, I believe his printer is actually a da Vinci 1.0A. Mine is a vanilla 1.0 and I do not have the holes for dual extruders drilled in the chassis, just a single center placed hole used as a cable mount in the stock design.
You may be interested in the E3D V6 hotend mount even if you're using a commercial Bowden extruder with another mounting method. Reusing the stock carriage without modification has several advantages. First, you won't have to attempt printing a gigantic carriage on an ailing da Vinci stock hotend. Secondly, the stock carriage is injection molded and has a far greater strength to weight ratio of anything you could ever print on your stock printer. Additionally, the envelope of the mount and stock carriage is such that you won't have problems with the carriage crashing into the Z axis rods or other obstacles in the build area. And finally, it's always nice to know you can go back to some degree if you change your mind. I can completely revert to the original hotend configuration in about 10 minutes with a few basic tools without even removing the carriage from the printer.
I see this design as pretty basic and straightforward, but I'm pretty happy with the results. Having the extruder output a little further forward lets me run a slightly shorter Bowden tube than I would otherwise, which generally improves print quality, all other things being equal. I'm currently running my infills at 80mm/s without issue, and I could probably go faster but the printer gets super loud, so I tend to run it on the slower side. I'm glad to not hear my printer sound like it's shaking itself to death doing infills on narrow regions, slinging that stepper motor around is a serious problem in cases like that.
As usual, use this design at your own risk, I am not responsible for any damages or injuries that may result from using these parts.
3/8/2017: I added an updated version of the hotend_base file, called "hotend_base_v2." After struggling with some part corner lifting (more than I would have thought, even with ABS) I did some flow visualization and determined that a slight amount of air was blowing across the print bed and the printed part. This air was circulating around the underside of the carriage below the rear side of the heat sink fins. The new hotend_base file shrouds the rear of the heat sink, leaving a duct for the air to escape through the original stepper motor bore hole and onto the top side of the carriage, away from the print bed. While this is an improvement in restricting airflow, it didn't make things air tight (to my eye anyway), so I wrapped the underside (between the fan duct/base of the heat sink and the hot end heat block) in a little aluminum foil, secured with some electrical tape (far from the hot parts), to make sure no air was escaping and blowing onto the print bed. I've run the printer for about 15 hours so far on three medium-large solid infill parts and it seems to have reduced some of my curling problems, even for these challenging parts.
hotend_base_v2 is a drop-in swap for the original design, so if you're already running this Bowden conversion you should be able to print the new part in 20-30 minutes and swap it out pretty easily.
I will probably redesign this entire hot end assembly at some point and post it as a new thing. It has always bothered me that the fan duct isn't securely attached to the hotend base before installation, it makes removing and reinstalling this thing pretty fiddly, and I usually feel like I need three hands to do a good job. Aside from that I intend to design a layer cooling fan mount and duct that is easily removable with thumbscrews (so you can quickly remove that extra weight and bulk when not printing PLA). I'm hoping to be able to make one that doesn't have the belt passing through it (like another design does on Thingiverse), as I think that makes installation and removal a huge PITA. I'll also put more consideration into how I vent the hot end heat sink cooling airflow, probably leaving a larger exit hole through the original stepper motor bore hole and forcing it to blow straight up.
Original summary
This is an all original design for converting an XYZ da Vinci 1.0 to use an E3D V6 1.75mm hot end and a Bowden style extruder. It does not require any drilling, bending, or other permanent modification, except you may have to draw a 12V line from the power supply to drive the stock always-on E3D V6 fan that blows over the heat sink. You should be able to install this mod without removing the carriage, cutting up any plastic panels, or anything similarly inconvenient. Note that this mod will require you to run another firmware like Repetier, as it will require you to reverse the extrusion axis direction (easy to change in the Repetier configuration header file). The hardware side of the mod is completely reversible, although I don't personally know of a way to reflash the stock da Vinci firmware if you decided you wanted to go all the way back.
I designed this to be made of mostly small parts that are easier to print successfully on a marginal setup (like my da Vinci with the stock extruder and clog-prone hotend). The only real challenging part to print is the main extruder mount chassis, which has three areas requiring supports and a fairly long footprint that can be prone to lifting. Because a lot of these parts are under considerable compressive stress when assembled, I suggest printing this with a very high infill percentage. A sparse infill can lead to internal wall buckling that'll make the part fail. I printed mine as solid infill, as I do with any serious structural part.
This mod would technically work in a da Vinci 1.0a, but the 1.0a has holes drilled for a dual Bowden extruder mount on the top shelf of the chassis. You could do a more compact build by using the other Bowden extruder mount on Thingiverse (http://www.thingiverse.com/thing:846434). Despite the title that user posted, I believe his printer is actually a da Vinci 1.0A. Mine is a vanilla 1.0 and I do not have the holes for dual extruders drilled in the chassis, just a single center placed hole used as a cable mount in the stock design.
You may be interested in the E3D V6 hotend mount even if you're using a commercial Bowden extruder with another mounting method. Reusing the stock carriage without modification has several advantages. First, you won't have to attempt printing a gigantic carriage on an ailing da Vinci stock hotend. Secondly, the stock carriage is injection molded and has a far greater strength to weight ratio of anything you could ever print on your stock printer. Additionally, the envelope of the mount and stock carriage is such that you won't have problems with the carriage crashing into the Z axis rods or other obstacles in the build area. And finally, it's always nice to know you can go back to some degree if you change your mind. I can completely revert to the original hotend configuration in about 10 minutes with a few basic tools without even removing the carriage from the printer.
I see this design as pretty basic and straightforward, but I'm pretty happy with the results. Having the extruder output a little further forward lets me run a slightly shorter Bowden tube than I would otherwise, which generally improves print quality, all other things being equal. I'm currently running my infills at 80mm/s without issue, and I could probably go faster but the printer gets super loud, so I tend to run it on the slower side. I'm glad to not hear my printer sound like it's shaking itself to death doing infills on narrow regions, slinging that stepper motor around is a serious problem in cases like that.
As usual, use this design at your own risk, I am not responsible for any damages or injuries that may result from using these parts.
Similar models
thingiverse
free
Printrbot Plus 1404 Extruder Fan Mount by FooFighter94
...e extruder. this design is especially useful if you are running a hotend which is shorter than the stock ubis (i have an e3d v6).
thingiverse
free
Da Vinci Jr Pro 1.0a e3d v6 Mount by Jslough
... e3d components with the real issues. if you have one of these printers and have any questions about this conversion let me know!
thingiverse
free

Da Vinci 1.0 Bowden drive + E3D v6 Conversion by evannguyen
...eel free ask me any questions in the mean time.
you can see the mod in action here: https://www.youtube.com/watch?v=dpzdc1hzqiw
thingiverse
free

E3d V6 hotend to stock Geeetech Prusa i3 X carriage adapter
...ith the v6 fitment facing up.
this pieces went directly from printed to being mounted and used without any post-printing process.
thingiverse
free
E3D V6 Hotend 30mm cooler with BL-touch by alex2801
...mount for my ctc i3 pro b printer. i use this with a bowden type extruder. the mount is attached to the original x axis carriage.
thingiverse
free
da Vinci 1.0 Pro - Direct Drive Carriage Upgrade With E3D Titan Aero and E3D All-Metal v6 HotEnd by jeremiahlandi_LI
...belt, bearings and allows the carriage to slide very similary to the original design. the side holes are to...
thingiverse
free

Anet A6 E3D V6 mount plate by ant82
... screw hotend on to m6 bolt, then insert mounting plate (i heated top of e3d with hot air) and tighten the screw to the carriage.
thingiverse
free

E3d V6 1.75mm Bowden hotend Bracket for MK2 short travel (there is newer version now holes for left or right) by RobMitshi
...ks, main bracket and added a clamp.
a full instuctable is at:
http://www.instructables.com/id/3d-printer-extruderhot-end-upgrade/
thingiverse
free
E3D V6 3mm Bowden Mount for Taz by Shoosh
....com). you may not even need to print the mount, as i have heard the aluminum mount for the hexagon hot end fits nicely on the v6
thingiverse
free

Formbot / Vivedino Raptor Carriage Mount Threaded Heat Sink
...and a threaded heat sink. with the threaded heat sink you will see improved stability of your hotend assembly and cleaner prints.
Andrewt111
thingiverse
free
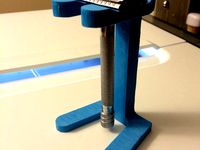
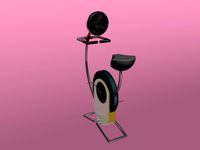
Razor Stand, one piece, no supports by AndrewT111
...usual, use this design at your own risk, i am not responsible for any damages or injuries that may result from using these parts.
thingiverse
free

Fountain Pen Rest (one piece, no supports) by AndrewT111
...usual, use this design at your own risk, i am not responsible for any damages or injuries that may result from using these parts.
thingiverse
free

Toyota 80-series Land Cruiser lower tailgate release lever by AndrewT111
...e particularly critical). i included a step file so hopefully that will be straightforward for you in your cad program of choice!
thingiverse
free

XYZ da Vinci filament cartridge spool replacement by AndrewT111
...usual, use this design at your own risk, i am not responsible for any damages or injuries that may result from using these parts.
thingiverse
free

XYZ da Vinci 1.0 bed leveling thumbscrew by AndrewT111
...rom using these parts.
edit 2017/06/10: another user asked for a 4 spoke version, so i've uploaded the stl/step files for it.
thingiverse
free

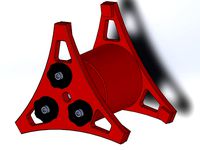
45 degree camera tripod mount wedge by AndrewT111
...#39;s strong enough. you are using this design at your own risk, and i am not responsible for any damages or injury that results.
thingiverse
free
XYZ da Vinci filament spool drill mount by AndrewT111
...usual, use this design at your own risk, i am not responsible for any damages or injuries that may result from using these parts.
thingiverse
free

Sennheiser HD 580/600/650/6XX offset head pads by AndrewT111
...meter as the #6-32 variety i used, so you should be able to use m3 screws and inserts without any modifications to the stl/steps.
thingiverse
free

XYZ da Vinci 1.0 E3D V6 Bowden hotend remix by madmike8
...hotend remix by madmike8 thingiverse this a remix of andrewt111#39;s awesome davinci1.0 e3dv6 bowden conversion. i needed to use...
thingiverse
free

Reversed Da Vinci 1.0a Bowden extruder by greenogre
...i used this with the e3d hotend mod by andrewt111 at http://www.thingiverse.com/thing:1510425 this version requires that you reverse the...
Vinci
3d_export
$9

clcok vinci
...clcok vinci
3dexport
clcok vinci
3ddd
$1
willisau vinci chair
...willisau vinci chair
3ddd
willisau , vinci
vinci chair from willisau ag.
design_connected
$13
Vinci chair
...vinci chair
designconnected
willisau vinci chair computer generated 3d model. designed by ballendat, martin.
3ddd
$1

BOVA-комод-vinci
...bova-комод-vinci
3ddd
bova , комод
bova-комод-vinci
3ddd
$1
leonardo da vinci
...leonardo da vinci
3ddd
всадник , лошадь
leonardo da vinci
3d_export
$25
a - leonardo da vinci
...a - leonardo da vinci
3dexport
a - leonardo da vinci<br>antiquity
turbosquid
$10

Pouf Vinci
...ty free 3d model pouf vinci for download as max, obj, and fbx on turbosquid: 3d models for games, architecture, videos. (1507069)
turbosquid
$30
Da Vinci
... available on turbo squid, the world's leading provider of digital 3d models for visualization, films, television, and games.
3d_export
$25
machine- leonardo da vinci
...machine- leonardo da vinci
3dexport
machine- leonardo da vinci
3d_export
$25

mortar - leonardo da vinci
...mortar - leonardo da vinci
3dexport
mortar - leonardo da vinci
Bowden
turbosquid
$199
Vintage Ben Bowden Spacelander bike
... available on turbo squid, the world's leading provider of digital 3d models for visualization, films, television, and games.
3ddd
$1

Manooi Artica
...and pendants in various sizes and forms. suspension: galvanized bowden - dia. 1,5 mm. bulb: max 60 w -...
thingiverse
free
Remix Compact Bowden extruder - m6 bowden couplers and bowden tube pass-through
...ouplers and bowden tube pass-through
thingiverse
remix compact bowden extruder - m6 bowden couplers and bowden tube pass-through
thingiverse
free

Bowden Extruder
...bowden extruder
thingiverse
i have created bowden extruder for flsun delta 3d printer.
thingiverse
free

bowden 3mm by spee_D
...bowden 3mm by spee_d
thingiverse
for bowden 3mm
thingiverse
free
Bowden Tube Cutter
...bowden tube cutter
thingiverse
bowden tube cutter
thingiverse
free
Customizable Bowden Clip
...customizable bowden clip
thingiverse
customizable bowden clip
thingiverse
free
Bowden Oiler by fcheshire
...bowden oiler by fcheshire
thingiverse
inline bowden oiler
thingiverse
free

Bowden adapter by helkaroui
...bowden adapter by helkaroui
thingiverse
this is a fixed bowden adapter
thingiverse
free

Adventure3 Bowden Clip
...adventure3 bowden clip
thingiverse
adventure3 bowden clip
Xyz
turbosquid
$7

Xyz triaxial adjustment platform
...stment platform for download as 3ds, ige, obj, stl, and sldas on turbosquid: 3d models for games, architecture, videos. (1237272)
turbosquid
$7
Rusty Metal Letter XYZ
...etras de metal oxidado for download as 3ds, obj, c4d, and fbx on turbosquid: 3d models for games, architecture, videos. (1454094)
turbosquid
$9

XYZ Glass Tube Font - Letras de cristal
...nt - letras de cristal for download as c4d, 3ds, fbx, and obj on turbosquid: 3d models for games, architecture, videos. (1547160)
3d_export
$8
sci-fi sneakers
...located in scene xyz=0,0,0<br>.:::formats:::.<br>.obj / located in scene in xyz0,0,0 .fbx 2006 / located in scene in xyz=0,0,0 .mb...
3d_export
$18
forklift
...maya .:::formats:::. .obj / multiformat located in scene in xyz0,0,0 .fbx / autodesk fbx200611 / located in scene inxyz=0,0,0...
3d_export
$15
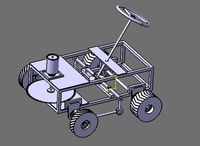
golf cart
...autodesk maya .obj / multiformat located in scene in xyz0,0,0 .fbx / autodesk fbx200611 / located in scene inxyz=0,0,0...
3d_export
$10
Birdhouse
...autodesk maya .obj / multiformat located in scene in xyz0,0,0 .fbx / autodesk fbx200611 / located in scene inxyz=0,0,0...
3d_export
$8
tower crane
...** .:::formats:::.** -.obj / multiformat located in scene in xyz0,0,0 -.fbx / autodesk fbx200611 / located in scene inxyz=0,0,0...
3d_export
$15

wooden pier
.../ 3ds max 2016 / located in scene in xyz0,0,0<br>.:::textures::::.<br>handled painted textures.<br>x3 - 4096x4096 / .jpg<br>-color<br>-nrm<br>-bump<br>thanks for...
3d_export
$10
wooden pier winter
.../ 3ds max 2016 / located in scene in xyz0,0,0<br>.:::textures::::.<br>handled painted textures.<br>x3 - 4096x4096 / .jpg<br>-color<br>-nrm<br>-bump<br>thanks for...
E3D
turbosquid
$23

E3D - Google Home
... 3d model e3d - google home for download as max, obj, and c4d on turbosquid: 3d models for games, architecture, videos. (1192509)
cg_studio
free

e3d model
...e3d model
cgstudio
- e 3d model, royalty free license available, instant download after purchase.
turbosquid
$2

Syringe C4D (E3D Ready)
...lty free 3d model syringe c4d (e3d ready) for download as c4d on turbosquid: 3d models for games, architecture, videos. (1336720)
turbosquid
$12

Microphone USB E3D and C4D
...ree 3d model microphone usb e3d & c4d for download as c4d on turbosquid: 3d models for games, architecture, videos. (1568216)
turbosquid
$29

E3D - OnePlus 6 Black
...model e3d - oneplus 6 black for download as max, obj, and c4d on turbosquid: 3d models for games, architecture, videos. (1358534)
turbosquid
$29

E3D - Motorola One 2018
...del e3d - motorola one 2018 for download as max, obj, and c4d on turbosquid: 3d models for games, architecture, videos. (1358533)
turbosquid
$29

E3D - Disney MagicBands 2
...l e3d - disney magicbands 2 for download as max, obj, and c4d on turbosquid: 3d models for games, architecture, videos. (1355515)
turbosquid
$29

E3D - Samsung Z4 Smartphone
...e3d - samsung z4 smartphone for download as max, obj, and c4d on turbosquid: 3d models for games, architecture, videos. (1182179)
turbosquid
$23

E3D - Razer Phone model
...del e3d - razer phone model for download as max, obj, and c4d on turbosquid: 3d models for games, architecture, videos. (1231207)
turbosquid
$23

E3D - Alcatel Idol 5
... model e3d - alcatel idol 5 for download as max, obj, and c4d on turbosquid: 3d models for games, architecture, videos. (1212799)
V6
3d_export
$100

v6 engine
...engine
3dexport
complete v6 engine modeled on solidworks 2017 along with .stl, .sldprt and .sldasm of all th parts and assembly.
3d_export
$10

V6 engine
... the first v6 engines were designed and produced independently by marmon motor car company, deutz gasmotoren fabrik and delahaye.
3d_export
$35

v6 engine
...s a complete model of a v6 engine containing over 400 components. you can contact me for a video of all the components assembling
3d_export
$10

v6 engine
...v6 engine
3dexport
turbosquid
$25

Bed1001-v6
... available on turbo squid, the world's leading provider of digital 3d models for visualization, films, television, and games.
turbosquid
$22

Chair2-v6
... available on turbo squid, the world's leading provider of digital 3d models for visualization, films, television, and games.
turbosquid
$20

V6.mb
... available on turbo squid, the world's leading provider of digital 3d models for visualization, films, television, and games.
3d_export
$20

V6 engine
...rovided in this package is all the parts in sldprt format and assembly in sldasm format. i can also convert the format on demand.
3ddd
$1

Стол V6
...6" в стиле дизельпанк изготовлен из блока двигателя, 4х поршней и 4х шатунов.
столешница изготовлена из стекла толщиной 8мм.
cg_studio
$199

V6 VVTi3d model
...v6 vvti3d model
cgstudio
.3ds - v6 vvti 3d model, royalty free license available, instant download after purchase.
Conversion
3ddd
$1

Conversation Seat
...шетка
the conversation seat made in englandhttp://www.squintlimited.com/products/the_conversation_seat/gold
+ max 2011
3d_export
$10

Converse 3D Model
...converse 3d model
3dexport
converse shoe pc unix mac
converse 3d model electropainter17075 38067 3dexport
turbosquid
$100

converse-shoe
...quid
royalty free 3d model converse-shoe for download as c4d on turbosquid: 3d models for games, architecture, videos. (1398427)
turbosquid
$10

Conversation Furniture
... available on turbo squid, the world's leading provider of digital 3d models for visualization, films, television, and games.
turbosquid
$7

Converse Allstars
... available on turbo squid, the world's leading provider of digital 3d models for visualization, films, television, and games.
design_connected
$16

Conversation Club Chair
...conversation club chair
designconnected
donghia conversation club chair chairs computer generated 3d model. designed by n/a.
design_connected
$27

Hemicycle Conversation Chair
...rsation chair
designconnected
ligne roset hemicycle conversation chair computer generated 3d model. designed by nigro, philippe.
3d_export
$24

Converse keds 3D Model
...converse keds 3d model
3dexport
converse all star ked shoe clothes sports
converse keds 3d model vermi1ion 26201 3dexport
3ddd
$1

Converse All-Star Shoes
...converse all-star shoes
3ddd
кеды , обувь
converse all-star shoes
design_connected
$18

CONVERSE Jack Purcell Sneakers
...converse jack purcell sneakers
designconnected
converse jack purcell sneakers computer generated 3d model.
Drilling
archibase_planet
free

Drill
...drill
archibase planet
drill electric drill power drill
drill n091107 - 3d model (*.gsm+*.3ds) for interior 3d visualization.
archibase_planet
free

Drill
...drill
archibase planet
drill hand drill
drill 1 - 3d model (*.gsm+*.3ds) for interior 3d visualization.
archibase_planet
free
Drill
...drill
archibase planet
drill hand drill
drill 2 - 3d model (*.gsm+*.3ds) for interior 3d visualization.
archibase_planet
free

Drill
...drill
archibase planet
drill hand drill
drill 3- 3d model (*.gsm+*.3ds) for interior 3d visualization.
archibase_planet
free
Drill
...drill
archibase planet
boring rig rig drill
drill n070807 - 3d model for interior 3d visualization.
archibase_planet
free
Drill
...drill
archibase planet
hand drill toolware
drill 2 - 3d model (*.gsm+*.3ds) for interior 3d visualization.
archibase_planet
free
Drill
...drill
archibase planet
perforator drill auger
drill 3 - 3d model (*.gsm+*.3ds) for interior 3d visualization.
turbosquid
$25
Drill
...ll
turbosquid
royalty free 3d model drill for download as ma on turbosquid: 3d models for games, architecture, videos. (1203923)
turbosquid
free
Drill
...l
turbosquid
free 3d model drill for download as fbx and obj on turbosquid: 3d models for games, architecture, videos. (1628646)
archibase_planet
free
Drill
...drill
archibase planet
boring mill perforator driller
drill pro 1 - 3d model (*.gsm+*.3ds) for interior 3d visualization.
17
3d_export
$6

rocks 17
...rocks 17
3dexport
rocks 3d model 17
3ddd
$1
PLANTS 17
...plants 17
3ddd
цветок , горшок
plants 17,, pots in diameter 100,80,60,40cm,,, enjoy
3d_export
$6
tap-17
...tap-17
3dexport
3d_export
$6
set-17
...set-17
3dexport
3d_export
$27

C-17 Globemaster
...c-17 globemaster
3dexport
c-17 globemaster
3ddd
free
Renault FT-17
...renault ft-17
3ddd
ft-17 , renault , танк
turbosquid
$40
cottage 17
...bosquid
royalty free 3d model cottage 17 for download as max on turbosquid: 3d models for games, architecture, videos. (1377003)
turbosquid
$30

Apartment 17
...squid
royalty free 3d model apartment 17 for download as max on turbosquid: 3d models for games, architecture, videos. (1432680)
turbosquid
$10

Surfboard 17
...squid
royalty free 3d model surfboard 17 for download as max on turbosquid: 3d models for games, architecture, videos. (1375686)
turbosquid
$7
Rock 17
...turbosquid
royalty free 3d model rock 17 for download as obj on turbosquid: 3d models for games, architecture, videos. (1486522)
0
turbosquid
$12

Calligraphic Digit 0 Number 0
...hic digit 0 number 0 for download as max, obj, fbx, and blend on turbosquid: 3d models for games, architecture, videos. (1389318)
3d_export
$6

set-0
...set-0
3dexport
turbosquid
$6

hedge 0
...yalty free 3d model hedge 0 for download as max, obj, and fbx on turbosquid: 3d models for games, architecture, videos. (1450353)
turbosquid
$5

Nuber 0
...oyalty free 3d model nuber 0 for download as ma, obj, and fbx on turbosquid: 3d models for games, architecture, videos. (1564674)
turbosquid
$22

0.jpg
... available on turbo squid, the world's leading provider of digital 3d models for visualization, films, television, and games.
turbosquid
free

Steam Locomotive Fowler 4F 0-6-0
... available on turbo squid, the world's leading provider of digital 3d models for visualization, films, television, and games.
turbosquid
$10

Liquid Number 0
... model liquid number 0 for download as c4d, 3ds, fbx, and obj on turbosquid: 3d models for games, architecture, videos. (1689919)
turbosquid
$45

Dragon360_perspShape_tmp.0.jpg
... available on turbo squid, the world's leading provider of digital 3d models for visualization, films, television, and games.
turbosquid
$8

Rocks Debris 0
... available on turbo squid, the world's leading provider of digital 3d models for visualization, films, television, and games.
3d_export
$18

wood-guardrail-fence 0
...wood-guardrail-fence 0
3dexport
wood-guardrail-fence 0<br>3ds max 2015
Updated
turbosquid
$5

orthographic room (updated)
...ee 3d model orthographic room (updated) for download as blend on turbosquid: 3d models for games, architecture, videos. (1375451)
turbosquid
$95

Romantic Bedroom - Updated
... available on turbo squid, the world's leading provider of digital 3d models for visualization, films, television, and games.
turbosquid
$39
Sofa. Updated release
... available on turbo squid, the world's leading provider of digital 3d models for visualization, films, television, and games.
turbosquid
$15

Procedurally updating cartoon crystal
...l procedurally updating cartoon crystal for download as blend on turbosquid: 3d models for games, architecture, videos. (1525853)
3d_export
$5

10 Surfboard s UPDATE
...10 surfboard s update
3dexport
3d_export
$10
chair updated rocking
...chair updated rocking
3dexport
armchair renewed plywood 18 mm. for cnc machines. layout in the stp archive.
turbosquid
free

Marble Table Updated
...el marble table for download as 3ds, obj, fbx, blend, and dae on turbosquid: 3d models for games, architecture, videos. (1201300)
turbosquid
$35
Mauser 1930the model is updated with the kits
... available on turbo squid, the world's leading provider of digital 3d models for visualization, films, television, and games.
turbosquid
$145

Contemporary Bedroom Collection Vol 1 - Updated
... available on turbo squid, the world's leading provider of digital 3d models for visualization, films, television, and games.
turbosquid
$16

B&B Mart Armchair MPRN (Updated)
...art armchair mprn (updated) for download as max, obj, and fbx on turbosquid: 3d models for games, architecture, videos. (1284355)
Cutting
design_connected
$11
e15 Cut Cutting Boards
...e15 cut cutting boards
designconnected
e15 cut cutting boards computer generated 3d model.
design_connected
$16
Cut
...cut
designconnected
lapalma cut computer generated 3d model. designed by rota, francesco.
3d_export
$5
cutting machine
...cutting machine
3dexport
crop cutting machine
3d_export
$5

cutting board
...cutting board
3dexport
12 models for cutting boards
3d_export
$20
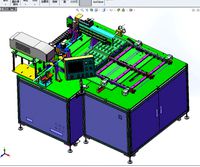
wire laser cutting peeling cutting machine ffc cutting machine
...and receiving machine, with the structure of this drawing, you don't need to draw by yourself, welcome to collect, thank you.
3ddd
$1
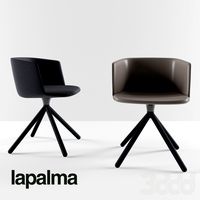
Lapalma CUT
... cut
фабрика: lapalma
коллекция: cut
размер:↑ 74 cm, ↔ 55 см.
описание: стул, ткань, кожа, дерево.
сайт: www.lapalma.it
3ddd
$1
стул lapalma cut
...стул lapalma cut
3ddd
lapalma , cut
стул lapalma cut
3ddd
$1

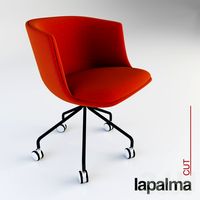
Lapalma CUT
...
коллекция: cut
размер:↑ 74 cm, ↔ 55 см.
описание: стул, порошковое покрытие, черный, белый, ткань, пластик.
сайт: www.lapalma.it
design_connected
$16
Hi Cut
...hi cut
designconnected
kartell hi cut computer generated 3d model. designed by starck, philippe.
3ddd
$1
Vorwerk Cut
...vorwerk cut
3ddd
ковер
vorwerk cut
прямоугольный:
размеры : 2400mm x 3200mm
круглый:
размеры : 2400mm
Complete
turbosquid
$35
complete plan
...quid
royalty free 3d model complete plan for download as max on turbosquid: 3d models for games, architecture, videos. (1221693)
turbosquid
$10
COMPLETE WASHROOM
...
royalty free 3d model complete washroom for download as max on turbosquid: 3d models for games, architecture, videos. (1413853)
turbosquid
$1

Complete Office
...id
royalty free 3d model complete office for download as max on turbosquid: 3d models for games, architecture, videos. (1323641)
vizpark
$509

VP COMPLETE
...e is the ultimate collection of 3d archviz assets, including 900 3d models, 50 hdris, 100 tileable textures and pattern software.
turbosquid
$15
excercise complete
... available on turbo squid, the world's leading provider of digital 3d models for visualization, films, television, and games.
turbosquid
$1
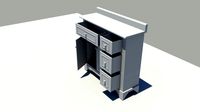
complete cabinet
... available on turbo squid, the world's leading provider of digital 3d models for visualization, films, television, and games.
turbosquid
free

complete Desk.lwo
... available on turbo squid, the world's leading provider of digital 3d models for visualization, films, television, and games.
3d_export
$5
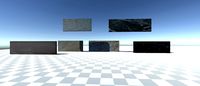
Complete Wall Pack
...complete wall pack
3dexport
a complete set of 14 walls
3d_ocean
$12
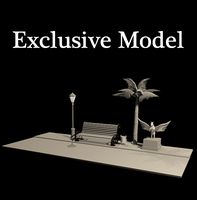
Complete Model
... any other purpose. model includes, tree, street light, bench with urn, horse model. total poly and verts are 282,036 and 334,...
turbosquid
$80

sasuke complete susanoo
...oyalty free 3d model sasuke complete susanoo for download as on turbosquid: 3d models for games, architecture, videos. (1693376)
Da
3ddd
$1

Luce da Vivere
...luce da vivere
3ddd
luce da vivere
luce da vivere mary 387/6+3
3ddd
$1

Luce da Vivere
...luce da vivere
3ddd
luce da vivere
luce da vivere
cristalline 494/12 rosso/cromo
turbosquid
$6

Cabinet DA
...ty free 3d model cabinet da for download as max, fbx, and obj on turbosquid: 3d models for games, architecture, videos. (1637312)
turbosquid
$6
Bookcase DA
... free 3d model bookcase da for download as max, fbx, and obj on turbosquid: 3d models for games, architecture, videos. (1639996)
turbosquid
$5
Wardrobe DA
...y free 3d model wardrobe da for download as max, fbx, and obj on turbosquid: 3d models for games, architecture, videos. (1661117)
turbosquid
$5
Partition DA
... free 3d model partition da for download as max, fbx, and obj on turbosquid: 3d models for games, architecture, videos. (1640359)
3ddd
$1
Ecstacity_LAMPADA DA TERRA
...ecstacity_lampada da terra
3ddd
ecstacity
торшер ecstacity_lampada da terra
3ddd
$1
leonardo da vinci
...leonardo da vinci
3ddd
всадник , лошадь
leonardo da vinci
turbosquid
$60

DA-ExoticWeapons
... available on turbo squid, the world's leading provider of digital 3d models for visualization, films, television, and games.
turbosquid
$32
DA-SpikedChainMace
... available on turbo squid, the world's leading provider of digital 3d models for visualization, films, television, and games.
8
turbosquid
$6

Rock 8-8
...urbosquid
royalty free 3d model rock 8-8 for download as obj on turbosquid: 3d models for games, architecture, videos. (1659393)
3ddd
$1
Italamp 387/8+8
...italamp 387/8+8
3ddd
italamp
люстра italamp 387/8+8
размеры 92x71h
3ddd
$1
8 марта
...8 марта
3ddd
8 марта
кресло 8 марта
design_connected
$16
No 8
...nected
photo-realistic 3d models of the sibast no 8 armchair from sibast for 3d architectural and interior design presentations.
3d_export
$5
hinge 8
...hinge 8
3dexport
hinge 8
3d_export
$5

iphone 8
...iphone 8
3dexport
iphone 8
turbosquid
$69

iPhone 8 and iPhone 8 Plus
... free 3d model iphone 8 and iphone 8 plus for download as max on turbosquid: 3d models for games, architecture, videos. (1202442)
turbosquid
$12

Calligraphic Digit 8 Number 8
...hic digit 8 number 8 for download as max, obj, fbx, and blend on turbosquid: 3d models for games, architecture, videos. (1389341)
3ddd
free

PLANTS 8
...plants 8
3ddd
цветок , горшок
plant 8,,, hope u all like it
3ddd
$1
8 Марта / Amadey
...8 марта / amadey
3ddd
8 марта
8 marta amadey
3
turbosquid
$10

Mountain Bike 3 -3 of 3
...model mountain bike 3 (#3 of 3) for download as fbx and blend on turbosquid: 3d models for games, architecture, videos. (1438752)
turbosquid
$6

Rock 3-3
...urbosquid
royalty free 3d model rock 3-3 for download as obj on turbosquid: 3d models for games, architecture, videos. (1628065)
turbosquid
$29

Books 150 pieces 3-3-3
...books 150 pieces 3-3-3 for download as max, obj, fbx, and stl on turbosquid: 3d models for games, architecture, videos. (1384033)
turbosquid
$3

Genesis 3 Clothing 3
... available on turbo squid, the world's leading provider of digital 3d models for visualization, films, television, and games.
3d_export
$5

hinge 3
...hinge 3
3dexport
hinge 3
3ddd
$1

Розетка 3
...розетка 3
3ddd
розетка
розетка 3
turbosquid
$50

is-3
... available on turbo squid, the world's leading provider of digital 3d models for visualization, films, television, and games.
turbosquid
$10

Mountain Bike 3 -2 of 3
...model mountain bike 3 (#2 of 3) for download as fbx and blend on turbosquid: 3d models for games, architecture, videos. (1438750)
turbosquid
$10

Mountain Bike 1 -3 of 3
...model mountain bike 1 (#3 of 3) for download as fbx and blend on turbosquid: 3d models for games, architecture, videos. (1438743)
3d_export
$5

3 CATS
...3 cats
3dexport
3 cats pen holder
1
turbosquid
$69

armchairs(1)(1)
... available on turbo squid, the world's leading provider of digital 3d models for visualization, films, television, and games.
turbosquid
$15

ring 1+1
... available on turbo squid, the world's leading provider of digital 3d models for visualization, films, television, and games.
turbosquid
$10

chair(1)(1)
... available on turbo squid, the world's leading provider of digital 3d models for visualization, films, television, and games.
turbosquid
$8

Chair(1)(1)
... available on turbo squid, the world's leading provider of digital 3d models for visualization, films, television, and games.
turbosquid
$2

RING 1(1)
... available on turbo squid, the world's leading provider of digital 3d models for visualization, films, television, and games.
turbosquid
$1

house 1(1)
... available on turbo squid, the world's leading provider of digital 3d models for visualization, films, television, and games.
turbosquid
$1

Table 1(1)
... available on turbo squid, the world's leading provider of digital 3d models for visualization, films, television, and games.
turbosquid
$59

Formula 1(1)
...lty free 3d model formula 1 for download as max, fbx, and obj on turbosquid: 3d models for games, architecture, videos. (1567088)
design_connected
$11

No 1
...no 1
designconnected
sibast no 1 computer generated 3d model. designed by sibast, helge.
turbosquid
$2

desert house(1)(1)
...3d model desert house(1)(1) for download as 3ds, max, and obj on turbosquid: 3d models for games, architecture, videos. (1055095)