Thingiverse
Xiaomi M365 Pro Luggage Rack by sinns
by Thingiverse
Last crawled date: 4 years ago
Xiaomi M365 Pro Luggage Rack
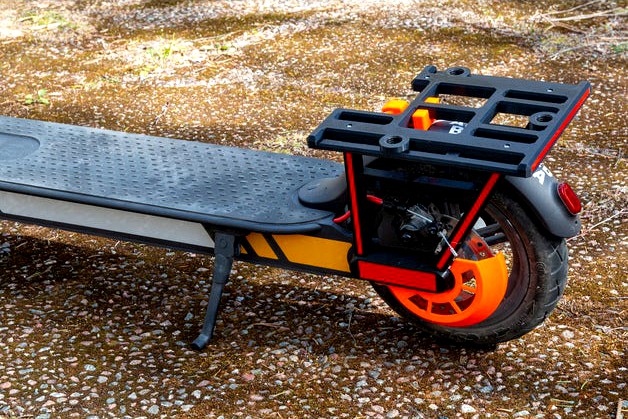
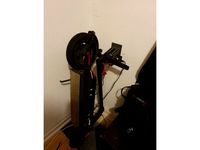
A 3D printable luggage rack design for the Xiaomi M365 Pro electric scooter that does not prevent the folding down of the handlebars for carrying.
Overview
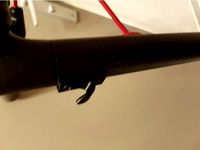
The design includes a 3 part rack (left stay, right stay and rack surface) that mounts in place of the existing side covers of the M365 pro scooter. The rack is designed to fit around the existing hardware (such as the disc brake calliper) without the need to alter any parts. Since the rack blocks access to the original folding hook (mounted on the rear mudguard) the design includes a new hook design which is higher and placed further back to compensate for the angle of the original hook's mount.
The design requires a strong flexible plastic and is therefore suitable for filaments such as PETG and ABS. The design requires a printer with a 20x25cm print surface.
Maximum safe weight on the rack is approximately 5Kgs
Assembly instructions
Required hardware
The following hardware is required for assembly (in addition to the 3D printed parts):
M5x16mm screw (used to secure the hook in place of the original M5x10mm screw)
M5 Nylon nut (you could use a standard nut, but be sure to thread-lock it)
M5 spring washer
M5 washer
8x M3x0.5 threaded brass inserts
6x M3x10 screws
Superglue
Red Reflective tape 20mm wide
Craft knife
Assembly
Basic mounting
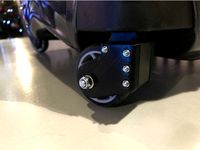
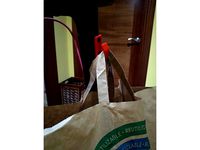
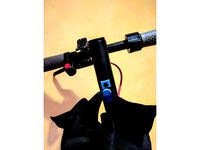
Remove the mudguard and the original hook. Place the new hook in the same place using the M5x16mm screw. The order should be screw, spring washer, washer, mudguard then hook. Note that the hook is designed so you can fit a 5mm spanner into the hook to tighten the nylon bolt.
Remove the original side covers. Glue 2 support pins into the centre holes of the rack stays. Insert two M3 brass inserts into each stay using a hot iron (such as a soldering iron) - ensure the insert is straight and flush with the surface. Superglue two support pins into each stay. Affix the left and right rack stays using the original hex screws (use thread-lock).
Press the rack surface onto the left and right stays as well as down into the 'U' mount of the hook (this should be easy to do and not require any force). Screw into place using 4x M3x10 screws (use thread-lock).
Note that the left stay and the rack surface have two additional slots each for M3 brass inserts (on the base of the stay, and under the rear of the surface). These are for attaching additional accessories such as a disc guard.
Apply the reflective tape to the sides and back of the rack (as shown in the pictures). The main reflective location is designed to take the full 20mm wide tape. For the stay struts and the back of the rack surface you will need to carefully cut thin strips of tape and affix.
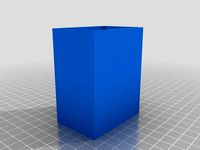
Box fastener
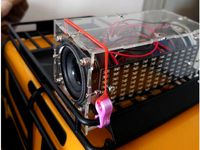
In order to easily carry larger objects it is useful to affix a small plastic box to the rack (cheap plastic boxes with sealable lids can be sourced from many supermarkets and hardware stores). To make this easy the rack has 3 threaded holes. Print the 3 fasteners and drill holes in the box to allow them to pass through. Ensure the box is as central on the rack as possible (without excessive overhang on the sides of the rack). Mount the box using the 3 fasteners. The box can be easily removed when not required or if you need to fold the scooter for transport.
Disc guard
The disc guard is designed to protect the disc brake rotor from impact damage as well as large stones etc. To fit the disc guard use 2 M3x16 screws and attach to the left rack stay using the provided M3 fittings underneath the stay.
Printing instructions
Overview
The model has been printed and tested on the Prusa MK3S/MMU2S printer using PETG filament. All parts fit on a 20x25 printing bed.
The OpenSCAD source files provide a parameter interface that allows you to render either the whole model or the individual parts (placed flat on the axis ready for STL (or other 3D format) export). This requires OpenSCAD 2019.05 or later.
The github repository for the model can be found at https://github.com/simoninns/Xiaomi-M365-Pro-Luggage-Rack
Recommended print settings
Rack surface
Number required: 1
Material: Prusament PETG (Prusa Jet Black)
Layer: 0.20mm (Quality)
Infill: 20%
Supports: Support on build plate only
Print time (approximate): 10h 59m
Notes: None
Rack left
Number required: 1
Material: Prusament PETG (Jet Black)
Layer: 0.20mm (Quality)
Infill: 20%
Supports: None
Print time (approximate): 6h 0m
Notes: Due to the configuration of the disc brake and the handlebars, the left and right rack stays are not the same size.
Rack right
Number required: 1
Material: Prusament PETG (Jet Black)
Layer: 0.20mm (Quality)
Infill: 20%
Supports: None
Print time (approximate): 5h 33m
Notes: Due to the configuration of the disc brake and the handlebars, the left and right rack stays are not the same size.
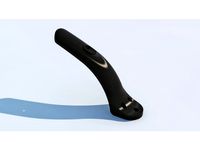
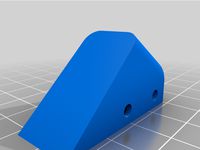
Hook
Number required: 1
Material: Prusament PETG (Prusa Orange)
Layer: 0.20mm (Quality)
Infill: 50%
Supports: Everywhere
Print time (approximate): 2h 36m
Notes: The hook should be printed on it's side to ensure the print layers are 90 degrees from the direction of force when lifting the scooter. This requires the use of supports 'everywhere' due to the shape.
Support pins
Number required: 1 (includes 4 pins per print)
Material: Prusament PETG (Prusa Orange)
Layer: 0.20mm (Quality)
Infill: 50%
Supports: None
Print time (approximate): 0h 15m
Notes: To prevent the pins falling over during printing, turn on brim and set to 10mm.
Box fasteners
Number required: 1 (includes 3 fasteners per print)
Material: Prusament PETG (Prusa Orange)
Layer: 0.20mm (Quality)
Infill: 25%
Supports: None
Print time (approximate): 3h 4m
Notes: These are only required if you wish to affix a box to the rack surface. The fastener threads are 0.25mm smaller in diameter than the threads on the rack surface to allow for printing tolerance. This is a pretty tight fit to begin with and you may need to insert and remove them several times to make the threads correctly mate. If insertion into the rack is too tight, either scale the print slightly or alter the design files according to your 3D printer. Alternatively, lightly sand the fastener's thread until it fits correctly.
Disc guard
Number required: 1
Material: Prusament PETG (Prusa Orange)
Layer: 0.20mm (Quality)
Infill: 15%
Supports: None
Print time (approximate): 2h 10m
Notes: This part is optional.
Author
The Xiaomi M365 Pro Luggage Rack is designed and maintained by Simon Inns.
Licensing
OpenSCAD source files - software license (GPLv3)
This is free software: you can redistribute it and/or modify
it under the terms of the GNU General Public License as published by
the Free Software Foundation, either version 3 of the License, or
(at your option) any later version.
This program is distributed in the hope that it will be useful,
but WITHOUT ANY WARRANTY; without even the implied warranty of
MERCHANTABILITY or FITNESS FOR A PARTICULAR PURPOSE. See the
GNU General Public License for more details.
You should have received a copy of the GNU General Public License
along with this program. If not, see
3D model file - Creative Commons license (Creative Commons BY-SA 4.0)
Please see the following link for details: https://creativecommons.org/licenses/by-sa/4.0/
You are free to:
Share - copy and redistribute the material in any medium or format
Adapt - remix, transform, and build upon the material
for any purpose, even commercially.
This license is acceptable for Free Cultural Works.
The licensor cannot revoke these freedoms as long as you follow the license terms.
Under the following terms:
Attribution - You must give appropriate credit, provide a link to the license, and indicate if changes were made. You may do so in any reasonable manner, but not in any way that suggests the licensor endorses you or your use.
ShareAlike - If you remix, transform, or build upon the material, you must distribute your contributions under the same license as the original.
No additional restrictions - You may not apply legal terms or technological measures that legally restrict others from doing anything the license permits.
A 3D printable luggage rack design for the Xiaomi M365 Pro electric scooter that does not prevent the folding down of the handlebars for carrying.
Overview
The design includes a 3 part rack (left stay, right stay and rack surface) that mounts in place of the existing side covers of the M365 pro scooter. The rack is designed to fit around the existing hardware (such as the disc brake calliper) without the need to alter any parts. Since the rack blocks access to the original folding hook (mounted on the rear mudguard) the design includes a new hook design which is higher and placed further back to compensate for the angle of the original hook's mount.
The design requires a strong flexible plastic and is therefore suitable for filaments such as PETG and ABS. The design requires a printer with a 20x25cm print surface.
Maximum safe weight on the rack is approximately 5Kgs
Assembly instructions
Required hardware
The following hardware is required for assembly (in addition to the 3D printed parts):
M5x16mm screw (used to secure the hook in place of the original M5x10mm screw)
M5 Nylon nut (you could use a standard nut, but be sure to thread-lock it)
M5 spring washer
M5 washer
8x M3x0.5 threaded brass inserts
6x M3x10 screws
Superglue
Red Reflective tape 20mm wide
Craft knife
Assembly
Basic mounting
Remove the mudguard and the original hook. Place the new hook in the same place using the M5x16mm screw. The order should be screw, spring washer, washer, mudguard then hook. Note that the hook is designed so you can fit a 5mm spanner into the hook to tighten the nylon bolt.
Remove the original side covers. Glue 2 support pins into the centre holes of the rack stays. Insert two M3 brass inserts into each stay using a hot iron (such as a soldering iron) - ensure the insert is straight and flush with the surface. Superglue two support pins into each stay. Affix the left and right rack stays using the original hex screws (use thread-lock).
Press the rack surface onto the left and right stays as well as down into the 'U' mount of the hook (this should be easy to do and not require any force). Screw into place using 4x M3x10 screws (use thread-lock).
Note that the left stay and the rack surface have two additional slots each for M3 brass inserts (on the base of the stay, and under the rear of the surface). These are for attaching additional accessories such as a disc guard.
Apply the reflective tape to the sides and back of the rack (as shown in the pictures). The main reflective location is designed to take the full 20mm wide tape. For the stay struts and the back of the rack surface you will need to carefully cut thin strips of tape and affix.
Box fastener
In order to easily carry larger objects it is useful to affix a small plastic box to the rack (cheap plastic boxes with sealable lids can be sourced from many supermarkets and hardware stores). To make this easy the rack has 3 threaded holes. Print the 3 fasteners and drill holes in the box to allow them to pass through. Ensure the box is as central on the rack as possible (without excessive overhang on the sides of the rack). Mount the box using the 3 fasteners. The box can be easily removed when not required or if you need to fold the scooter for transport.
Disc guard
The disc guard is designed to protect the disc brake rotor from impact damage as well as large stones etc. To fit the disc guard use 2 M3x16 screws and attach to the left rack stay using the provided M3 fittings underneath the stay.
Printing instructions
Overview
The model has been printed and tested on the Prusa MK3S/MMU2S printer using PETG filament. All parts fit on a 20x25 printing bed.
The OpenSCAD source files provide a parameter interface that allows you to render either the whole model or the individual parts (placed flat on the axis ready for STL (or other 3D format) export). This requires OpenSCAD 2019.05 or later.
The github repository for the model can be found at https://github.com/simoninns/Xiaomi-M365-Pro-Luggage-Rack
Recommended print settings
Rack surface
Number required: 1
Material: Prusament PETG (Prusa Jet Black)
Layer: 0.20mm (Quality)
Infill: 20%
Supports: Support on build plate only
Print time (approximate): 10h 59m
Notes: None
Rack left
Number required: 1
Material: Prusament PETG (Jet Black)
Layer: 0.20mm (Quality)
Infill: 20%
Supports: None
Print time (approximate): 6h 0m
Notes: Due to the configuration of the disc brake and the handlebars, the left and right rack stays are not the same size.
Rack right
Number required: 1
Material: Prusament PETG (Jet Black)
Layer: 0.20mm (Quality)
Infill: 20%
Supports: None
Print time (approximate): 5h 33m
Notes: Due to the configuration of the disc brake and the handlebars, the left and right rack stays are not the same size.
Hook
Number required: 1
Material: Prusament PETG (Prusa Orange)
Layer: 0.20mm (Quality)
Infill: 50%
Supports: Everywhere
Print time (approximate): 2h 36m
Notes: The hook should be printed on it's side to ensure the print layers are 90 degrees from the direction of force when lifting the scooter. This requires the use of supports 'everywhere' due to the shape.
Support pins
Number required: 1 (includes 4 pins per print)
Material: Prusament PETG (Prusa Orange)
Layer: 0.20mm (Quality)
Infill: 50%
Supports: None
Print time (approximate): 0h 15m
Notes: To prevent the pins falling over during printing, turn on brim and set to 10mm.
Box fasteners
Number required: 1 (includes 3 fasteners per print)
Material: Prusament PETG (Prusa Orange)
Layer: 0.20mm (Quality)
Infill: 25%
Supports: None
Print time (approximate): 3h 4m
Notes: These are only required if you wish to affix a box to the rack surface. The fastener threads are 0.25mm smaller in diameter than the threads on the rack surface to allow for printing tolerance. This is a pretty tight fit to begin with and you may need to insert and remove them several times to make the threads correctly mate. If insertion into the rack is too tight, either scale the print slightly or alter the design files according to your 3D printer. Alternatively, lightly sand the fastener's thread until it fits correctly.
Disc guard
Number required: 1
Material: Prusament PETG (Prusa Orange)
Layer: 0.20mm (Quality)
Infill: 15%
Supports: None
Print time (approximate): 2h 10m
Notes: This part is optional.
Author
The Xiaomi M365 Pro Luggage Rack is designed and maintained by Simon Inns.
Licensing
OpenSCAD source files - software license (GPLv3)
This is free software: you can redistribute it and/or modify
it under the terms of the GNU General Public License as published by
the Free Software Foundation, either version 3 of the License, or
(at your option) any later version.
This program is distributed in the hope that it will be useful,
but WITHOUT ANY WARRANTY; without even the implied warranty of
MERCHANTABILITY or FITNESS FOR A PARTICULAR PURPOSE. See the
GNU General Public License for more details.
You should have received a copy of the GNU General Public License
along with this program. If not, see
3D model file - Creative Commons license (Creative Commons BY-SA 4.0)
Please see the following link for details: https://creativecommons.org/licenses/by-sa/4.0/
You are free to:
Share - copy and redistribute the material in any medium or format
Adapt - remix, transform, and build upon the material
for any purpose, even commercially.
This license is acceptable for Free Cultural Works.
The licensor cannot revoke these freedoms as long as you follow the license terms.
Under the following terms:
Attribution - You must give appropriate credit, provide a link to the license, and indicate if changes were made. You may do so in any reasonable manner, but not in any way that suggests the licensor endorses you or your use.
ShareAlike - If you remix, transform, or build upon the material, you must distribute your contributions under the same license as the original.
No additional restrictions - You may not apply legal terms or technological measures that legally restrict others from doing anything the license permits.
Similar models
grabcad
free

Xiaomi M365 Pro Luggage Rack
...and the rack surface have two additional slots each for m3 brass inserts (on the base of the stay, and under the rear of the surf
thingiverse
free

luggage hook for Traxxas crawler by lammatt
...
thingiverse
a hook used to tie things on the luggage rack
thread a rubberband through the hole and hook the hooks onto the rack
grabcad
free

Hanging Hook
...a prusa i3 mk3s printer. print the hook on its' side and no supported required.
i hope you can find this print useful, too.
thingiverse
free
Samsonite Luggage Wheel by dancan13f
...shcs
4 x m3 lock nut
1 x m4x45mm shcs
1 x m4 lock nut
1 x m4 washer
1 x m6x45mm
1 x m6 lock nut
1 x m6 washer
1 x 5mmx15mm washer
cg_trader
$5

Pack Xiaomi MIJIA m365 accessory ready for print | 3D
...365 lock
-xiaomi m365 pro luggage rack
-gopro m365 hook
-xiaomi mijia m365 number mount and plate
-ring xiaomi mijia m365 pro
thingiverse
free

JGAurora A5 AutoLev support by eduardofsr
...jgaurora a5 autolev support by eduardofsr
thingiverse
printed in petg 0.20mm layer.
thingiverse
free

Nintendo Switch Tower
...rsion :
glue
mounting
look at pictures.
for screw version, bodybottom_screw and bodymiddle_screw are fixed with 6 x m3x40mm shcs.
thingiverse
free
hook for traxxas crawler by lammatt
...
thingiverse
a hook used to tie things on the luggage rack
thread a rubberband through the hole and hook the hooks onto the rack
thingiverse
free

19" Rack mount support by mojo_replica
...gh strength. after printing use a m6 thread cutter on the two holes before inserting the m6 mounting screws.
cheers,
mojo_replica
thingiverse
free

Ikea Clock TROMMA digits and support by valeriuene
... x 16mm screw and one m3 nut is required for the support.
30pcs screws 2,9x4,5 (ex. 5001390 bossard) are required for the digits.
Sinns
3d_export
$20

Wheel SINN rim and tire 3D Model
...eels sport performance disk brake caliper brembo yokohama sinn racing
wheel sinn rim and tire 3d model 3dlogicline 40631 3dexport
3dbaza
$4

Petit And Sinn Lamp Collection (325025)
...;verts:34 355 <br>xform: yes<br>render: v-ray 5<br>platform v-ray , corona<br>formats: 3ds max 2013, obj
3dbaza
$3

PETIT AND SINN COLLECTION (330433)
...<br>verts: 47 412<br>xform: yes<br>render: v-ray 5<br>platform: v-ray<br>formats: 3ds max 2016, obj
thingiverse
free

Extreme AP305C Bracket by sinns
...s - you may not apply legal terms or technological measures that legally restrict others from doing anything the license permits.
thingiverse
free
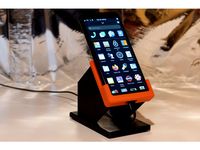
PinePhone Development Stand by sinns
...s - you may not apply legal terms or technological measures that legally restrict others from doing anything the license permits.
thingiverse
free

Feder by SaschaB
...ziellen sinn. nur um zu sehen ob es geht ;)
gedruckt mit pla.
um die feder halb zusammen zu drücken werden 4,5 kg druck benötigt.
thingiverse
free
Cheap and Easy Stackable Box / Leicht zu Druckende stapelbare Box by Lucifor
...it günstigem filament ca 60 cent je box. viel spaß damit, sie gewinnt keinen schönheitspreis, aber das war auch nicht der sinn :)
thingiverse
free

Pulledpork Kralle by Dymilla
...auf anfrage habe ich hier für interessenten eine stl erstellt
private skizze,modell,
geistige „eigentum“ im sinne des art. 14 gg
thingiverse
free

Peace Bowl / Tray by FamousK
...g with an 0.8mm or 0.4mm nozzle
printed on an anet a8 with an 0.8mm nozzle at 0.4mm layer, 3 bottomlayers, 0 toplayers, 2 shells.
M365
thingiverse
free
handles M365 Xiaomi
...handles m365 xiaomi
thingiverse
handles m365 xiaomi
thingiverse
free
Xiaomi M365 Hook
...xiaomi m365 hook
thingiverse
this is a hook for xiomi m365 electric scooter
thingiverse
free

M365 groceries hook- gancio porta spesa m365 by gabry96
...m365 by gabry96
thingiverse
grocery hook for m365, should be a pretty good fit.
--> liked it? give a like, its free :) <--
thingiverse
free

SUPPORT GOPRO FOR XIAOMI M365
...support gopro for xiaomi m365
thingiverse
support gopro for xiaomi m365
thingiverse
free

Xiaomi M365 Xanes Light by ozkos
...xiaomi m365 xanes light by ozkos
thingiverse
xiaomi m365 and xiaomi m365 pro xanes light holder
thingiverse
free
M365 sports fender
...sports fender
thingiverse
a simple sport-style rear fender design for the xiaomi m365.
can be used directly with 10 "wheels
thingiverse
free
Mijia m365 hook, gancho by ghuanlu
...erse
small hook for xiaomi mijia m365 scooter
xiaomi mijia m365 patineterako euskarria
gancho para patinete mijia m365 de xiaomi
thingiverse
free
Xiaomi M365 PRO SCREEN COVER by ozkos
...xiaomi m365 pro screen cover by ozkos
thingiverse
screen cover m365 and m365 pro
thingiverse
free
M365 Wall Mount
... a ender 3. i hope you like it. the scooter is resting on the front wheel and handlebar/light. please comment what you think. :-)
thingiverse
free
Hook / Crochet M365 V2 by Trankilloman
...hook / crochet m365 v2 by trankilloman
thingiverse
hook for xiaomi m365
Luggage
3ddd
$1

Minotti Luggage
...minotti luggage
3ddd
minotti , om
"om" minotti luggage
design_connected
$16
Luggage Puffs
...luggage puffs
designconnected
luggage puffs computer generated 3d model. designed by ericsson, ellinor .
design_connected
$16
Luggage Armchair
...luggage armchair
designconnected
minotti luggage armchair computer generated 3d model. designed by dordoni, rodolfo.
turbosquid
$10
luggage table
...quid
royalty free 3d model luggage table for download as max on turbosquid: 3d models for games, architecture, videos. (1471701)
turbosquid
$5
Luggage Box
...osquid
royalty free 3d model luggage box for download as fbx on turbosquid: 3d models for games, architecture, videos. (1303955)
turbosquid
$5

Luggage Box
...osquid
royalty free 3d model luggage box for download as fbx on turbosquid: 3d models for games, architecture, videos. (1303954)
turbosquid
$5

Luggage 2
...rbosquid
royalty free 3d model luggage 2 for download as max on turbosquid: 3d models for games, architecture, videos. (1336095)
3ddd
$1

Celine Luggage Bag
...celine luggage bag
3ddd
celine , сумка
celine luggage bag
turbosquid
$4
Luggage Cart
...royalty free 3d model luggage cart for download as ma and obj on turbosquid: 3d models for games, architecture, videos. (1399114)
cg_studio
$15

Luggage carriage3d model
...gage carrier carriage croydon.
.max - luggage carriage 3d model, royalty free license available, instant download after purchase.
Xiaomi
turbosquid
$10

Xiaomi MiBand3
...uid
royalty free 3d model xiaomi miband3 for download as 3dm on turbosquid: 3d models for games, architecture, videos. (1418734)
turbosquid
$6
xiaomi case
...osquid
royalty free 3d model xiaomi case for download as stl on turbosquid: 3d models for games, architecture, videos. (1199253)
3d_export
$18

xiaomi mi rabbit bunny
...xiaomi mi rabbit bunny
3dexport
xiaomi mi rabbit bunny is the character of xiaomi co.
turbosquid
$19
Xiaomi Mi5
... available on turbo squid, the world's leading provider of digital 3d models for visualization, films, television, and games.
3d_ocean
$12

XiaoMi 4 Phone Model
...xiaomi 4 phone model
3docean
mi4 model phone xiaomi
xiaomi mi4 phone model, made in china.copyright belongs to eagle design.
3d_export
$9
xiaomi 3d logo emblem
...xiaomi 3d logo emblem
3dexport
xiaomi phone 3d emblem logo
3d_export
$12

Xiaomi 13 Pro
...xiaomi 13 pro
3dexport
3d_export
$5

xiaomi mi a2
...xiaomi mi a2
3dexport
3d_ocean
$15

Xiaomi Mi3
...or materials. model created in 3ds max 2012 and saved to 3ds max 2011, 3ds max 2010 as well. for thumbnails renders used v-ray...
turbosquid
$24
Xiaomi Internet Radio
...yalty free 3d model xiaomi internet radio for download as max on turbosquid: 3d models for games, architecture, videos. (1192265)
Rack
archibase_planet
free
Rack
...ack
archibase planet
rack paper rack rack for paper
rack 6 office n060914 - 3d model (*.gsm+*.3ds) for interior 3d visualization.
archibase_planet
free
Rack
...ack
archibase planet
rack paper rack rack for paper
rack 3 office n060914 - 3d model (*.gsm+*.3ds) for interior 3d visualization.
archibase_planet
free
Rack
...ack
archibase planet
rack paper rack rack for paper
rack 5 office n060914 - 3d model (*.gsm+*.3ds) for interior 3d visualization.
archibase_planet
free
Rack
...ack
archibase planet
rack paper rack rack for paper
rack 7 office n060914 - 3d model (*.gsm+*.3ds) for interior 3d visualization.
archibase_planet
free

Rack
...for magazines rack for notebooks notebooks notebook
rack notebook n120614 - 3d model (*.gsm+*.3ds) for interior 3d visualization.
archibase_planet
free

Rack
...rack
archibase planet
rack umbrella umbrella rack
rack n180811 - 3d model (*.3ds) for interior 3d visualization.
archibase_planet
free
Rack
...rack
archibase planet
rack book rack stand
rack - 3d model (*.gsm+*.3ds) for interior 3d visualization.
archibase_planet
free

Rack
...rack
archibase planet
rack rack for glasses
rack 1 - 3d model (*.gsm+*.3ds) for interior 3d visualization.
archibase_planet
free
Rack
...rack
archibase planet
rack rack for glasses
rack 2 - 3d model (*.gsm+*.3ds) for interior 3d visualization.
3d_export
free
rack
...rack
3dexport
rack
Pro
turbosquid
$29

Pro
...ree 3d model mac pro for download as obj, c4d, fbx, and blend on turbosquid: 3d models for games, architecture, videos. (1505782)
turbosquid
$15

Apple Mac Pro and Pro Display
...ee 3d model apple mac pro and pro display for download as max on turbosquid: 3d models for games, architecture, videos. (1417078)
3d_export
$5

iphone 13 pro max and pro
...3 pro max and 13 pro the model is made in four colors (graphite, gold, silver, and blue), all of which are attached in the files.
3d_export
free

sapphire pro
...sapphire pro
3dexport
sapphire pro 3d printer head mask
3d_export
$4

macbook pro
...macbook pro
3dexport
macbook pro 13" inch 2020 years model
3ddd
free

GentleLase Pro
... syneron , candela
gentlelase pro аппарат для лазерной эпиляции
turbosquid
$25

PRO frame
...rbosquid
royalty free 3d model pro frame for download as max on turbosquid: 3d models for games, architecture, videos. (1148329)
turbosquid
$5

Alien pro
...osquid
royalty free 3d model alien pro for download as blend on turbosquid: 3d models for games, architecture, videos. (1678446)
turbosquid
$5

iphone11 pro
...uid
royalty free 3d model iphone11 pro for download as blend on turbosquid: 3d models for games, architecture, videos. (1562707)
3ddd
$1

Mac Pro (appel)
...mac pro (appel)
3ddd
компьютер , apple
mac pro