Thingiverse
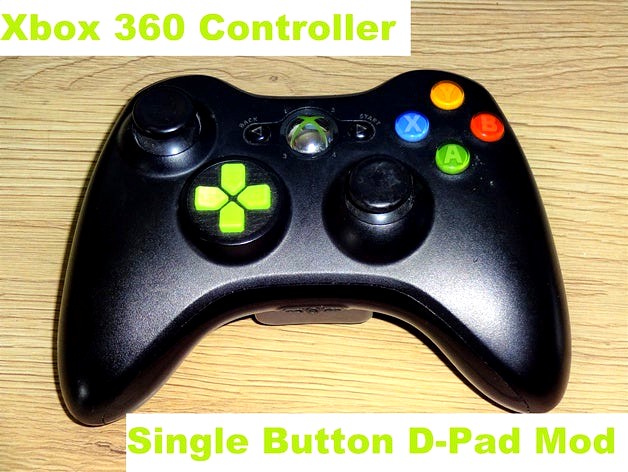
Xbox 360 Controller - Single Button D-Pad Mod
by Thingiverse
Last crawled date: 5 years, 4 months ago
This is a complete redesign inspired by Altenife's https://www.thingiverse.com/thing:630628
Thanks for the awesome idea!
Despite it's old age, the Xbox 360 Controller still is my favourite gamepad
when it comes to PC-Gaming or Retrogames on the Raspberry Pi.
Sadly it is flawed by the horrendous D-pad Microsoft came up with,
but there is a solution to this annoying problem!
Replace the D-pad with four single buttons!
It is a rather easy mod that can be done in less than an hour,
if you are a little experienced with basic tools.
The result is not perfect, but in my opinion it is a major improvement over the original unprecise mess.
Because now you actually have control over the directional inputs.
WARNING!
This modification to your Xbox 360 controller can NOT be reversed!
Attempt this only if you feel confident in assembling electronics or have somebody help you take the controller apart and reassemble it!
That being said, let's get down to business!
Tools needed:
Torx T8 security srewdriver (Amazon)
File or Dremel
Glue (suitable for your printing material & ABS, e.g. Superglue)
Printed parts
Step 1: Printing
You will need to print 1x insert and 4x button of your choice. (Try both designs)
Insert: PLA, 100% infill, 0.2mm layer height, no raft, no support, print this part standing up!
Buttons: PLA, ~15% infill, 0.1mm layer height, no raft, no support, print those lying on the side!
Step 2: Modifying the Controller
First you need to take it apart by unscrewing the 7 security T8 screws.
(one is underneath the barcode sticker inside the battery housing)
Then carefully pull apart both shell halves and look out for any loose parts that might fall out, like the rumble motors. Take out the main circuit board and remove all remaining loose parts from the upper half.
Now you can put the printed insert into the left thumbstick opening and check the fit.
Make sure the "cross" that is formed by the button guides is aligned correctly with those 4 protrusions visible inside the controller, around the thumbstick opening.
If it fits okay, mark the area inside the button guides that is visible when the insert is flush with the controller surface.
If you are certain everything is correct, the next step is carefully removing the marked area with either a file or any other suitable tool.
Try not to damage the outer rim of the thumbstick housing, it would be visible on the finished controller!
Now is the time to double-check how the d-pad is aligned, because once glued in place it cannot be readjusted!
The openings don't need to be the exact size of the insert. I made them a little larger on my controllers to give more wiggle room for the buttons.
So once it fits together well, just apply a small amount of glue onto the outwards facing area of the 4 remaining wedges and drop the insert in from the top.
Check the alignment inside and then fix the insert in place with tape on the outside to make sure it sits flush and centered.
Let the glue harden and remove the tape.
Proceed by checking the smooth movement of the buttons inside the guides and remove excess material with a file if needed.
It is now time to put the controller back together and see if it still works.
If it does: Congrats on your new, old controller.
Which leads us directly to the last step:
Step 3: Profit!
And that's it!
Have even more fun playing your favourite games!