Thingiverse
X-Carriage for Toranado Prusa i3 8mm LM8LUU 45mm Bearing by cheetahkid
by Thingiverse
Last crawled date: 4 years, 8 months ago
I built it from ground up using 123Design, similar to http://www.thingiverse.com/thing:1302584
It is for http://www.thingiverse.com/thing:1246951. (other holes maybe added for other extruder, let me know).I been told that should be able to mount any extruder to that that uses the 23x23mm hole pattern. (The NEMA17 "Wade" i3 rework, etc) thank Toranado3D.
I changed to work with 45mm bearing LM8LUU, added adjustable belt works with Wanhao or similar that don't use adjuster and even 2.5mm belt can be use (not tested), cable hole seem work without anything to tie to.
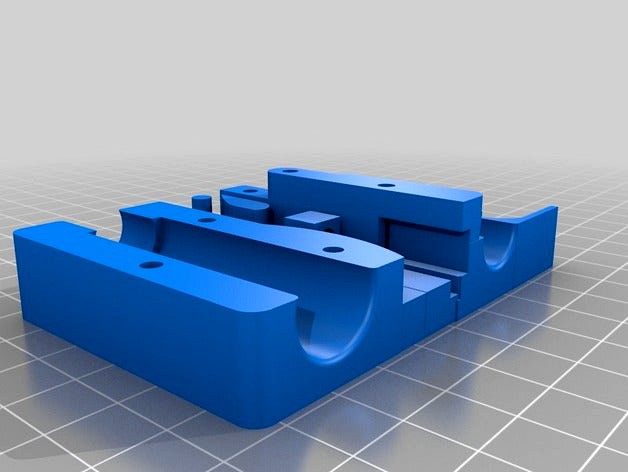
Showing in detail, I have added adjuster to tight the belt (not forgetting a tiewrap), and didn't need support apart where the bridge are need to remove. Suitable for 45mm bearings, Having GT2 belt but also 2.5mm belt too. On Wanhao, belt is slightly too short so it need replacing that belt (check it first).
You need to follow the photo. Break off the corner, clean up with a hot iron. Push in Brass Knurl Nuts with a hot iron, flush to the surface and quickly use the screw to straighten.
To test the belt, connect up the GT2 belt, the adjuster have a washer with 20mm screw, put in GT2 belt in before screw in, check the photo.
You are ready to put it in, it is require that LM8LUU is set up. Put in the base and slide in both LM8LUU, you see the bearings slides in makes it locked in but still loose. Fit the covers with 22mm screws, don't put it up too tight but just enough to grip, and slides fully to see it moves freely.
If you have belt ready that to added in make sure it is the right length which you can screw in, readjust the length if it too short or too long, make sure the screw isn't cut in the belt on the other side, don't put in tiewrap just yet till it is bearly tight then put tie wrap at the end of the aduster to holds both belt in and out of adjuster and that won't slip then cut off the excess, then to adjust till it is correct. Slide the carriage end to end and free from loose objects.
Free to put on the Toranado extruder.
Only find it quick to put it on in say 5 minutes. It took me a long time designing and few rejects that I made in the past week is now paid off.
Parts required
5x M3 22mm screws
1x M3 20mm screw
6x M3x4mm Brass Knurl Nuts
1x M3 plain washer
1x tiewrap 2.5mm 100mm
2 x LM8LUU (45mmx15mmx8mm)
2 extra piece of thin layers for testing for x_stop switch, the one with a bump is for Wanhao I3D, X-CARRIAGE_45mm_thin_sw, put this between the extruder and the carriage, add a switch for x-stop by screw (M2 screws and drill 1.5mm hole), glue or tiewrap
It is for http://www.thingiverse.com/thing:1246951. (other holes maybe added for other extruder, let me know).I been told that should be able to mount any extruder to that that uses the 23x23mm hole pattern. (The NEMA17 "Wade" i3 rework, etc) thank Toranado3D.
I changed to work with 45mm bearing LM8LUU, added adjustable belt works with Wanhao or similar that don't use adjuster and even 2.5mm belt can be use (not tested), cable hole seem work without anything to tie to.
Showing in detail, I have added adjuster to tight the belt (not forgetting a tiewrap), and didn't need support apart where the bridge are need to remove. Suitable for 45mm bearings, Having GT2 belt but also 2.5mm belt too. On Wanhao, belt is slightly too short so it need replacing that belt (check it first).
You need to follow the photo. Break off the corner, clean up with a hot iron. Push in Brass Knurl Nuts with a hot iron, flush to the surface and quickly use the screw to straighten.
To test the belt, connect up the GT2 belt, the adjuster have a washer with 20mm screw, put in GT2 belt in before screw in, check the photo.
You are ready to put it in, it is require that LM8LUU is set up. Put in the base and slide in both LM8LUU, you see the bearings slides in makes it locked in but still loose. Fit the covers with 22mm screws, don't put it up too tight but just enough to grip, and slides fully to see it moves freely.
If you have belt ready that to added in make sure it is the right length which you can screw in, readjust the length if it too short or too long, make sure the screw isn't cut in the belt on the other side, don't put in tiewrap just yet till it is bearly tight then put tie wrap at the end of the aduster to holds both belt in and out of adjuster and that won't slip then cut off the excess, then to adjust till it is correct. Slide the carriage end to end and free from loose objects.
Free to put on the Toranado extruder.
Only find it quick to put it on in say 5 minutes. It took me a long time designing and few rejects that I made in the past week is now paid off.
Parts required
5x M3 22mm screws
1x M3 20mm screw
6x M3x4mm Brass Knurl Nuts
1x M3 plain washer
1x tiewrap 2.5mm 100mm
2 x LM8LUU (45mmx15mmx8mm)
2 extra piece of thin layers for testing for x_stop switch, the one with a bump is for Wanhao I3D, X-CARRIAGE_45mm_thin_sw, put this between the extruder and the carriage, add a switch for x-stop by screw (M2 screws and drill 1.5mm hole), glue or tiewrap