Thingiverse

Wyzecam outdoor mount
by Thingiverse
Last crawled date: 4 years, 2 months ago
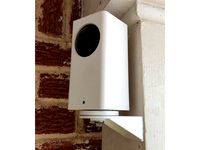
I needed a way to mount a cheap Wyzecam indoor camera under a roof overhang to monitor my driveway.
Tilt is adjustable as is the azimuth. For tilt, I used a 1/4-20 bolt (or 6mm), washers and nut. For azimuth, I threaded the part I called Pivot with a 6-32 (or 4mm) tap and secured the mount to the pivot at the desired azimuth.
The camera stops (just print two, each side is the same) are secured to the main body with #4 or 3mm screws. Just use the appropriate tap.
I printed the main body and hood as separate parts and glued them together, but I included a STL with both parts combined.
Run the USB connector for the camera into the hole in the bottom of the main body, connect to camera and slide it into the housing. Secure the camera to the housing with two camera stops, one on each side. If you want to waterproof the housing, you might want to use some sort of body filler, sanded smooth and painted. If the camera is pointed downward, water should stay out of the housing.
Similar models
thingiverse
free
Wyzecam Pan Camera Wall Mount by Isaiahsdad
...r wyzecam pan camera to any wall, giving you the full 360 degree range of motion. made with hole to fit 1/4" 20 mount screw.
thingiverse
free

Logitech C270 Security Camera Housing With Camera Cover by David3dprintertiktok
...am. the camera still fits in the camera body with the back clip that comes with the camera, but i removed mine for other reasons.
thingiverse
free

Pan Tilt for ArWing Pro by baze
...y)
screw "arm" to second servo and into dji cameras upper mounting hole (not too tight so that camera can pivot freely)
thingiverse
free

Wyzecam Night Vision Mount by Isaiahsdad
...one side and battery on the other. use your hotspot to connect to the camera and you have a true stand alone night vision camera.
thingiverse
free
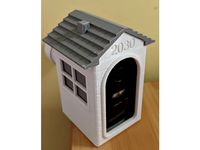
EufyCam 2C Bird House by rayyong
....
slide the camera into the roof, then slide the roof into the main body. screw the mount through the back, and you're done.
thingiverse
free

Fully 3D Printed Compact Camera Grip by M_JM
...e mount instead of a heavier camera since the screw is only made out of plastic and can easily break and get stuck in the camera.
thingiverse
free

Ender 3 Pro Wyzecam v2 X axis mount by mshinall
... the upper end of the y-axis.
remove the stock wyzecam v2 mount and re-use the stock m2 screw to mount the included camera mount.
thingiverse
free

Rigidbot Side Mount Spool Holders by Sactocal
...o the frame on one side or just use zip ties to secure it firmly if you don't want to just let it ride on the side like i do.
thingiverse
free

Crib side mount clip for WyzeCam v2 by kkr16
...t yet.
this is a crib side clip mount for the wyze wyzecam v2 that we are using as a baby monitor.
our crib has 22mm thick sides.
thingiverse
free

Customizable tilted universal hollow mount by gerie
...ned this customizable mount. you can print it in two halfes, there are allign holes , in witch you can put a 1.75 filament peice.
Wyzecam
thingiverse
free

Wyzecam Pan 1 inch riser
...wyzecam pan 1 inch riser
thingiverse
riser piece for my wyzecam pan base.
thingiverse
free
wyzecam v2 stencil by fattyasus
...il to cut out tape circles for masking the lenses on a wyzecam v2 (maybe a v1, dunno). white security cameras suck. paint them.
thingiverse
free

Wyzecam Corner Mount - Top Load
... and run it through the cable access hole behind. the mount will need some sort of adhesive (.i.e command hook adhesive strips).
thingiverse
free
Wyzecam Pan Camera Wall Mount by Isaiahsdad
...r wyzecam pan camera to any wall, giving you the full 360 degree range of motion. made with hole to fit 1/4" 20 mount screw.
thingiverse
free

Wyzecam Pan 1 inch riser -base
...ises height 1 inch, cutout for usb plug and indentation on bottom to increase height further using my 1 inch riser attachment stl
thingiverse
free

Wyzecam Pan Simple Wall Mount by Isaiahsdad
...e double sided tape to mount it to the wall, or drill holes for screws. recessed area designed for the pan camera base to fit in.
thingiverse
free
Wyzecam Night Vision Mount by Isaiahsdad
...one side and battery on the other. use your hotspot to connect to the camera and you have a true stand alone night vision camera.
thingiverse
free
Crib side mount clip for WyzeCam v2 by kkr16
...t yet.
this is a crib side clip mount for the wyze wyzecam v2 that we are using as a baby monitor.
our crib has 22mm thick sides.
thingiverse
free

Crib top mount clip for WyzeCam v2 by kkr16
...it yet.
this is a crib top clip mount for the wyze wyzecam v2 that we are using as a baby monitor.
our crib has 22mm thick sides.
thingiverse
free

Wyzecam Siding Clip by holycrapitsjosh
...then against wind and the occasional cable snag i'd recommend using the stick on magnet base to keep the camera on the shelf.
Outdoor
3ddd
$1
Лежак OUTDOOR
...лежак outdoor
3ddd
лежак
outdoor
3d_export
free

outdoor table
...outdoor table
3dexport
outdoor table
turbosquid
$20

outdoor
... available on turbo squid, the world's leading provider of digital 3d models for visualization, films, television, and games.
3ddd
$1
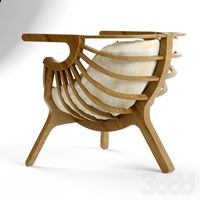
outdoor chair
...outdoor chair
3ddd
садовая мебель
outdoor chair
3ddd
$1
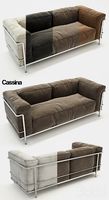
lc3 outdoor
...lc3 outdoor
3ddd
cassina
lc3 outdoor cassina
3ddd
$1
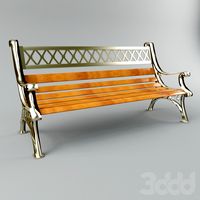
Outdoor Bench
...outdoor bench
3ddd
скамья
outdoor garden bench
3d_export
$65

Outdoor
...outdoor
3dexport
simple rendering of the scene file
3d_export
$50

outdoor patio
...outdoor patio
3dexport
get wonderful ideas on ”outdoor patio ideas
design_connected
$18

Outdoor Armchair
...outdoor armchair
designconnected
outdoor armchair computer generated 3d model.
design_connected
$9

Outdoor Ottoman
...outdoor ottoman
designconnected
outdoor ottoman computer generated 3d model.
Mount
3d_export
free

mounting bracket
...mounting plate is the portion of a hinge that attaches to the wood. mounting plates can be used indoors, cabinetry and furniture.
turbosquid
$2

MOUNTING
... available on turbo squid, the world's leading provider of digital 3d models for visualization, films, television, and games.
turbosquid
free

Mounts
... available on turbo squid, the world's leading provider of digital 3d models for visualization, films, television, and games.
turbosquid
free

Mount Fuji
...fuji
turbosquid
free 3d model mount fuji for download as obj on turbosquid: 3d models for games, architecture, videos. (1579977)
3d_export
$5

Headphone mount LR
...headphone mount lr
3dexport
headphone mount l+r
turbosquid
$39

Mount rainier
...quid
royalty free 3d model mount rainier for download as fbx on turbosquid: 3d models for games, architecture, videos. (1492586)
turbosquid
$5

pipe mounting
...quid
royalty free 3d model pipe mounting for download as obj on turbosquid: 3d models for games, architecture, videos. (1293744)
turbosquid
$3

Mounting Tires
...uid
royalty free 3d model mounting tires for download as fbx on turbosquid: 3d models for games, architecture, videos. (1708511)
3d_export
$5

Magnetic GoPro Mount
...pro mount
3dexport
cool magnetic mount for gopro. allows you to mount the camera on flat metal surfaces and get exclusive shots.
turbosquid
$5

Stone Mount
...ty free 3d model stone mount for download as ma, obj, and fbx on turbosquid: 3d models for games, architecture, videos. (1370306)