Thingiverse
Wyze Pan Cam tilt mod
by Thingiverse
Last crawled date: 4 years, 1 month ago
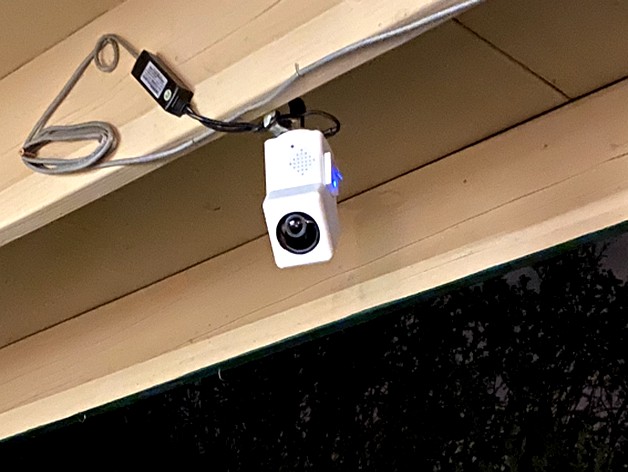
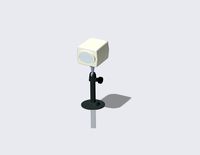
A modified Wyze Pan Cam housing for use when the Wyze Pan is hanging and you want the tilt range to go lower. Hanging a Wyze Pan from a ceiling often results in half the tilt range being wasted on the ceiling, and a tilt mount won't maintain the tilt for the full pan-range.
The idea here is you gut the insides of the existing Wyze Pan and transplant them into the new housing.
====================
There are two versions of the main body:
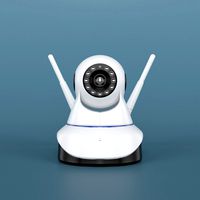
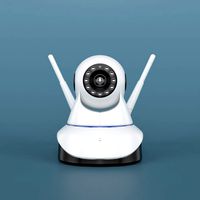
1) Speaker in the front, which is the version I've tested with and is shown in the pictures
2) Speaker in the back, which should work, but i have not printed yet.
====================
Assembly:
You can use the screws from the original enclosure.
First attach the upper portion with the camera, motor, and mounting hardware to the lid, and screw in the two mounting screws. Leave the camera ribbon cable connected. Then slide the lid into the main body and feed the motor cable and camera ribbon cable through the bottom. This will be a tight fit, to help keep things in place. There is also a screw hole to prevent the lid from slipping out, and you can reuse one of the back-panel screws for this.
Put the speaker into the speaker notch. Hopefully there will be enough stickiness from the original case to keep it in, but you can add a little dab of general purpose glue or silicon adhesive to keep it in.
Screw the USB PCB onto the "USB mount" printed part, With the ribbon cable connected to the USB port, and plug in the speaker to the USB PCB. Then place that whole USB assembly into the main body from the bottom and line it up with the outer holes, and use two more screws to mount it.
You'll need two extra screws, but we can get those from the original enclosure, as there is a metal plate with two screws, that won't be used in the new enclosure (I have no idea what that's for).
Carefully remove the wifi antenna from the original enclosure (it's basically a sticker with some copper) and stick it in the new enclosure opposite of the USB port, or anywhere that seems to have room.
Your main body should now have the top/camera portion installed, the speaker/USB ports, and antenna installed. Now connect the camera ribbon cable, the USB ribbon cable, the wifi antenna, and tilt motor wires to the bottom pan assembly. You'll have to twist the camera ribbon cable to maintain the correct connector orientation for plugging it in (for the "speaker-front" version).
The bottom panel and pan assembly will snap into the new enclosure like it does for the old one. Don't forget the little black rubber thing that sits over the LED on the PCB. It might be a tight fit. the bottom screw hole should line up fairly good. This might be a really tight fit. There's also a hole for a screw, just to be on the safe side and prevent it form sliding out. You can use the other screw from the original back-panel for this.
NOTE: If you put things back together and the camera doesn't do anything, don't panic. Open it back up and reseat your ribbon cables.
The idea here is you gut the insides of the existing Wyze Pan and transplant them into the new housing.
====================
There are two versions of the main body:
1) Speaker in the front, which is the version I've tested with and is shown in the pictures
2) Speaker in the back, which should work, but i have not printed yet.
====================
Assembly:
You can use the screws from the original enclosure.
First attach the upper portion with the camera, motor, and mounting hardware to the lid, and screw in the two mounting screws. Leave the camera ribbon cable connected. Then slide the lid into the main body and feed the motor cable and camera ribbon cable through the bottom. This will be a tight fit, to help keep things in place. There is also a screw hole to prevent the lid from slipping out, and you can reuse one of the back-panel screws for this.
Put the speaker into the speaker notch. Hopefully there will be enough stickiness from the original case to keep it in, but you can add a little dab of general purpose glue or silicon adhesive to keep it in.
Screw the USB PCB onto the "USB mount" printed part, With the ribbon cable connected to the USB port, and plug in the speaker to the USB PCB. Then place that whole USB assembly into the main body from the bottom and line it up with the outer holes, and use two more screws to mount it.
You'll need two extra screws, but we can get those from the original enclosure, as there is a metal plate with two screws, that won't be used in the new enclosure (I have no idea what that's for).
Carefully remove the wifi antenna from the original enclosure (it's basically a sticker with some copper) and stick it in the new enclosure opposite of the USB port, or anywhere that seems to have room.
Your main body should now have the top/camera portion installed, the speaker/USB ports, and antenna installed. Now connect the camera ribbon cable, the USB ribbon cable, the wifi antenna, and tilt motor wires to the bottom pan assembly. You'll have to twist the camera ribbon cable to maintain the correct connector orientation for plugging it in (for the "speaker-front" version).
The bottom panel and pan assembly will snap into the new enclosure like it does for the old one. Don't forget the little black rubber thing that sits over the LED on the PCB. It might be a tight fit. the bottom screw hole should line up fairly good. This might be a really tight fit. There's also a hole for a screw, just to be on the safe side and prevent it form sliding out. You can use the other screw from the original back-panel for this.
NOTE: If you put things back together and the camera doesn't do anything, don't panic. Open it back up and reseat your ribbon cables.
Similar models
thingiverse
free

Camera Mount for Hackerboxes 24 by ktelep
...this bracket will allow you to use some of the screw hardware in the box to mount it to the top u plate of the pan/tilt assembly.
thingiverse
free
OrangeRx transmitter antenna mount by Scorpio9999
...e back to pcb.
return back cover in place and screw it.
you are done!
first mount module in transmitter then screw antenna on it.
thingiverse
free

Ender 3 Pro Wyze Camera Mount
... the official wyze mounting ring sits inside to provide a magnetic hold on the camera.
includes clips to hold the usb cable tidy.
thingiverse
free

RAMPS 1.4a Enclosure by Delphius
...ed" version of the main body piece which should allow for more airflow. i haven't printed it yet and make no guarantees.
thingiverse
free

Camera stand for Wyze Cam v2 and Wyze Cam Pan by grha88
... models large cutouts are to reduce filament and printing time. the tabs on the back work well with the wyze-supplied usb cables.
thingiverse
free

VESA Mount (200mm) for ssd/hdd and Raspberry Pi 2/3
...base, this is very thin (to keep lightweight with less material possible), also be careful when you get the support material out!
thingiverse
free

QIDI X-PLUS WYZE CAMERA CLIP by B0SC0
...t not too long.
it could interfere with the top of the print head
enclosure during printing.
print head temp = 230c
bed temp = 70
thingiverse
free

Custom Lulzbot Taz 5 Ramps 1.4 Enclosure by weekend_warrior1999
...lder
panel mount usb
40mm fan and mounting screws
2 40mm fan guards
t nuts and screws for mounting
screws for mounting pcb board.
thingiverse
free

Raspberry Pi Camera Mount for Pan Tilt thing by LogicalToby
...rce m2 nuts in to the back so it's not just screwing in to the plastic but it isn't really necessary so do what you like.
thingiverse
free
Wyze Camera Corner Mount for Lack Enclosure by youngmark
...t for lack enclosure. it can easily be mounted with two offset screw holes. please feel free to make any comments or suggestions.
Wyze
thingiverse
free

Wyze Cam Holder
...wyze cam holder
thingiverse
wyze cam holder. the screws i used are #10 pan head.
thingiverse
free

Wyze Aquarium Mount
...wyze aquarium mount
thingiverse
allows you to mount your wyze webcam onto your fish tank
thingiverse
free

Wyze WebCam Cover by Brandon250r
...wyze webcam cover by brandon250r
thingiverse
wyze cam cover for privacy.
thingiverse
free
Camera stand for Wyze Cam v2 and Wyze Cam Pan by grha88
... models large cutouts are to reduce filament and printing time. the tabs on the back work well with the wyze-supplied usb cables.
thingiverse
free

Wyze Camera Mount
...unctions properly.
print order:
wyze pin circle
wyze pin hex
wyze cam mount with or without cable router, either round or square.
thingiverse
free

Dual Wedge for Wyze Doorbell by madebymab
... by madebymab
thingiverse
designed to angle a wyze doorbell camera to the right and slightly down. fits the wyze doorbell plate.
thingiverse
free

CR-10 Wyze Bed Handle
...verse
bed handle for cr-10 with a easy wyze mount as requested. to make monitoring and mounting a wyze cam to printer with ease.
thingiverse
free

Wyze Cam Window Mount V2
...wyze cam window mount v2
thingiverse
simple widow mount for the wyze cam
thingiverse
free

Wyze Aquarium Mount by mrodyssey
...igned to hang 7 inched down from the rim of your home aquarium so you can mount a wyze cam v2 and monitor you tank away from home
thingiverse
free

Wyze Hand Vacuum Holder by PD_224
...wyze hand vacuum holder by pd_224
thingiverse
wall mount for the new wyze hand vac.
Pan
design_connected
$16

Pan Pan
...pan pan
designconnected
ligne roset pan pan computer generated 3d model. designed by kuehne-thompson, barbara.
archibase_planet
free

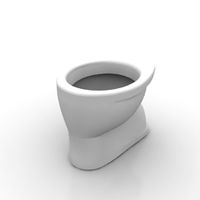
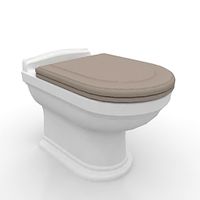
Pan
...pan
archibase planet
lavatory pan w.c. pan sanitary ware
lavatory pan - 3d model for interior 3d visualization.
archibase_planet
free
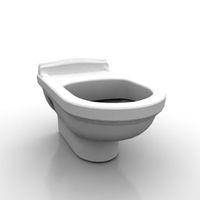
Pan
...pan
archibase planet
lavatory pan w.c. pan sanitary ware
lavatory pan - 3d model for interior 3d visualization.
archibase_planet
free
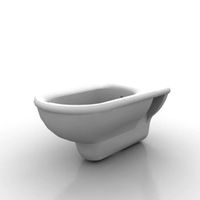
Pan
...pan
archibase planet
lavatory pan pan sanitary ware
lavatory pan 666310_9926k1 - 3d model for interior 3d visualization.
archibase_planet
free
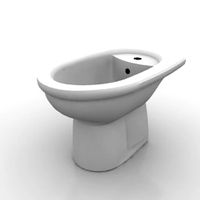
Pan
...pan
archibase planet
lavatory pan pan sanitary ware
lavatory pan 666110 - 3d model for interior 3d visualization.
archibase_planet
free

Pan
...pan
archibase planet
frying pan; pan kitchen ware
pan - 3d model (*.gsm+*.3ds) for interior 3d visualization.
archibase_planet
free
Pan
...pan
archibase planet
lavatory pan w.c. pan sanitary ware
lavatory pan k5018 - 3d model for interior 3d visualization.
archibase_planet
free
Pan
...pan
archibase planet
lavatory pan w.c. pan sanitary ware
lavatory pan r3701 - 3d model for interior 3d visualization.
archibase_planet
free

Pan
...pan
archibase planet
lavatory pan w.c. pan sanitary ware
lavatory pan v3122 - 3d model for interior 3d visualization.
archibase_planet
free
Pan
...pan
archibase planet
lavatory pan w.c. pan sanitary engineering
pan - 3d model (*.gsm+*.3ds) for interior 3d visualization.
Tilt
3ddd
free
TILT
...tilt
3ddd
tilt
http://www.graypants.com
tilt
gp-133 -size: o: 46cm | h: 35cm.
3ddd
$1

TILT
...tilt
3ddd
kenneth cobonpue
http://www.kennethcobonpue.com/collection/view/44/tilt
design_connected
$9
Tilt
...signconnected
photo-realistic 3d models of the tilt shelves from bonaldo for 3d architectural and interior design presentations.
turbosquid
$7
Tilt
... available on turbo squid, the world's leading provider of digital 3d models for visualization, films, television, and games.
3ddd
$1
Urban electric Tilt
...urban electric tilt
3ddd
urban electric , tilt
urban electric tilt
design_connected
free

Tilt 70
...tilt 70
designconnected
free 3d model of tilt 70 by nc möbler designed by andersson, peter.
3d_export
$5

tilt door knob
...tilt door knob
3dexport
tilt door knob
turbosquid
$65
Tilt scale
... available on turbo squid, the world's leading provider of digital 3d models for visualization, films, television, and games.
turbosquid
$3

Tilted Cross
... available on turbo squid, the world's leading provider of digital 3d models for visualization, films, television, and games.
3d_export
$5
tilt shape door knob
...tilt shape door knob
3dexport
tilt shape door knob
Cam
archibase_planet
free

Cam
...cam
archibase planet
tv camera equipment
cam dolly - 3d model (*.gsm+*.3ds) for interior 3d visualization.
3d_export
$8

Cam and Follower
...ry to linear (reciprocating) motion. as the cam rotates, the follower rises and falls in a process known as reciprocating motion.
3d_ocean
$15
Studio Cam
...p. made in 3ds max 2013 1- 3dsmax with vray render included material and light 2- obj file 3- fbx file hope you like it please...
3d_export
$37

thermal cam
...thermal cam
3dexport
turbosquid
$19
Security cam
...oyalty free 3d model security cam for download as ige and obj on turbosquid: 3d models for games, architecture, videos. (1331128)
turbosquid
$40
Security Cam
...y free 3d model security cam for download as ma, fbx, and obj on turbosquid: 3d models for games, architecture, videos. (1601103)
3d_export
$40
security cam
...security cam
3dexport
home security camera
turbosquid
$280

cam-bot
... available on turbo squid, the world's leading provider of digital 3d models for visualization, films, television, and games.
turbosquid
$33

AT_minivan_(CAM)
... available on turbo squid, the world's leading provider of digital 3d models for visualization, films, television, and games.
turbosquid
$10

video cam
... available on turbo squid, the world's leading provider of digital 3d models for visualization, films, television, and games.
Mod
design_connected
$13

MOD. 4233 - MOD. 4234 Table Lamp
...mod. 4233 - mod. 4234 table lamp
designconnected
arcahorn mod. 4233 - mod. 4234 table lamp computer generated 3d model.
design_connected
$11

MOD.1095
...mod.1095
designconnected
mod.1095 computer generated 3d model. designed by sarfatti, gino.
3ddd
$1

fireplaces mod Spec
...fireplaces mod spec
3ddd
камин
fireplaces mod spec 180x90x125h
3ddd
free

Flos Mod. 2129
... mod
фабрика: flos
модель: mod. 2129
описание: подвесной светильник, металл, белый, черный.
сайт: www.flos.com
turbosquid
$32

MOD A 001
... available on turbo squid, the world's leading provider of digital 3d models for visualization, films, television, and games.
turbosquid
$29

Maars Mod
... available on turbo squid, the world's leading provider of digital 3d models for visualization, films, television, and games.
turbosquid
$15

Mod 70..
... available on turbo squid, the world's leading provider of digital 3d models for visualization, films, television, and games.
turbosquid
$10

MOD Sofa
... available on turbo squid, the world's leading provider of digital 3d models for visualization, films, television, and games.
turbosquid
$1

Mod-Lite
... available on turbo squid, the world's leading provider of digital 3d models for visualization, films, television, and games.
turbosquid
$1
pc mod
... available on turbo squid, the world's leading provider of digital 3d models for visualization, films, television, and games.