Thingiverse

Waveshare 7.5" e-paper weather display
by Thingiverse
Last crawled date: 5 years, 3 months ago
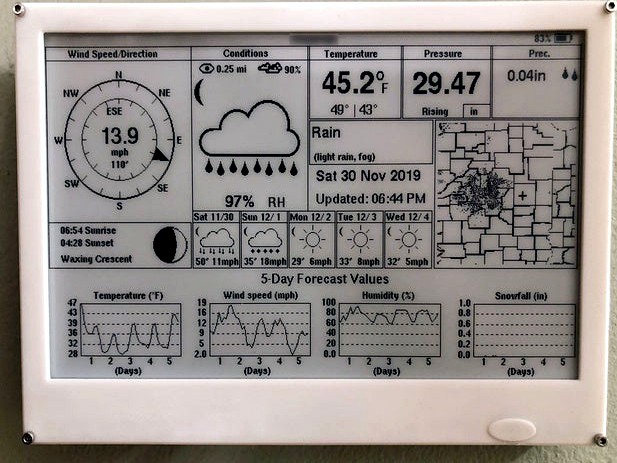
Wall-mount frame and case for Waveshare's 7.5" e-paper display, with room in back for a driver board, battery, and voltage regulator. Can be used to create a weather display using an ESP32 or Raspberry Pi. Battery life is about 4 months with the components below and when set to a 30-minute refresh interval.
Components for battery-powered ESP32 version:
Source by G6EJD (thanks!): https://github.com/G6EJD/ESP32-e-Paper-Weather-Display
Waveshare 7.5" E-Paper display: https://www.waveshare.com/7.5inch-e-paper-hat.htm
Waveshare ESP32: https://www.waveshare.com/e-paper-esp32-driver-board.htm
2500 mAh lipo battery: https://www.adafruit.com/product/328
Adafruit PowerBoost 1000 Charger (optional): https://www.adafruit.com/product/2465
Adafruit TPL5111 Low Power Timer Breakout (optional): https://www.adafruit.com/product/3573
6mm pushbutton (optional)
The optional booster/charger allows the ESP32 to be powered with a lipo battery and for the battery to be charged in parallel. Alternatively, you could leave the ESP plugged in to USB or connect a battery via a simple voltage regulator after the 5V input.
The optional TPL5111 timer supplies power on a fixed interval, greatly increasing battery life. (Unfortunately the Waveshare ESP32 breakout draws about 15 mA even when the ESP itself is in deep sleep (other brands may not have this issue), and the Adafruit booster draws another 5 mA). The timer sets the booster's enable pin high, waits for the ESP to do its thing, then turns the booster off. Connect ENout from the timer to EN on the booster, and an ESP output to DONE on the timer. Connect VDD and GND on the timer to Bat and GND on the booster.
The optional pushbutton tells the system to update on demand. Connect it between Bat on the booster and Delay on the timer. Print the "_withbutton" versions of the bezel and frame, as well as the button cap. Insert something squishy (o-ring, piece of foam, rubber band, etc.) between the pushbutton and the button cap.
A Raspberry Pi Zero W could be used instead of the ESP32 if you don't mind keeping it plugged in. The Pi's power consumption would probably make a battery impractical.
pojamapeoples has posted a wiring diagram (thanks!): https://www.thingiverse.com/make:756610
Tinkercad model: https://www.tinkercad.com/things/aJjVszpMBMK
I modified G6EJD's source to display a radar image (first image shows modified version, second image shows mostly-original). This requires a separate web server for image processing, as the ESP32 doesn't have enough horsepower. Will post source and instructions once I clean up the code, or you can PM me.
