Thingiverse
Watney Rover -- remix by callmelightningjunior
by Thingiverse
Last crawled date: 3 years ago
I'm listing this as a remix and a work in progress.
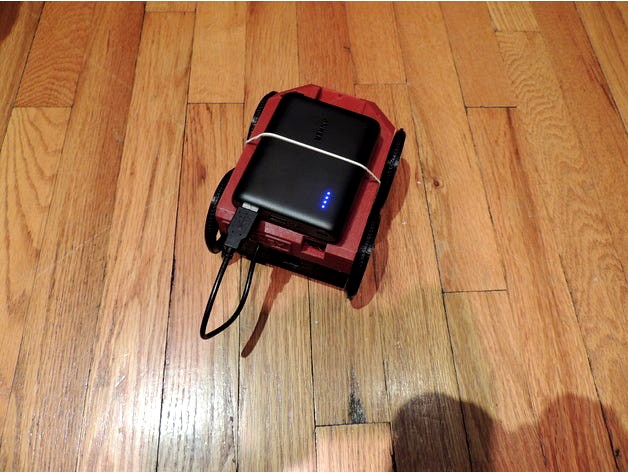
At this point it's the basic rover, I haven't mounted a camera yet. The quick assembly was to evaluate performance issues. Comments have been made about performance on carpet. The rover runs fine straight on carpet, but has trouble turning which seems to be a motor torque issue. I want to measure current to see if it's a current limit issue or something else. I also want to experiment with other turn algorithms other than the current full speed skid, and jog modes. I was concerned that the speed might be to fast, but in first impressions it seems ok.
I've got several remix ideas:
I want to put finer tooth gears. This should reduce noise and improve durability. Currently all the gears are 7T, which means the same teeth always contact, which can lead to uneven wear.
I want to add a better battery attachment than simply strapping one to the deck.
As far as software I'm interested on trying to create a program mode, similar to the old Big Trak, where the rover will behave like a remote rover where a set of instructions are given, then executed rather than direct control. If that is done this could have application as an education project -- simulation of an interplanetary rover, physical 'turtle' graphics.
Added new Gear Train
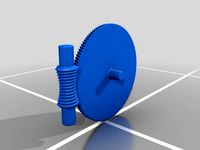
I've added an alternative gear train using finer pitch gears. The coarse gears are noisy and really "cog" (show a preferred position of tooth to valley).
The design went this way, I decided on making them 2 1/2 times finer -- guessing an initial module of 2.5mm (it turned out to be a little larger). This gives 17.5 teeth which allows a 17/18 pair. 17 is a prime number and 18 is not 17, so every tooth will mate with every tooth in operation. This should give more even wear. The final module turned out to be 1.14mm -- 3D printing is wonderful, who cares about standard sizes, just print what fits.
I printed the gear set on a raft to eliminate flash on the bottom edge
Assembly Notes
The wheel bearing surfaces were tight, so I sanded the holes with 600 sandpaper wrapped around a sightly smaller piece of rod.
I drilled out holes where possible with a #41 (~2.4mm) drill, and tapped 3x0.5, rather than trusting the screws to self tap. The Pi and H-bridge were secured with #4 x 1/4" sheet metal screws rather than the suggested 3x0.5 screws. Be careful not to over-tighten. I drilled through and tapped the motor block screw holes, and used 3x8 screes to hold it down. I had already stripped one of the short screws removing and replacing it while working on the gear train.
I put a small amount of grease on all bearing surfaces and gear teeth. I used Woodland Scenics HL657, but any plastic compatible grease should do.
I also printed two of the wheels mirrored so that there are left and right wheels,
At this point it's the basic rover, I haven't mounted a camera yet. The quick assembly was to evaluate performance issues. Comments have been made about performance on carpet. The rover runs fine straight on carpet, but has trouble turning which seems to be a motor torque issue. I want to measure current to see if it's a current limit issue or something else. I also want to experiment with other turn algorithms other than the current full speed skid, and jog modes. I was concerned that the speed might be to fast, but in first impressions it seems ok.
I've got several remix ideas:
I want to put finer tooth gears. This should reduce noise and improve durability. Currently all the gears are 7T, which means the same teeth always contact, which can lead to uneven wear.
I want to add a better battery attachment than simply strapping one to the deck.
As far as software I'm interested on trying to create a program mode, similar to the old Big Trak, where the rover will behave like a remote rover where a set of instructions are given, then executed rather than direct control. If that is done this could have application as an education project -- simulation of an interplanetary rover, physical 'turtle' graphics.
Added new Gear Train
I've added an alternative gear train using finer pitch gears. The coarse gears are noisy and really "cog" (show a preferred position of tooth to valley).
The design went this way, I decided on making them 2 1/2 times finer -- guessing an initial module of 2.5mm (it turned out to be a little larger). This gives 17.5 teeth which allows a 17/18 pair. 17 is a prime number and 18 is not 17, so every tooth will mate with every tooth in operation. This should give more even wear. The final module turned out to be 1.14mm -- 3D printing is wonderful, who cares about standard sizes, just print what fits.
I printed the gear set on a raft to eliminate flash on the bottom edge
Assembly Notes
The wheel bearing surfaces were tight, so I sanded the holes with 600 sandpaper wrapped around a sightly smaller piece of rod.
I drilled out holes where possible with a #41 (~2.4mm) drill, and tapped 3x0.5, rather than trusting the screws to self tap. The Pi and H-bridge were secured with #4 x 1/4" sheet metal screws rather than the suggested 3x0.5 screws. Be careful not to over-tighten. I drilled through and tapped the motor block screw holes, and used 3x8 screes to hold it down. I had already stripped one of the short screws removing and replacing it while working on the gear train.
I put a small amount of grease on all bearing surfaces and gear teeth. I used Woodland Scenics HL657, but any plastic compatible grease should do.
I also printed two of the wheels mirrored so that there are left and right wheels,
Similar models
thingiverse
free
Another Worm Gear (Globoid 120:1) by pauljs75
...ld be a workable gear.
also i'm thinking of doing something based on this, such as a differential. nothing too clever though.
thingiverse
free

Springy Cable Mount by pchanizzle
... wanted to use command strips rather than drill/screw, but i included the original with screw holes.
https://youtu.be/zgy-2zddxq8
grabcad
free

Helical motor gear
...helical motor gear grabcad helical gears are similar to spur gears except that their teeth are cut...
thingiverse
free

SK450 Claw Landing Gear - Extended by luodanli
...model with reinforced screw holes,
11/21/2015 compensate for original screws when printing with material less flexible than nylon
cults
free

Gears paradoxical- paradoxical gear
...red the first one gear with two teeth, called paradoxical.
i wanted to make teeth and it works well.
nop21 (google translation)
thingiverse
free

sock knitting machine resize ritzel by Gebsews
...39;t engage. mine is now easy to turn and have not had any problems with teeth not engaging on the gears. use at your own risk.
thingiverse
free

Simple Clock Gears by NZ1J
...ad of a cycloid. the pinion teeth should be narrower than the 50% you'd expect in a gear tooth.
these gears are a 2:1 ratio.
grabcad
free

Helical Gear
...helical gear grabcad helical gears are similar to spur gears except that their teeth are cut...
thingiverse
free

Water Tap Key - Wasserhahnschlüssel / Drehknauf by fakio87
...e direction to open the watertab - i forget the direction to turn all the time ;-)
print with the flat side down without supports
thingiverse
free
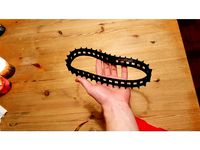
Flexible printable rover tracks by Flying_Ginger
...ut i wanted to share the track just in case someone else wanted to use it for their rover.
printed in tpc with an hardness of 45d
Watney
thingiverse
free
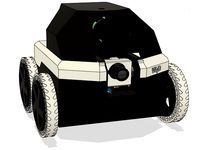
Watney rover by nivanov
...initely.
please visit https://github.com/nikivanov/watney for more information about assembly, software setup, and configuration.
thingiverse
free

Terraforming Mars Player Board (Fits Maker Select as 1 print) by Thorkon
...space characters: (spiff (calvin and hobbes), spike (cowboy bebop), watney (the martian), olimar (pikmin). i tried to represent different...
sketchfab
$10

Reid's Brewery | Pub Sign
...logos are built into the exterior. reid’s merged with watneyamp;rsquo;s in 1898, but in the mid-19th century was one...
thingiverse
free

Ares 3 Hab by OpenFabPDX
...tanks, oxygenator, water reclaimer, communications dish (not present during watney#39;s stay), antennae array (modeled intact), and of course, the...
grabcad
free

2Claw for Watney
...2claw for watney
grabcad
revised end effector
cults
free

The Martian Wrist Computer
...is a model of the wrist computer that mark watney wears in ridleys scott's movies "the martian" based on...
Callmelightningjunior
thingiverse
free

BMP280 Case by callmelightningjunior
... for mounting. support for the board inside the case. slot for connector for easy wiring. 'bmp280' labels for play value.
thingiverse
free

New E-lock for Arduino Uno case by callmelightningjunior
...he arduino case. the original reuires a 4mm diameter spring. this takes a 3mm spring which is a more common ballpoint pen spring.
thingiverse
free

Stylus for Pocket CHIP by callmelightningjunior
...red. finally, i use the lanyard, and the clip used the entire triangular hole, fouling the lanyard.
so, time to design a new one.
thingiverse
free
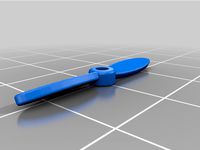
Propeller for WWI Aircraft by callmelightningjunior
...le with .1mm layer height. the resin models are scales to 1/160 (n scale) printed with a elegoo mars with 40 micron layer height.
thingiverse
free

PocketCHIP "Mechanical" Keyboard by callmelightningjunior
... shift. the pale yellow key is the one normal character key in the row.
all in all, i'm very pleased with how this turned out
thingiverse
free

More easily printable frame for old Russian gondola by callmelightningjunior
...ee my https://www.thingiverse.com/thing:4594319 for coupler loops and https://www.thingiverse.com/thing:4594292 for coupler hook.
thingiverse
free
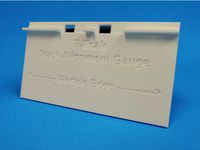
T-Trak Track Alignment Gauge by callmelightningjunior
.../ for example modules.
see http://ttrak.wikidot.com/hillside for an example of modules using the 3-position single track concept.
thingiverse
free

Caster Foot for Ikea Melltorp table by callmelightningjunior
... version 2 stl.
the suspenders: i printed this heavier. 3 shells and 35% triangle infill.
see the new photo for a modified piece.
thingiverse
free
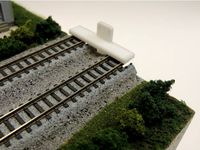
T-Trak Module Height Gauges -- T-Square style by callmelightningjunior
...e top model railroad displays. see http://www.t-trak.org/ for more information and http://ttrak.wikidot.com/ for example modules.
Rover
3d_ocean
$89

Land-Rover Range Rover 2011
...andling have been transformed with the introduction of new engines, transmission and chassis systems. combine these enhancemen...
3d_export
$20

land rover
...land rover
3dexport
land rover
3d_export
$14

Land Rover Range Rover 2022
...land rover range rover 2022
3dexport
3d_export
$39

land rover range rover iii
... rover iii
3dexport
land rover range rover iii, year 2002.<br>model with high quality finishing on the outside and inside.
3d_export
$7

the rover
...the rover
3dexport
turbosquid
$5
Rover
...royalty free 3d model rover for download as max, obj, and fbx on turbosquid: 3d models for games, architecture, videos. (1673120)
3d_ocean
$89
Land Rover Range Rover 1986
...y, in real units of measurement, qualitatively and maximally close to the original. model formats: - *.max (3ds max 2008 scanl...
3d_export
$29

Land Rover Range Rover 1993 3D Model
... rover range rover 1993 3d model
3dexport
land rover range 1993
land rover range rover 1993 3d model 3dlogicline 39509 3dexport
3d_export
$69

Land Rover Range Rover Velar 2023
...land rover range rover velar 2023
3dexport
3d_export
$20

land rover range rover
...e apps.<br>car textures:png - 2k resolution other available formats: obj, 3ds, fbx, max. polycount: 35742 poly / 37163 tris
Remix
turbosquid
$5

MODA Collection Remix Chair
... available on turbo squid, the world's leading provider of digital 3d models for visualization, films, television, and games.
3d_export
$12

remix yamaha rm1x
...remix yamaha rm1x
3dexport
geometry triangles 15.2k vertices 7.6k pbr no textures 1 materials 1 uv layers yes
3d_ocean
$5

Vray fabric Kvadrat remix green - tileable
...th vray and 3dsmax. high-resolution texture images (2000×2000 px) file included: shader vray 2.40 texture image 3ds max 2011 file
turbosquid
$20

Gerrit Rietveld 1938 Zig Zag Chair Remix
... available on turbo squid, the world's leading provider of digital 3d models for visualization, films, television, and games.
3d_export
$10

multicolored remix parametric table furniture
... fbx, obj, mtl, archive with textures. the model has no glitches. render and materials - vray . without using plugins. good use!
3ddd
$1

Barovier&Toso / Manhattan Remix 7192
... 004293-142405
в коллекции есть люстры 7, 9, 12 рожковые. диаметр соответственный 1000, 1250, 1500 мм.
3ddd
$1

Muuto fiber chair
...grey/grey, dusty green/dusty green, nature/oak, natural white/oak upholstery options remix 183/black, remix 133/grey, remix 643/dusty red leather options black...
3ddd
$1

Barovier&Toso 7190-7195
...7190-7195 3ddd barovier&toso потолочнай люстра фабрики barovier&toso;, коллекция manhattan remix артикул 7190-7195. размеры в inches: 39"...
3d_export
$5

3D Locking Handle Weatherproof Storage Box Container
...handle weatherproof storage box container 3dexport new, improved and remixd! no screws required. print-in-place. weatherproof. parametric. 2 parts. easy...
cg_studio
$49

HTC One Mini 2 Amber Gold3d model
...cell phone mobile cellular super lcd touchscreen touch screen remix amber gold .max .obj .mb .lwo .fbx .c4d .3ds...