Thingiverse
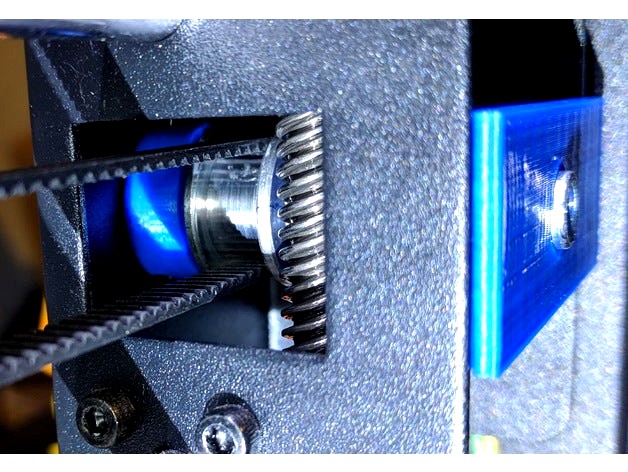
Wanhao DI3 X Idler Upgrade by ftk1
by Thingiverse
Last crawled date: 3 years ago
This is an X axis idler upgrade for the Wanhao Duplicator i3 and clones. Since the stock idler pulley is supported only on one side, it tends to get skewed with the tension causing mis-alignment and increased wear.
This part utilizes a longer bolt to create support from the other side of the carriage to keep the idler pulley perpendicular to the belt. The only extra part needed is an M5x45 bolt. This design was inspired by The_Monstro's x idler, but does not require drilling holes or disassembling the carriage from the printer.
This upgrade can install in place, but it is a little tricky:
Disassembly
1) Raise the carriage at least half way up the Z axis
2) Release the belt from the print head
3) Using a hex key, unscrew the idler bolt from the bottom of the carriage. This will be tedious since there is only room to turn about 1/4 turn each time, but fortunately, the bolt only needs to be unthreaded a few millimeters
4) Once the bolt is released, you'll find that the pulley and bolt is jammed between the back wall of the carriage and motion rods. Unloosen the nut behind the pulley a few turns using a needle nose plier through the hole the belt goes through and the hex key from the bottom, until you're able to remove the pulley and bolt from the bottom
5) Remove the nut and bolt from the pulley, save nut for the new idler mount.
Assembly
1) There is a threaded insert that the stock pulley mounted to. The printed idler spacer mounts over this protrusion. Thread the new bolt from the back side of carriage until it sticks out a few mm inside. Then use the end of the bolt to guide the spacer into place. It will fit snugly over the insert. My insert had a blob of welded metal, which is why the spacer has a cutout to accommodate it.
2) Bring the pulley with belt into position by the spacer, then thread in the bolt until it is through the pulley and flush with the end.
3) Use the nut that was removed from original bolt and press it into the hole of the new idler mount
4) Guide the idler mount from the bottom of the carriage up to the pulley with the inserted nut facing forward and the thicker leg facing toward the center of the printer.. The left leg of the mount will align vertically with the hole that the belt goes through and the part will fit snugly in the carriage
5) Start screwing in the bolt from the back feeling for if the bolt is aligned to the hole. When aligned, the idler mount won't push out from the carriage when the bolt is tightened. Try to keep the mount pressed down fully in the carriage, then tighten bolt as far as it will go until it is flush with the back of the carriage.
6) Re-mount and tension the belt
Similar models
thingiverse
free
Prusa MK3 Bear 20T 5ID Gates Y idler + tensioner
... on the insertion depth: rely exclusively on the belt to verify the alignment.
again, with great thanks to gregsaun for his work.
thingiverse
free
Tronxy x5s Belt Tensioner by unnefer
...stment spacers until you find the one that removes the remaining slack in the belts and keeps the belts tensioned to your liking.
thingiverse
free

Wanhao i3 plus y-belt pulley mount by frediiii
...reads to further enhance rigidity. to use these, you have to drill some 3mm holes in your printer base and get additional screws.
thingiverse
free

Wanhao i3 X - idler upgrade - bolt reversed by Pumpal
...ll be the same as the factory.
you will need 2x m5 nylon nuts (can reuse the stock and get only 1 additional) and a 5x40 m5 bolt.
thingiverse
free

Tronxy X5s e3d v6 Mount With Belt Aligner by graham01
...ckets see: https://www.thingiverse.com/thing:2594291
for my micro cooling fan duct see: https://www.thingiverse.com/thing:2469775
thingiverse
free

Idler pulley bracket for v-slot surface mount by anthem
... but i suggest inserting your belt before mounting to the v-slot, or mount only one side and rotate the bracket up to get access.
thingiverse
free

Ender 3 V2 Linear Rail Direct Drive X-Axis Conversion V1 by VonTaube
...
crimp belt and tension
see ender 3 v2 direct drive link below for extruder install infohttps://www.thingiverse.com/thing:4621486
thingiverse
free

Taz 6 style Externally Accessable Y axis belt tensioner by piercet
... an adjusted endplate that will clear the tensioner bolt and washer. if you are using a more stock taz you do not need that part.
grabcad
free

Nuts
...nt axial movement. for example, a bolt is inserted through two parts, with aligned holes, and a nut is then screwed onto the bolt
grabcad
free

Husqvarna 532197249 Riding Mower Deck Idler Pulley Bracket - Modified
...led and tapped for a 3/8" stud. original and replacement ($5) sheet metal part is well known for breaking at it's pivot.
Ftk1
thingiverse
free
HTC RE End Cap by ftk1
...r i want. the dimensions and inner ring of the cap match the original so that it will fit properly with the original accessories.
thingiverse
free

Pi Zero Hubpixed HubPiWi Case by ftk1
...te that the covering of the non-power usb port on the pi zero is intentional. you cannot use that port while the hub is attached.
thingiverse
free

Organizer for Metric Tap, Drill and Die by ftk1
...ap drill bit is a little tight, but can be remedied by inserting the drill cutting side down and spinning it by hand a few times.
thingiverse
free
Wanhao DI3 Y Tensioner Idler by ftk1
... i mounted the tensioner to the front of the printer first using the existing 3 holes to mark the holes for drilling the other 3.
thingiverse
free

Pi Zero Hubpixed HubPiWi Case- Beefed Up with Tabs by cyclenut
...tabs by cyclenut thingiverse i printed out one of ftk1#39;s cases and it was great but i was looking...
Di3
thingiverse
free
Wanhao Di3 v2 Light / Wanhao Di3 v2 Beleuchtung by JMDesigns
...wanhao di3 v2 light / wanhao di3 v2 beleuchtung by jmdesigns
thingiverse
wanhao di3 v2 light / wanhao di3 v2 beleuchtung
thingiverse
free
Wanhao Di3 MagFix System by JMDesigns
...wanhao di3 magfix system by jmdesigns
thingiverse
wanhao di3 magfix system
thingiverse
free
Wanhao Di3 Silicone Softgrip by JMDesigns
...wanhao di3 silicone softgrip by jmdesigns
thingiverse
wanhao di3 silicone softgrip
thingiverse
free
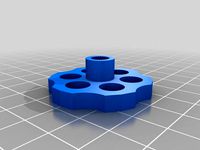
Di3 rotary dial by 3Dplanner
...hingiverse
original model of jo3ri http://www.thingiverse.com/thing:33286 , adjusted for the di3.
layer 0.2
shell 2
fill 50%
pla
thingiverse
free
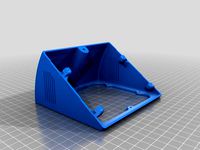
Di3 LCD Angler ( With Air Vents ) by diamonddrake
...3 lcd angler ( with air vents ) by diamonddrake
thingiverse
this is a remix of rtideas di3 lcd angler, i simply added air vents.
thingiverse
free
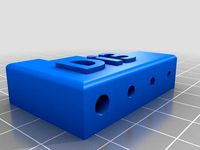
Di3 Hex Wrench Holder by BliNDF123
...de a hex wrench holder for the ones that come with the di3, stuck it to the side frame of my printer with some double sided tape.
thingiverse
free
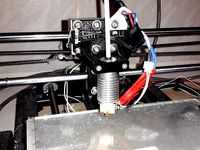
E3D v6 mount for Wanhao Di3 by slimc
...w design http://www.thingiverse.com/thing:1657971
set of components that allow the e3d v6 hotend to be mounted on the wanhao di3.
thingiverse
free

Wanhao Di3 V2.1 Knob Grip by Hyperlinks
...
thingiverse
this is a remix for the di3 v2.1. it did not fit properly on my printer (too tall), so i scaled it down minus 7 mm.
thingiverse
free
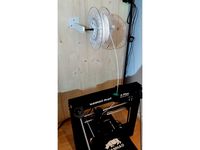
Wanhao Di3+ filament cleaner by Alpin3D
...wanhao di3+ filament cleaner by alpin3d
thingiverse
v1.1
filament cleaner / sponge
v1.2
better filament control
thingiverse
free
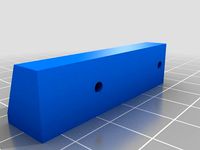
Di3 Nozzle LED Mount by sprfly
...e cooler. uses a 3 led section of self adhesive strip leds. i tapped into the always on hotend fan to provide the 12v to my leds.
Idler
3d_export
$20

telescopic stacker belt conveyor
...and the actual components are as follows cema c idler cema c impact roller dodge bearing avoid tension bearing...
3d_export
$49
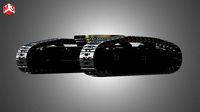
Liebherr R9250 Tracks - Crawler
...main parts: bottom rollers car bodies final drives top idler front idlers slewing rings-turntable bearings sprockets text track chains...
3d_export
$119

JD - 953MH Tracked Log Loader
...boby with engine<br>main body bolts<br>main body grilles<br>pedals<br>right - front idlerlt;br>right - rear idler<br>right track chain<br>right track links<br>right track protector<br>right...
3d_export
$129

JD - 959MH Tracked Feller Buncher
...boby with engine<br>main body bolts<br>main body grilles<br>pedals<br>right - front idlerlt;br>right - rear idler<br>right track chain<br>right track links<br>right track protector<br>right...
3d_export
$119

JD - 959MH Tracked Log Loader
...boby with engine<br>main body bolts<br>main body grilles<br>pedals<br>right - front idlerlt;br>right - rear idler<br>right track chain<br>right track links<br>right track protector<br>right...
3d_export
$119

JD - 953MH Tracked Harvester
...tool - lower<br>moving limbing tool - upper<br>pedals<br>right - front idlerlt;br>right - rear idler<br>right feed rollers<br>right track chain<br>right track links<br>right...
thingiverse
free
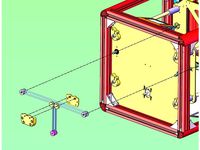
Idler seat by jcen517
...idler seat by jcen517
thingiverse
idler seat
thingiverse
free

Idler by GEON_3D
...idler by geon_3d
thingiverse
idler para extrusor 1,75
imprimir en abs, petg o cualquier material resistente
thingiverse
free

wade idler by nautilux
...wade idler by nautilux
thingiverse
wade idler reforzado
thingiverse
free

Idler Frame by Dinusha
...idler frame by dinusha
thingiverse
idler frame specially for the belt conveyors.
Wanhao
thingiverse
free
Wanhao Logo Plate / Wanhao Logo Schild by JMDesigns
...wanhao logo plate / wanhao logo schild by jmdesigns
thingiverse
wanhao logo plate / wanhao logo schild
thingiverse
free
Wanhao logo by nebtio
...wanhao logo by nebtio
thingiverse
wanhao logo
thingiverse
free
Wanhao keychain by Rein3003
...wanhao keychain by rein3003
thingiverse
a keychain with the logo of wanhao
thingiverse
free

Wanhao Di3 v2 Light / Wanhao Di3 v2 Beleuchtung by JMDesigns
...wanhao di3 v2 light / wanhao di3 v2 beleuchtung by jmdesigns
thingiverse
wanhao di3 v2 light / wanhao di3 v2 beleuchtung
thingiverse
free
TUSH For Wanhao by wtmi1992
...tush for wanhao by wtmi1992
thingiverse
the ultimate spool holder, modified for the top of the wanhao control box. fits snug.
thingiverse
free
fanduct wanhao d12 by theopoilmek
...fanduct wanhao d12 by theopoilmek
thingiverse
fanduct pour wanhao d12
thingiverse
free
Wanhao i3 Marlin by johan21
...wanhao i3 marlin by johan21
thingiverse
marlin for wanhao i3 rampsboard 1.4.
thingiverse
free

Wanhao Duplicator i3 by imagineering4
...wanhao duplicator i3 by imagineering4
thingiverse
these are the stl files for the improvements to the wanhao duplicator i3, v2
thingiverse
free
Wanhao D6 filament guard
...wanhao d6 filament guard
thingiverse
this is a filament guard for wanhao d6 machine to avoid the filament unrolling
thingiverse
free
Wanhao Duplicator i3 Model by Hilde3D
...wanhao duplicator i3 model by hilde3d
thingiverse
wanhao duplicator i3 model
Upgrade
turbosquid
$15

Upgraded Glock
...e 3d model upgraded glock for download as obj, fbx, and blend on turbosquid: 3d models for games, architecture, videos. (1185950)
3ddd
$1

Calligaris / UPGRADE
...calligaris / upgrade
3ddd
calligaris
c материалом
3d_export
free

cz upgrade
...cz upgrade
3dexport
https://www.buymeacoffee.com/mestrezen3d https://linktr.ee/mestrezen3
turbosquid
$80

Custer Tank upgrade
... available on turbo squid, the world's leading provider of digital 3d models for visualization, films, television, and games.
turbosquid
$39

Domestos 1 upgrade
... available on turbo squid, the world's leading provider of digital 3d models for visualization, films, television, and games.
3d_export
$10

Upgraded tea cup
...upgraded tea cup
3dexport
a cup with an unusual design and a unique shape for a more enjoyable tea experience
3d_export
$8

dixy outlander classic style upgraded poplar wood lounge chair
...utlander classic style upgraded poplar wood lounge chair
3dexport
dixy outlander classic style upgraded poplar wood lounge chair
turbosquid
free

AK-12 + Upgrades low-poly 3D model
...ow-poly 3d model for download as fbx, blend, and unitypackage on turbosquid: 3d models for games, architecture, videos. (1501145)
evermotion
$700

Upgrade from V-ray 1.5 to 3.5 for 3ds max
...here is no need to purchase a new dongle - your current dongles will be reprogrammed to carry v-ray 3. evermotion 3d models shop.
evermotion
$300

Upgrade from V-Ray 2.0 to V-ray 3.5 for 3ds Max
... interface (gui) for editing settings on one machine and one render node for rendering on one machine. evermotion 3d models shop.
