Thingiverse

Vorpal Hexapod Eye Accessories by vorpal
by Thingiverse
Last crawled date: 3 years, 1 month ago
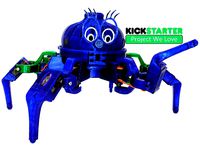
This is an add-on accessory for the totally awesome Vorpal Combat Hexapod, If you haven't seen that yet, then this thing won't make sense, so visit there first:
Thing 2513566: Vorpal Combat Hexapod
Check out the Hexapod Intro Features Video
I made this all open source and respectfully ask you to consider supporting the project. We successfully funded on Kickstarter with hundreds of kits sold, and now we have our own store. We have more than just the Hexapod electronics, we have all kinds of things useful for small robotics and other projects:Vorpal Robotics Store with Hexapod Kits
IMPORTANT: If you opt-in to receive our store monthly newsletters you'll automatically be enrolled in a monthly prize drawing, first prize is a $100 store credit and there are lots of other smaller prizes too! Sign up for newsletters here:
Vorpal Store Opt-in for Prize Drawing
Why do I need this for the Hexapod?
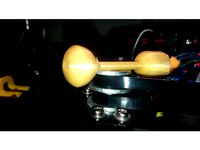
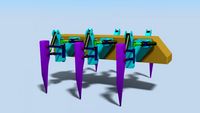
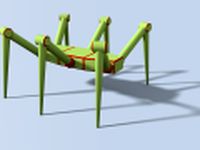
OK, now that you understand, this thing is two different eye decorations for the Vorpal Combat Hexapod.
The eye decorations may seem trivial, but they are an integral part of the project. When the eyes are installed in the right place, they clearly indicate where the "front" of the robot is and so are crucial for orienting the person using the gamepad.
Also, trust me on this, people respond much more positively to the robot if it has the eyes on. Without the eyes: creepy spidery thing. With the eyes: Cute cartoon-like thing.
Installing the Hook-and-Loop (Velcro)
As of November 1, 2019 our kits include 10mm diameter self-stick hook and loop fasteners (Velcro-like material) to attach decorations like these eyes to the hexapod. The convention is that the "hook" material (tiny plastic spikey things) go on the Hexapod and the "loop" (fuzzy mushy material) goes on the decoration that attaches to the hexapod. Just peel off the plastic backing and self-stick the 10mm diameter circular fasteners to the appropriate round receptacles on the robot and eye decorations.
Installing the Magnets
Before November 1, 2019 our kits used 10mm diameter magnets to hold on decorations such as eyes. I've kept the traditional magnet version files hosted here on Thingiverse as a variation. You would also need to print the magnet version of the hexapod CAP object.
Each design has a recepticle for a 10mm diameter by 3mm thick magnet. The magnet should be installed with the South pole exposed. In our kits, north pole is marked with a dimple. Magnets on the robot should have dimple showing, magnets on accessories that stick to the robot should have dimples hidden. Pretty easy.
The magnets, if they are the correct size, snap in. You may be able to do this with your fingrs, or you may need to gently use piiers to force them in that last little bit. But for me at least, they never fall out. If they fall out for you I'm sure a drop of superglue or hot glue will solve the problem.
Give Us More Eyes!
If you develop compatible eyes, please let me know and we will link to them off our website! If we're super impressed, we may even send you a Vorpal Combat Hexapod T-shirt.
To be compatible, make a round hole 10.8mm in diameter on the back (where the nose is). it should be 3mm deep. See our OnShape project for exact details. You don't need to use OnShape for your contributions, anything you want.
Thing 2513566: Vorpal Combat Hexapod
Check out the Hexapod Intro Features Video
I made this all open source and respectfully ask you to consider supporting the project. We successfully funded on Kickstarter with hundreds of kits sold, and now we have our own store. We have more than just the Hexapod electronics, we have all kinds of things useful for small robotics and other projects:Vorpal Robotics Store with Hexapod Kits
IMPORTANT: If you opt-in to receive our store monthly newsletters you'll automatically be enrolled in a monthly prize drawing, first prize is a $100 store credit and there are lots of other smaller prizes too! Sign up for newsletters here:
Vorpal Store Opt-in for Prize Drawing
Why do I need this for the Hexapod?
OK, now that you understand, this thing is two different eye decorations for the Vorpal Combat Hexapod.
The eye decorations may seem trivial, but they are an integral part of the project. When the eyes are installed in the right place, they clearly indicate where the "front" of the robot is and so are crucial for orienting the person using the gamepad.
Also, trust me on this, people respond much more positively to the robot if it has the eyes on. Without the eyes: creepy spidery thing. With the eyes: Cute cartoon-like thing.
Installing the Hook-and-Loop (Velcro)
As of November 1, 2019 our kits include 10mm diameter self-stick hook and loop fasteners (Velcro-like material) to attach decorations like these eyes to the hexapod. The convention is that the "hook" material (tiny plastic spikey things) go on the Hexapod and the "loop" (fuzzy mushy material) goes on the decoration that attaches to the hexapod. Just peel off the plastic backing and self-stick the 10mm diameter circular fasteners to the appropriate round receptacles on the robot and eye decorations.
Installing the Magnets
Before November 1, 2019 our kits used 10mm diameter magnets to hold on decorations such as eyes. I've kept the traditional magnet version files hosted here on Thingiverse as a variation. You would also need to print the magnet version of the hexapod CAP object.
Each design has a recepticle for a 10mm diameter by 3mm thick magnet. The magnet should be installed with the South pole exposed. In our kits, north pole is marked with a dimple. Magnets on the robot should have dimple showing, magnets on accessories that stick to the robot should have dimples hidden. Pretty easy.
The magnets, if they are the correct size, snap in. You may be able to do this with your fingrs, or you may need to gently use piiers to force them in that last little bit. But for me at least, they never fall out. If they fall out for you I'm sure a drop of superglue or hot glue will solve the problem.
Give Us More Eyes!
If you develop compatible eyes, please let me know and we will link to them off our website! If we're super impressed, we may even send you a Vorpal Combat Hexapod T-shirt.
To be compatible, make a round hole 10.8mm in diameter on the back (where the nose is). it should be 3mm deep. See our OnShape project for exact details. You don't need to use OnShape for your contributions, anything you want.
Similar models
thingiverse
free
Vorpal Hexapod Name Plates by vorpal
...r me at least, they never fall out. if they fall out for you i'm sure a drop of superglue or hot glue will solve the problem.
thingiverse
free

Vorpal Hexapod Capture The Flag Game Pieces by vorpal
...r me at least, they never fall out. if they fall out for you i'm sure a drop of superglue or hot glue will solve the problem.
thingiverse
free

Vorpal Hexapod Joust Game by vorpal
...r me at least, they never fall out. if they fall out for you i'm sure a drop of superglue or hot glue will solve the problem.
thingiverse
free

Vorpal Hexapod Light Sensor Bracket by vorpal
...you to attach a keyes ky-018 light sensor (or similar clones) to your vorpal hexapod for use with scratch...
thingiverse
free
Vorpal Hexapod Stand by vorpal
...tors.
printing
i recommend you turn on brims (or rafts if you prefer, but in my opinion brims are much easier to cleanly remove).
thingiverse
free
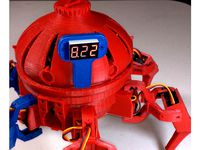
Vorpal Hexapod Battery Voltmeter Mount by vorpal
...ale jumper to either gnd pin on the nano.
this puts the meter in parallel with the nano, and it will display raw battery voltage.
thingiverse
free

Vorpal Hexapod Coaster/Whiteboard Magnet by vorpal
...other diameters, or even square magnet sheets, will of course also work). these are available from craft stores and amazon.com.
thingiverse
free

Vorpal Hexapod On Board Sign by vorpal
...other diameters, or even square magnet sheets, will of course also work). these are available from craft stores and amazon.com.
thingiverse
free

Vorpal Hexapod HC-SR04 Ultrasonic Rangefinder Bracket by vorpal
...ou can pull the bundle out to make connections when you attach a sensor, or just tuck it away when you're not using a sensor.
thingiverse
free

Vorpal Combat Hexapod Nameplate Generator by Danal
...nstead, click the "open in customizer" button above and thingiverse will generate a custom stl with the name you enter!
Vorpal
turbosquid
$10
vorpal scifi.max
... available on turbo squid, the world's leading provider of digital 3d models for visualization, films, television, and games.
turbosquid
free
Vorpal Edge
... available on turbo squid, the world's leading provider of digital 3d models for visualization, films, television, and games.
thingiverse
free

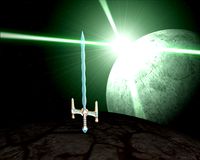
Vorpal Blade Stand by 3dlyx
...vorpal blade stand by 3dlyx
thingiverse
a tiny but stable stand to display beautiful alice's beautiful vorpal blade
thingiverse
free

Crosseyed Vorpal Eyes by Helensdad
...ad
thingiverse
a pair of crossed eyes for vorpal the hexapod. just needs brim removing and a light sanding. paint as you wish...
thingiverse
free

Vorpal Boots by adstaggs
...vorpal boots by adstaggs
thingiverse
https://www.youtube.com/watch?v=q5jiruos_bw
thingiverse
free

Vorpi TPU sneakers ( for Vorpal The Hexapod )
...d )
thingiverse
super-stylish sneakers for vorpal the hexapod
( https://www.thingiverse.com/thing:2513566 )
designed by urukalo
thingiverse
free
Vorpal Lock by nexnox
...ne, two! and through and through
the vorpal blade went snicker-snack!
he left it dead, and with its head
he went galumphing back.
thingiverse
free
Vorpal the Hexapod Dalek eye by Helensdad
...apod dalek eye by helensdad
thingiverse
single eye on a stick for vorpal, inspired by the daleks from the uk sci fi show dr who.
thingiverse
free
Vorpal Hexapod Light Sensor Bracket by vorpal
...d go to any unused servo controller port, and the signal should go to one of the analog ports that scratch can access (a3 or a6).
thingiverse
free
Vorpal Hexapod Coaster/Whiteboard Magnet by vorpal
...other diameters, or even square magnet sheets, will of course also work). these are available from craft stores and amazon.com.
Hexapod
3d_export
$10
Hexapod 3D Model
...ulic piston concept industrial phyzics simulation leg vehicle car animated blender
hexapod 3d model florincristian 97713 3dexport
3d_export
$10

Hexapod Robot 3D Model
...cle car concept ideea 3d model blender aniamted phyzics simulation simulated
hexapod robot 3d model florincristian 97714 3dexport
3d_export
$6
Hexapod Robot 3D Model
...t futuristic industrial vehicle 3d moel blender exterior landscape character
hexapod robot 3d model florincristian 97715 3dexport
3d_export
$79
Japanese Hexapod Robot Kondo KMR-M6 3D Model
...six
japanese hexapod robot kondo kmr-m6 3d model download .c4d .max .obj .fbx .ma .lwo .3ds .3dm .stl irhine.lab 102286 3dexport
3d_export
$79

hexapod platform
...:<br>.jpg(8192x8192)<br>.jpg(4096x4096)<br>normal<br>glossiness<br>mask<br>hope you like it!!
3d_export
$99

3d satelite dish on hexapod platform
...:<br>.jpg(8192x8192)<br>.jpg(4096x4096)<br>normal<br>glossiness<br>mask<br>hope you like it!!
cg_studio
$29
Hexapod3d model
...hexapod3d model
cgstudio
.max - hexapod 3d model, royalty free license available, instant download after purchase.
3d_export
$10

Mosquito 3D Model
...mosquito 3d model 3dexport mosquito insect bug hexapod flyer mosquito 3d model def 19400...
3d_export
$10

Insects Set
...insects is a large widespread group of small invertebrates hexapod common animals. for insects science, insects collections, insect expositions,...
thingiverse
free
Hexapod by razondirk
...hexapod by razondirk
thingiverse
a simple hexapod that i made for a school project. building instructions to follow.
Eye
3ddd
$1

Best / Eye Eye
...пристенная best eye eye.
1660 полигонов.
wall mounted range hood best eye eye.
1660 polygons.
file: max 2010, 2012; fbx; obj.
3d_export
$5

eyes
...eyes
3dexport
eyes
3d_ocean
$5

3D EYE
...ocean
body cornia dynamic eye eye eyes human human eye iris nurbs eye organ
detailed eye . purchase and use it for any purpose ..
3d_ocean
$5
3d Eye
...3d eye
3docean
3d eye eyes
this is 3d eye model
3d_export
$5

Human eye
...human eye
3dexport
human eye, iris, eyeball, eye anatomy
turbosquid
free

Eye
...eye
turbosquid
free 3d model eye for download as c4d on turbosquid: 3d models for games, architecture, videos. (1429061)
turbosquid
free

Eyes
...eyes
turbosquid
free 3d model eyes for download as blend on turbosquid: 3d models for games, architecture, videos. (1153269)
turbosquid
$25

eye
...e
turbosquid
royalty free 3d model eye for download as blend on turbosquid: 3d models for games, architecture, videos. (1371896)
turbosquid
$10

Eye
...eye
turbosquid
royalty free 3d model eye for download as c4d on turbosquid: 3d models for games, architecture, videos. (1303492)
turbosquid
$5

Eye
...e
turbosquid
royalty free 3d model eye for download as blend on turbosquid: 3d models for games, architecture, videos. (1343488)
Accessories
3ddd
$1
accessories
...accessories
3ddd
чаша
accessories
3ddd
$1

accessories
...accessories
3ddd
статуэтка
accessories
3ddd
$1

accessories
...accessories
3ddd
статуэтка
accessories
3ddd
$1
accessories
...accessories
3ddd
статуэтка
accessories
archibase_planet
free
Accessories
...accessories
archibase planet
fireplace accessories
accessories - 3d model (*.gsm+*.3ds) for interior 3d visualization.
archibase_planet
free
Accessories
...accessories
archibase planet
fireplace accessories
accessories - 3d model (*.gsm+*.3ds) for interior 3d visualization.
archibase_planet
free
Accessory
...accessory archibase planet art accessories design creative accessory f1137 - 3d model for interior...
archibase_planet
free
Accessories
...accessories
archibase planet
kitchen ware kitchen accessories
accessories - 3d model (*.gsm+*.3ds) for interior 3d visualization.
archibase_planet
free
Accessories
...accessories
archibase planet
poker fireplace accessory
accessories 3 - 3d model (*.gsm+*.3ds) for interior 3d visualization.
archibase_planet
free
Accessories
...essories
archibase planet
kitchen accessories pots and pans cooking battery
accessories - 3d model for interior 3d visualization.