Thingiverse
UV Curing Station Cover and Instructions by cpangracs
by Thingiverse
Last crawled date: 4 years, 8 months ago
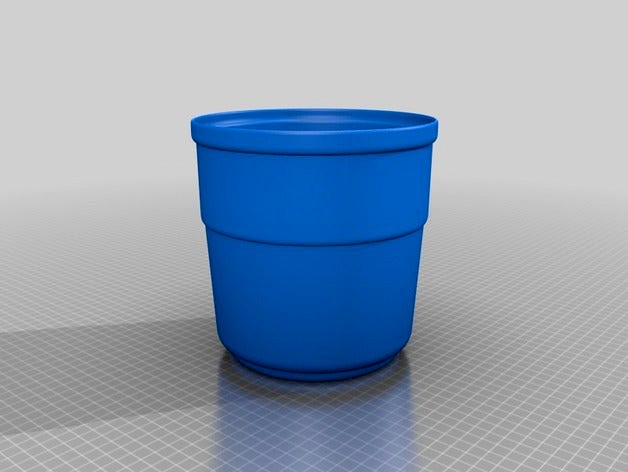
I wanted to create a unique lid for a UV Resin print curing station for my new Phrozen Make resin printer due here next month. I print small pieces, so I didn't need much by way of size, so this is re-sized to 180mm in diameter and 180mm tall, which will fit nicely over the UV-powered rotating stand. I used the "Furo Oke" bath pail by Tomonori (Arigato!) as a starting point and added a hole in the bottom for the UV light strip plug. I am still printing this out as I put this up, so I will update it when finished. I will, however, post links to all the parts you need. I am printing this (initially) in Vase-mode, just to save time. Unsure how strong it will be. ***NOTE: I also dropped the model about 11mm below the bed so I didn't have to worry about supports for the "lip".
Now, for the build. You will need the following or similar (all prices in US $ and US voltages):
UV Light Strip - $15.99 -https://www.amazon.com/gp/product/B01L7JEAN0/ref=oh_aui_detailpage_o08_s00?ie=UTF8&psc=1
12v Power Supply - $7.99 -https://www.amazon.com/gp/product/B019Q3U72M/ref=oh_aui_detailpage_o08_s00?ie=UTF8&psc=1
Decorative Mirror Tiles - $9.99 - (you can likely get smaller/cheaper package, I like overkill)https://www.amazon.com/gp/product/B01AAGGHO6/ref=oh_aui_detailpage_o08_s00?ie=UTF8&psc=1
Solar-Powered Display Stand - $5.99 - https://www.amazon.com/gp/product/B002Y2AW3C/ref=oh_aui_detailpage_o09_s00?ie=UTF8&psc=1
That's less than $40!
So, print-out this thing, then line the inside walls with the mirror tiles. You could also save money and just use aluminum foil and some hot glue, but make sure it's as smooth as possible. That would save you a few bucks right there!
Now, insert the power lead through the hole in the cover from the inside, then start peeling the adhesive backing off of the light strip and start wrapping it along the inside, leaving a space of about 1/4" as you spiral it around until you get to the lip of the cover. Now, I have a pretty lengthy strip here (I WAS going to just use a cheap 5-gallon bucket, but where the heck is the fun in that?), so you can probably do just fine with a half-sized strip! Look, more money saved!
Once you have everything secured nicely, just plug in the light strip, and you have a serious little UV curing set-up, albeit for small prints. If you have a need for one for bigger stuff that won't fit, you can take the same principles and do it with a 5 gal bucket, or even a box, be creative! I have no idea of the proper timing for this, but I would say no more than a few minutes to start with for testing.
As you can see from the pics, I stopped the model print early because I decided that it was big enough for my needs. It was a fast and ugly print, and there are thin/open areas that let the UV light through. My final will be MUCH nicer...
Enjoy!
Curt Pangracs