Thingiverse
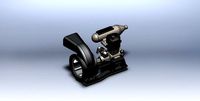
Upgraded Max Z Effector (Inductive Sensor, 30mm Fan and 30mm Blower/Part Cooling) by JAW
by Thingiverse
Last crawled date: 3 years ago
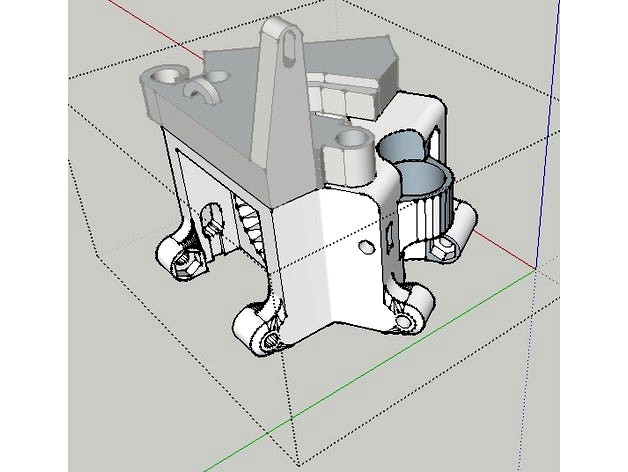
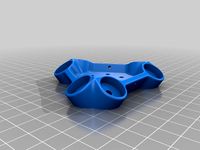
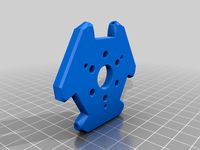
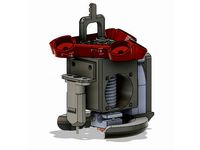
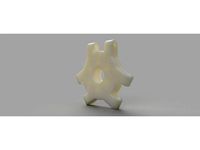
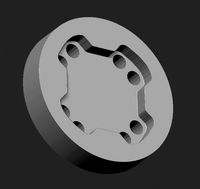
Description: The JAW Effector improves print quality by raising the hotend nozzle closer to the plain of the effector's arms. This isn't a unique idea, but my design is smaller in diameter than other designs that utilize ball ends. The result of this compact effector is improved print accuracy, while still maintaining the original build volume of a Kossel style delta printer.
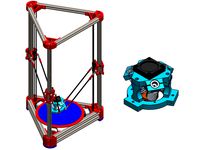
Testing: Final design tested 2/27/18 without any clearance issues on my homebrew Kossel Mini delta printer using Traxxis rod ends. Works like a charm!
Hints for assembling perfect traxxis rod ends: First, glue the carbon rods to the rod ends using a printable jig found on Thingiverse. Then, hold the rod ends in a shallow pot of water at a rolling boil. After submerging the rods for 10 to 15 seconds, squeeze the circular holes gently with pliers (they should bend under pressure and seem to return after you stop squeezing). Next, push the balls into the rod ends (make sure to do this on the correct side of the rod ends, one side has a larger lip and the other has a shiny ring around the opening). If done properly, you will have zero play in your effector's arms 100% of the time (no throwing out ball ends that are loose after assembly). If you assemble a ball end that isn't tight, gently remove the ball from the rod end and repeat the assembly process again to correct the issue.
Print Settings:
-Print in PETG (or you can use ABS). Regular PLA will not withstand the higher temperatures around the heater block.
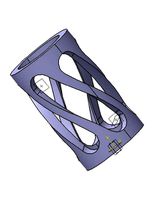
-Print with supports for the main body of the effector (under the radius/curve of the hotend arms so they print well and to support the center column of the effector where the hotend will go. The hotend clip will not need support.
Hardware:
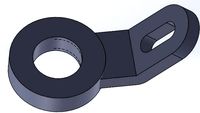
-You will use various M3 bolts and will also need an extra m3 nut (besides the 12 for the effector's arms) for the inductive sensor holder.
-The effector is designed to be used with one 30x30x10 axial fan to cool the hotend, as well as one 30x30x10 radial fan for print/part cooling. (You can find these on eBay and sometimes on Amazon when they are in stock. They are 5-volt fans, which is perfect for a Duet board).
Testing: Final design tested 2/27/18 without any clearance issues on my homebrew Kossel Mini delta printer using Traxxis rod ends. Works like a charm!
Hints for assembling perfect traxxis rod ends: First, glue the carbon rods to the rod ends using a printable jig found on Thingiverse. Then, hold the rod ends in a shallow pot of water at a rolling boil. After submerging the rods for 10 to 15 seconds, squeeze the circular holes gently with pliers (they should bend under pressure and seem to return after you stop squeezing). Next, push the balls into the rod ends (make sure to do this on the correct side of the rod ends, one side has a larger lip and the other has a shiny ring around the opening). If done properly, you will have zero play in your effector's arms 100% of the time (no throwing out ball ends that are loose after assembly). If you assemble a ball end that isn't tight, gently remove the ball from the rod end and repeat the assembly process again to correct the issue.
Print Settings:
-Print in PETG (or you can use ABS). Regular PLA will not withstand the higher temperatures around the heater block.
-Print with supports for the main body of the effector (under the radius/curve of the hotend arms so they print well and to support the center column of the effector where the hotend will go. The hotend clip will not need support.
Hardware:
-You will use various M3 bolts and will also need an extra m3 nut (besides the 12 for the effector's arms) for the inductive sensor holder.
-The effector is designed to be used with one 30x30x10 axial fan to cool the hotend, as well as one 30x30x10 radial fan for print/part cooling. (You can find these on eBay and sometimes on Amazon when they are in stock. They are 5-volt fans, which is perfect for a Duet board).
Similar models
thingiverse
free

Universal Kossel / Delta / Rostock Effector lock and cover for hotend by robertoreis
...end by robertoreis
thingiverse
a effector cover and lock hotend. suport tools, 30mm fan for printer and 40mm fan for the hotend.
thingiverse
free

Kossel Mini Delta Effector For E3D V6 With Dual Fan Mount by cristiprefac
...mount, so you can use auto bed leveling with it (see the pics).
you'll need a bunch of m3 screws and nuts to put it together.
thingiverse
free

Kossel Clear end effector with E3D v5 hotend (DOES NOT FIT!!!) by Mynasru
...g. all components are helt in place with the use of m3 screws.
warning!!! 3d printed part does not fit with fans installed!!
thingiverse
free

Kossel Pro Delta E3D V6 End Effector Version 8 by calviniba
...nd print super slow (30mm/s) to be able to print the overhangs properly with no support.
dimensions:
arm width: 41mm
radius: 30mm
thingiverse
free

Max Z Effector by JAW
... aquarium air pump).
print settings: petg
sliced with cura
layer height at .2mm
supports: yes
brim: yes
actual pictures to come!
thingiverse
free

Kossel print cooling 30mm fan mount by Roxanna77
...30mm fan mount, designed for use on the auto bed leveling effector, might work on others. will need to final drill and tap holes.
thingiverse
free

mini kossel JT magnetic effector plate by davejavu123
...or plate by davejavu123
thingiverse
this works with the 30mm fan (thing:948319) and the mini kossel magnetic ball joint and rods
thingiverse
free

One piece, e3d v6 Kossel Effector for magnetic rod ends by MortarArt
...oling. i'd honestly love to tidy this one up and print it better, but this one works with some cleanup.
printed in solid abs.
thingiverse
free

Triple fan holder 30mm by Hatsyflatsy
... 2 are for cooling you print object.
i made this so you can still use your own effector. and no need for re-calibrate your delta.
thingiverse
free

Delta Effector for E3D V6 by Osechi
...effector offset : 25mm
i use the following parts,
・lj12a3-4-z-bx
・e3d v6 hotend
・3010 fans
・3010 blower fan
・m3 screws & nuts
Effector
3d_ocean
$5

Radial Sound Effector
...e spheres will expand with your song. fully customisable, change the color, the size of the spheres or even put in different s...
3d_ocean
$12

3D Customizable Puzzle Set (16x10)
...mograph compatible (you can effect the pieces with mograph effector) - included also a non-mograph version with...
thingiverse
free
Effector by olo2000pm
...effector by olo2000pm
thingiverse
effector
thingiverse
free
CERAMBOT-Effector
...cerambot-effector
thingiverse
cerambot-effector
thingiverse
free

modulize effector by candyasdf
...ulize effector by candyasdf
thingiverse
mount things on effector with m3 screws
effector radius : 25.4mm
rod arm distance : 40mm
thingiverse
free
Delta Effector by zavier
...delta effector by zavier
thingiverse
delta effector with radial fan 50 and bltouch
thingiverse
free
D810 Effector by WhiteTiger13
...d810 effector by whitetiger13
thingiverse
this is d810 effector for d810 without autocalibration, and also cap for it.
thingiverse
free
Effector for Delta Printer
...effector for delta printer
thingiverse
effector for delta printer (3 color)
using diamond hotend
thingiverse
free
Delta effector magnetic by fpassos
...delta effector magnetic by fpassos
thingiverse
effector for e3dv6 hotend. i needed put the spheres (10mm) on the effector.
thingiverse
free
End Effector Gripper
...end effector gripper
thingiverse
end effector gripper
for a robotic arm
uses mg995 servo motor
Inductive
turbosquid
$2

Induction hob
...quid
royalty free 3d model induction hob for download as skp on turbosquid: 3d models for games, architecture, videos. (1564919)
turbosquid
$10
Induction Hob
... 3d model whirlpool induction hob for download as max and obj on turbosquid: 3d models for games, architecture, videos. (1390871)
3ddd
$1

Siemens Induction Cooktop
...duction cooktop
3ddd
варочная поверхность , siemens
induction cooktop siemens eh975md21p
turbosquid
$10
Induction cooker
...del induction cooker for download as sldpr, max, fbx, and obj on turbosquid: 3d models for games, architecture, videos. (1698439)
3d_export
$15
Induction Furnace Model 3D Model
...l
3dexport
inductor induction furnace ironworks cast steel stove hearth
induction furnace model 3d model conqueror 38004 3dexport
turbosquid
$38

Wimshurst Static Machine Induction
...st static machine induction for download as max, obj, and fbx on turbosquid: 3d models for games, architecture, videos. (1404224)
turbosquid
$25

Britannia Delphi Induction Oven
... available on turbo squid, the world's leading provider of digital 3d models for visualization, films, television, and games.
turbosquid
$50

Induction 4-Burner Cooktop Gaggenau
...3d model induction 4-burner cooktop gaggenau for download as on turbosquid: 3d models for games, architecture, videos. (1256929)
turbosquid
$25
48W_Tuscany Range - Burners-Griddle-Induction
... available on turbo squid, the world's leading provider of digital 3d models for visualization, films, television, and games.
turbosquid
$15
Miele KM 6115 Induction Cooker
... available on turbo squid, the world's leading provider of digital 3d models for visualization, films, television, and games.
Jaw
3d_export
$9

jaws
...jaws
3dexport
jaws 3d model. rigged
3d_export
$5

jaws of life
...jaws of life
3dexport
jaws of life, mated so you can move jaws.
turbosquid
$49
Jaw
...jaw
turbosquid
royalty free 3d model jaw for download as max on turbosquid: 3d models for games, architecture, videos. (1630683)
3d_export
$7
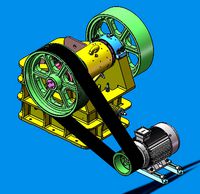
jaw crusher
...jaw crusher
3dexport
3d model of jaw crusher
turbosquid
free

Jaw
... available on turbo squid, the world's leading provider of digital 3d models for visualization, films, television, and games.
turbosquid
$27
Jaws Runner
...free 3d model jaws runner for download as obj, fbx, and blend on turbosquid: 3d models for games, architecture, videos. (1347511)
3d_export
$6
3-Jaw Bearing Puller
...3-jaw bearing puller
3dexport
3-jaw bearing puller, 3-jaw gear puller
turbosquid
$19

Jaws Bruce
... available on turbo squid, the world's leading provider of digital 3d models for visualization, films, television, and games.
turbosquid
$5
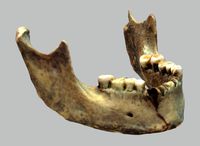
Human's jaw
...id
royalty free 3d model human's jaw for download as fbx on turbosquid: 3d models for games, architecture, videos. (1330690)
3d_export
$9
Jaw harp 3D Model
...dexport
harmonica jew harp jaw jew's music melody instrument 3d obj fbx max mentalray
jaw harp 3d model gizart 99939 3dexport
Blower
3d_export
$5
ball blower
...ball blower
3dexport
ball blower
3d_export
$10
engine blower assambly
...engine blower assambly
3dexport
engine blower assambly
3d_export
$5
air pipe blower
...air pipe blower
3dexport
air pipe blower
3d_export
$5
air hand blower
...air hand blower
3dexport
air hand blower
3d_export
$5
Blower Boom 3D Model
...blower boom 3d model
3dexport
boom blower
blower boom 3d model bkl1989 63079 3dexport
turbosquid
$44
blower-dxf
... available on turbo squid, the world's leading provider of digital 3d models for visualization, films, television, and games.
turbosquid
$39

Old Blower
...l old blower for download as ma, max, gltf, fbx, obj, and stl on turbosquid: 3d models for games, architecture, videos. (1638848)
3d_export
$7
zy series centrifugal blower
...zy series centrifugal blower
3dexport
zy series centrifugal blower
3d_export
$5
root blower compressor
...oot blower compressor
3dexport
you will get both .stl and .sldprt format of root blower compressor from here at very cheap rate.
turbosquid
$5
V8 engine with blower
... available on turbo squid, the world's leading provider of digital 3d models for visualization, films, television, and games.
30Mm
turbosquid
$38
30mm
... available on turbo squid, the world's leading provider of digital 3d models for visualization, films, television, and games.
turbosquid
$1

Base insert - Stone&Rails 30mm
...odel base insert - stone&rails 30mm for download as blend on turbosquid: 3d models for games, architecture, videos. (1325627)
3d_export
$5

Front 30mm Lift Kit for 1996-2004 Nissan Pathfinder and 1997-2003 Infiniti QX4
...port
front 30mm lift kit for 1996-2004 nissan pathfinder r50, terrano r50, regulus 1997-2003 infiniti qx4 - front strut spacers
3d_export
$8
soviet russian 30mm aircraft shells 30x165
...tnyy)<br>- 30x165 fz - high explosive incendiary (tr. fugasno-zazhigatel'nyy)<br>*modifier - subdivision surface
3ddd
$1

Бамбук
...бамбук 3ddd бамбук производитель: - модель: - размеры: d-30mm ...
3d_export
$5

soap
...3dexport 3d model of a soap bar. .stl file 30mm x 60mm...
3d_export
$5
fense
...of the back boards is 50mm, width 2050mm, length 30mm<br>texture link -...
3ddd
$1

Молоток
...инструмент производитель: douglas _http://www.douglastool.com/ _ модель: hammer размеры: w-150mm, d-30mm ...
3d_export
$8
sliding door vintage
...sliding door vintage 3dexport 2100mm x 1000mm x 30mmlt;br>3dsmax 2011 +...
3ddd
$1
3D панели Alivio Flower
...3ddd панель w 600mm / h 600mm / d 30mm стек не свернут...
Upgraded
turbosquid
$15

Upgraded Glock
...e 3d model upgraded glock for download as obj, fbx, and blend on turbosquid: 3d models for games, architecture, videos. (1185950)
3ddd
$1

Calligaris / UPGRADE
...calligaris / upgrade
3ddd
calligaris
c материалом
3d_export
free

cz upgrade
...cz upgrade
3dexport
https://www.buymeacoffee.com/mestrezen3d https://linktr.ee/mestrezen3
turbosquid
$80

Custer Tank upgrade
... available on turbo squid, the world's leading provider of digital 3d models for visualization, films, television, and games.
turbosquid
$39

Domestos 1 upgrade
... available on turbo squid, the world's leading provider of digital 3d models for visualization, films, television, and games.
3d_export
$10

Upgraded tea cup
...upgraded tea cup
3dexport
a cup with an unusual design and a unique shape for a more enjoyable tea experience
3d_export
$8

dixy outlander classic style upgraded poplar wood lounge chair
...utlander classic style upgraded poplar wood lounge chair
3dexport
dixy outlander classic style upgraded poplar wood lounge chair
turbosquid
free

AK-12 + Upgrades low-poly 3D model
...ow-poly 3d model for download as fbx, blend, and unitypackage on turbosquid: 3d models for games, architecture, videos. (1501145)
evermotion
$700

Upgrade from V-ray 1.5 to 3.5 for 3ds max
...here is no need to purchase a new dongle - your current dongles will be reprogrammed to carry v-ray 3. evermotion 3d models shop.
evermotion
$300

Upgrade from V-Ray 2.0 to V-ray 3.5 for 3ds Max
... interface (gui) for editing settings on one machine and one render node for rendering on one machine. evermotion 3d models shop.
Sensor
3d_export
free

parking sensor
...parking sensor
3dexport
car parking sensor
turbosquid
$1

Sensor
... available on turbo squid, the world's leading provider of digital 3d models for visualization, films, television, and games.
3d_export
$5

Smoke sensor
...port
smoke sensor, can be an impressive element for your projects. easy to use, realistic image, low polygon, quality materials.
3d_export
$5

Air Quality Sensor v1
...air quality sensor v1
3dexport
air quality sensor v1
3d_export
$15

float sensor
...e up render. - all parts and materials are logically named. other formats ================= - collada (.dae) - autodesk fbx - obj
turbosquid
$26

Wind sensor C
...free 3d model wind sensor c for download as 3ds, obj, and fbx on turbosquid: 3d models for games, architecture, videos. (1328943)
turbosquid
$26

Wind sensor B
...free 3d model wind sensor b for download as 3ds, obj, and fbx on turbosquid: 3d models for games, architecture, videos. (1328168)
3d_export
$5

ultrasound sensor
...ivers convert ultrasound into electrical signals, and transceivers can both transmit and receive ultrasound. export in: -obj -fbx
3ddd
free

Вытяжка Shindo pallada sensor
... вытяжка
вытяжка shindo pallada sensor. в двух размерах - 600 и 900. текстуры в комплекте.
turbosquid
$52

Wind sensor A B C
...
royalty free 3d model wind sensor a b c for download as fbx on turbosquid: 3d models for games, architecture, videos. (1408406)
Z
3d_export
$5

nissan z
...nissan z
3dexport
nissan z
3ddd
$1

Vase Z
...vase z
3ddd
vase z
3ddd
$1

полотенцесушить Z
...полотенцесушить z
3ddd
полотенцесушитель
полотенцесушить z
design_connected
free

Z-Chair
...z-chair
designconnected
free 3d model of z-chair designed by karman, aleksei.
design_connected
$11

Z Lamp
...z lamp
designconnected
phillips z lamp computer generated 3d model. designed by kalff, louis.
3d_export
$5

Dragon balls z
...dragon balls z
3dexport
dragon ball z
turbosquid
$20

Fighter Z
...
turbosquid
royalty free 3d model fighter z for download as on turbosquid: 3d models for games, architecture, videos. (1292563)
turbosquid
$9

Pen Z
...pen z
turbosquid
free 3d model pen z for download as obj on turbosquid: 3d models for games, architecture, videos. (1686775)
turbosquid
free

z chair
...z chair
turbosquid
free 3d model z chair for download as max on turbosquid: 3d models for games, architecture, videos. (1410230)
turbosquid
$5

Letter Z
...urbosquid
royalty free 3d model letter z for download as max on turbosquid: 3d models for games, architecture, videos. (1408540)
Fan
3d_export
$5

fan
...fan
3dexport
fan 3d model, table fan, fan, electric fan, ventilator
archibase_planet
free

Fan
...fan
archibase planet
fan large fan
fan out n260707 - 3d model for interior 3d visualization.
archibase_planet
free

Fan
...fan
archibase planet
fan ceiling fan ventilator
fan stealth n300615 - 3d model (*.gsm+*.3ds) for interior 3d visualization.
3d_export
$15

fan
...fan
3dexport
is an ancient fan
3ddd
$1

Fan-C-Fan by marco gallegos
...n-c-fan by marco gallegos
3ddd
вентилятор , marco gallegos
fan-c-fan by marco gallegos
3d_export
$10

fan
...fan
3dexport
a detailed fan designed for home or space blowing is now available for only 19.99!
turbosquid
$1

Fan
...fan
turbosquid
free 3d model fan for download as on turbosquid: 3d models for games, architecture, videos. (1427865)
turbosquid
$14

Fan
...fan
turbosquid
royalty free 3d model fan for download as on turbosquid: 3d models for games, architecture, videos. (1415642)
3ddd
$1

Светильник Fan
...светильник fan
3ddd
fan , italamp
светильник fan, производитель italamp
turbosquid
$25

Fan
...fan
turbosquid
royalty free 3d model fan for download as c4d on turbosquid: 3d models for games, architecture, videos. (1483246)
Cooling
turbosquid
free
Cool Inc. Cool Box
... available on turbo squid, the world's leading provider of digital 3d models for visualization, films, television, and games.
3d_export
$5

cool penguin
...cool penguin
3dexport
cool penguin
turbosquid
$1
cooling
... available on turbo squid, the world's leading provider of digital 3d models for visualization, films, television, and games.
3d_export
$26
cooling tower
...ers.<br>model with full detail in real size. all nodes and bolted connections are built. it was designed for nuclear power.
3ddd
$1
Mantra Cool
...14 версиях и obj-файл, а также материал для включенного и для выключенного светильника. turbosmooth/meshsmooth при необходимости.
3d_export
$5
cool electric guitar
...cool electric guitar
3dexport
cool electric guitar
turbosquid
$5

Cooling glass
...quid
royalty free 3d model cooling glass for download as obj on turbosquid: 3d models for games, architecture, videos. (1193829)
turbosquid
$30
CPU Cooling
...royalty free 3d model cpu cooling for download as max and fbx on turbosquid: 3d models for games, architecture, videos. (1386263)
turbosquid
$5

Cool CLoud
...
royalty free 3d model cool cloud for download as ma and obj on turbosquid: 3d models for games, architecture, videos. (1572300)
3d_export
$5
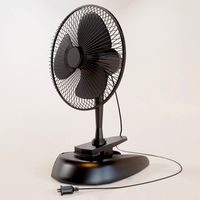
table cooling fan
...table cooling fan
3dexport
table cooling fan made of black plastic. individual small size cooling fan for office desk.
Part
3d_export
$5
Parts
...parts
3dexport
parts
3d_export
$5
Part
...part
3dexport
part
3d_export
$5

Part
...part
3dexport
machine part
3d_export
$65

Part
...part
3dexport
simple rendering of the scene file
3d_export
$65

Part
...part
3dexport
simple rendering of the scene file
3d_export
$30

fan part
...fan part
3dexport
this is a part of fan of pedastal
3d_export
$10
machine parts
...machine parts
3dexport
3d part modeling work ,contact for 3d work
turbosquid
$59

Mechanical Part
...id
royalty free 3d model mechanical part for download as c4d on turbosquid: 3d models for games, architecture, videos. (1410833)
turbosquid
$17
Road parts
...bosquid
royalty free 3d model road parts for download as 3ds on turbosquid: 3d models for games, architecture, videos. (1192967)
turbosquid
$9

Cutter Parts
...squid
royalty free 3d model cutter parts for download as stl on turbosquid: 3d models for games, architecture, videos. (1220010)