Thingiverse
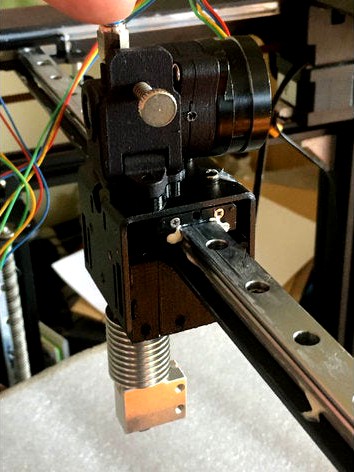
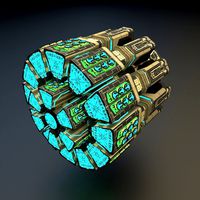
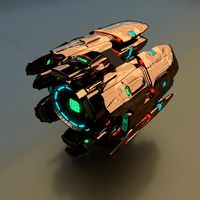
Two Trees Sapphire Plus Volcano (from Dragon) Direct Drive Orbiter tweaks by SimonSolar2C
by Thingiverse
Last crawled date: 3 years, 3 months ago
Many thanks to the originator(s) of this Oribiter Volcano design, with integrated cable tensioners.
I had a few issues fitting it, so Im sharing the adjustments I made.
You will need to source the original parts from sources listed:https://www.thingiverse.com/thing:4223085 ( ref to marvelous Orbiter Extruder design (138grams including motor!)
Tensioner - the gates belts that came with my Plus were cutoff too short by the factory for the tensioner, so I modified the dimensions so they would reach. The they pulled out of the non-adjuster side so I ended up putting those back in to the edge of the mount with small cable ties. Adjuster side working well.
OP had the BLT set so low that it hits the Z screws. I didn't want to loose Z height by the method many use of spacing the z motors down. With careful measurement the BLT can sit higher up and just have enough reach to get below the nozzle height when deployed. Advantage is that the BLT needle is somewhat protected by the fan ducts.
Offsets: #define NOZZLE_TO_PROBE_OFFSET { -26, 20, -3.45 }
Fan ducts - I started off moving these up, similarly to clear the Z screws, but then ended up using 5015 fans, so I changed those also to fit without hitting the Z screws - you will need to use a silicon cover on your Volcano hotend for reliable operation close to the heat bed.
Spacer under Orbiter - fits to avoid extruder hitting frame
Cable tidy - the one by OP hits the frame at maximum Y, so adjusted this so cables sit to one side.
The entry to the volcano sits slightly below the rail enough that there is no way to have a direct line from the extruder, so I made a little guide for to put some PTFE tubing down - 33.9mm of tube from memory.
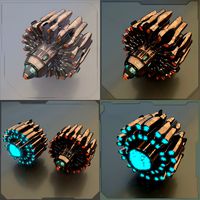
Rather than try to explain how it comes together from various mashup of parts, I hope my photos will demonstrate. I've included one photo shows where you drill holes in the top of the gantry mount - I put threads inserts in there, others have cut threads into the metal. Please don't do this over your printer. There are also two holes needed in the front-I mislabelled these on the uploaded photo!!!
Don't forget to put the nuts into the tensioner blocks before assembling the whole thing into the gantry.
Metal fragments will wreak your machine!
Its a big change putting in 9 more wires (5xBLT, 4xExtruder) - You'll want to have appropriate tools and parts, screws, etc.etc.
I used screws with flat heads when mounting the fans - you'll see they are sitting at a weird angle. You'll need 2 tapered head screws about 15mm long. Or just superglue some plastic to hold the fan base apart.
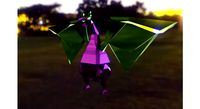
-Two test dogs sitting together - you can see the improvement after I calibrated Linear Advance (left )
Videos showing building mess, speed and quality resultshttps://youtu.be/0B6mjV7Pxbwhttps://youtu.be/e1uwbyc3Xnghttps://youtu.be/B3CFxNQh1Tc
I had a few issues fitting it, so Im sharing the adjustments I made.
You will need to source the original parts from sources listed:https://www.thingiverse.com/thing:4223085 ( ref to marvelous Orbiter Extruder design (138grams including motor!)
Tensioner - the gates belts that came with my Plus were cutoff too short by the factory for the tensioner, so I modified the dimensions so they would reach. The they pulled out of the non-adjuster side so I ended up putting those back in to the edge of the mount with small cable ties. Adjuster side working well.
OP had the BLT set so low that it hits the Z screws. I didn't want to loose Z height by the method many use of spacing the z motors down. With careful measurement the BLT can sit higher up and just have enough reach to get below the nozzle height when deployed. Advantage is that the BLT needle is somewhat protected by the fan ducts.
Offsets: #define NOZZLE_TO_PROBE_OFFSET { -26, 20, -3.45 }
Fan ducts - I started off moving these up, similarly to clear the Z screws, but then ended up using 5015 fans, so I changed those also to fit without hitting the Z screws - you will need to use a silicon cover on your Volcano hotend for reliable operation close to the heat bed.
Spacer under Orbiter - fits to avoid extruder hitting frame
Cable tidy - the one by OP hits the frame at maximum Y, so adjusted this so cables sit to one side.
The entry to the volcano sits slightly below the rail enough that there is no way to have a direct line from the extruder, so I made a little guide for to put some PTFE tubing down - 33.9mm of tube from memory.
Rather than try to explain how it comes together from various mashup of parts, I hope my photos will demonstrate. I've included one photo shows where you drill holes in the top of the gantry mount - I put threads inserts in there, others have cut threads into the metal. Please don't do this over your printer. There are also two holes needed in the front-I mislabelled these on the uploaded photo!!!
Don't forget to put the nuts into the tensioner blocks before assembling the whole thing into the gantry.
Metal fragments will wreak your machine!
Its a big change putting in 9 more wires (5xBLT, 4xExtruder) - You'll want to have appropriate tools and parts, screws, etc.etc.
I used screws with flat heads when mounting the fans - you'll see they are sitting at a weird angle. You'll need 2 tapered head screws about 15mm long. Or just superglue some plastic to hold the fan base apart.
-Two test dogs sitting together - you can see the improvement after I calibrated Linear Advance (left )
Videos showing building mess, speed and quality resultshttps://youtu.be/0B6mjV7Pxbwhttps://youtu.be/e1uwbyc3Xnghttps://youtu.be/B3CFxNQh1Tc
Similar models
thingiverse
free

Makertech Axis 3D printer Z gantry guides by Nitrowing
...s up than the knobs that were included.
mine are attached so that the adjustment screws are away from the gantry for easy access.
thingiverse
free

Removable Extruder Fan Holder A8 with Z probe by Aeolian
...wo 50mm screws to put the mount in place
add the z-probe
simply slide the fan in!
feel free for comments and photo if you make it
thingiverse
free

Titan Aero + Volcano / Standart Extruder + BLTouch sturdy mount by AndroVet
...hout blt), for standart or volcano extruder.
https://youtu.be/479kqtiaplqhttps://youtu.be/edyhblqchzkhttps://youtu.be/odbsxfsm1ru
thingiverse
free

Adimlab Gantry BL Touch Mount by ypatel9
...n.
for your firmware after:
nozzle_to_probe_offset { 14,25, -4.9 } //volcano offset for z, change to 0 for v6 and adjust after.
thingiverse
free

Improved Extruder Arm with adjustable tension by darren_bergen
...adjustment screw.
extruder_arm_b_180: original extruder arm top plate but rotated by 180 degrees for proper printing orientation.
thingiverse
free

Tronxy X5S v2 extruder tension adjuster by jpnurro
...nal screw with this one allows you to adjust the optimal extruder tension with the 4mm screw (there are the ready made threads)..
thingiverse
free

Orbiter 1.5 direct-drive extruder mount for Prusa Mini by paenian
...p as needed.
m900 k0.03 ; set the linear advance for the orbiter
i made a video of the install here: https://youtu.be/f6vlfakn_5i
thingiverse
free

Sapphire Pro Plus Orbiter mount with cable management by nlucc
...s
print with support touching the build plate
use 4 top layers
infill 50-100%
you can print it in pla but i recommend petg or abs
thingiverse
free

Ender 3 Gantry Cables Clip For Z Motor by zuberio
...
simple remix that uses less plastic. you'll also need two m3x8 screws to attach this clip to the free holes on the z-motor.
thingiverse
free

Anet A3 Centered Blower Fan Mount with Cable Holder
...ake sure it's not taking too much stress.
i use 2 m3 10mm screw from the z stepper. to put cable holder on the blower mount.
Simonsolar2C
thingiverse
free
Nozzle for KathmanduPump2IntexColeman by SimonSolar2C
...onsolar2c
thingiverse
my pump was missing the nozzle to pump up my airbed and boat (coleman & intex) so here is the nozzle.
thingiverse
free

Cookie Cutter - 4K by SimonSolar2C
...cookie cutter - 4k by simonsolar2c
thingiverse
i wanted more resolution (detail) in my cutter so increased image size for inputs
thingiverse
free

Coathanger Clamp by SimonSolar2C
...r.
see pictures
note this is not designed for strength, its more like a locator, so please uses metal washers to spread the load.
thingiverse
free

ThiEYE T5e USB Cover by SimonSolar2C
...hipping.
update - i added version that includes microphone plug. it does not sit flush with the side of the camera edge, by 0.5mm
thingiverse
free

Battery Holder by enif-txoof-webmongersimonsolar2c by SimonSolar2C
...the txoof script which caused a hole underneath.
putting it here so i can make battery holder with his improvement to the markers
thingiverse
free

C965 Mount Extender by SimonSolar2C
... non symmetrical part - testing now
update v5 - okay it broke with my dogs paws on it, so this version is stronger where it broke
thingiverse
free
Modular Rocket Section Joiner by SimonSolar2C
...t same dimensions as original so it should work nicely under same print settings
original: https://www.thingiverse.com/thing:8754
thingiverse
free
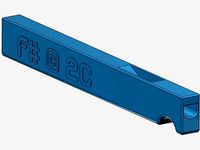
Micro Whistle in F#(4) by SimonSolar2C
...m working on.
update
i removed the hole that made it a necklace because it was causing weakness in the essential windpipe section
thingiverse
free

Titan Aero Layer Fan Shroud_BiggerBehind by SimonSolar2C
...he orientation i had it in, and the thickness of the e3d sock, then wrapped in kapton tape.
i also slightly enlarged the airflow.
thingiverse
free

Tevo BW Cable Clamp by SimonSolar2C
... i have another whole different clamp in mind.
it is laid out in the direction needed to provide the strength needed to the clamp
Volcano
3d_export
$10

volcano
...volcano
3dexport
erupting volcano for 3d printing
3d_export
$5

volcano
...volcano
3dexport
an erupting volcano with lava flows
design_connected
$11
Volcano
...volcano
designconnected
chista volcano computer generated 3d model.
3d_export
free

volcano
...volcano
3dexport
a volcano surrounded by stones<br>perfect for simple, unre demanding games
3d_export
$10

temple in volcano
...temple in volcano
3dexport
temple in volcano for 3d printing
turbosquid
$8

Volcano
... free 3d model volcano for download as fbx, stl, obj, and dae on turbosquid: 3d models for games, architecture, videos. (1664127)
turbosquid
$40

volcano
... available on turbo squid, the world's leading provider of digital 3d models for visualization, films, television, and games.
turbosquid
$5

Volcano
... available on turbo squid, the world's leading provider of digital 3d models for visualization, films, television, and games.
turbosquid
$5

Volcano
...e 3d model volcano for download as ma, max, fbx, obj, and stl on turbosquid: 3d models for games, architecture, videos. (1567779)
turbosquid
free

volcano
... available on turbo squid, the world's leading provider of digital 3d models for visualization, films, television, and games.
Orbiter
3ddd
free

Orbit
...ь - orbit 6225
габарит - 1450*400*310
сайт производитель -http://www.garsnas.se/en-gb/products/screens-lamps/orbit-6225
design_connected
$16

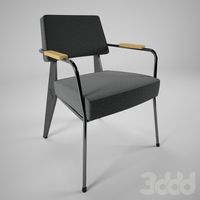
Orbital
...orbital
designconnected
modus furniture orbital lounge chairs computer generated 3d model. designed by christophe pillet.
3d_ocean
$5
Benzene Orbitals
...l arrangement. orbitals represent electronic cloud around atoms involved in benzene particle. red-green lobes of p-orbitals cr...
3ddd
$1

Dedon / Orbit
...dedon / orbit
3ddd
dedon
dedon / orbit
3ddd
$1

orbit lamps
...t lamps
3ddd
orbit
new modern orbit lamp.
it is a ceiling lamp, every element is parent father - child, and dummy. easy control.
3ddd
free
Dedon / Orbit
...d
dedon , германия , круглая
dedon orbit daybed
3ddd
$1

Люстра ORBITAL SP10
...люстра orbital sp10
3ddd
orbital
люстра orbital sp10
3ddd
$1
Foscarini Orbital
...foscarini orbital
3ddd
foscarini , orbital
дизайнер ferruccio laviani, 1992 г.
3ddd
$1
Dandelion Orbit Chandelier
...dandelion orbit chandelier
3ddd
dandelion , orbit
dandelion orbit chandelier
3ddd
$1

Orbit Chandelier
...orbit chandelier
3ddd
orbit
manufacturer:
townsend design, usa
www.townsenddesign.net
designer:
patrick townsend
Tweaks
3d_export
$5
camera
...era
3dexport
the camera is done completely, but the textures need to be tweaked a little (because, i did everything in a hurry).
3d_export
$5
modern house
...modern house
3dexport
a great model for someone who would edit this model both inside and a little more tweaking on the outside
3d_ocean
$19

MaxMounts
...ds max, in a single click. several tweak-able parameters have been provided to get an infinite variety. the script also has an...
3d_ocean
$16

Mermaid
...olygons. made entirely in 3ds max 2015. it’s completely editable which means you can tweak whatever you need – if needed. not ...
3d_export
$45

Cyborg Head Bust V1
...ade with blender 2.9 render cycles and workbench, with some tweak and edit, its 3d print ready files ready: .blend .fbx .obj .stl
3d_ocean
$9

dragon (devil) character
...dragon devil character design. base model, with some minor tweaks you’ve got yourself a tiny little fellah. files included;...
3d_ocean
$15

Generic Laptop
...to a software, might need some texture linkings, and tweaks ...
3d_ocean
$9
ACOG Scope
...ll uv’s *parenting configured for easy movement/tweaking (moving the base will move everything) not included: normal/specular ...
3ddd
$1
Finn Juhl Poet Sofa
...e and hit render, nothing to cleanup, and dont need to tweak any material. texures are tilable. obj included for other platforms.
3d_ocean
$8

alien cartoon character
...from here with this alien. with a couple of tweaks here and there you’ve got your own alien! files...
Sapphire
turbosquid
$30

Sapphire
...alty free 3d model sapphire for download as obj, fbx, and dae on turbosquid: 3d models for games, architecture, videos. (1304434)
turbosquid
$9

Sapphire
... available on turbo squid, the world's leading provider of digital 3d models for visualization, films, television, and games.
3d_export
free

sapphire pro
...sapphire pro
3dexport
sapphire pro 3d printer head mask
turbosquid
$35

Sapphire ring
...quid
royalty free 3d model sapphire ring for download as 3dm on turbosquid: 3d models for games, architecture, videos. (1320838)
turbosquid
$22

Ring with sapphires
...royalty free 3d model ring with sapphires for download as 3dm on turbosquid: 3d models for games, architecture, videos. (1375607)
turbosquid
$20

sapphire ring
...quid
royalty free 3d model sapphire ring for download as 3dm on turbosquid: 3d models for games, architecture, videos. (1306560)
turbosquid
$3

Zora Sapphire
... free 3d model zora sapphire for download as ma, fbx, and obj on turbosquid: 3d models for games, architecture, videos. (1613795)
turbosquid
$50

sapphire ring
... available on turbo squid, the world's leading provider of digital 3d models for visualization, films, television, and games.
turbosquid
$8

Sapphire Lode
... available on turbo squid, the world's leading provider of digital 3d models for visualization, films, television, and games.
turbosquid
$5

Sapphire Gem
... available on turbo squid, the world's leading provider of digital 3d models for visualization, films, television, and games.
Dragon
3d_export
$15
dragon
...dragon
3dexport
dragon
3d_export
$15
dragon
...dragon
3dexport
dragon
3d_export
$5

dragon
...dragon
3dexport
dragon figurine
3d_export
$6
dragon
...dragon
3dexport
cool dragon for decoration
3d_export
$20
dragon
...dragon
3dexport
glass dragon made in blender.
3d_export
$8
dragon
...dragon
3dexport
3d model of the dragon (sculpting)
3d_export
$5
dragon
...dragon
3dexport
dragon 3d model printing
3d_export
$5
dragon
...dragon
3dexport
black dragon with model+render
archibase_planet
free

Dragon
...dragon
archibase planet
toy dragon
dragon n170508 - 3d model (*.gsm+*.3ds) for interior 3d visualization.
archibase_planet
free
Dragon
...dragon
archibase planet
sculpture dragon statue
dragon 1- 3d model (*.3ds) for interior 3d visualization.
Direct
design_connected
free
Compas Direction
...compas direction
designconnected
free 3d model of compas direction by vitra designed by prouvé, jean.
design_connected
$18
Direction Pivotant
...direction pivotant
designconnected
vitra direction pivotant computer generated 3d model. designed by prouvé, jean.
turbosquid
$6
not direct the front
...oyalty free 3d model not direct the front for download as max on turbosquid: 3d models for games, architecture, videos. (1213034)
turbosquid
$10

Rails Direct
... available on turbo squid, the world's leading provider of digital 3d models for visualization, films, television, and games.
3d_export
$5

Picto toilet directions
...lude 3d files next to rhino6: x3dv, step, igus, obj and stl. double-sided, flipping changes the gender directions to the toilets.
3ddd
$1
fauteuli direction
...d
chair , vitra , fauteuli
fauteuli vitra chair
design_connected
$18
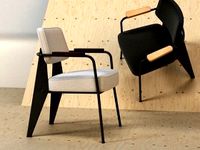
Fauteuil Direction, 1951
...fauteuil direction, 1951
designconnected
vitra fauteuil direction, 1951 computer generated 3d model. designed by prouvé, jean.
3d_export
$5
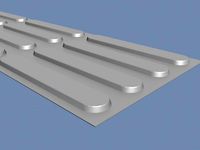
Directional tactile 3D Model
...tactile 3d model
3dexport
directional tactile braille tile flooring interior
directional tactile 3d model renob000 71068 3dexport
turbosquid
$26

Radio direction finder A
...ty free 3d model radio direction finder a for download as fbx on turbosquid: 3d models for games, architecture, videos. (1212490)
turbosquid
$7

Wooden direction signage
...ty free 3d model wooden direction signage for download as max on turbosquid: 3d models for games, architecture, videos. (1453747)
Plus
turbosquid
$2
plus-plus puzzle and lego
...d model plus-plus puzzle and lego for download as stl and obj on turbosquid: 3d models for games, architecture, videos. (1662633)
3ddd
$1
Стенка Plus
...стенка plus
3ddd
plus , модная мебель
фабрика "модная мебель", модель plus
3ddd
$1
Спальня METIS plus
... hulsta , metis , спальня
спальня metis plus
design_connected
$11
be plus B+
...be plus b+
designconnected
blå station be plus b+ chairs computer generated 3d model. designed by börge lindau.
design_connected
$11
Bank Plus
...bank plus
designconnected
röthlisberger kollektion bank plus coffee tables computer generated 3d model. designed by atelier oi.
3ddd
$1

elos Plus
... candela
elos plus — мультифункциональный аппарат для проведения лазерного и ipl лечений
3ddd
$1
Calligaris Even Plus
...calligaris even plus
3ddd
calligaris
calligaris_chair_even plus
design_connected
$29
Basket Plus
...nconnected
photo-realistic 3d models of the basket plus bed from bonaldo for 3d architectural and interior design presentations.
3ddd
free
Artpole Faktum Plus
... артполе , панель
artpole faktum plus
размеры:
высота 625мм
ширина 800мм
глубина 17мм
3ddd
$1
Мария / Jazz Plus
...мария / jazz plus
3ddd
мария
кухня фабрики мария модель__jazz plus
Drive
turbosquid
$90
Drive
...turbosquid
royalty free 3d model drive for download as blend on turbosquid: 3d models for games, architecture, videos. (1654393)
3d_export
$10

cycloidal drive
...cycloidal drive
3dexport
cycloidal drive
3d_ocean
$5

Flash Drive
...h drive included : – materials – scene ( lighs / room ) – .c4d + .obj for any questions please feel free to contact me thank you.
3d_ocean
$5

Usb drive
...s shaders and a lighting setup. it also has a small animation of it going in and out. i saved it out as both a .blend file and...
3d_ocean
$5

Pen Drive
...est computer drive game model good low poly new pen pen drive textured unwrapped uv very low poly
a very beautiful low poly model
3d_ocean
$10

External hard drive
... is a detailed model of a trekstor external hard drive. you can easily modify the label on the top. simply edit the text objects.
turbosquid
$60

Star Drive
...squid
royalty free 3d model star drive for download as blend on turbosquid: 3d models for games, architecture, videos. (1254314)
turbosquid
$50
Star Drive
...squid
royalty free 3d model star drive for download as blend on turbosquid: 3d models for games, architecture, videos. (1263524)
turbosquid
$45

Star Drive
...squid
royalty free 3d model star drive for download as blend on turbosquid: 3d models for games, architecture, videos. (1287060)
turbosquid
$40
Star Drive
...squid
royalty free 3d model star drive for download as blend on turbosquid: 3d models for games, architecture, videos. (1261902)
Trees
3d_ocean
$9
tree
...tree
3docean
textured tree
textured tree
3d_ocean
$9

tree
...tree
3docean
textured tree
textured tree made with cinema4d
3d_ocean
$9

tree
...tree
3docean
cinema4d textured tree
textured tree made with cinema4d
3d_export
$10

tree
...tree
3dexport
this is a tree.
3d_export
$7
Tree
...tree
3dexport
tree
3d_export
$5
tree
...tree
3dexport
tree
3d_export
$5
Tree
...tree
3dexport
tree
3d_export
$5
Tree
...tree
3dexport
tree
3d_export
$5

Tree
...tree
3dexport
tree
3d_export
free

tree
...tree
3dexport
tree.
Two
turbosquid
$4

Two Axes Two States
...free 3d model two axes two states for download as obj and fbx on turbosquid: 3d models for games, architecture, videos. (1468396)
3d_export
$5
s of two one and two
...blender file. one burner cooker: vertices: 16,221 faces: 14,780 triangle: 31,490 two burner stove: vertices: 25,200 faces: 23,625
turbosquid
$20
two
...osquid
royalty free 3d model two for download as 3ds and stl on turbosquid: 3d models for games, architecture, videos. (1435051)
3ddd
$1
avec two
...avec two
3ddd
jmm , avec two
jmm avec two
3ddd
$1
cea two
... вентилятор , потолочный
cea two
все размеры
vray+corona
3d_export
$5
Two speaker
...two speaker
3dexport
this is a 3d model of two speakers from sven
3d_export
free
Two wall
...two wall
3dexport
two wall<br>.blend
design_connected
$29

All-Two
...all-two
designconnected
bonaldo all-two computer generated 3d model. designed by bicego, sergio.
design_connected
$9

Two Timer
...two timer
designconnected
established & sons two timer computer generated 3d model. designed by industrial facility.
turbosquid
$21
DAVENTRY Two Over Two Chest of Drawers
... chest of drawers for download as max, max, max, fbx, and obj on turbosquid: 3d models for games, architecture, videos. (1684477)