Thingiverse
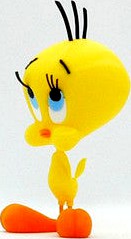
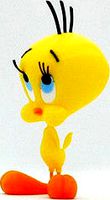
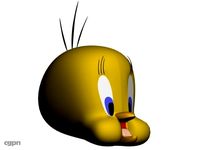
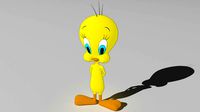
Tweety Bird by reddadsteve
by Thingiverse
Last crawled date: 3 years ago
Tweety, also known as Tweety Pie and Tweety Bird, is a yellow canary in the Warner Bros. Looney Tunes and Merrie Melodies series of animated cartoons.
The name "Tweety" is a play on words, as it originally meant "sweetie", along with "tweet" being an English onomatopoeia for the sounds of birds. His characteristics are based on Red Skelton's famous "Junior the Mean Widdle Kid." Tweety appeared in 46 cartoons during the golden age, made between 1942 and 1962.
His signature lines are "I tawt I taw a puddy tat!" and "I did! I did taw a puddy tat!"
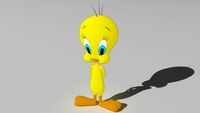
No supports are required. One piece, head, is presented as two pieces without supports and also as one piece if you want to use your slicer supports. If you have the proper filament colors, no painting is needed.
The assembled model is 105mm tall and is in proportion to my Sylvester model.
Enjoy!
...........................................................................................................
Print Instructions:
Supports: No
Resolution: .2mm
Infill: 10%
Notes:**
Refer to the notes below for a few helpful printing and assembly instructions.
...........................................................................................................
Building the model
Colors
Black: (Paramount3D PLA - Black)
hair_front
hair_middle
hair_back
eyebrow_left
eyebrow_right
eyelash_1_left
eyelash_1_right
eyelash_2_left
eyelash_2_right
eyelash_3_left
eyelash_3_right
eye_black_left
eye_black_right
..
Yellow: (Paramount3D PLA - Simpson Yellow)
body
head_front
head_back
head_onepiece (optional piece to print the head without a seam using slicer supports)
..
Orange: (Paramount3D PLA - McLaren Orange)
foot_left
foot_right
beak
..
White: (Overture PLA - White)
eye_white_left
eye_white_right
..
Light Blue: (Soulutech PLA - Aqua Blue)
eye_blue_left
eye_blue_right
..
Any Color (hidden piece)
head_pin
...........................................................................................................
Printing and assembly tips
Printing tips
1 - No supports are required.
2 - There are some pieces that may need brims or rafts, use your discretion. When setting up my prints I prefer to be conservative, especially since the base of many parts are hidden when inserted into another part. For the smaller parts, a good first layer is helpful.
*I used brims on:
body
3 - If you can print all the small black pieces without a brim they will look and fit better. Simple clean bed adhesion is all that is required.
4- The model stands by itself using the print parameters noted above. If a higher infill is used on the head, the model may become top heavy. Use your discretion for different printing parameters. I would suggest higher infills for all parts except for the head, which should be done at the lowest infill.
5 - The head is split into two parts to print cleanly without supports, but produces a seam in the completed model. A single head piece is also provided if you want to use slicer supports.
6 - A number of the left/right parts look quite similar, but are actually different.
..
Assembly tips:
1 -Take your time gluing the model together and enjoy the process. The eyelashes may be tricky.
2 - I used E6000 sticky craft glue to put this model together. The sticky glue allows more time to position the parts than a fast drying superglue. I have 'fat fingers' and a shaky hand, so the sticky glue works out best for me, especially with small pieces. Just remember to leave enough time for the glue to set before combining too many parts.
3 - Refer closely to the diagram for the order of the eyelashes. The outermost eyelash, 3, has a more angled base than the others. All the eyelash bottoms should fit flat to the inner top surface of the slot at the top of the eye hole. All the slight bottom extensions of each eyelash points away from the middle.
4 - important , the eyes and eyelashes are essential to the models character. However, the eyelashes can be tricky to align properly. I specifically used my tacky glue for the eye area. There is a notch at the top of the eye hole for the lashes. I put the tacky glue there first and placed each eyelash with a toothpick for positioning. They should stay in place while the glue remains tacky (or wait until the glue is fully set). The eye_whites can be inserted and then the eye blues. The eye_blacks should then be firmly pressed into position while ensuring the lashes stay positioned. Personally I was able to do the left eye in one shot but I needed to redo the right eye a few times before the lashes were sitting nicely.
5 - The foot insertion to the leg is round, therefore simply rotate each foot to point as you like.
6 - This is purposely a small model in order to be in proportion to Sylvester, so I apologize in advance for the small parts.
7 - Refer to the assembly diagrams in the pictures section as well as the uploaded pictures for putting the model together. The model is meant to be glued.
Do not hesitate to ask questions, feedback is essential to making better models.
The name "Tweety" is a play on words, as it originally meant "sweetie", along with "tweet" being an English onomatopoeia for the sounds of birds. His characteristics are based on Red Skelton's famous "Junior the Mean Widdle Kid." Tweety appeared in 46 cartoons during the golden age, made between 1942 and 1962.
His signature lines are "I tawt I taw a puddy tat!" and "I did! I did taw a puddy tat!"
No supports are required. One piece, head, is presented as two pieces without supports and also as one piece if you want to use your slicer supports. If you have the proper filament colors, no painting is needed.
The assembled model is 105mm tall and is in proportion to my Sylvester model.
Enjoy!
...........................................................................................................
Print Instructions:
Supports: No
Resolution: .2mm
Infill: 10%
Notes:**
Refer to the notes below for a few helpful printing and assembly instructions.
...........................................................................................................
Building the model
Colors
Black: (Paramount3D PLA - Black)
hair_front
hair_middle
hair_back
eyebrow_left
eyebrow_right
eyelash_1_left
eyelash_1_right
eyelash_2_left
eyelash_2_right
eyelash_3_left
eyelash_3_right
eye_black_left
eye_black_right
..
Yellow: (Paramount3D PLA - Simpson Yellow)
body
head_front
head_back
head_onepiece (optional piece to print the head without a seam using slicer supports)
..
Orange: (Paramount3D PLA - McLaren Orange)
foot_left
foot_right
beak
..
White: (Overture PLA - White)
eye_white_left
eye_white_right
..
Light Blue: (Soulutech PLA - Aqua Blue)
eye_blue_left
eye_blue_right
..
Any Color (hidden piece)
head_pin
...........................................................................................................
Printing and assembly tips
Printing tips
1 - No supports are required.
2 - There are some pieces that may need brims or rafts, use your discretion. When setting up my prints I prefer to be conservative, especially since the base of many parts are hidden when inserted into another part. For the smaller parts, a good first layer is helpful.
*I used brims on:
body
3 - If you can print all the small black pieces without a brim they will look and fit better. Simple clean bed adhesion is all that is required.
4- The model stands by itself using the print parameters noted above. If a higher infill is used on the head, the model may become top heavy. Use your discretion for different printing parameters. I would suggest higher infills for all parts except for the head, which should be done at the lowest infill.
5 - The head is split into two parts to print cleanly without supports, but produces a seam in the completed model. A single head piece is also provided if you want to use slicer supports.
6 - A number of the left/right parts look quite similar, but are actually different.
..
Assembly tips:
1 -Take your time gluing the model together and enjoy the process. The eyelashes may be tricky.
2 - I used E6000 sticky craft glue to put this model together. The sticky glue allows more time to position the parts than a fast drying superglue. I have 'fat fingers' and a shaky hand, so the sticky glue works out best for me, especially with small pieces. Just remember to leave enough time for the glue to set before combining too many parts.
3 - Refer closely to the diagram for the order of the eyelashes. The outermost eyelash, 3, has a more angled base than the others. All the eyelash bottoms should fit flat to the inner top surface of the slot at the top of the eye hole. All the slight bottom extensions of each eyelash points away from the middle.
4 - important , the eyes and eyelashes are essential to the models character. However, the eyelashes can be tricky to align properly. I specifically used my tacky glue for the eye area. There is a notch at the top of the eye hole for the lashes. I put the tacky glue there first and placed each eyelash with a toothpick for positioning. They should stay in place while the glue remains tacky (or wait until the glue is fully set). The eye_whites can be inserted and then the eye blues. The eye_blacks should then be firmly pressed into position while ensuring the lashes stay positioned. Personally I was able to do the left eye in one shot but I needed to redo the right eye a few times before the lashes were sitting nicely.
5 - The foot insertion to the leg is round, therefore simply rotate each foot to point as you like.
6 - This is purposely a small model in order to be in proportion to Sylvester, so I apologize in advance for the small parts.
7 - Refer to the assembly diagrams in the pictures section as well as the uploaded pictures for putting the model together. The model is meant to be glued.
Do not hesitate to ask questions, feedback is essential to making better models.
Similar models
thingiverse
free
Tweety by reddadsteve
...- a number of the left/right parts look quite similar but are actually different. .. assembly tips: 1 -take...
thingiverse
free

Old Hag by reddadsteve
... model together. the model is meant to be glued.
do not hesitate to ask questions, feedback is essential to making better models.
thingiverse
free

Sylvester the Cat by reddadsteve
... model together. the model is meant to be glued.
do not hesitate to ask questions, feedback is essential to making better models.
thingiverse
free
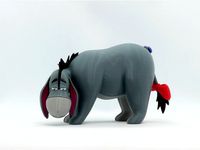
Eeyore by reddadsteve
... model together. the model is meant to be glued.
do not hesitate to ask questions, feedback is essential to making better models.
thingiverse
free
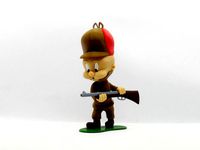
Elmer Fudd by reddadsteve
... model together. the model is meant to be glued.
do not hesitate to ask questions, feedback is essential to making better models.
thingiverse
free
Schroeder by reddadsteve
... model together. the model is meant to be glued.
do not hesitate to ask questions, feedback is essential to making better models.
thingiverse
free

Eyeball Father in a teacup by reddadsteve
... model together. the model is meant to be glued.
do not hesitate to ask questions, feedback is essential to making better models.
thingiverse
free
Astro Jetson by reddadsteve
... model together. the model is meant to be glued.
do not hesitate to ask questions, feedback is essential to making better models.
thingiverse
free

Prickle by reddadsteve
... model together. the model is meant to be glued.
do not hesitate to ask questions, feedback is essential to making better models.
thingiverse
free
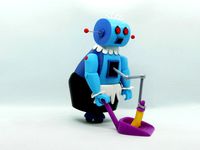
Rosie the Robot by reddadsteve
... model together. the model is meant to be glued.
do not hesitate to ask questions, feedback is essential to making better models.
Reddadsteve
thingiverse
free

Dilbert by reddadsteve
...required. if you have the right filament colors, no painting is needed.
the completed model is 225mm tall after assembly.
enjoy!
thingiverse
free

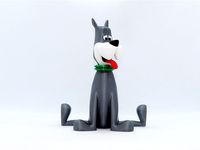
Dogbert by reddadsteve
...assembly. this model is in proportion to the dilbert, wally and pointy haired boss models that i've previously posted.
enjoy!
thingiverse
free

Hagar the Horrible by reddadsteve
...printing the pieces in the suggested colors. no supports are required.
hagar may look fierce but he is really a pussycat.
enjoy!
thingiverse
free

Rat by reddadsteve
...all after assembly. this model is in proportion to the pig and crocodile models from the comic that i've also posted.
enjoy!
thingiverse
free
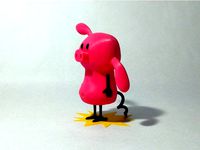
Pig by reddadsteve
...tall after assembly. this model is in proportion to the pig and crocodile models from the comic that i've also posted.
enjoy!
thingiverse
free

Crocodile by reddadsteve
...tall after assembly. this model is in proportion to the pig and crocodile models from the comic that i've also posted.
enjoy!
thingiverse
free

Alice by reddadsteve
...n proportion to the dilbert, wally, pointy haired boss and dogbert models from the comic that i've previously posted.
enjoy!
thingiverse
free

Wally by reddadsteve
... is 200mm tall after assembly. this model is in proportion to the dilbert and pointy haired boss models previously posted.
enjoy!
thingiverse
free

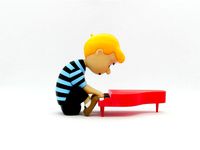
Charlie Brown by reddadsteve
...ad luck.
no supports are required. if you have the proper filament colors, no painting is needed.
the model is 140mm tall.
enjoy!
thingiverse
free

Kermit the Frog by reddadsteve
...o supports are required. if you have the proper filament colors, no painting is needed.
the assembled model is 140mm tall.
enjoy!
Tweety
3d_ocean
$25

Tweety
...morphs . morph detials : close eye smile sad surprise mad _ video here : https://www.youtube.com/watch?v=52yfgxbriiu are you i...
3ddd
$1

Tweety by SOKOLOVA design
...tweety by sokolova design
3ddd
статуэтка
decorative birds tweety by sokolova design (manufactured by yod)
cg_studio
$10
Tweety Head3d model
... head cartoon bird yellow cute face
.max - tweety head 3d model, royalty free license available, instant download after purchase.
3d_export
$15
Tweety bird 3D Model
...bird 3d model
3dexport
tweety bird looney tunes cartoon toon rigged high poly kid cute
tweety bird 3d model buncic 82153 3dexport
3ddd
$1
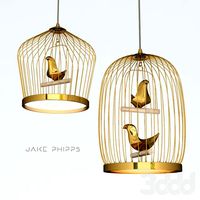
Tweetie lamps by Jake Phipps
...двесной
подвесной светильник "tweetie" lamps, дизайн jake phipps, ссылкаhttp://jakephipps.com/products-page/
3ddd
$1
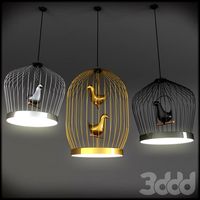
Tweety-LED pendant lamp
...r casamania.
colors: gold, silver, & black.
diameter: 41 cm.
note: 3d max 2014, 2011 & 2009 versions models are included.
cg_studio
$11

Tweety3d model
...ty bird cartoon cute looney toons yellow
.max - tweety 3d model, royalty free license available, instant download after purchase.
3d_export
$15

Tweetybird lamp 3D Model
...3d model
3dexport
bird tweety lamp table funny cartoon kids room light colour vray
tweetybird lamp 3d model likfik 32588 3dexport
free3d
free

Tweety
...tweety
free3d
tweety
free3d
$15
Tweety bird
...tweety bird
free3d
tweety bird simply rigged. model is in t pose,physique rigging
Bird
design_connected
$18
Birds Birds Birds
...oto-realistic 3d models of the birds birds birds pendant from ingo maurer for 3d architectural and interior design presentations.
archibase_planet
free
Bird
...bird
archibase planet
humming-bird hummingbird bird
humbird - 3d model (*.gsm+*.3ds) for interior 3d visualization.
design_connected
$13
Birds
...birds
designconnected
architectmade birds computer generated 3d model. designed by vedel, kristian.
3ddd
$1
Birds
...birds
3ddd
статуэтка
modern abstract resin animal bird sculpture,casting sculpture
3d_ocean
$7
bird feeders
...bird feeders
3docean
bird feeders wood
bird feeders
3ddd
$1
Bird mirror
...bird mirror
3ddd
visionnaire , bird
visionnaire - bird mirror
3ddd
free
Angry birds
...angry birds
3ddd
angry birds , птица
angry birds
archibase_planet
free
Bird
...bird
archibase planet
parrot birds macaw
macaw n200908 - 3d model (*.gsm+*.3ds) for interior 3d visualization.
3d_export
$25

heron bird
...heron bird
3dexport
heron bird
3d_export
$25

crane bird
...crane bird
3dexport
crane bird