Thingiverse
TronXY X3A / X3 X-Axis & Z-Axis Drag Chain Cable Management by Nate80
by Thingiverse
Last crawled date: 3 years ago
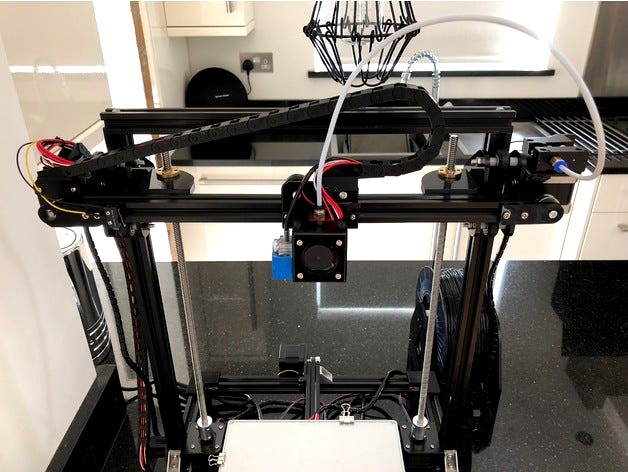
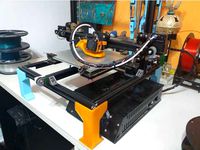
The TronXY X3A / X3 doesn't come with much in the way of cable management. The supplied plastic wrap does the job for some of the cables, but it isn't the best solution for the collection of cables that feed the extruder area considering how frequently they are pulled around the X and Z axis. I got fed up of cable tied wires choking the Bowden tube, being pulled too tight, or falling onto the print bed, so I decided to add a drag chain setup to the 3D Printer.
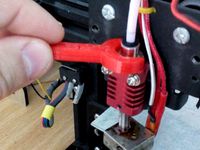
PLEASE NOTE: At the moment this design only works when the TronXY is lifted on a set of legs (see my other designs for these). Also, this does involve lengthening the wires that feed the extruder fan, sensor probe, thermistor and heater cartridge. I also ran a new length of wire to power a secondary filament cooling fan that can be plugged into the standard Melzi control board.
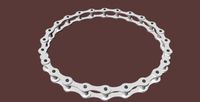
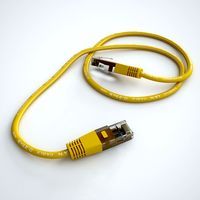
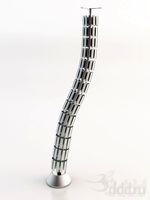
As well as printing the files provided (various drag chain mounts) you'll need a 7x7mm Drag Chain, like this one:
https://www.amazon.co.uk/Redrex-Plastic-Towline-Carrier-Machines/dp/B072SPQFLM
I bought a 1m long drag chain rather than designing and printing one as it would be time consuming and difficult for many to print successfully. For your info, the measurement quoted when choosing a drag chains is of the internal area, not the external dimensions.
The models I've designed were made according to the measurements of a Redrex 7x7mm Plastic Drag Chain. If you buy a different sized drag chain, or a same sized drag chain from a different manufacturer you may need to change the position of the fixing holes etc.
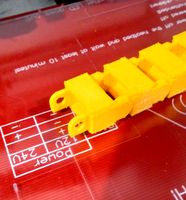
Once you've separated the drag chain into 2 lengths: one for the X-Axis (the head + 25 sections in my case) and one for the Z-Axis (the tail and 26 sections in my case), you'll need to print a new head and tail for the 2 ends that are now missing their connectors.
Printed Parts Needed:
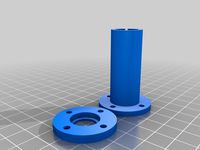
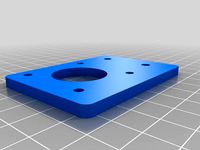
Print 1 each of the 5 attached models.
Other Parts Needed:
1 x 1m long 7mm x 7mm Drag Chain.
8 x M3 x 10mm Countersunk Screws
2 x M3 x 12mm Flat Head Screws
10 x M3 nuts
2 x M4 x 10mm screws (to replace the top 2 original shorter ones from the X-Axis Stepper Motor when attaching one of the Drag Chain Mounts)
2 x 2020 M4 T-Nuts
2 x M4 x 8mm (to go with the T-Nuts in order to attach the lower mount to the frame)
PVC coated 26AWG wire to extend:
Thermistor (2 x 60mm of White)
Extruder Fan (1 x 60mm of Red and 1 x 60mm of Black)
Sensor Probe (1 x 40mm of Black, 1 x 40mm of Blue and 1 x 40mm of Brown)
OPTIONAL BUT RECOMMENDED - PVC coated 26AWG wire to run new:
Filament Cooling Fan (1 x 2m of Red and 1 x 2m of Black)
PVC coated 18AWG wire to extend:
Heater Cartridge (2 x 60mm of Red)
Heat shrink wrap (recommend 2mm and 4mm)
=====
If you like this model please click the 'Like' button.
And I'm super happy to see photo's of people's makes, so please come back and share a picture of your print. :-D
And if you found my design helpful or it saved you some $$$ I'm always grateful for a small donation that will help fuel future designs by way of a cup of coffee. Thank you.
=====
This model is not to be uploaded or sold in any form, or modified, and is intended for personal use only.
PLEASE NOTE: At the moment this design only works when the TronXY is lifted on a set of legs (see my other designs for these). Also, this does involve lengthening the wires that feed the extruder fan, sensor probe, thermistor and heater cartridge. I also ran a new length of wire to power a secondary filament cooling fan that can be plugged into the standard Melzi control board.
As well as printing the files provided (various drag chain mounts) you'll need a 7x7mm Drag Chain, like this one:
https://www.amazon.co.uk/Redrex-Plastic-Towline-Carrier-Machines/dp/B072SPQFLM
I bought a 1m long drag chain rather than designing and printing one as it would be time consuming and difficult for many to print successfully. For your info, the measurement quoted when choosing a drag chains is of the internal area, not the external dimensions.
The models I've designed were made according to the measurements of a Redrex 7x7mm Plastic Drag Chain. If you buy a different sized drag chain, or a same sized drag chain from a different manufacturer you may need to change the position of the fixing holes etc.
Once you've separated the drag chain into 2 lengths: one for the X-Axis (the head + 25 sections in my case) and one for the Z-Axis (the tail and 26 sections in my case), you'll need to print a new head and tail for the 2 ends that are now missing their connectors.
Printed Parts Needed:
Print 1 each of the 5 attached models.
Other Parts Needed:
1 x 1m long 7mm x 7mm Drag Chain.
8 x M3 x 10mm Countersunk Screws
2 x M3 x 12mm Flat Head Screws
10 x M3 nuts
2 x M4 x 10mm screws (to replace the top 2 original shorter ones from the X-Axis Stepper Motor when attaching one of the Drag Chain Mounts)
2 x 2020 M4 T-Nuts
2 x M4 x 8mm (to go with the T-Nuts in order to attach the lower mount to the frame)
PVC coated 26AWG wire to extend:
Thermistor (2 x 60mm of White)
Extruder Fan (1 x 60mm of Red and 1 x 60mm of Black)
Sensor Probe (1 x 40mm of Black, 1 x 40mm of Blue and 1 x 40mm of Brown)
OPTIONAL BUT RECOMMENDED - PVC coated 26AWG wire to run new:
Filament Cooling Fan (1 x 2m of Red and 1 x 2m of Black)
PVC coated 18AWG wire to extend:
Heater Cartridge (2 x 60mm of Red)
Heat shrink wrap (recommend 2mm and 4mm)
=====
If you like this model please click the 'Like' button.
And I'm super happy to see photo's of people's makes, so please come back and share a picture of your print. :-D
And if you found my design helpful or it saved you some $$$ I'm always grateful for a small donation that will help fuel future designs by way of a cup of coffee. Thank you.
=====
This model is not to be uploaded or sold in any form, or modified, and is intended for personal use only.
Similar models
thingiverse
free
![[Ender_3] Control box by i-alem](/t/8060279.jpg)
[Ender_3] Control box by i-alem
...60mm fan)
4 x din965 m2.5 x 5 (raspberry)
2 x din934 m4 (ender 3 lcd mount)
nuts:
60x din934 m3
2 x din934 m4 (ender 3 lcd mount)
thingiverse
free

Anet A8 X-axis Cable Chain by Schneiderg
... and one of everything else.
note:
make sure to run your wires through the extruder mount before installing the rest of the chain
thingiverse
free

Y axis Mod for Geeetech Mecreator 2 by Napzerty
...th jflo 7x7mm drag chain cable wire carrier.
https://fr.aliexpress.com/item/32428660796.html?spm=a2g0s.9042311.0.0.27426c37vqskml
thingiverse
free

TronXY X3S Z-axis cable chain by spectrelabs
...tronxy x3s z-axis. best printed in abs or other similar material that is heat resistant. you will need to...
thingiverse
free

Cetus3D 60mm fan adapter by Redonix76
... and 60mm x 15mm. the wires are only 5v so using 12vs will only give you 50% fan speed. get a 5v 60mm fan and you'll be good.
thingiverse
free

Drag Chain Cable Raceway for Onefinity CNC by muddyfeet
...) m4 x 10mm flat head screws to secure drag chains
(1) m4 tap for threading holes
assemble per video:https://youtu.be/x7eg7uzhg84
thingiverse
free

Anet A8 X Axis Cable Chain with Z Stop Adjustment by Amd64bits
...ust needed the male connector. i remexied the drdbpsg's file to accomodate the 10x10 connector, i hope this work for you too!
thingiverse
free

TronXY X3S X-axis cable chain by spectrelabs
...above but the spacing of the mounting holes look similar to the design by modelstation. the mounts are best...
thingiverse
free

MPCNC ZAxis Cable Chain Stepper Mount by sintex
... for zip ties!
requires:
1 x m3x12 screw
1 x m3 hex nut
cable chain used for this is https://www.thingiverse.com/thing:34661
thingiverse
free

Narrow cable chain by iraklyn
...res: power and thermistor. normal cable chain is quite large. i've printed with petg. but it should be fine with abs as well.
Nate80
thingiverse
free

Spaghetti Measure : Italian Pasta Cooking Aid by Nate80
...offee. thank you.
=====
this model is not to be uploaded or sold in any form, or modified, and is intended for personal use only.
thingiverse
free

Spaghetti Measure Italian Pasta Cooking Aid by Nate80
...p of coffee. thank you.
this model is not to be uploaded or sold in any form, or modified, and is intended for personal use only.
thingiverse
free

Bed Levelling Label for Malyan M150 by Nate80
...ffee. thank you.
=====
this model is not to be uploaded or sold in any form, or modified, and is intended for personal use only.
thingiverse
free
Malyan M150 Angled LCD Screen Bracket by Nate80
...ffee. thank you.
=====
this model is not to be uploaded or sold in any form, or modified, and is intended for personal use only.
thingiverse
free

Tronxy X3 / X3A / 2020 Extrusion Framed 3D Printer Legs by Nate80
...ffee. thank you.
=====
this model is not to be uploaded or sold in any form, or modified, and is intended for personal use only.
X3A
thingiverse
free

z-rod stabilizer tronxy x3a by fk462
...z-rod stabilizer tronxy x3a by fk462
thingiverse
simple no bearing z-rod stabilizer for tronxy x3a
thingiverse
free

Tronxy X3A sensor mount by kencam
...an website (3dtoday.ru) and thought it would be a good addition to the tronxy x3 collection.
credit goes to dantes of 3dtoday.ru
thingiverse
free

TronXY X3A Fan Shroud
...d print it without supports. although it printed without them, my ovrerhangs were a little jagged. with supports it printed fine.
thingiverse
free

Tronxy X3A fan shroud with sensor mount by nuH2BuH
...ngiverse
fan shroud with inductive sensor mount for tronxy x3a. it helps your printer to cool down plastic after being extruded.
thingiverse
free

Tronxy X3A Legs by adre76
...e printer.
needed only a little sanding on my printer but your result may vary.
as always, blender was used for the entire design
thingiverse
free

Tronxy X3/X3a Power supply cover by ikishk
...at comes with tronxy x3/x3a (and possibly other) printers.
only requires one m3 screw to secure in place (its a pretty tight fit)
thingiverse
free

Tronxy X3A Legs Honeycombed
...file because it's a 4am hacked together mess, but the honeycomb library is the key so take a look at that if your interested.
thingiverse
free

ik3a alg0t mount for tronxy x3/x3a by ikishk
...ik3a alg0t mount for tronxy x3/x3a by ikishk
thingiverse
secure your printer to your ik3a alg0t.
thingiverse
free

Tronxy X3A better hotend cover
..., simply unbolt the front fan for access to the hotend.
(prints the things in red, follow the alignment on the slicer screenshot)
thingiverse
free

Tronxy X3A simple part cooling by MoayadH
...le air flow.
you can use glue gun to hold the fan tighter to the duct.
the holes are 3mm, make sure you use a good length screws.
Tronxy
thingiverse
free
LMF8LUU for tronxy x5s
...lmf8luu for tronxy x5s
thingiverse
lmf8luu for tronxy x5s
thingiverse
free
TRONXY XY2PRO by MaiMaiFACTORY
...tronxy xy2pro by maimaifactory
thingiverse
tronxy xy2-pro
sadebox
thingiverse
free

Power_supply_cover for TRONXY by Karollo
...power_supply_cover for tronxy by karollo
thingiverse
power supply cover for tronxy.
thingiverse
free
Tronxy support by d3m1sf
...tronxy support by d3m1sf
thingiverse
soporte para impresora tronxy x3.
thingiverse
free
Tronxy 13mm wrench
...tronxy 13mm wrench
thingiverse
13mm wrench for hotend fitting on tronxy x1...
thingiverse
free

Tronxy x5s by alex190074
...tronxy x5s by alex190074
thingiverse
tronxy x5s cart x fully adjustable only !!
thingiverse
free
Tronxy Logo
...tronxy logo
thingiverse
made this logo
thingiverse
free

Patas TronXY X3 - Vitofeli - TronXY Legs by Todopic
...todopic
thingiverse
patas separadoras para la tronxy x3, permite colocar la caja de control debajo y aprovechas mejor el espacio
thingiverse
free
TRONXY X5S EXTRUDER by ADAM98
...tronxy x5s extruder by adam98
thingiverse
tronxy x5s extruder
thingiverse
free

Belt tensioner Tronxy by jpalianak
...belt tensioner tronxy by jpalianak
thingiverse
belt tensioner tronxy
X3
turbosquid
$199

Eurocopter X3
... available on turbo squid, the world's leading provider of digital 3d models for visualization, films, television, and games.
turbosquid
$40

Car-x3
... available on turbo squid, the world's leading provider of digital 3d models for visualization, films, television, and games.
turbosquid
$15

Onkyo X3
... available on turbo squid, the world's leading provider of digital 3d models for visualization, films, television, and games.
turbosquid
$5

Chairs x3
... available on turbo squid, the world's leading provider of digital 3d models for visualization, films, television, and games.
3d_export
$42

BMW X3 3D Model
...bmw x3 3d model
3dexport
model of bmw x3 materials are for brazil r/s
bmw x3 3d model stihl 1384 3dexport
3d_export
$69

BMW-X3 2022
...vertisements or games corona render and materials all textures include in *.rar files lighting setup is not included in the file!
3d_ocean
$89

BMW X3 2011
...um sports activity vehicle with all-road capability and unparalleled driving dynamics. this first generation bmw x3 became a b...
design_connected
$10

KONTEXTUR X3 Watering Can
...kontextur x3 watering can
designconnected
kontextur x3 watering can computer generated 3d model.
turbosquid
$5

Grenade MH-x3
...yalty free 3d model grenade mh-x3 for download as obj and fbx on turbosquid: 3d models for games, architecture, videos. (1691211)
turbosquid
$6

Door X3 ProfilDoors
...el door x3 profildoors for download as 3ds, max, obj, and fbx on turbosquid: 3d models for games, architecture, videos. (1247248)
Drag
turbosquid
$30
Drag Pack Centerline Auto Drag Wheels
... available on turbo squid, the world's leading provider of digital 3d models for visualization, films, television, and games.
turbosquid
$30

Drag Pack Centerline Auto Drag Wheels
... available on turbo squid, the world's leading provider of digital 3d models for visualization, films, television, and games.
turbosquid
$5

Drag Car
...r
turbosquid
royalty free 3d model drag car for download as on turbosquid: 3d models for games, architecture, videos. (1613195)
turbosquid
free

drag strip
...free 3d model drag strip for download as fbx and unitypackage on turbosquid: 3d models for games, architecture, videos. (1486232)
turbosquid
$8

drag bike.max
... available on turbo squid, the world's leading provider of digital 3d models for visualization, films, television, and games.
turbosquid
$49

Raven drag red
...uid
royalty free 3d model raven drag red for download as fbx on turbosquid: 3d models for games, architecture, videos. (1486830)
turbosquid
$20
Centerline Auto Drag Wheels
... available on turbo squid, the world's leading provider of digital 3d models for visualization, films, television, and games.
turbosquid
$20

Centerline Auto Drag Wheels
... available on turbo squid, the world's leading provider of digital 3d models for visualization, films, television, and games.
3d_export
$10
Drag Cabinet
...~ 100,000 model parts: 1 texture format: .png .jpg resolution: 1024*1024 pbr in substance painter formats: .obj .gltf .fbx .blend
turbosquid
$1

Low Drag Racetech Wing Mirror
...racetech wing mirror for download as ige, obj, stl, and sldpr on turbosquid: 3d models for games, architecture, videos. (1208958)
Management
vizpark
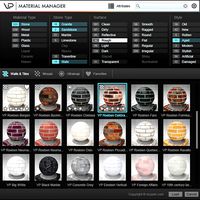
$10

Material Manager
...ager
vizpark
the vp material manager is a new innovative tool to manage materials within 3ds max® in ways never possible before.
vizpark
free
Material Manager
...ager
vizpark
the vp material manager is a new innovative tool to manage materials within 3ds max® in ways never possible before.
3d_export
$6

management desk
...management desk
3dexport
quality table object with chairs for office and management space
3d_ocean
$5
Manager table
...manager table
3docean
office manager table. including dxf, obj, 3ds max file with maps.
turbosquid
$10

Eddie the manager
...
royalty free 3d model eddie the manager for download as max on turbosquid: 3d models for games, architecture, videos. (1344924)
turbosquid
$5

Manager Desk
...uid
royalty free 3d model manager desk for download as blend on turbosquid: 3d models for games, architecture, videos. (1435584)
turbosquid
$4

manager room
...squid
royalty free 3d model manager room for download as max on turbosquid: 3d models for games, architecture, videos. (1616151)
turbosquid
$5

Manager desk
...lty free 3d model manager desk #2 for download as max and obj on turbosquid: 3d models for games, architecture, videos. (1304731)
turbosquid
$5

Manager desk
...lty free 3d model manager desk #3 for download as max and obj on turbosquid: 3d models for games, architecture, videos. (1304733)
turbosquid
$10

Modular Cable manager
...yalty free 3d model modular cable manager for download as fbx on turbosquid: 3d models for games, architecture, videos. (1402372)
Axis
3ddd
$1

Мария Axis
...
3ddd
кухня , классическая , axis
модель кухни.
3d_export
$22

Axis robot 6-axis robotic arm
...ing parts drawings, standard parts purchased parts list, can be produced directly according to the drawings, welcome to download!
3ddd
free

Versatile Axis
...ddd
nexus , плитка
http://bvtileandstone.com/ceramic-porcelain/versatile-axis/
3d_export
$19

robot 2 axis
...robot 2 axis
3dexport
robot 2 axis
turbosquid
$40

Axis R5F
... available on turbo squid, the world's leading provider of digital 3d models for visualization, films, television, and games.
turbosquid
$40

Axis S5F
... available on turbo squid, the world's leading provider of digital 3d models for visualization, films, television, and games.
turbosquid
$30

Axis Athlon
... available on turbo squid, the world's leading provider of digital 3d models for visualization, films, television, and games.
turbosquid
$10

Linear Axis
... available on turbo squid, the world's leading provider of digital 3d models for visualization, films, television, and games.
3d_export
$15

drawing axis
...drawing axis
3dexport
simple rendering of the scene file
3ddd
$1

versatile axis ARC
...versatile axis arc
3ddd
versatile , плитка
versatile axis arc red dot design award
Chain
archibase_planet
free
Chain
...chain
archibase planet
chain chain link chain loop
chain n020708 - 3d model (*.gsm+*.3ds) for interior 3d visualization.
3d_export
$5
chain
...chain
3dexport
3d model chain
3d_export
$5

chain
...chain
3dexport
chain. obj,fbx,blend
archibase_planet
free

Chain
...se planet
chain circuit catena
chain - archicad parametrical gdl 3d model (*.gsm). regulation of the length, curvature and angle.
archibase_planet
free
Chain
...n
archibase planet
chain circuit catena
chain - archicad parametrical gdl 3d model(*.gsm). regulation of the length and angle xyz
3d_ocean
$5
Chain
...chain
3docean
3d models chain design elements
3d models, design elements
3d_ocean
$5

Chain
...chain
3docean
3d models chain design elements
3d models, design elements
turbosquid
$10
Chain
...hain
turbosquid
royalty free 3d model chain for download as on turbosquid: 3d models for games, architecture, videos. (1329200)
turbosquid
$9

chain
...hain
turbosquid
royalty free 3d model chain for download as on turbosquid: 3d models for games, architecture, videos. (1549461)
turbosquid
$2
Chain
...hain
turbosquid
royalty free 3d model chain for download as on turbosquid: 3d models for games, architecture, videos. (1148668)
Cable
3d_export
free

Cables
...cables
3dexport
cables for your purposes
3d_export
free
cable belt for cable organization
...ze your cables in 3d printers. it will bend only to one direction. the area to put the cables per piece is aprox. 1,6cmx2,6cmx1cm
3d_ocean
$16
Ethernet Cable
...ethernet cable
3docean
cable computer electronics ethernet internet network connected
ethernet cable 3d model
3d_export
$65

cable
...cable
3dexport
simple rendering of the scene file
turbosquid
$14

Cable
...l cable for download as ma, max, fbx, 3ds, gltf, obj, and stl on turbosquid: 3d models for games, architecture, videos. (1631358)
3ddd
$1
Cable Cover
...cable cover
3ddd
кабель
vertebra passacavo - cable cover
max + vray 2.20.03
3d_export
$15
Cable reel
...without cable. textures 4k 4096x4096 targa, png, jpeg.<br>number of polygons without cable: 2896<br>with cable: 35328
3d_export
$7

short cable
...short cable
3dexport
rubber cord. very detailed. cable thickness: 2.55 mm total length: 55mm
3d_export
$5

USB CABLE
...usb cable
3dexport
turbosquid
$25
cable clip
...squid
royalty free 3d model cable clip for download as sldpr on turbosquid: 3d models for games, architecture, videos. (1232374)
Z
3d_export
$5

nissan z
...nissan z
3dexport
nissan z
3ddd
$1

Vase Z
...vase z
3ddd
vase z
3ddd
$1

полотенцесушить Z
...полотенцесушить z
3ddd
полотенцесушитель
полотенцесушить z
design_connected
free

Z-Chair
...z-chair
designconnected
free 3d model of z-chair designed by karman, aleksei.
design_connected
$11

Z Lamp
...z lamp
designconnected
phillips z lamp computer generated 3d model. designed by kalff, louis.
3d_export
$5

Dragon balls z
...dragon balls z
3dexport
dragon ball z
turbosquid
$20

Fighter Z
...
turbosquid
royalty free 3d model fighter z for download as on turbosquid: 3d models for games, architecture, videos. (1292563)
turbosquid
$9

Pen Z
...pen z
turbosquid
free 3d model pen z for download as obj on turbosquid: 3d models for games, architecture, videos. (1686775)
turbosquid
free

z chair
...z chair
turbosquid
free 3d model z chair for download as max on turbosquid: 3d models for games, architecture, videos. (1410230)
turbosquid
$5

Letter Z
...urbosquid
royalty free 3d model letter z for download as max on turbosquid: 3d models for games, architecture, videos. (1408540)