Thingiverse
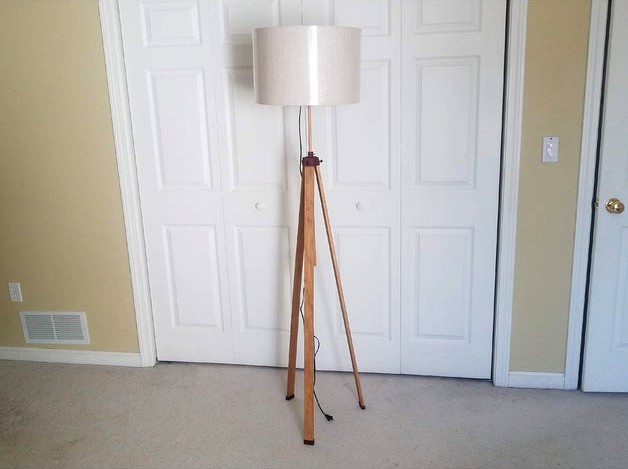
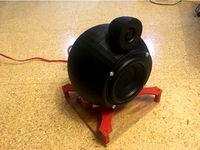
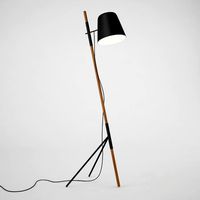
Tripod Floor Lamp
by Thingiverse
Last crawled date: 4 years, 3 months ago
This project will guide you through the step-by-step to create a Tripod Floor Lamp.
It has a lot of steps, but they are not that difficult.
List of printed parts:
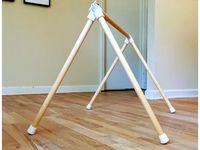
3 feet, 1 for each leg
1 core to mount the legs angled
1 lamp socket mount
1 bumper to protect the vertical rod (print this in some sort of flexible filament like TPU/TPE, if you don't have this kind of filament, I bet you can use any kind of bumper)
List of non-printed parts:
Here you find the list of materials to buy if you don't have them. However you might substitute some of the items if you wish. Read carefully
3 hardwood board. 1/2 in. x 2 in. x 4 ft. I don't know much about wood and I chose poplar, you can pick any kind of wood you prefer.
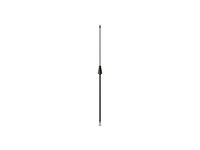
1 hardwood dowel. 1/2 in. x 48 in.
1 large shade. Large: 17" diameter, 11" high.
3 big thumb screws. 1/4 in.-20 x 1 in.
3 big nuts for the thumb screws above. 1/4 in.
1 small thumb screw. #10-32 x 1/2 in.
1 small nut for the small thumb screw above.
1 lamp cord
1 bulb socket
1 lamp harp
OPTIONAL:
You can paint/stain the wood to achieve the appearance you desire.
I decided to use Danish oil
Also sprayed the thumb screws and nuts with rust oleum
Assembling instructions:
01) Use the "core" to mark on the wood board the place to drill
02) Using 1/4in drill bit, drill the holes (1 hole for each leg)
03) Paint/stain the parts you want, if you desire to do so
04) Place the nuts on the "core"
05) Put the feet in place
06) Place the legs on the core and secure them using the larger thumb screw
07) Screw the small thumb screw on the small nut
08) Glue the bumper on the tip of the small thumb screw
09) Slide the small thumb screw on it's place, fitting the nut on it's place and use a drop of glue to hold, permanently, the nut in place. Be careful, you don't want to glue the nut and thumb screw together.
10) Assemble the socket, cord and the lamp harp.
11) Put the socket inside the "socket mount".
12) Insert the dowel on the "socket mount"
13) Place the dowel on it's position and secure it tightening the small thumb screw.
14) Place the light bulb on the socket
15) Put the shade
16) Turn it on and enjoy it!!
17) If you make one hit "Post a Make"
If you like this, check my Wall Lamp.
It has a lot of steps, but they are not that difficult.
List of printed parts:
3 feet, 1 for each leg
1 core to mount the legs angled
1 lamp socket mount
1 bumper to protect the vertical rod (print this in some sort of flexible filament like TPU/TPE, if you don't have this kind of filament, I bet you can use any kind of bumper)
List of non-printed parts:
Here you find the list of materials to buy if you don't have them. However you might substitute some of the items if you wish. Read carefully
3 hardwood board. 1/2 in. x 2 in. x 4 ft. I don't know much about wood and I chose poplar, you can pick any kind of wood you prefer.
1 hardwood dowel. 1/2 in. x 48 in.
1 large shade. Large: 17" diameter, 11" high.
3 big thumb screws. 1/4 in.-20 x 1 in.
3 big nuts for the thumb screws above. 1/4 in.
1 small thumb screw. #10-32 x 1/2 in.
1 small nut for the small thumb screw above.
1 lamp cord
1 bulb socket
1 lamp harp
OPTIONAL:
You can paint/stain the wood to achieve the appearance you desire.
I decided to use Danish oil
Also sprayed the thumb screws and nuts with rust oleum
Assembling instructions:
01) Use the "core" to mark on the wood board the place to drill
02) Using 1/4in drill bit, drill the holes (1 hole for each leg)
03) Paint/stain the parts you want, if you desire to do so
04) Place the nuts on the "core"
05) Put the feet in place
06) Place the legs on the core and secure them using the larger thumb screw
07) Screw the small thumb screw on the small nut
08) Glue the bumper on the tip of the small thumb screw
09) Slide the small thumb screw on it's place, fitting the nut on it's place and use a drop of glue to hold, permanently, the nut in place. Be careful, you don't want to glue the nut and thumb screw together.
10) Assemble the socket, cord and the lamp harp.
11) Put the socket inside the "socket mount".
12) Insert the dowel on the "socket mount"
13) Place the dowel on it's position and secure it tightening the small thumb screw.
14) Place the light bulb on the socket
15) Put the shade
16) Turn it on and enjoy it!!
17) If you make one hit "Post a Make"
If you like this, check my Wall Lamp.
Similar models
thingiverse
free
Roman Pilum by dragon3318
...ooden dowel at the end of the 25 mm round timber.
glue the wooden dowel into the 8 mm hole and place the pilum rear point on top.
thingiverse
free

Doweling Jig by photoresistor
...rotect the print from the rotating drill bit, and likely glue the spacer into place so it doesn't break loose as it heats up.
thingiverse
free

Ikea Januari Mounting Plate by Madda
...can't fall out, when screwing the lamp on.
i included the sketchup files, so you can cosumize this print to fit other models.
thingiverse
free
Fold-Up Baby Gym and Play Stand by geallen3106
... the small hole in each sleeve
7) assemble two legs on each side, large flat portion of leg should be facing each other.
8) enjoy
thingiverse
free
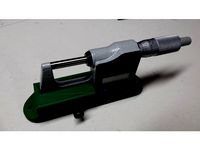
Micrometer Stand for Mitutoyo 293 Series, etc. by tetralite
...nting ears.
the 1/4" screw, when tightened, pushes the vertical tab against the frame of the micrometer to hold it in place.
thingiverse
free

Articulated Phone Mount by 1Prelude
...iameter 11.80mm)
whatever screws you want to attach to wall (mounting plate hole diameter is 3.5mm)
can use duct-tape in a pinch!
thingiverse
free
tcp115 and ND16FA-4 5/8" speaker
...he crossover , put the tweeter in and screw the woofer in place using m4 screws
step 10:
if you need help please leave a comment
thingiverse
free

Keychain smartphone stand by jeffjiang
...nut to get your desired tilting angle. i tried with iphone 6. it works fine with most angles either landscape or portrait. enjoy!
thingiverse
free

Simple FPV ground station by HugeOne
... generix vrx slide right in. there's a place for a 5.8 ghz vtx and small mount for another dowel to hold an omni rx antenna.
thingiverse
free

X-UAV Mini Talon "Better" Motor Mount by amnesia74
...uploaded the skp file just in case you want to modify something.
printed in abs, 100% infill, 0.20mm layer thickness, no support.
Tripod
archibase_planet
free
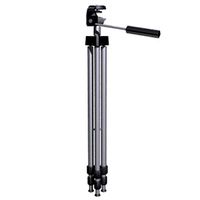
Tripod
...tripod
archibase planet
tripod staff state stand
tripod - 3d model for interior 3d visualization.
archibase_planet
free
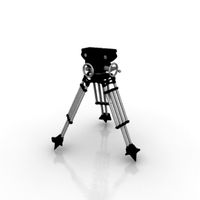
Tripod
...tripod
archibase planet
camera tripod
cam tripod 2 - 3d model (*.gsm+*.3ds) for interior 3d visualization.
archibase_planet
free
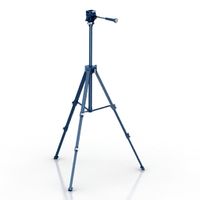
Tripod
...tripod
archibase planet
tripod support stand holder
tripod n191213 - 3d model (*.gsm+*.3ds+*.max) for interior 3d visualization.
design_connected
$13
Tripod
...tripod
designconnected
erickson æsthetics tripod computer generated 3d model. designed by erickson, ben.
design_connected
$13

Tripod
...tripod
designconnected
david weeks studio tripod computer generated 3d model. designed by weeks, david.
3d_ocean
$4

Tripod
...tripod
3docean
3d models coffee table furnishings furniture tripod
3d models,furnishings,furniture
archibase_planet
free
Tripod
...tripod
archibase planet
tv camera equipment
cam tripod - 3d model (*.gsm+*.3ds) for interior 3d visualization.
turbosquid
$4

Tripod
...urbosquid
royalty free 3d model tripod for download as blend on turbosquid: 3d models for games, architecture, videos. (1580064)
turbosquid
$5

Tripod
...uid
royalty free 3d model tripod for download as c4d and fbx on turbosquid: 3d models for games, architecture, videos. (1593078)
turbosquid
$35

Tripod
... available on turbo squid, the world's leading provider of digital 3d models for visualization, films, television, and games.
Floor
3d_ocean
$8
Floor
...floor
3docean
exhibition floor stand
exhibition stand floor
3ddd
$1

The floor
...the floor
3ddd
паркет
the floor
3ddd
$1

floor
...floor
3ddd
паркет
floor
turbosquid
$5
Floor / Dirty Floor
... available on turbo squid, the world's leading provider of digital 3d models for visualization, films, television, and games.
3ddd
$1
Floor lamp
... boconcept
http://www.boconcept.com/en-us/accessories/lamps/lamps/floor-lamps/9583/7742/outrigger-floor-lamp
3d_export
$65

exterior house ground floor and first floor
...exterior house ground floor and first floor
3dexport
exterior house ground floor and first floor
3ddd
$1

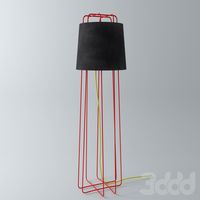
Floor lamp
...floor lamp
3ddd
floor lamp
3ddd
$1
floor lamp
...floor lamp
3ddd
floor lamp
3ddd
free

Floor lamp
...floor lamp
3ddd
floor lamp
3ddd
free

Floor lamp
...floor lamp
3ddd
floor lamp
Lamp
archibase_planet
free
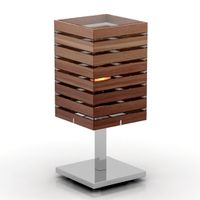
Lamp
...lamp
archibase planet
lamp reading lamp table lamp
lamp - 3d model (*.gsm+*.3ds) for interior 3d visualization.
archibase_planet
free
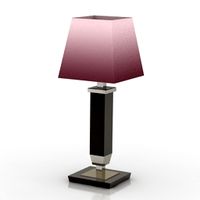
Lamp
...lamp
archibase planet
lamp reading lamp table lamp
lamp - 3d model (*.gsm+*.3ds) for interior 3d visualization.
archibase_planet
free

Lamp
...lamp
archibase planet
lamp table lamp reading lamp
lamp - 3d model (*.gsm+*.3ds) for interior 3d visualization.
archibase_planet
free

Lamp
...lamp
archibase planet
lamp table lamp reading lamp
lamp - 3d model (*.gsm+*.3ds) for interior 3d visualization.
archibase_planet
free

Lamp
...lamp
archibase planet
lamp reading lamp table lamp
lamp - 3d model (*.gsm+*.3ds) for interior 3d visualization.
archibase_planet
free
Lamp
...lamp
archibase planet
lamp reading lamp table lamp
lamp - 3d model (*.gsm+*.3ds) for interior 3d visualization.
archibase_planet
free
Lamp
...lamp
archibase planet
lamp table lamp reading lamp
lamp - 3d model (*.gsm+*.3ds) for interior 3d visualization.
archibase_planet
free

Lamp
...lamp
archibase planet
lamp table lamp reading lamp
lamp - 3d model (*.gsm+*.3ds) for interior 3d visualization.
archibase_planet
free

Lamp
...lamp
archibase planet
lamp reading lamp table lamp lantern
lamp - 3d model (*.3ds) for interior 3d visualization.
3d_ocean
$6

Lamp
...lamp
3docean
lamp
a high quality lamp.