Thingiverse

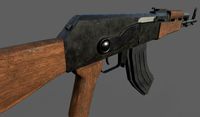
Transformer Trailer Hitch Cover by Mister-Ed
by Thingiverse
Last crawled date: 3 years, 1 month ago
Transformerkopf für die Anhängerkupplung mit Bremslicht im Visier.
IN DEUTSCHLAND NICHT ZUGELASSEN!! (Andere Länder bitte selber Prüfen.)
Ich übernehme keinerlei Haftung für Schäden.
Passt nur auf Kugeldurchmesser 50 mm.
Als erstes im „Visier1“, 2 Stk. LED Streifen (Weiß) mit je 3 LED, 12V , aus der Restekiste, verbauen. Dann den Deckel „Visier2“ (wasserdicht) verkleben.
Ich habe ein Stepp Down Modul verbaut. Zum Schutz der LED. Eingestellt auf 11,8 Volt.https://www.amazon.degpproductB077VW4BTYref=ppx_yo_dt_b_asin_title_o02_s00?ie=UTF8&psc=1
(Muss man nicht, kann man auch weglassen. Muss jeder selber wissen.)
Kabel durch die Führung zum Stepp Down Modul führen und das Visier einkleben. (am besten Wasserdicht wegen dem Stepp Down Modul.)
Kabel an Modul anlöten, TESTEN (immer mal zwischendurch), und mit „Deckel“ verschließen (Wasserdicht).
1 Stk. Gewindestange M3 anpassen, Länge + 2 Stk. Sicherungsmuttern, für das Scharnier am Kopf.
2 Stk. Gewindestange M3 anpassen, Länge + 2 Stk. gekonterte Muttern M3 + dicke 1 Mutter M3 + 4 mm.
In das Teil „Kopf1“, 2 Stk. M3 Muttern einlegen und mit je 2 Stk M3 Muttern (aufgebohrt auf 3,5 mm) auf doppeln. Die Flächen mit je einer der Abdeckungen verschließen.
Die restlichen „Einleger“ aufkleben.
Verschraubt wird der Kopf von hinten. Das „Tool“ sollte dies erleichtern.
Die Kabellänge anpassen und Anhängerstecker (13 oder 7 Polig) montieren.
www.amazon.de/s?k=anh%C3%A4nger+stecker&ref=choice_dp_b
Belegung:
13 Pol Stecker, Plus (+) der Bremsleuchte = Pin Nr. 6
Minus (-) Masse = Pin Nr. 3
7 Pol Stecker, Plus (+) der Bremsleuchte = Pin Nr. 6 - 54
Minus (-) Masse = Pin Nr. 3 – 31
(Je nach Fahrzeug Typ, selber Informieren!)
Zusätzlich könnte man auch noch, in die unteren Abdeckungen, LED für Blinker einsetzen.
Die Mittleren Einleger bieten sich an für Rücklichter.
Viel Spaß beim Nachbauen.
Transformer head for the trailer coupling with brake light in the visor.
NOT ALLOWED IN GERMANY !! (Please check other countries yourself.)
I am not responsible for any damage.
Only fits a ball diameter of 50 mm.
First, in “Visier1”, install 2 LED strips (white) with 3 LEDs each, 12V, from the scrap box.
Then glue the cover "Visier2" (waterproof).
I installed a step down module. To protect the LED. Set to 11.8 volts.https://www.amazon.de/gp/product/B077VW4BTY/ref=ppx_yo_dt_b_asin_title_o02_s00?ie=UTF8&psc=1
(You don't have to, you can leave it out. Everyone has to know.)
Guide the cable through the guide to the step down module and glue in the visor. (preferably waterproof because of the step down module.)
Solder the cable to the module, TEST it (every now and then) and close it with the "lid" (watertight).
Adjust 1 pc. Threaded rod M3, length + 2 pc. Lock nuts, for the hinge on the head.
Adjust 2 pieces of threaded rod M3, length + 2 pieces of countered nuts M3 + 1 thick nut M3 + 4 mm.
Insert 2 pieces of M3 nuts into the part "Head 1" and double up with 2 pieces of M3 nuts each (drilled out to 3.5 mm). Close the surfaces with one of the covers.
Glue on the remaining "inserts".
The head is screwed from behind. The "tool" should make this easier.
Adjust the cable length and mount the trailer plug (13 or 7 pin).https://www.amazon.de/s?k=anh%C3%A4nger+steck&ref=choice_dp_b
Occupancy:
13-pin plug, plus (+) of the brake light = pin no.6
Minus (-) ground = pin no.3
7-pin plug, plus (+) of the brake light = pin no.6 - 54
Minus (-) ground = pin no.3 - 31
(Depending on the vehicle type, inform yourself!)
In addition, you could also insert LEDs for turn signals in the lower covers.
The middle inserts are ideal for taillights.
Have fun building it.
Similar models
thingiverse
free

LED Beleuchtung für 3d Drucker CTC by Leon75
...ichtet,das die led´s auf tischmitte zeigen.
habe mir jeweils 2 für links und 2 für rechts gedruckt und mit weißen led´s bestückt.
thingiverse
free

Griff für Küchenschrank / Handle for kitchen cupboard by Ce-ha
... with sone acrylic glue.
benötigt werden zwei m3 muttern und schrauben. die muttern sollten mit sekundenkleber eingeklebt werden.
thingiverse
free
height adjustable optical bench (Zeiss) - höheneinstellbare optische Bank aus Zeiss Dreikantprofil by Ce-ha
...m3 muttern mit den madenschrauben zur befestigung der endkappe und die m10 schrauben zur verbindung mit dem zeiss dreiecksprofil.
thingiverse
free
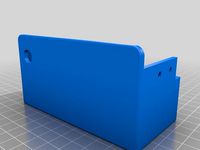
Abdeckung für Netzteil mit Füßen by Animalmother1705
...nen auf der seite mit dem spannungswahlschieber angeschraubt werden und bieten einen sicheren stand für das hochkante aufstellen.
thingiverse
free

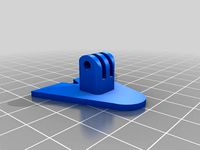
Yi Home Dome Camera Adapter Halterung by 3Ddruckerling
...stk. 4 x 30 mm holzschraube
ich habe die originale platte auf die gedruckte adapterplatte mit 2 stk. m4 x 20 mm schrauben geklebt
thingiverse
free

Laser NEJE Master 2S Fix-Focus Slider Air-Assist by kurzdavor
...id 2mm
1 stk. silikonschlauch id 8mm
2 stk. kabelbinder für den schlauchverbinder
2 stk. kabelbinder schlauchbefestigung am gerät
thingiverse
free

Sparkcube (und andere) Druckkopf mit Beleuchtung für E3D V6 by Rolfiklein
...n usern habe ich den kühlkanal jetzt auch noch mit schräg nach innen gerichteten blaslöchern geändert. ist die datei kanalspk.stl
thingiverse
free
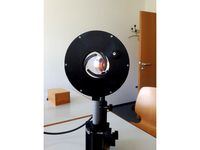
Universal lens holder / universeller Linsenhalter by Ce-ha
...ich der mechanismus bei rechtsdrehung des rändels (raendel1). die muttern werden in die dafür vorgesehenden aussparungen geklebt.
thingiverse
free

Servoanschluss Tragfläche Heron Solius MPX by bluelex73
...me von der rückseite mit etwas epoxy einkleben.
f) das ganze mit der anderen tragfläche wiederholen.
viel spass beim löten....:-)
thingiverse
free
Montagepalttform für den Swift II by Gerok
...bau der plattform wird mit einer m3 nylonschraube durchgeführt und mit sekundenkleber auf die original motorhalterung aufgeklebt.
Mister
3ddd
free
диван Cassina Mister
...диван cassina mister
3ddd
cassina , mister
диван с лампой cassina mister
turbosquid
$19

Mantellassi Mister
... available on turbo squid, the world's leading provider of digital 3d models for visualization, films, television, and games.
cg_studio
$1800
Mister menmeu3d model
...ior mister menmeu
professional 3d model mister menmeu - .max - , royalty free license available, instant download after purchase.
3ddd
free
Mantellassi Mister
...й
размеры, мм: 2030 (длина); 1000 (ширина); 950 (высота)
описание: диван двухместный
страна: италия
сайт: www.mantellassi.com
3d_ocean
$19

Mister MAGOO RIGGED
...ed in max version only. the textures are used only for his shirt flowers pattern and his glasses. the hat and the glasses are ...
3ddd
$1
Cassina Mister
...мпой. обивка - ткань
габариты: w 290 х l 103 х h 68http://cassina.com/en/collection/sofas-and-armchairs/235-238-mister
3d_ocean
$15

Mister Timber
... character named mister timber. this model is also perfect for mobile applications as well, check out my profile for more models!
turbosquid
$29
Aquarium and Stand- mister
... available on turbo squid, the world's leading provider of digital 3d models for visualization, films, television, and games.
3d_export
$20

Mister Timber 3D Model
...dy low poly polygonanatomy base people boy child dude guy hero human male man
mister timber 3d model clutchtrigger 58670 3dexport
3ddd
$1

Mister P 305 SMANIA
... smania
фабрика: smania
артикул: dvmister01
коллекция: master collection
длина: 304
глубина: 120
высота: 78
Hitch
turbosquid
$1

Hitch Post
...squid
royalty free 3d model hitch post for download as blend on turbosquid: 3d models for games, architecture, videos. (1363925)
turbosquid
$5

truckie hitch
... truckie hitch for download as dae, fbx, obj, stl, x, and 3ds on turbosquid: 3d models for games, architecture, videos. (1667555)
3d_export
$5

Trailer hitch 3D Model
...trailer hitch 3d model
3dexport
trailer hitch 3d model 1201314354 63678 3dexport
turbosquid
$1500

Gooseneck Trailer Hitch
... available on turbo squid, the world's leading provider of digital 3d models for visualization, films, television, and games.
turbosquid
$12

boom hitch knot
...oom hitch knot for download as fbx, obj, stl, x, 3ds, and dae on turbosquid: 3d models for games, architecture, videos. (1665845)
turbosquid
$7

timber hitch knot
...ber hitch knot for download as fbx, obj, stl, 3ds, x, and dae on turbosquid: 3d models for games, architecture, videos. (1667552)
turbosquid
$7

snug hitch knot
...nug hitch knot for download as stl, x, 3ds, dae, fbx, and obj on turbosquid: 3d models for games, architecture, videos. (1667347)
turbosquid
$7

barrel hitch knot
...rel hitch knot for download as fbx, obj, stl, x, 3ds, and dae on turbosquid: 3d models for games, architecture, videos. (1665476)
turbosquid
$7

mooring hitch knot
...ing hitch knot for download as 3ds, dae, fbx, obj, stl, and x on turbosquid: 3d models for games, architecture, videos. (1666682)
turbosquid
$7

kellig hitch knot
...lig hitch knot for download as stl, fbx, obj, 3ds, x, and dae on turbosquid: 3d models for games, architecture, videos. (1666663)
Ed
3ddd
$1
ED slide
...ed slide
3ddd
круглый
ed slide 140см
turbosquid
$5

Ed
... available on turbo squid, the world's leading provider of digital 3d models for visualization, films, television, and games.
3ddd
$1
ED 209
...ed 209
3ddd
ed209 , robocop , робот
ed 209
3d_export
$15
Ed
...g.<br>ed_eyes_texture - 3000x3000 png.<br>ed_hair_texture - 3000x3000 png.<br>ed_teeth_texture - 3000x3000 png.
turbosquid
$7

Edding marker
...lty free 3d model edding marker for download as blend and fbx on turbosquid: 3d models for games, architecture, videos. (1668198)
3d_ocean
$29
ED City Sample
... district ed city landscape model scene simple skyscraper street streets tall town
ed city sample this ?s architectural backround
3d_export
$5
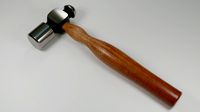
ed hammer
...ed hammer
3dexport
high-quality modeled hammer with wood and metallic texture.
3d_ocean
$35
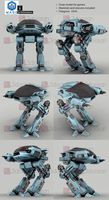
Robot ED-209 - 15145 polys
...iginal robocop movie. here are the details: - rendered in vray 2.30 – materials and textures included - polygons: 15145 as alw...
3ddd
$1

fratelli allievi ED 801
...fratelli allievi ed 801
3ddd
fratelli allievi
торшер fratelli allievi ed 801
turbosquid
$19

Table Ed Design
... available on turbo squid, the world's leading provider of digital 3d models for visualization, films, television, and games.
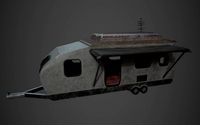
Trailer
archibase_planet
free
Trailer
...ailer hindcarriage motorcycle trailer hind-carriage
trailer n070414 - 3d model (*.gsm+*.3ds+*.max) for exterior 3d visualization.
archibase_planet
free

Trailer
...iler forestry trailer hindcarriage hind-carriage
trailer forestry n260614 - 3d model (*.gsm+*.3ds) for exterior 3d visualization.
archibase_planet
free
Trailer
...trailer
archibase planet
trailer
trailer n260907 - 3d model (*.gsm+*.3ds) for interior 3d visualization.
archibase_planet
free
Trailer
...trailer
archibase planet
lorrry truck trailer
trailer n190609 - 3d model (*.3ds) for 3d visualization.
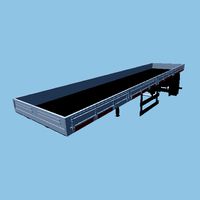
archibase_planet
free
Trailer
...archibase planet
trailer hind-carriage hindcarriage
box trailer 1 n120614 - 3d model (*.gsm+*.3ds) for exterior 3d visualization.
3ddd
$1
Trailer
...trailer
3ddd
trailer , трейлер
маленький та зручний торговий вагончик. текстури є.
3d_export
$5
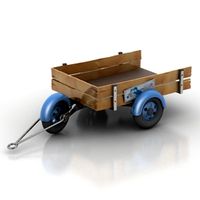
an old trailer
...an old trailer
3dexport
an old trailer
3d_export
$5
Model of a trailer
...model of a trailer
3dexport
model of a trailer
turbosquid
$50

trailer
...turbosquid
royalty free 3d model trailer for download as c4d on turbosquid: 3d models for games, architecture, videos. (1643198)
turbosquid
$35

Trailer
...turbosquid
royalty free 3d model trailer for download as fbx on turbosquid: 3d models for games, architecture, videos. (1213660)
Transformer
archibase_planet
free
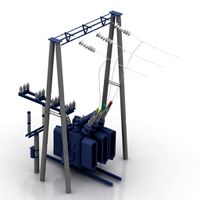
Transformer
...r high-voltage transformer voltage transformer
high voltage transformer n300614 - 3d model (*.3ds) for exterior 3d visualization.
archibase_planet
free
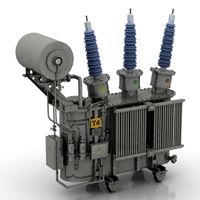
Transformer
...transformer electric transformer converter transducer
transformer n121015 - 3d model (*.gsm+*.3ds) for exterior 3d visualization.
archibase_planet
free
Transformer
...sformer
archibase planet
transformer toy child play
transformer n140408 - 3d model (*.gsm+*.3ds) for interior 3d visualization.
3d_export
$50

Transformer
...transformer
3dexport
3d bltnder
turbosquid
$12

Transformer
...free 3d model transformer for download as blend, fbx, and obj on turbosquid: 3d models for games, architecture, videos. (1614605)
archive3d
free
Transformer 3D Model
...ansformer unit
transformer unit n250816 - 3d model (*.gsm+*.3ds) for exterior 3d visualization.
turbosquid
$79

transformer
... available on turbo squid, the world's leading provider of digital 3d models for visualization, films, television, and games.
turbosquid
$60

Transformer
... available on turbo squid, the world's leading provider of digital 3d models for visualization, films, television, and games.
turbosquid
$10

Transformer
... available on turbo squid, the world's leading provider of digital 3d models for visualization, films, television, and games.
turbosquid
$6

transformation
... available on turbo squid, the world's leading provider of digital 3d models for visualization, films, television, and games.
Cover
archibase_planet
free
Cover
...cover
archibase planet
cover place setting
cover n170807 - 3d model for interior 3d visualization.
3ddd
$1
cover
...cover
3ddd
ковер , круглый
cover decor
archibase_planet
free

Cover
...cover
archibase planet
cover place setting setting
servis-cafe1930 - 3d model for interior 3d visualization.
turbosquid
free
Coverings
...rings
turbosquid
free 3d model coverings for download as dwg on turbosquid: 3d models for games, architecture, videos. (1279391)
3d_export
$5
plug cover
...plug cover
3dexport
plug cover
turbosquid
$25

Covers
... available on turbo squid, the world's leading provider of digital 3d models for visualization, films, television, and games.
3d_export
$10
manhole cover
...manhole cover
3dexport
manhole cover gost, stl, step
turbosquid
$5

Street Gas Cover Manhole Cover
... available on turbo squid, the world's leading provider of digital 3d models for visualization, films, television, and games.
3ddd
free
Bed cover
...bed cover
3ddd
постельное белье
very useful bed cover
3d_export
$5
cpu cover
...cpu cover
3dexport
cpu cover, cpu box, sheet metal container