Thingiverse

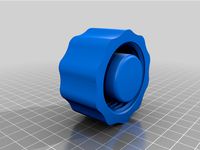
tool-capsuleFiller #000 by BETLOG
by Thingiverse
Last crawled date: 3 years ago
A medical capsule filler for #000 capsules.
This has been modified from my prior capsuleFiller, which is for #00 capsules, unlike the #00 version: have not printed and not tested this #000 version. I'm pretty sure I made all of the size adjustments correctly, but maybe not. And refer to my profile for extrusion line width tolerance notes.
Requires 4x 0.8x10x15mm springs https://www.aliexpress.com/item/32963259463.html
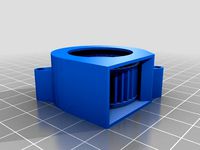
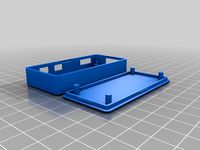
1) base - place it on a sturdy, clean work surface. You ARE going to make a big mess that probably stains everything. (cough turmeric cough)
2) drop 4 springs into their recesses
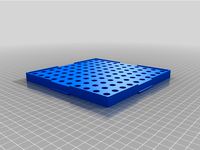
3) sprungPlate - with the grips (on the outside) toward the top of the plate, drop it on top of the springs, make sure the springs remain upright and test the sprungPlate movement by EVENLY pressing it fully down a few times.
4) capGuide - drop it onto the plate stack with the wider hole openings upward
5) pour capsule BODIES into the capGuide and drop them into all of the holes with their opening facing upward. A pair of pointed ESD tweezers are really useful for flipping those that go in upside down. Remove capGuide (optional).
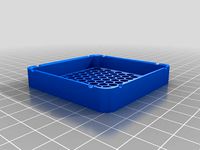
6) pour powder into the tray and spread it to fill all capsules, the tamping plate can be used to spread and tamp powder into the capsules. Remove capGuide if you didn't earlier.
NOTE:
Avoid pressing too hard or allowing the sprungPlate to bounce around, as this may crush capsules, eject powder, capsules, springs, or the entire plate.
7) capPlate - drop it into the stack with the larger holes facing UP (side grips toward the bottom)
8) capGuide - drop it onto the plate stack with the wider hole openings upward
9) pour in capsule CAPS, and coerce them into the holes with their openings facing UP. Again with the tweezers. Remove capGuide.
10) capRetainer - drop it onto the plate stack, with the wider side of the holes facing DOWN
11) lift capPlate AND capRetainer out of the stack as a single unit, and carefully flip it over so the holes face DOWN, carefully place it back into the stack.
12) test movement by pressing down evenly a little, if it appears everything is going to work, slowly press down hard.
NOTE:
You may feel or hear the caps locking, or crushing.
13) capPlate - carefully remove it from the stack.
14) capRetainer & sprungPlate - lift both together to remove from the base, and flip them upside down.
NOTE:
It may be easiest to remove sprungPlate and leave all of the joined capsules in capRetainer, and then poke them out from that. Just be sure you push them the right way or the cap will be forced off.
..Or maybe poking the capsules out of both plates held together will be easiest.
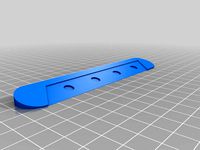
You may need a small poker. I didn't print one. Mine usually fll out with some wiggling and bumping on the bench.
Pressing this many capsules together at once may result in crushing them before they actually lock, maybe my tolerances could be different to rectify this, but I suspect it is simply a case of a sum total too many lock forces being required. So you may need to lock them individually, or just disregard this as they tend be sufficiently sealed to stay intact anyway.
Let me know so i can fix if required.
This has been modified from my prior capsuleFiller, which is for #00 capsules, unlike the #00 version: have not printed and not tested this #000 version. I'm pretty sure I made all of the size adjustments correctly, but maybe not. And refer to my profile for extrusion line width tolerance notes.
Requires 4x 0.8x10x15mm springs https://www.aliexpress.com/item/32963259463.html
1) base - place it on a sturdy, clean work surface. You ARE going to make a big mess that probably stains everything. (cough turmeric cough)
2) drop 4 springs into their recesses
3) sprungPlate - with the grips (on the outside) toward the top of the plate, drop it on top of the springs, make sure the springs remain upright and test the sprungPlate movement by EVENLY pressing it fully down a few times.
4) capGuide - drop it onto the plate stack with the wider hole openings upward
5) pour capsule BODIES into the capGuide and drop them into all of the holes with their opening facing upward. A pair of pointed ESD tweezers are really useful for flipping those that go in upside down. Remove capGuide (optional).
6) pour powder into the tray and spread it to fill all capsules, the tamping plate can be used to spread and tamp powder into the capsules. Remove capGuide if you didn't earlier.
NOTE:
Avoid pressing too hard or allowing the sprungPlate to bounce around, as this may crush capsules, eject powder, capsules, springs, or the entire plate.
7) capPlate - drop it into the stack with the larger holes facing UP (side grips toward the bottom)
8) capGuide - drop it onto the plate stack with the wider hole openings upward
9) pour in capsule CAPS, and coerce them into the holes with their openings facing UP. Again with the tweezers. Remove capGuide.
10) capRetainer - drop it onto the plate stack, with the wider side of the holes facing DOWN
11) lift capPlate AND capRetainer out of the stack as a single unit, and carefully flip it over so the holes face DOWN, carefully place it back into the stack.
12) test movement by pressing down evenly a little, if it appears everything is going to work, slowly press down hard.
NOTE:
You may feel or hear the caps locking, or crushing.
13) capPlate - carefully remove it from the stack.
14) capRetainer & sprungPlate - lift both together to remove from the base, and flip them upside down.
NOTE:
It may be easiest to remove sprungPlate and leave all of the joined capsules in capRetainer, and then poke them out from that. Just be sure you push them the right way or the cap will be forced off.
..Or maybe poking the capsules out of both plates held together will be easiest.
You may need a small poker. I didn't print one. Mine usually fll out with some wiggling and bumping on the bench.
Pressing this many capsules together at once may result in crushing them before they actually lock, maybe my tolerances could be different to rectify this, but I suspect it is simply a case of a sum total too many lock forces being required. So you may need to lock them individually, or just disregard this as they tend be sufficiently sealed to stay intact anyway.
Let me know so i can fix if required.
Similar models
grabcad
free

Positive Connections
...sition by the height difference, in addition to the spring force.
the mechanism ensures the required locking force of 200 newton.
thingiverse
free

Pill Packer 100x by adolist
... blocked off however these are not on the actual model when printed and this is only a program error within stl viewing programs.
thingiverse
free

powder funnel Hornady Lock and Load powder hopper by Air_
...l hornady lock and load powder hopper by air_
thingiverse
powder funnel to fit onto powder hopper of hornady lnl reloading press
thingiverse
free

100 "00" Capsule Filler Machine
...ed, and then you are done. (you will normally hear a click when a capsule is closed.)
*note: top half is the small capsule plate.
thingiverse
free

Stack plate for flight controller like Naze32, Flip, CC3D, etc. by kristjanvaga
...t can be used to stack mount items onto flight controller boards with 30mm hole spacing, such as:
naze32
flip32
cc3d
etc.
thingiverse
free

Nespresso Vertuoline capsule refill holder by WhoDeanie
...or the nespresso vertuoline capsules. allows you to reuse the capsules and tamp down the coffee and espresso grounds much easier.
thingiverse
free
Pill Crusher by bluelava0207
...en become hard to crush further. just unscrew slightly, shake the pills around, then crush more, and repeat until fully crushed.
grabcad
free

Nema 34 motor smart component
...hex nuts all in 1/4-20. all you may need to do is adjust the length of the cap screws by clicking on them and dragging the arrow.
thingiverse
free

Vertical Nespresso capsule dispenser by oaktreebr
...nser by oaktreebr
thingiverse
i've added some holes and removed part of the front facing plate to try to save some material.
thingiverse
free

Harry Potter Wand Jack 7C by EloraBot
...harry potter wand jack 7c by elorabot
thingiverse
piece #1 the small hole has to face down onto build plate.
Betlog
thingiverse
free
dummy - barrel connector 5.5mm female by BETLOG
...- barrel connector 5.5mm female by betlog
thingiverse
a reference object i needed to make for "does it fit?" purposes.
thingiverse
free
DUMMY DC12V 40mm 4500RPM Brushless Fan Blower by BETLOG
...an blower by betlog
thingiverse
dummy/mockup/reference model of a
dc12v 40mm 4500rpm brushless fan blower
like the images shown.
thingiverse
free
Drill_bits_cylindrical_case-BETLOG-002 by BETLOG
...precise than needing to add 0.45 to 0.48...divided by two (0.225 to 0.24) to everything....0.4 divided by 2 is 0.2... and easier.
thingiverse
free

Z Leadscrew Rod Stabilizer - Flyingbear P902 by BETLOG
...e loud squeaking it makes when moving the z axis large distances.
connects to the 2020 frame by the usual m4 bolts and hammernuts
thingiverse
free

dummy - regulator 9-35V to 5v 5A by BETLOG
...e for "does it fit?" purposes.
2017-07-28 - replaced. previous version holes and width were incorrect enough to matter.
thingiverse
free
tool-capsuleFiller by BETLOG
...is to work reliably.
designed for size #00 caps.
requires 4x 0.8x10x15mm springs https://www.aliexpress.com/item/32963259463.html
thingiverse
free
Raspberry Pi Zero Case - BETLOG version by BETLOG
...precise than needing to add 0.45 to 0.48...divided by two (0.225 to 0.24) to everything....0.4 divided by 2 is 0.2... and easier.
thingiverse
free

calibration - quick - support angle by BETLOG
...el is small to print fast, and simulate almost worst case scenario where heater is always in fairly close proximity to the print.
thingiverse
free
fan guard - 60mm by BETLOG
...lades will almost always be the last time.
as always; assumes a 0.4mm nozzle. layer height is fairly irrelevant, but i used 0.3mm
thingiverse
free
BladeScraper by BETLOG
...t;hold" the blade so once you get it under the print yo can remove the block and just move the blade around under the print.
000
turbosquid
$15

Sofa 000
...free 3d model sofa 000 for download as 3ds, max, obj, and fbx on turbosquid: 3d models for games, architecture, videos. (1401892)
turbosquid
$40

TIRE 000
... available on turbo squid, the world's leading provider of digital 3d models for visualization, films, television, and games.
turbosquid
$10

chair 000
... available on turbo squid, the world's leading provider of digital 3d models for visualization, films, television, and games.
turbosquid
$32
MOD A 000.max
... available on turbo squid, the world's leading provider of digital 3d models for visualization, films, television, and games.
turbosquid
free
warship 000.blend
... available on turbo squid, the world's leading provider of digital 3d models for visualization, films, television, and games.
turbosquid
$1

electric engine BLDC with water cooling for printing 10 000 W stl
...with water cooling for printing 10 000 w stl for download as on turbosquid: 3d models for games, architecture, videos. (1632791)
3ddd
$1

Ручки для кухни Giusti WMN.721Y.128.XXX и WPO.721X.000.XXX
...установить свою степень сглаживания, изначально установлено 2.
в архиве библиотека материалов для ручек. всё настроено для vray.
3d_export
$5
baby
...3dexport baby head<br>poligon min 106 468 x 7 473 000 , max 6 859 000 x 7 473...
3ddd
$1

Статуетка
...статуетка 3ddd 000 00000 0000 00000 0 0 000 0 0 0...
3d_export
$6

Rome Centurion Sculpt
...sculpt 3dexport rome centurion high poly model .ztl 75 000 000...
Tool
turbosquid
$21
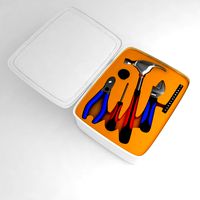
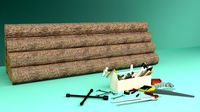
Tool box with tools
... available on turbo squid, the world's leading provider of digital 3d models for visualization, films, television, and games.
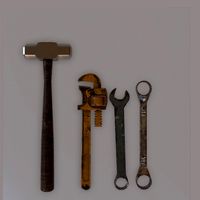
archibase_planet
free
Tools
...tools
archibase planet
tools instruments implements
tools n070114 - 3d model (*.gsm+*.3ds+*.max) for interior 3d visualization.
3d_ocean
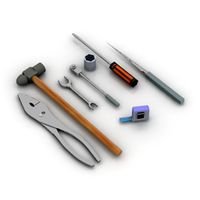
$12
Tools
...tools
3docean
hammer metal old screw tools wrench
maya
turbosquid
$6

Tool Cart / Tool Box
...
royalty free 3d model tool cart / tool box for download as on turbosquid: 3d models for games, architecture, videos. (1241859)
3d_ocean
$15
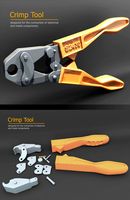
crimp tool
... tool copper cutter crimp crimp tool electrical electrical tools press tools pressing tool tools wire cutter
created in maya 2013
3d_ocean
$5

Tools
...tools
3docean
3d models paint tools work
3d,models,works,paint,art,create,working,
3d_export
free
tools
...tools
3dexport
coldsteel
turbosquid
$15
Tools
...turbosquid
royalty free 3d model tools for download as blend on turbosquid: 3d models for games, architecture, videos. (1331352)
3ddd
$1
bar tool
...bar tool
3ddd
барный
bar tool
turbosquid
$35
tools
... available on turbo squid, the world's leading provider of digital 3d models for visualization, films, television, and games.