Thingiverse

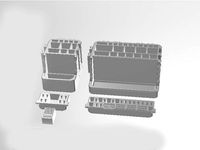
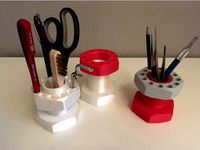
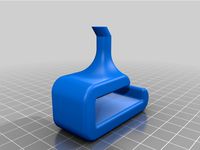
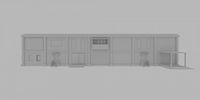
tool- and penholder - deskorganizer - modular - boxes by AzurOne
by Thingiverse
Last crawled date: 3 years ago
the holes / guides / tunnels are designed for cable ties.
for none needed holes = > i leave support
Printed with a Prusa Style 3DPrinter
I am printing nearly everything sucessfully in high definition
(layer height 0,05mm-0,2mm) with these types of filament:
White PLA Filament 1,75 mm:
3 spool pack (nicest price)1 spool pack
Black PLA Filament 1,75 mm:
3 spool pack (nicest price)1 spool pack
!!!NOW THIS IS SUPER HOT!!!
MECHANICAL HIGHLY DURABLE - NICEST SURFACES DUE TO TRANSPARENT NONE PIGMENTED PETG FILAMENT
TRANSPARENT PETG Filament1 spool pack
Print Settings:
Layer:
height:0,2
perimeters: 3
solid layers: top4 bottom4
Infill: 10%
Support:yes
Advanced:
extrusion width:
default: 0,45
first layer: 0,45
perimeter: 0,45
external perimeter: 0,45
infill: 0,4
solid infill: 0,7
top solid infill: 0,45
support material: 0,35
Infill perimeter overlap: 30%
Bridge Flow: 0,95
For support:
< Shirts, Hoodies, Stickers, Mugs >
PAYPALME
Thank you, have a nice day, n cya o/
Update:
added an inlays for the x1 and x2 frontpart to organize:
usb-sticks
sd-cards in several formats
usb-adapters
other stuff
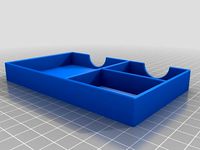
added a easy-to-print version of the things by simplifying the rails. https://www.thingiverse.com/thing:2924654
note: I still prefer to print the version with the complex rails - as its a nice benchmark for me o/
I always print these parts with 8-10% infill, how much i used for this print i'm not aware anymore.
The inlay was definitely an 8% infill print.
the numerous walls contribute to the stability of parts.
Print settings:
Filament:
PETG:
diameter 1.75mm
extrusion mulktiplier: 1 (depends on your filament)
density:1.29g/cm³ (depends on your filament)
cost: too much money/kg
temperature (°C)
extruder first layer: 230 other layers: 240 (depends on your filament)
bed: first layer:85 other layers: 90 (depends on your filament)
Layers and Perimeters:
layer height 0.2
perimeters 2
horizontal shells: solid layers: top 3, bottom 3
ensure vertical shell thickness: enabled
detect bridging perimeters: enabled
Infill:
8% Infill
fill pattern: grid
top/bottom fill pattern: rectilinear
combine infill every 1 layers
only infill where needed: disabled
(causes the infill to not get parallel to the perimeter lines and within this to get rarely connected/melted to the perimeters. please let this deactivated)
solid infill every: "0" layers
fill angle: 45°
solid infill threshold area: 0 mm²
bridging angle: 0°
only retract when crossing perimeters: disabled
infill before perimeters: disabled (i think if the perimeters are printed first and have time to cool down, they are building a smoother object surface)
skirt and brim
loops: 1
distance from object: 2mm
skirt height: 2 layer
minimum extrusion length: 4mm
brim width:0mm
Support Material:
generate support material: enabled (its only for the rails)
overhang threshold: 45°
enforce support for the first: "0" layers
raft layer: "0" layer
options for support material and raft
contact z distance: "0.2" (detachable)
patter: rectilinear
support sheath around the support: disabled
pattern spacing: 2 mm
pattern angle: 0°
interface layers: "2" layers
interface pattern spacing: 0.2 mm
interface loops: disabled
support on build plate only: enabled (so the support will only get generated for the rails, the print of the cable-tie-tunnels works great with bridging)
xy separation between an object and its suport: 0.4 mm
don't support bridges: enabled
synchronize with object layers: disabled
speed:
perimeters 45mm/s
small perimeters: 25mm/s
external perimeters:35mm/s
infill: 170mm/s
solid infill: 170mm/s
top solid infill: 50mm/s
support material: 50mm/s
support material interface:100%
bridges: 30mm/s
gap fill: 40mm/s
speed for non-print moves
travel: 180mm/s
modifiers
first layer speed: 30mm/s
acceleration control
perimeters 800mm/s²
infill: 1500mm/s²
bridge: 1000mm/s²
first layer: 1000mm/s²
default: 1000mm/s²
autospeed:
max print speed: 170mm/s
max volumetric speed: 0 mm³/s
max volumetric slope positive: 0 mm³s/s²
max volumetric slope negative: 0 mm³s/s²
Advanced:
default extrusion width: 0.45mm
first layer: 0.6mm (the first layer is on the printbed and with good calibration and configs it gets perfectly smooth - I print it with a wide layer so that it goes a little faster)
perimeters: 0.45 mm
external perimeters: 0.45 mm
infill: 0.4 mm (with this setting, my infill layer lines are still very stable)
solid infill: 0.7 mm (This does not affect the upper layer and the plains fill up well and quickly)
top solid infill: 0.45 mm (my config for a smooth surface)
support material: 0.35 mm
overlap:
infill/perimeter overlap: 30% (so that infill and perimeter are well glued together)
bridge flow ratio: 0.95
other
clip multi-part objects: enabled
elefant foot compensation: 0mm
xy size compensation: 0mm
resolution 0mm
for none needed holes = > i leave support
Printed with a Prusa Style 3DPrinter
I am printing nearly everything sucessfully in high definition
(layer height 0,05mm-0,2mm) with these types of filament:
White PLA Filament 1,75 mm:
3 spool pack (nicest price)1 spool pack
Black PLA Filament 1,75 mm:
3 spool pack (nicest price)1 spool pack
!!!NOW THIS IS SUPER HOT!!!
MECHANICAL HIGHLY DURABLE - NICEST SURFACES DUE TO TRANSPARENT NONE PIGMENTED PETG FILAMENT
TRANSPARENT PETG Filament1 spool pack
Print Settings:
Layer:
height:0,2
perimeters: 3
solid layers: top4 bottom4
Infill: 10%
Support:yes
Advanced:
extrusion width:
default: 0,45
first layer: 0,45
perimeter: 0,45
external perimeter: 0,45
infill: 0,4
solid infill: 0,7
top solid infill: 0,45
support material: 0,35
Infill perimeter overlap: 30%
Bridge Flow: 0,95
For support:
< Shirts, Hoodies, Stickers, Mugs >
PAYPALME
Thank you, have a nice day, n cya o/
Update:
added an inlays for the x1 and x2 frontpart to organize:
usb-sticks
sd-cards in several formats
usb-adapters
other stuff
added a easy-to-print version of the things by simplifying the rails. https://www.thingiverse.com/thing:2924654
note: I still prefer to print the version with the complex rails - as its a nice benchmark for me o/
I always print these parts with 8-10% infill, how much i used for this print i'm not aware anymore.
The inlay was definitely an 8% infill print.
the numerous walls contribute to the stability of parts.
Print settings:
Filament:
PETG:
diameter 1.75mm
extrusion mulktiplier: 1 (depends on your filament)
density:1.29g/cm³ (depends on your filament)
cost: too much money/kg
temperature (°C)
extruder first layer: 230 other layers: 240 (depends on your filament)
bed: first layer:85 other layers: 90 (depends on your filament)
Layers and Perimeters:
layer height 0.2
perimeters 2
horizontal shells: solid layers: top 3, bottom 3
ensure vertical shell thickness: enabled
detect bridging perimeters: enabled
Infill:
8% Infill
fill pattern: grid
top/bottom fill pattern: rectilinear
combine infill every 1 layers
only infill where needed: disabled
(causes the infill to not get parallel to the perimeter lines and within this to get rarely connected/melted to the perimeters. please let this deactivated)
solid infill every: "0" layers
fill angle: 45°
solid infill threshold area: 0 mm²
bridging angle: 0°
only retract when crossing perimeters: disabled
infill before perimeters: disabled (i think if the perimeters are printed first and have time to cool down, they are building a smoother object surface)
skirt and brim
loops: 1
distance from object: 2mm
skirt height: 2 layer
minimum extrusion length: 4mm
brim width:0mm
Support Material:
generate support material: enabled (its only for the rails)
overhang threshold: 45°
enforce support for the first: "0" layers
raft layer: "0" layer
options for support material and raft
contact z distance: "0.2" (detachable)
patter: rectilinear
support sheath around the support: disabled
pattern spacing: 2 mm
pattern angle: 0°
interface layers: "2" layers
interface pattern spacing: 0.2 mm
interface loops: disabled
support on build plate only: enabled (so the support will only get generated for the rails, the print of the cable-tie-tunnels works great with bridging)
xy separation between an object and its suport: 0.4 mm
don't support bridges: enabled
synchronize with object layers: disabled
speed:
perimeters 45mm/s
small perimeters: 25mm/s
external perimeters:35mm/s
infill: 170mm/s
solid infill: 170mm/s
top solid infill: 50mm/s
support material: 50mm/s
support material interface:100%
bridges: 30mm/s
gap fill: 40mm/s
speed for non-print moves
travel: 180mm/s
modifiers
first layer speed: 30mm/s
acceleration control
perimeters 800mm/s²
infill: 1500mm/s²
bridge: 1000mm/s²
first layer: 1000mm/s²
default: 1000mm/s²
autospeed:
max print speed: 170mm/s
max volumetric speed: 0 mm³/s
max volumetric slope positive: 0 mm³s/s²
max volumetric slope negative: 0 mm³s/s²
Advanced:
default extrusion width: 0.45mm
first layer: 0.6mm (the first layer is on the printbed and with good calibration and configs it gets perfectly smooth - I print it with a wide layer so that it goes a little faster)
perimeters: 0.45 mm
external perimeters: 0.45 mm
infill: 0.4 mm (with this setting, my infill layer lines are still very stable)
solid infill: 0.7 mm (This does not affect the upper layer and the plains fill up well and quickly)
top solid infill: 0.45 mm (my config for a smooth surface)
support material: 0.35 mm
overlap:
infill/perimeter overlap: 30% (so that infill and perimeter are well glued together)
bridge flow ratio: 0.95
other
clip multi-part objects: enabled
elefant foot compensation: 0mm
xy size compensation: 0mm
resolution 0mm
Similar models
thingiverse
free
tool- and penholder - deskorganizer - modular - boxes - easy to print version by AzurOne
...e flow ratio: 0.95
other
clip multi-part objects: enabled
elefant foot compensation: 0mm
xy size compensation: 0mm
resolution 0mm
thingiverse
free
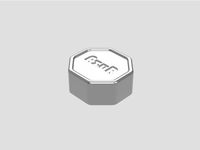
Grip Cap for ... Something by AzurOne
... 30%
bridge flow: 0,95
for support:
< shirts, hoodies, stickers, mugs >
paypalme
thank you, have a nice day, n cya o/
thingiverse
free

testtower with overhangs by AzurOne
... 30%
bridge flow: 0,95
for support:
< shirts, hoodies, stickers, mugs >
paypalme
thank you, have a nice day, n cya o/
thingiverse
free

calibration cube by AzurOne
... 30%
bridge flow: 0,95
for support:
< shirts, hoodies, stickers, mugs >
paypalme
thank you, have a nice day, n cya o/
thingiverse
free

e-step calibration by AzurOne
... 30%
bridge flow: 0,95
for support:
< shirts, hoodies, stickers, mugs >
paypalme
thank you, have a nice day, n cya o/
thingiverse
free

calibration tower by AzurOne
... 30%
bridge flow: 0,95
for support:
< shirts, hoodies, stickers, mugs >
paypalme
thank you, have a nice day, n cya o/
thingiverse
free

calibration cube - xyz by AzurOne
... 30%
bridge flow: 0,95
for support:
< shirts, hoodies, stickers, mugs >
paypalme
thank you, have a nice day, n cya o/
thingiverse
free

MOLLE - fast attachment clip by AzurOne
... 30%
bridge flow: 0,95
for support:
< shirts, hoodies, stickers, mugs >
paypalme
thank you, have a nice day, n cya o/
thingiverse
free

flashlight mounting part for #Bike Handy Mount by AzurOne
... 30%
bridge flow: 0,95
for support:
< shirts, hoodies, stickers, mugs >
paypalme
thank you, have a nice day, n cya o/
thingiverse
free

basket for 4 glasses - or for almost everything by AzurOne
... 30%
bridge flow: 0,95
for support:
< shirts, hoodies, stickers, mugs >
paypalme
thank you, have a nice day, n cya o/
Deskorganizer
thingiverse
free

DeskOrganizer by Nevitt
...deskorganizer by nevitt
thingiverse
modified desk organizer.
thingiverse
free

deskorganizer by DanielCamp
...deskorganizer by danielcamp
thingiverse
this is for the contest going on. it is a desk organizer.
thingiverse
free

deskOrganizer by Elward
...deskorganizer by elward
thingiverse
a desktop organizer for pens, pencils and so
thingiverse
free

Deskorganizer "twisted square" by Renngarage
...deskorganizer "twisted square" by renngarage
thingiverse
deskorganizer for business cards, pens, notes...
thingiverse
free

Deskorganizer V2 by seaspotter
...d the stl a bit from what i originaly designed because made 2 small mistakes, so these are fixed with the actual versin.
have fun
thingiverse
free

Penholder / Deskorganizer for Pencils / Screw and Wing Nut by maroth2
...rhülle 2
screw and nut with m50x4 tread. you can easy print without support structure. i used pla,
infill 15%, contour envelope 2
thingiverse
free
Penholder / Deskorganizer / Organizer for Pencils / Screw and Nut by maroth2
...hüllen 2
screw and nut with m50x4 tread. you can easy print without support structure. i used pla,
infill 15%, contour envelope 2
thingiverse
free
Post it Organizer by MaZ_T3
...post it organizer by maz_t3 thingiverse this is a deskorganizer i made for normal and small post-it, and also...
thingiverse
free

tool- and pen, -cil stand/holder - deskorganizer - simple by AzurOne
... 30%
bridge flow: 0,95
for support:
< shirts, hoodies, stickers, mugs >
paypalme
thank you, have a nice day, n cya o/
thingiverse
free

tool- and pen, -cil stand/holder - simple - deskorganizer by AzurOne
... 30%
bridge flow: 0,95
for support:
< shirts, hoodies, stickers, mugs >
paypalme
thank you, have a nice day, n cya o/
Azurone
thingiverse
free
Shower Cabin Hook by AzurOne
...shower cabin hook by azurone
thingiverse
shower cabin hook
thingiverse
free

shower-cabin-hook by AzurOne
...shower-cabin-hook by azurone
thingiverse
shower-cabin-hook
thingiverse
free

JD Bot - Torso by AzurOne
...jd bot - torso by azurone
thingiverse
jd bot - torso
thingiverse
free
Yamaha DTX Drums - Mount by AzurOne
...yamaha dtx drums - mount by azurone
thingiverse
yamaha dtx drums - mount
thingiverse
free

Mini Cam - Tripod Mount by AzurOne
...mini cam - tripod mount by azurone
thingiverse
mini cam - tripod mount
thingiverse
free
Drum Hardware - Tubular Frame - Shifted by AzurOne
...drum hardware - tubular frame - shifted by azurone
thingiverse
drum hardware - tubular frame - shifted
thingiverse
free
Monitor Ledge - Benq/Zowie XL 2546 by AzurOne
...monitor ledge - benq/zowie xl 2546 by azurone
thingiverse
monitor ledge - benq/zowie xl 2546
thingiverse
free

Drum Hardware - Tubular Frame - Shifted - fillets by AzurOne
...drum hardware - tubular frame - shifted - fillets by azurone
thingiverse
drum hardware - tubular frame - shifted - fillets
thingiverse
free

Yamaha DTX Drums - Mount - 15 deg slant by AzurOne
...yamaha dtx drums - mount - 15 deg slant by azurone
thingiverse
yamaha dtx drums - mount - 15 deg slant
thingiverse
free

wall mount - waterbed heater touch control - calesco by AzurOne
...wall mount - waterbed heater touch control - calesco by azurone
thingiverse
wall mount - waterbed heater touch control - calesco
Penholder
turbosquid
$30

penHolder
... available on turbo squid, the world's leading provider of digital 3d models for visualization, films, television, and games.
turbosquid
free

Penholder
... available on turbo squid, the world's leading provider of digital 3d models for visualization, films, television, and games.
turbosquid
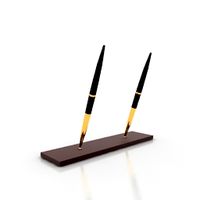
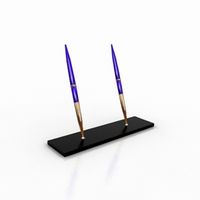
$39

Penholder With Pencils
... available on turbo squid, the world's leading provider of digital 3d models for visualization, films, television, and games.
3d_export
free

Download free Svin King penholder 3D Model
...penholder free
svin king penholder 3d model download free .c4d .max .obj .fbx .ma .lwo .3ds .3dm .stl hiropraktic 105576 3dexport
3d_ocean
$5
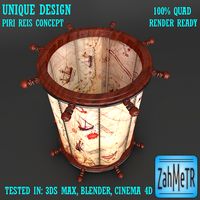
Penholder Concept Piri Reis
...created for a design competition about piri reis. all questions about my models and designs will be answered lightning fast. p...
3d_ocean
$5
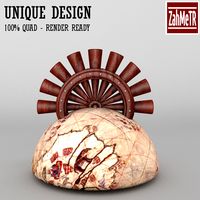
Penholder Concept Piri Reis 2
...created for a design competition about piri reis. all questions about my models and designs will be answered lightning fast. p...
3d_export
$29

mesh penholder
...count: 9<br>- xform: no<br>- boxtrick: yes<br>textures:<br>pbr metallic / roughnes textures 4096x4096 png
archive3d
free

Pen 3D Model
...pen 3d model archive3d pen penholder pen 1 - 3d model for interior 3d...
archive3d
free
Accessories 3D Model
...accessories 3d model archive3d pens penholder office accessories accessories - 3d model for interior 3d...
archive3d
free
Pen 3D Model
...pen 3d model archive3d pens penholder writing materials pen n160808 - 3d model (*.gsm+*.3ds) for...
Modular
3ddd
$1
MODULAR
...modular
3ddd
modular , врезной свет
modular потолочные светильники
3ddd
$1
Modular Spock
...modular spock
3ddd
modular
modular spock
3ddd
$1
MODULAR / Spock
...modular / spock
3ddd
modular
modular/spock
design_connected
$7
Modular
...modular
designconnected
emmemobili modular shelves and storage computer generated 3d model. designed by ferruccio laviani.
3ddd
$1
Modular spock
...modular spock
3ddd
modular
spock wall led
turbosquid
$25
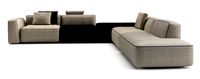
Modular sofa Angelo Cappellini Modular
...a angelo cappellini modular for download as max, fbx, and obj on turbosquid: 3d models for games, architecture, videos. (1570923)
turbosquid
$15
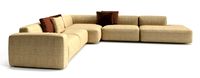
Modular sofa Angelo Cappellini Modular
...a angelo cappellini modular for download as max, fbx, and obj on turbosquid: 3d models for games, architecture, videos. (1570304)
3ddd
$1
Modular 2FLAT2C
...modular 2flat2c
3ddd
modular
modularhttp://www.supermodular.com/
3d_export
free
Modular walls
...modular walls
3dexport
modular walls for playing without materials and textures
3ddd
$1
Modular / Lighting Juliette
...modular / lighting juliette
3ddd
modular
modular lighting juliette
Tool
turbosquid
$21
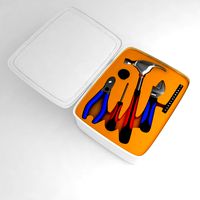
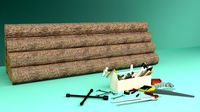
Tool box with tools
... available on turbo squid, the world's leading provider of digital 3d models for visualization, films, television, and games.
archibase_planet
free
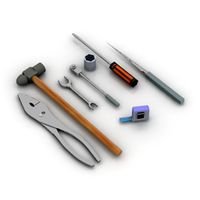
Tools
...tools
archibase planet
tools instruments implements
tools n070114 - 3d model (*.gsm+*.3ds+*.max) for interior 3d visualization.
3d_ocean
$12
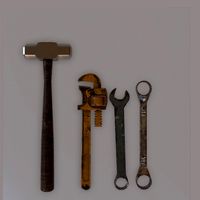
Tools
...tools
3docean
hammer metal old screw tools wrench
maya
turbosquid
$6

Tool Cart / Tool Box
...
royalty free 3d model tool cart / tool box for download as on turbosquid: 3d models for games, architecture, videos. (1241859)
3d_ocean
$15
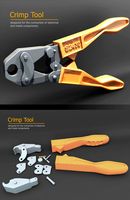
crimp tool
... tool copper cutter crimp crimp tool electrical electrical tools press tools pressing tool tools wire cutter
created in maya 2013
3d_ocean
$5

Tools
...tools
3docean
3d models paint tools work
3d,models,works,paint,art,create,working,
3d_export
free
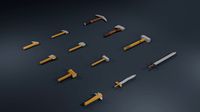
tools
...tools
3dexport
coldsteel
turbosquid
$15
Tools
...turbosquid
royalty free 3d model tools for download as blend on turbosquid: 3d models for games, architecture, videos. (1331352)
3ddd
$1
bar tool
...bar tool
3ddd
барный
bar tool
turbosquid
$35

tools
... available on turbo squid, the world's leading provider of digital 3d models for visualization, films, television, and games.
Boxes
archibase_planet
free

Box
...box
archibase planet
box carton cardboard box
box 2 - 3d model (*.3ds) for interior 3d visualization.
archibase_planet
free

Box
...box
archibase planet
carton cardboard box box
box 1 - 3d model (*.3ds) for interior 3d visualization.
3d_export
$6

box
...box
3dexport
box
3d_export
$5

Box
...box
3dexport
box
3d_export
$5

box
...box
3dexport
box
3d_export
$5

box
...box
3dexport
box
archibase_planet
free

Box
...box
archibase planet
box box for paper notebook pencil
box - 3d model (*.gsm+*.3ds) for interior 3d visualization.
archibase_planet
free

Box
...box
archibase planet
box carton cardboard box
box n170111 - 3d model (*.gsm+*.3ds) for interior 3d visualization.
archibase_planet
free

Box
...box
archibase planet
box carton cardboard box
box n050411 - 3d model (*.gsm+*.3ds) for interior 3d visualization.
archibase_planet
free

Boxes
...boxes
archibase planet
boxes box case bin
boxes n281213 - 3d model (*.gsm+*.3ds+*.max) for interior 3d visualization.