Thingiverse

Titan-Bowden-Extruder (A8, AM8, i3) by HardyP
by Thingiverse
Last crawled date: 3 years ago
Animation der Montage --> https://youtu.be/a3HzwQrNAPwExtruder bei der Arbeit --> https://youtu.be/aUU559Xew_A
Folgende Library werden verwendet:
Nut_Job.scad ---> Thingiverse 193647 - NUT JOB | Nut, Bolt, Washer and Threaded Rod Factory
Allgemein
Zwei Jahre lang habe ich den originalen Extruder des ANET A8 verwendet. Immer, wenn ich ihn mal wieder auseinanderbauen musste, dachte ich: "Da muss ich mal was anderes machen!" Besondere Probleme entstanden immer beim Wechsel von PETG auf PLA und umgekehrt.
Zunächst mal die Analyse meiner Anforderungen:
--> Ich drucke ausschließlich Mit PETG- und PLA-Filament, möchte aber auch gerne TPU-Filament verwenden.
--> Durch meinen AM8 ist die maximale Druckgeschwindigkeit auf 80mm/s begrenzt, mormalerweise drucke ich mit 60mm/s.
--> Ich drucke zZt. ausschliesslich mit einer 0.4mm Nozzle, für feinere Details würde ich aber auch gerne mit einer zB 0.2mm Nozzle drucken.
--> Da die Druckgeschwindigkeit limitiert ist, würde ich gerne für großvolumige Drucke ein Hotend mit Volcano verwenden.
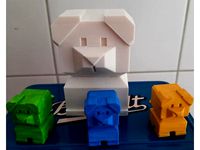
Als für mich optimale Lösung sehe ich in einem Bowden-Extruder, und die schnelle Tauschbarkeit unterschiedlicher Hotends an dem X-Carrier. Anfangs habe ich versucht die Hotends mit Magneten an dem X-Carrier zu arritieren, das hat sich bei meinen Versuchen allerdings nicht bewährt. Nun schraube ich das entsprechende Hotend ganz simpel mit vier M3-Schrauben an dem X-Carrier fest, wobei dort die entsprechenden Muttern fest eingelegt sind.
Dieses Verfahren hat sich inzwischen bei mir sehr gut bewährt, ein Wechsel dauert etwa 5 Minuten, inklusive Filament-Wechsel. Vor dem Wechsel eines Hotends führe ich einen Z-Home in der Mitte des Druckbettes durch. Dadurch wird das neue Hotend in genau der gleichen Höhe wie das alte montiert, und man kann anschließend ohne eine Justiereung eine Druck mit dem gewechselten Hotend beginnen.
Als Hotends habe ich das E3D-Lite6 ausgewählt:
--> Es ist erheblich preisgünstiger als ein Vollmetall-Hotend.
--> Da das PTFE durch den Kühlkörper bis an die Nozzle reicht, gibt es weniger Probleme mit PLA im Hotend.
--> Der Nachteil der geringeren Schmelzleistung, wirkt sich bei der maximalen Druckgeschwindigkeit meines AM8 nicht nachteilig aus. 80mm/s bei 0.2mm Schichthöhe können meine Lite6 alle.
Als Extruder habe ich den E3D-Titan ausgewählt:
--> Preislich noch tragbar
--> Mit Pancake-Steppermotor sehr leicht (Direct-Extruder für TPU)
--> Ich wollte gerne in der Systemfamilie von E3D bleiben
Auf der RAMPS 1.4 meines AM8 habe ich 2 Steppertreiber für Extruder, davon habe ich einen für den Bowden-Extruder verwendet, die Anschlüsse des anderen sind zum X-Carrier, für die Verwendung als Direct-Extruder, geführt. Außerdem sind sowohl zum Bowden-Extruder als auch zum Direct-Extruder Signalleitungen für einen RunOut-Sensor geführt.
Meine derzeitige Anzahl von Wechsel-Hotends:
--> 0.4mm Nozzle für PETG (Bowden)
--> 0.4mm Nozzle für PLA (Bowden)
--> 0.25mm Nozzle für PLA (Bowden)
--> 0.4mm Nozzle für TPU (Direct)
--> 0.6mm Volcano Nozzle für PLA (Bowden) - in Planung
Da dieses Projekt einen recht großen Umfang hat, habe ich es in 5 Veröffentlicheungen aufgeteilt:
--> Titan-Bowden-Extruder (A8, AM8, i3)
--> X-Carrier (A8, AM8, i3)
--> Lite6-Bowden-Hotend
--> Lite6-Titan-Direct-Extruder
--> RunOut-Sensor
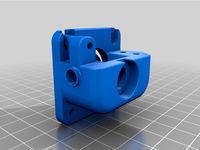
Titan-Bowden-Extruder (A8, AM8, i3)
Ich habe den Bowden-Extruder auf der rechten Seite der Z-Achse montiert. Da auf der linken Seite der Z-Achse der Steppermotor für die X-Achse montiert ist, und das Gewicht von X-Steppermotor und Bowden-Extruder in etwa gleich ist, haben nun beide Seiten der Z-Achse die gleiche Belastung. Das hat bei mir zu einem viel besseren Gleichlauf der Z-Achse geführt.
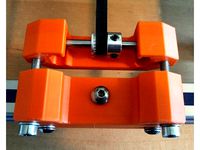
Der Bowden-Extruder wird auf die Wellen der X-Achse geklemmt. Damit dabei nicht der Gleichlauf des X-Carrier gestört wird, ist die untere Klemmung des Bowden-Extruder-Trägers als Langloch ausgeführt. Bei der Montage sollte erst die Klemmung an der oberen X-Welle erfolgen, danach die Klemmung an der unteren X-Welle. Auf jeden Fall ist der Gleichlauf des X-Carrier zu überprüfen, wird auch nur die geringste Behinderung festgestellt, muss eine Korrektur erfolgen. Auf jeden Fall muss bei der Montage mit Feingefühl vorgegangen werden.
Nach der Montage des Trägers werden Steppermotor und Titan-Extruder angeschraubt.
Ich habe den 0.9°-Steppermotor mit 40mm Länge von E3D verbaut. Für den Titan Extruder benötigt man einen 1.75mm Bowden-Adapter. Außerdem ist ein E3D-Collet erforderlich, mit dem der PTFE-Bowdenschlauch in dem Bowden-Adapter festgeklemmt wird. Alles ist als Set von E3D erhältlich.
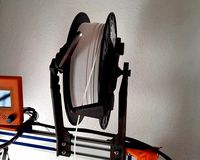
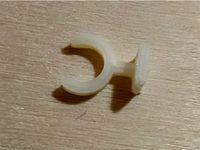
Bei meinem AM8 ist die Halterung der Filament-Spule oben am Drucker montiert. Da in den Bowden-Extruder das Filament aber von unten eingeführt wird, muss es um 180° umgelenkt werden. Um das zu erreichen, kann ein Filament-Guide an dem Extruder-Träger montiert werden. Dabei wird das Filament-Guide in zwei Befestigungslöcher des Trägers verklemmt. Bei den Klemmungen des PTFE-Bowdenschlauch am Filament-Guide kann man zwischen drei Versionen wählen: P4M6-PushFit, E3D-Collet oder 6mm-Collet. Ich benutze gerne die 6mm-Collet, da bei deren Verwendung der PTFE-Bowdenschlauch ohne Unterbrechnung durch das Filament-Guide geführt wird. Bei der Verwendung von PushFit wird der PTFE-Bowdenschlauch 2mal unterbrochen. Hier muss ein kurzes Stück PTFE zwischen die beiden PushFit vor der Verschraubung eingesetzt werden.
Bei einem Anet A8 oder einem AM8 (Durchmesser der X-Wellen = 8mm, Abstand der X-Wellen = 46mm) können folgende beigefügte STL-Dateien direkt verwendet werden:
--> hpExtruder1.stl
--> hpExtruder2.stl
--> hpFilamentGuideCollet6mm.stl oder hpFilamentGuideColletE3D.stl oder hpFilamentGuidePushFit.stl
Für einen anderen Durchmesser oder Abstand der X-Wellen müssen andere STL-Dateien mit der beigefügten OpenSCAD-Datei (hpTitanBowden.scad) erzeugt werden. Beide Werte können dort in Grenzen verändert werden.
Ich verwende Marlin 2 auf meinem AM8, folgende Werte habe ich dort für den Bowden-Extruder eingetragen:
Configuration.h
define EXTRUDE_MAXLENGTH 700
define DEFAULT_AXIS_STEPS_PER_UNIT { 100, 100, 400, 790 }
define DEFAULT_MAX_FEEDRATE { 250, 250, 6, 30 }
define DEFAULT_MAX_ACCELERATION { 3000, 3000, 100, 10000 }
Configuration_adv.h
ADVANCED_PAUSE_FEATURE
define PAUSE_PARK_RETRACT_FEEDRATE 30
define PAUSE_PARK_RETRACT_LENGTH 2
define FILAMENT_CHANGE_UNLOAD_FEEDRATE 15
define FILAMENT_CHANGE_UNLOAD_ACCEL 25
define FILAMENT_CHANGE_UNLOAD_LENGTH 600
define FILAMENT_CHANGE_SLOW_LOAD_FEEDRATE 6
define FILAMENT_CHANGE_SLOW_LOAD_LENGTH 60
define FILAMENT_CHANGE_FAST_LOAD_FEEDRATE 15
define FILAMENT_CHANGE_FAST_LOAD_ACCEL 25
define FILAMENT_CHANGE_FAST_LOAD_LENGTH 530
define ADVANCED_PAUSE_CONTINUOUS_PURGE
define ADVANCED_PAUSE_PURGE_FEEDRATE 6
define ADVANCED_PAUSE_PURGE_LENGTH 40
define ADVANCED_PAUSE_RESUME_PRIME 0
define FILAMENT_UNLOAD_PURGE_DELAY 5000
define FILAMENT_UNLOAD_PURGE_LENGTH 8
define FILAMENT_UNLOAD_PURGE_FEEDRATE 25
define PAUSE_PARK_NOZZLE_TIMEOUT 420
define FILAMENT_CHANGE_ALERT_BEEPS 10
define PAUSE_PARK_NO_STEPPER_TIMEOUT
define FILAMENT_LOAD_UNLOAD_GCODES
define FILAMENT_UNLOAD_ALL_EXTRUDERS
STEPS_PER_UNIT muss auf jeden Fall per Kalibration ermittelt werden, es gibt dazu sehr gute Anleitungen im Netz.
Mit diesen Einstellungen funktioniert bei mir das Laden und Entladen des Filaments sehr gut.
Für PLA habe ich einen Retract von 2mm bei 30mm/s , bei PETG habe ich 4mm bei 30mm/s eingestellt.
Bei einem gelungen Druck würde ich mich über einen Like sehr freuen!
Gruß Hardy
Animation of assembly --> https://youtu.be/a3HzwQrNAPwExtruder at work --> https://youtu.be/aUU559Xew_A
The following library is used:
Nut_Job.scad ---> Thingiverse 193647 - NUT JOB | Nut, Bolt, Washer and Threaded Rod Factory
General
For two years I used the original extruder of the ANET A8. Every time I had to disassemble it, I thought, "I've got to do something different with that!" Particular problems always arose when switching from PETG to PLA and TPU.
First, let's analyze my requirements:
--> I print exclusively with PETG and PLA filament, but would also like to use TPU filament.
--> Due to my AM8, the maximum print speed is limited to 80mm/s, normally I print at 60mm/s.
--> I currently print exclusively with a 0.4mm nozzle, but for finer details I would also like to print with a 0.2mm nozzle.
--> Since the print speed is limited, I would like to use a hotend with Volcano for large volume prints.
For me, the optimal solution is a Bowden extruder, and the quick exchangeability of different hotends on the X-Carrier. At the beginning I tried to arrange the hotends with magnets on the X-Carrier, but this did not prove successful in my tests. Now I simply screw the corresponding hotend to the X-carrier with four M3 screws, where the corresponding nuts are firmly inserted.
This procedure has proven itself very well in the meantime, a change takes about 5 minutes, including filament change. Before changing a hotend, I perform a Z-Home in the center of the print bed. This mounts the new hotend at exactly the same height as the old one, and you can then start a print with the changed hotend without an adjustment.
The hotend I chose was the E3D-Lite6:
--> It is considerably less expensive than a full metal hotend.
--> Since the PTFE extends through the heat sink to the nozzle, there are fewer problems with PLA in the hotend.
--> The disadvantage of the lower melt rate, does not have a negative effect on the maximum print speed of my AM8. My Lite6 can all do 80mm/s at 0.2mm layer height.
As extruder I have chosen the E3D-Titan:
--> Still affordable in price
--> Very light with pancake stepper motor (direct extruder for TPU)
--> I liked to stay in the system family of E3D
On the RAMPS 1.4 of my AM8 I have 2 stepper drivers for extruders, of which I used one for the Bowden extruder, the connections of the other are to the X-carrier, for use as a direct extruder. Also, signal lines for a RunOut sensor are routed to both the Bowden extruder and the Direct extruder.
My current number of interchangeable hotends:
--> 0.4mm Nozzle for PETG (Bowden)
--> 0.4mm Nozzle for PLA (Bowden)
--> 0.25mm Nozzle for PLA (Bowden)
--> 0.4mm Nozzle for TPU (Direct)
--> 0.6mm Volcano Nozzle for PLA (Bowden) - in planning
Since this project has quite a large scope, I have split it into 5 releases:
--> titan bowden extruder (A8, AM8, i3)
--> X-Carrier (A8, AM8, i3)
--> lite6-bowden hot end
--> lite6 titan direct extruder
--> RunOut sensor
Bowden Extruder (A8, AM8, i3)
I mounted the Bowden extruder on the right side of the Z-axis. Since the left side of the Z-axis has the stepper motor for the X-axis mounted on it, and the weight of the X-stepper motor and Bowden extruder are about the same, both sides of the Z-axis now have the same load. This has resulted in much better Z-axis synchronization for me.
The Bowden extruder is clamped onto the shafts of the X-axis. To avoid disturbing the synchronization of the X-carrier, the lower clamping of the Bowden extruder carrier is designed as an oblong hole. When mounting, the clamping on the upper X-shaft should be done first, followed by the clamping on the lower X-shaft. In any case, the synchronization of the X-carrier must be checked; if even the slightest obstruction is detected, a correction must be made. In any case, the assembly must be carried out with sensitivity.
After mounting the carrier, the stepper motor and titan extruder are screwed on.
I used the 0.9° stepper motor with 40mm length from E3D. For the titan extruder you need a 1.75mm Bowden adapter. You also need an E3D collet to clamp the PTFE Bowden tube into the Bowden adapter. Everything is available as a kit from E3D.
On my AM8, the filament spool holder is mounted at the top of the printer. However, since the filament is fed into the Bowden extruder from below, it must be deflected 180°. To achieve this, a filament guide can be mounted on the extruder support. The filament guide is clamped in two mounting holes of the carrier. There is a choice of three versions for clamping the PTFE bowden tube to the filament guide: P4M6-PushFit, E3D-Collet or 6mm-Collet. I like to use the 6mm-Collet because when using it, the PTFE bowden tube is guided through the filament guide without interruption. When using PushFit, the PTFE bowden tube is interrupted 2 times. In this case, a short piece of PTFE must be inserted between the two PushFit before screwing.
For an Anet A8 or an AM8 (diameter of the X-shafts = 8mm, distance of the X-shafts = 46mm) the following attached STL files can be used directly:
--> hpExtruder1.stl
--> hpExtruder2.stl
--> hpFilamentGuideCollet6mm.stl or hpFilamentGuideColletE3D.stl or hpFilamentGuidePushFit.stl
For a different diameter or distance of the X-waves, other STL files have to be created with the attached OpenSCAD file (hpTitanBowden.scad). Both values can be changed there within limits.
I use Marlin 2 on my AM8, the following values I entered there for the Bowden extruder:
Configuration.h
define EXTRUDE_MAXLENGTH 700
define DEFAULT_AXIS_STEPS_PER_UNIT { 100, 100, 400, 790 }
define DEFAULT_MAX_FEEDRATE { 250, 250, 6, 30 }
define DEFAULT_MAX_ACCELERATION { 3000, 3000, 100, 10000 }
Configuration_adv.h
ADVANCED_PAUSE_FEATURE
define PAUSE_PARK_RETRACT_FEEDRATE 30
define PAUSE_PARK_RETRACT_LENGTH 2
define FILAMENT_CHANGE_UNLOAD_FEEDRATE 15
define FILAMENT_CHANGE_UNLOAD_ACCEL 25
define FILAMENT_CHANGE_UNLOAD_LENGTH 600
define FILAMENT_CHANGE_SLOW_LOAD_FEEDRATE 6
define FILAMENT_CHANGE_SLOW_LOAD_LENGTH 60
define FILAMENT_CHANGE_FAST_LOAD_FEEDRATE 15
define FILAMENT_CHANGE_FAST_LOAD_ACCEL 25
define FILAMENT_CHANGE_FAST_LOAD_LENGTH 530
define ADVANCED_PAUSE_CONTINUOUS_PURGE
define ADVANCED_PAUSE_PURGE_FEEDRATE 6
define ADVANCED_PAUSE_PURGE_LENGTH 40
define ADVANCED_PAUSE_RESUME_PRIME 0
define FILAMENT_UNLOAD_PURGE_DELAY 5000
define FILAMENT_UNLOAD_PURGE_LENGTH 8
define FILAMENT_UNLOAD_PURGE_FEEDRATE 25
define PAUSE_PARK_NOZZLE_TIMEOUT 420
define FILAMENT_CHANGE_ALERT_BEEPS 10
define PAUSE_PARK_NO_STEPPER_TIMEOUT
define FILAMENT_LOAD_UNLOAD_GCODES
define FILAMENT_UNLOAD_ALL_EXTRUDERS
STEPS_PER_UNIT must be determined in any case by calibration, there are very good instructions on the net.
With these settings, the loading and unloading of the filament works very well for me.
For PLA I have a retract of 2mm at 30mm/s , for PETG I have set 4mm at 30mm/s .
In case of a successful print I would be very happy about a Like!
Greetings Hardy
Folgende Library werden verwendet:
Nut_Job.scad ---> Thingiverse 193647 - NUT JOB | Nut, Bolt, Washer and Threaded Rod Factory
Allgemein
Zwei Jahre lang habe ich den originalen Extruder des ANET A8 verwendet. Immer, wenn ich ihn mal wieder auseinanderbauen musste, dachte ich: "Da muss ich mal was anderes machen!" Besondere Probleme entstanden immer beim Wechsel von PETG auf PLA und umgekehrt.
Zunächst mal die Analyse meiner Anforderungen:
--> Ich drucke ausschließlich Mit PETG- und PLA-Filament, möchte aber auch gerne TPU-Filament verwenden.
--> Durch meinen AM8 ist die maximale Druckgeschwindigkeit auf 80mm/s begrenzt, mormalerweise drucke ich mit 60mm/s.
--> Ich drucke zZt. ausschliesslich mit einer 0.4mm Nozzle, für feinere Details würde ich aber auch gerne mit einer zB 0.2mm Nozzle drucken.
--> Da die Druckgeschwindigkeit limitiert ist, würde ich gerne für großvolumige Drucke ein Hotend mit Volcano verwenden.
Als für mich optimale Lösung sehe ich in einem Bowden-Extruder, und die schnelle Tauschbarkeit unterschiedlicher Hotends an dem X-Carrier. Anfangs habe ich versucht die Hotends mit Magneten an dem X-Carrier zu arritieren, das hat sich bei meinen Versuchen allerdings nicht bewährt. Nun schraube ich das entsprechende Hotend ganz simpel mit vier M3-Schrauben an dem X-Carrier fest, wobei dort die entsprechenden Muttern fest eingelegt sind.
Dieses Verfahren hat sich inzwischen bei mir sehr gut bewährt, ein Wechsel dauert etwa 5 Minuten, inklusive Filament-Wechsel. Vor dem Wechsel eines Hotends führe ich einen Z-Home in der Mitte des Druckbettes durch. Dadurch wird das neue Hotend in genau der gleichen Höhe wie das alte montiert, und man kann anschließend ohne eine Justiereung eine Druck mit dem gewechselten Hotend beginnen.
Als Hotends habe ich das E3D-Lite6 ausgewählt:
--> Es ist erheblich preisgünstiger als ein Vollmetall-Hotend.
--> Da das PTFE durch den Kühlkörper bis an die Nozzle reicht, gibt es weniger Probleme mit PLA im Hotend.
--> Der Nachteil der geringeren Schmelzleistung, wirkt sich bei der maximalen Druckgeschwindigkeit meines AM8 nicht nachteilig aus. 80mm/s bei 0.2mm Schichthöhe können meine Lite6 alle.
Als Extruder habe ich den E3D-Titan ausgewählt:
--> Preislich noch tragbar
--> Mit Pancake-Steppermotor sehr leicht (Direct-Extruder für TPU)
--> Ich wollte gerne in der Systemfamilie von E3D bleiben
Auf der RAMPS 1.4 meines AM8 habe ich 2 Steppertreiber für Extruder, davon habe ich einen für den Bowden-Extruder verwendet, die Anschlüsse des anderen sind zum X-Carrier, für die Verwendung als Direct-Extruder, geführt. Außerdem sind sowohl zum Bowden-Extruder als auch zum Direct-Extruder Signalleitungen für einen RunOut-Sensor geführt.
Meine derzeitige Anzahl von Wechsel-Hotends:
--> 0.4mm Nozzle für PETG (Bowden)
--> 0.4mm Nozzle für PLA (Bowden)
--> 0.25mm Nozzle für PLA (Bowden)
--> 0.4mm Nozzle für TPU (Direct)
--> 0.6mm Volcano Nozzle für PLA (Bowden) - in Planung
Da dieses Projekt einen recht großen Umfang hat, habe ich es in 5 Veröffentlicheungen aufgeteilt:
--> Titan-Bowden-Extruder (A8, AM8, i3)
--> X-Carrier (A8, AM8, i3)
--> Lite6-Bowden-Hotend
--> Lite6-Titan-Direct-Extruder
--> RunOut-Sensor
Titan-Bowden-Extruder (A8, AM8, i3)
Ich habe den Bowden-Extruder auf der rechten Seite der Z-Achse montiert. Da auf der linken Seite der Z-Achse der Steppermotor für die X-Achse montiert ist, und das Gewicht von X-Steppermotor und Bowden-Extruder in etwa gleich ist, haben nun beide Seiten der Z-Achse die gleiche Belastung. Das hat bei mir zu einem viel besseren Gleichlauf der Z-Achse geführt.
Der Bowden-Extruder wird auf die Wellen der X-Achse geklemmt. Damit dabei nicht der Gleichlauf des X-Carrier gestört wird, ist die untere Klemmung des Bowden-Extruder-Trägers als Langloch ausgeführt. Bei der Montage sollte erst die Klemmung an der oberen X-Welle erfolgen, danach die Klemmung an der unteren X-Welle. Auf jeden Fall ist der Gleichlauf des X-Carrier zu überprüfen, wird auch nur die geringste Behinderung festgestellt, muss eine Korrektur erfolgen. Auf jeden Fall muss bei der Montage mit Feingefühl vorgegangen werden.
Nach der Montage des Trägers werden Steppermotor und Titan-Extruder angeschraubt.
Ich habe den 0.9°-Steppermotor mit 40mm Länge von E3D verbaut. Für den Titan Extruder benötigt man einen 1.75mm Bowden-Adapter. Außerdem ist ein E3D-Collet erforderlich, mit dem der PTFE-Bowdenschlauch in dem Bowden-Adapter festgeklemmt wird. Alles ist als Set von E3D erhältlich.
Bei meinem AM8 ist die Halterung der Filament-Spule oben am Drucker montiert. Da in den Bowden-Extruder das Filament aber von unten eingeführt wird, muss es um 180° umgelenkt werden. Um das zu erreichen, kann ein Filament-Guide an dem Extruder-Träger montiert werden. Dabei wird das Filament-Guide in zwei Befestigungslöcher des Trägers verklemmt. Bei den Klemmungen des PTFE-Bowdenschlauch am Filament-Guide kann man zwischen drei Versionen wählen: P4M6-PushFit, E3D-Collet oder 6mm-Collet. Ich benutze gerne die 6mm-Collet, da bei deren Verwendung der PTFE-Bowdenschlauch ohne Unterbrechnung durch das Filament-Guide geführt wird. Bei der Verwendung von PushFit wird der PTFE-Bowdenschlauch 2mal unterbrochen. Hier muss ein kurzes Stück PTFE zwischen die beiden PushFit vor der Verschraubung eingesetzt werden.
Bei einem Anet A8 oder einem AM8 (Durchmesser der X-Wellen = 8mm, Abstand der X-Wellen = 46mm) können folgende beigefügte STL-Dateien direkt verwendet werden:
--> hpExtruder1.stl
--> hpExtruder2.stl
--> hpFilamentGuideCollet6mm.stl oder hpFilamentGuideColletE3D.stl oder hpFilamentGuidePushFit.stl
Für einen anderen Durchmesser oder Abstand der X-Wellen müssen andere STL-Dateien mit der beigefügten OpenSCAD-Datei (hpTitanBowden.scad) erzeugt werden. Beide Werte können dort in Grenzen verändert werden.
Ich verwende Marlin 2 auf meinem AM8, folgende Werte habe ich dort für den Bowden-Extruder eingetragen:
Configuration.h
define EXTRUDE_MAXLENGTH 700
define DEFAULT_AXIS_STEPS_PER_UNIT { 100, 100, 400, 790 }
define DEFAULT_MAX_FEEDRATE { 250, 250, 6, 30 }
define DEFAULT_MAX_ACCELERATION { 3000, 3000, 100, 10000 }
Configuration_adv.h
ADVANCED_PAUSE_FEATURE
define PAUSE_PARK_RETRACT_FEEDRATE 30
define PAUSE_PARK_RETRACT_LENGTH 2
define FILAMENT_CHANGE_UNLOAD_FEEDRATE 15
define FILAMENT_CHANGE_UNLOAD_ACCEL 25
define FILAMENT_CHANGE_UNLOAD_LENGTH 600
define FILAMENT_CHANGE_SLOW_LOAD_FEEDRATE 6
define FILAMENT_CHANGE_SLOW_LOAD_LENGTH 60
define FILAMENT_CHANGE_FAST_LOAD_FEEDRATE 15
define FILAMENT_CHANGE_FAST_LOAD_ACCEL 25
define FILAMENT_CHANGE_FAST_LOAD_LENGTH 530
define ADVANCED_PAUSE_CONTINUOUS_PURGE
define ADVANCED_PAUSE_PURGE_FEEDRATE 6
define ADVANCED_PAUSE_PURGE_LENGTH 40
define ADVANCED_PAUSE_RESUME_PRIME 0
define FILAMENT_UNLOAD_PURGE_DELAY 5000
define FILAMENT_UNLOAD_PURGE_LENGTH 8
define FILAMENT_UNLOAD_PURGE_FEEDRATE 25
define PAUSE_PARK_NOZZLE_TIMEOUT 420
define FILAMENT_CHANGE_ALERT_BEEPS 10
define PAUSE_PARK_NO_STEPPER_TIMEOUT
define FILAMENT_LOAD_UNLOAD_GCODES
define FILAMENT_UNLOAD_ALL_EXTRUDERS
STEPS_PER_UNIT muss auf jeden Fall per Kalibration ermittelt werden, es gibt dazu sehr gute Anleitungen im Netz.
Mit diesen Einstellungen funktioniert bei mir das Laden und Entladen des Filaments sehr gut.
Für PLA habe ich einen Retract von 2mm bei 30mm/s , bei PETG habe ich 4mm bei 30mm/s eingestellt.
Bei einem gelungen Druck würde ich mich über einen Like sehr freuen!
Gruß Hardy
Animation of assembly --> https://youtu.be/a3HzwQrNAPwExtruder at work --> https://youtu.be/aUU559Xew_A
The following library is used:
Nut_Job.scad ---> Thingiverse 193647 - NUT JOB | Nut, Bolt, Washer and Threaded Rod Factory
General
For two years I used the original extruder of the ANET A8. Every time I had to disassemble it, I thought, "I've got to do something different with that!" Particular problems always arose when switching from PETG to PLA and TPU.
First, let's analyze my requirements:
--> I print exclusively with PETG and PLA filament, but would also like to use TPU filament.
--> Due to my AM8, the maximum print speed is limited to 80mm/s, normally I print at 60mm/s.
--> I currently print exclusively with a 0.4mm nozzle, but for finer details I would also like to print with a 0.2mm nozzle.
--> Since the print speed is limited, I would like to use a hotend with Volcano for large volume prints.
For me, the optimal solution is a Bowden extruder, and the quick exchangeability of different hotends on the X-Carrier. At the beginning I tried to arrange the hotends with magnets on the X-Carrier, but this did not prove successful in my tests. Now I simply screw the corresponding hotend to the X-carrier with four M3 screws, where the corresponding nuts are firmly inserted.
This procedure has proven itself very well in the meantime, a change takes about 5 minutes, including filament change. Before changing a hotend, I perform a Z-Home in the center of the print bed. This mounts the new hotend at exactly the same height as the old one, and you can then start a print with the changed hotend without an adjustment.
The hotend I chose was the E3D-Lite6:
--> It is considerably less expensive than a full metal hotend.
--> Since the PTFE extends through the heat sink to the nozzle, there are fewer problems with PLA in the hotend.
--> The disadvantage of the lower melt rate, does not have a negative effect on the maximum print speed of my AM8. My Lite6 can all do 80mm/s at 0.2mm layer height.
As extruder I have chosen the E3D-Titan:
--> Still affordable in price
--> Very light with pancake stepper motor (direct extruder for TPU)
--> I liked to stay in the system family of E3D
On the RAMPS 1.4 of my AM8 I have 2 stepper drivers for extruders, of which I used one for the Bowden extruder, the connections of the other are to the X-carrier, for use as a direct extruder. Also, signal lines for a RunOut sensor are routed to both the Bowden extruder and the Direct extruder.
My current number of interchangeable hotends:
--> 0.4mm Nozzle for PETG (Bowden)
--> 0.4mm Nozzle for PLA (Bowden)
--> 0.25mm Nozzle for PLA (Bowden)
--> 0.4mm Nozzle for TPU (Direct)
--> 0.6mm Volcano Nozzle for PLA (Bowden) - in planning
Since this project has quite a large scope, I have split it into 5 releases:
--> titan bowden extruder (A8, AM8, i3)
--> X-Carrier (A8, AM8, i3)
--> lite6-bowden hot end
--> lite6 titan direct extruder
--> RunOut sensor
Bowden Extruder (A8, AM8, i3)
I mounted the Bowden extruder on the right side of the Z-axis. Since the left side of the Z-axis has the stepper motor for the X-axis mounted on it, and the weight of the X-stepper motor and Bowden extruder are about the same, both sides of the Z-axis now have the same load. This has resulted in much better Z-axis synchronization for me.
The Bowden extruder is clamped onto the shafts of the X-axis. To avoid disturbing the synchronization of the X-carrier, the lower clamping of the Bowden extruder carrier is designed as an oblong hole. When mounting, the clamping on the upper X-shaft should be done first, followed by the clamping on the lower X-shaft. In any case, the synchronization of the X-carrier must be checked; if even the slightest obstruction is detected, a correction must be made. In any case, the assembly must be carried out with sensitivity.
After mounting the carrier, the stepper motor and titan extruder are screwed on.
I used the 0.9° stepper motor with 40mm length from E3D. For the titan extruder you need a 1.75mm Bowden adapter. You also need an E3D collet to clamp the PTFE Bowden tube into the Bowden adapter. Everything is available as a kit from E3D.
On my AM8, the filament spool holder is mounted at the top of the printer. However, since the filament is fed into the Bowden extruder from below, it must be deflected 180°. To achieve this, a filament guide can be mounted on the extruder support. The filament guide is clamped in two mounting holes of the carrier. There is a choice of three versions for clamping the PTFE bowden tube to the filament guide: P4M6-PushFit, E3D-Collet or 6mm-Collet. I like to use the 6mm-Collet because when using it, the PTFE bowden tube is guided through the filament guide without interruption. When using PushFit, the PTFE bowden tube is interrupted 2 times. In this case, a short piece of PTFE must be inserted between the two PushFit before screwing.
For an Anet A8 or an AM8 (diameter of the X-shafts = 8mm, distance of the X-shafts = 46mm) the following attached STL files can be used directly:
--> hpExtruder1.stl
--> hpExtruder2.stl
--> hpFilamentGuideCollet6mm.stl or hpFilamentGuideColletE3D.stl or hpFilamentGuidePushFit.stl
For a different diameter or distance of the X-waves, other STL files have to be created with the attached OpenSCAD file (hpTitanBowden.scad). Both values can be changed there within limits.
I use Marlin 2 on my AM8, the following values I entered there for the Bowden extruder:
Configuration.h
define EXTRUDE_MAXLENGTH 700
define DEFAULT_AXIS_STEPS_PER_UNIT { 100, 100, 400, 790 }
define DEFAULT_MAX_FEEDRATE { 250, 250, 6, 30 }
define DEFAULT_MAX_ACCELERATION { 3000, 3000, 100, 10000 }
Configuration_adv.h
ADVANCED_PAUSE_FEATURE
define PAUSE_PARK_RETRACT_FEEDRATE 30
define PAUSE_PARK_RETRACT_LENGTH 2
define FILAMENT_CHANGE_UNLOAD_FEEDRATE 15
define FILAMENT_CHANGE_UNLOAD_ACCEL 25
define FILAMENT_CHANGE_UNLOAD_LENGTH 600
define FILAMENT_CHANGE_SLOW_LOAD_FEEDRATE 6
define FILAMENT_CHANGE_SLOW_LOAD_LENGTH 60
define FILAMENT_CHANGE_FAST_LOAD_FEEDRATE 15
define FILAMENT_CHANGE_FAST_LOAD_ACCEL 25
define FILAMENT_CHANGE_FAST_LOAD_LENGTH 530
define ADVANCED_PAUSE_CONTINUOUS_PURGE
define ADVANCED_PAUSE_PURGE_FEEDRATE 6
define ADVANCED_PAUSE_PURGE_LENGTH 40
define ADVANCED_PAUSE_RESUME_PRIME 0
define FILAMENT_UNLOAD_PURGE_DELAY 5000
define FILAMENT_UNLOAD_PURGE_LENGTH 8
define FILAMENT_UNLOAD_PURGE_FEEDRATE 25
define PAUSE_PARK_NOZZLE_TIMEOUT 420
define FILAMENT_CHANGE_ALERT_BEEPS 10
define PAUSE_PARK_NO_STEPPER_TIMEOUT
define FILAMENT_LOAD_UNLOAD_GCODES
define FILAMENT_UNLOAD_ALL_EXTRUDERS
STEPS_PER_UNIT must be determined in any case by calibration, there are very good instructions on the net.
With these settings, the loading and unloading of the filament works very well for me.
For PLA I have a retract of 2mm at 30mm/s , for PETG I have set 4mm at 30mm/s .
In case of a successful print I would be very happy about a Like!
Greetings Hardy
Similar models
thingiverse
free

Auflagen, Schutz für Spannzwingen by Modinox
... hält ganz gut und der reiniger löst das pla gut an.
die auflagen sind für größere spannzwingen- bei mir 1,50m und 1m spannweite.
thingiverse
free

Spool Holder / Filament Halterung by ProjektC
...terschiedliche höhe haben.
nach das rauf und runter sehr leicht geht, wird je nach spooler füllung von oben nach unten gewandert.
grabcad
free

Anycubic Chiron X-Assembly
...ect mode without encountering the said problems and without moving the position of the nozzle. no matter which of the two models.
grabcad
free

Anet AM8 Umbau auf E3D Hotend mit BMG Extruder ( Klone ).
...ingesteckt. der extruder wurde liegend auf den oberen querträger platziert. der ursprüngliche 0-punkt der düse wurde beibehalten.
thingiverse
free

anycubic mega s Hotend Fanbox by Hassprediger
...klebt und bei den oberen habe ich selbst schneidende schrauben verwendet
ich nutze dazu https://www.thingiverse.com/thing:2577163
thingiverse
free

Anet A8 Filament Guide by BuildJustForFun
.... bin am überlegen das teil in drei teile zu splitten um es einfacher auszudrucken.
schreibt wenn es noch was zu verbessern gibt.
thingiverse
free

Anycubic Chiron original X-Carriage (3D model, STEP, Fusion360) by flo13th
...ect mode without encountering the said problems and without moving the position of the nozzle. no matter which of the two models.
thingiverse
free

Plantronics Gamecom 780 Headband by Inkaepseleur
...ießend mit einem multec multirap m420 (single-extruder) bei verwendung von rotem pla-ht filament (hersteller simona) ausgedruckt.
thingiverse
free

Nozzle und Throat Cooling Kühlung Anet E10 by Utz
...edruckt, diese nochmals nachgebohrt mit einem 2,5mm bohrer und die gewinde reingebohrt. die durchgangslöcher mit 3mm nachgebohrt.
thingiverse
free

BMG Bowden Clip by Nyemrinju
...his clip because the capricorn ptfe tube on my anycubic chiron always slipped out of the bowden adapter of the bondtech extruder.
Hardyp
thingiverse
free

Unwinding Guide - "Janbex" by HardyP
... unwinding guide - "das filament" by hardyp
with a successful print i would be very happy about a like!
greetings hardy
thingiverse
free

GeoMouse - Geocache container by HardyP
...ing thingiverse 1271996 | pet mouse by steedmaker
if the print was successful i would be very happy about a like!
greetings hardy
thingiverse
free

DogBoneGeo - geocache container by HardyP
...g, i have included a version with print supports.
if the print is successful, i would be very happy about a like!
greetings hardy
thingiverse
free
CaliDog GeoCache container by HardyP
...t of the container requires a printing support.
in case of a successful print i would be very happy about a like!
greetings hardy
thingiverse
free

CaliCat GeoCache container by HardyP
...t of the container requires a printing support.
in case of a successful print i would be very happy about a like!
greetings hardy
thingiverse
free
Unwinding Guide - "Das Filament" by HardyP
...y affect the claws, in the coil grip (module guide2).
with a successful print i would be very happy about a like!
greetings hardy
thingiverse
free
AM8 Y-Tensioner (bearings and motor pulley) by HardyP
...-> 1 toothed belt wheel gt2 6mm, 16 teeth, 5mm bore
with a successful print i would be very happy about a like!
greeting hardy
Am8
evermotion
$12
armchair 055 am8
...f armchair with all textures, shaders and materials. it is ready to use, just put it into your scene.. evermotion 3d models shop.
evermotion
$12

armchair 051 am8
...f armchair with all textures, shaders and materials. it is ready to use, just put it into your scene.. evermotion 3d models shop.
evermotion
$10
chair 012 am8
...l of chair with all textures, shaders and materials. it is ready to use, just put it into your scene.. evermotion 3d models shop.
evermotion
$10
chair 011 am8
...l of chair with all textures, shaders and materials. it is ready to use, just put it into your scene.. evermotion 3d models shop.
evermotion
$10
chair 017 am8
...l of chair with all textures, shaders and materials. it is ready to use, just put it into your scene.. evermotion 3d models shop.
evermotion
$10
desk 079 am8
...el of desk with all textures, shaders and materials. it is ready to use, just put it into your scene.. evermotion 3d models shop.
evermotion
$10

chair 027 am8
...l of chair with all textures, shaders and materials. it is ready to use, just put it into your scene.. evermotion 3d models shop.
evermotion
$10

chair 015 am8
...l of chair with all textures, shaders and materials. it is ready to use, just put it into your scene.. evermotion 3d models shop.
evermotion
$10

chair 037 am8
...l of chair with all textures, shaders and materials. it is ready to use, just put it into your scene.. evermotion 3d models shop.
evermotion
$10

chair 013 am8
...l of chair with all textures, shaders and materials. it is ready to use, just put it into your scene.. evermotion 3d models shop.
Bowden
turbosquid
$199
Vintage Ben Bowden Spacelander bike
... available on turbo squid, the world's leading provider of digital 3d models for visualization, films, television, and games.
3ddd
$1

Manooi Artica
...and pendants in various sizes and forms. suspension: galvanized bowden - dia. 1,5 mm. bulb: max 60 w -...
thingiverse
free
Remix Compact Bowden extruder - m6 bowden couplers and bowden tube pass-through
...ouplers and bowden tube pass-through
thingiverse
remix compact bowden extruder - m6 bowden couplers and bowden tube pass-through
thingiverse
free

Bowden Extruder
...bowden extruder
thingiverse
i have created bowden extruder for flsun delta 3d printer.
thingiverse
free

bowden 3mm by spee_D
...bowden 3mm by spee_d
thingiverse
for bowden 3mm
thingiverse
free
Bowden Tube Cutter
...bowden tube cutter
thingiverse
bowden tube cutter
thingiverse
free
Customizable Bowden Clip
...customizable bowden clip
thingiverse
customizable bowden clip
thingiverse
free
Bowden Oiler by fcheshire
...bowden oiler by fcheshire
thingiverse
inline bowden oiler
thingiverse
free

Bowden adapter by helkaroui
...bowden adapter by helkaroui
thingiverse
this is a fixed bowden adapter
thingiverse
free

Adventure3 Bowden Clip
...adventure3 bowden clip
thingiverse
adventure3 bowden clip
Titan
design_connected
$18

Titan
...titan
designconnected
original btc titan computer generated 3d model.
3d_ocean
$25
RMS Titanic
...rms titanic
3docean
ship steamer titanic
3d model of the rms titanic
turbosquid
$8

Titan
...d
royalty free 3d model titan for download as , fbx, and obj on turbosquid: 3d models for games, architecture, videos. (1545505)
3d_export
$15

eren yeager titan from attack on titan
...eren yeager titan from attack on titan
3dexport
3d model of eren titan
3d_export
$5
titanic new
...titanic new
3dexport
titanic 3d model normal quality for animation
3d_export
$100
Titan 3D Model
...titan 3d model
3dexport
silo launcher rocket titan
titan 3d model acquarius 37854 3dexport
3d_ocean
$25
Titan
...nfs nfshs one ps ps1 psone rod speed sports stakes titan transport vehicle
quality exterior and low polygon interior concept car.
3ddd
$1

Titanic Lamp(table)
...titanic lamp(table)
3ddd
titanic lamp(table)
turbosquid
$10

Titan chair
...osquid
royalty free 3d model titan chair for download as max on turbosquid: 3d models for games, architecture, videos. (1301533)
turbosquid
$7

Colossal Titan
...d
royalty free 3d model colossal titan for download as blend on turbosquid: 3d models for games, architecture, videos. (1712491)
A8
turbosquid
$47

Car A8
...
turbosquid
royalty free 3d model car a8 for download as max on turbosquid: 3d models for games, architecture, videos. (1196060)
turbosquid
$15

Audi A8
...lty free 3d model audi a8 for download as obj, fbx, and blend on turbosquid: 3d models for games, architecture, videos. (1387519)
3d_export
$5

Audi A8 3D Model
...audi a8 3d model
3dexport
audi a8 cars car
audi a8 3d model ma 20351 3dexport
3d_export
$5

Audi A8 3D Model
...audi a8 3d model
3dexport
3d model of audi a8
audi a8 3d model badyaka 12136 3dexport
3d_ocean
$89

Audi A8 2010
...usiness car car class class f f german german luxury luxury s s s8 s8 sedan sedan vehicle vehicle
new audi a8 2010 detaled model.
turbosquid
$39

A8 2018
...a8 2018 for download as 3ds, obj, wrl, c4d, fbx, dae, and stl on turbosquid: 3d models for games, architecture, videos. (1345349)
turbosquid
free

audi a8 l
...rbosquid
royalty free 3d model audi a8 l for download as obj on turbosquid: 3d models for games, architecture, videos. (1663016)
3d_ocean
$45

Audi A8 restyled
...our door vehicle was created in blender3d 2.62.realistic renderings were created with yafaray 0.1.2 realistic plugin.rendering...
turbosquid
$79

2020 Audi A8
...ree 3d model 2020 audi a8 for download as blend, obj, and fbx on turbosquid: 3d models for games, architecture, videos. (1564786)
3d_export
$90

Audi A8 3D Model
...audi a8 3d model
3dexport
car transport vehicle
audi a8 3d model rajkmr21 103 3dexport
I3
3d_export
$10

suv i3
...suv i3
3dexport
suv i3 2013 series
3d_ocean
$89

BMW i3 2012
...y, in real units of measurement, qualitatively and maximally close to the original. model formats: - *.max (3ds max 2008 scanl...
cg_studio
$99

BMW i3 20143d model
...
cgstudio
.3ds .c4d .fbx .lwo .max .obj - bmw i3 2014 3d model, royalty free license available, instant download after purchase.
cg_studio
$99

BMW i3 20123d model
...tudio
.3ds .c4d .fbx .lwo .max .mb .obj - bmw i3 2012 3d model, royalty free license available, instant download after purchase.
cg_studio
$99

BMW i3 20143d model
...tudio
.3ds .c4d .fbx .lwo .max .mb .obj - bmw i3 2014 3d model, royalty free license available, instant download after purchase.
humster3d
$75

3D model of BMW i3 2014
...
buy a detailed 3d model of bmw i3 2014 in various file formats. all our 3d models were created maximally close to the original.
humster3d
$40

3D model of Kitchen Set I3
...uy a detailed 3d model of kitchen set i3 in various file formats. all our 3d models were created maximally close to the original.
3d_ocean
$30

Kitchen set i3
...ensils oven plates shelves sink table ware
kitchen set i3 include 3d models: cooker, oven, sink, cupboards, table, chair, plates.
3d_ocean
$89

BMW i3 2014
...y, in real units of measurement, qualitatively and maximally close to the original. model formats: - *.max (3ds max 2008 scanl...
cg_studio
$99

BMW i3 Concept 20113d model
...i3
.3ds .c4d .fbx .lwo .max .obj - bmw i3 concept 2011 3d model, royalty free license available, instant download after purchase.
Extruder
3ddd
$1

Extruded Chair
...extruded chair
3ddd
extruded , tom dixon
inspired by tom dixon extruded chair
turbosquid
$2

3D Printer Extruder
...d
royalty free 3d model 3d printer extruder for download as on turbosquid: 3d models for games, architecture, videos. (1537359)
turbosquid
$1

Zombie extruded text
...oyalty free 3d model zombie extruded text for download as obj on turbosquid: 3d models for games, architecture, videos. (1322198)
turbosquid
$4

Extruder conical screw
...el extruder conical screw for download as sldpr, ige, and stl on turbosquid: 3d models for games, architecture, videos. (1524433)
turbosquid
$50

3d PRINTER - Extruder
... available on turbo squid, the world's leading provider of digital 3d models for visualization, films, television, and games.
3d_export
$5

world earth extrude map
...world earth extrude map
3dexport
3ddd
$1

Simply Elegant Extruded Tree Coffee Table Design
...ble by link studios. the silhouette of a tree is visible at one angle, extruded from the surface to create the support structure.
3d_export
$13
extruded table
...ed to give you the highest possible quality for up to 4k renders. there is no post-production used on any of the renders you see.
3d_export
$13
extruded chair
...for high-quality render results. no extra plugins are required for this model. lights and cameras are not included in the scenes.
3d_export
$13
extruded table 2
...for high-quality render results. no extra plugins are required for this model. lights and cameras are not included in the scenes.