Thingiverse

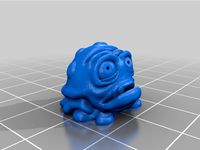
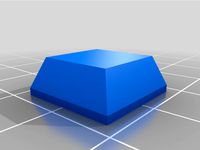
Tiny BMO | Keycap (No stem) by Panzyloaf
by Thingiverse
Last crawled date: 3 years, 5 months ago
This keycap is hollow and will not be able to mount directly onto your keyboard without some post-printing work.
I found that my printer does a really bang-up job when printing the Cherry MX stems, they would never fit correctly, or they would just break off. I designed this key to be hollow so that I could cast the stem out of resin.
My process:
Slice key with as super quality as possible. I used a .2mm nozzle at .08 layer height.
Use supports (I used line supports with 5% density, they came off very nicely).
Print key
Prepare your resin. I used UV resin because it cures quickly.
Cast the resin stems. I have my own Cherry MX molds, they are very cheap on Amazon (Link below)
Add some extra resin to the inside of the key so the stems have something to adhere to
Place the stem carefully into the inside of the keycap. *I do not remove the stems from their mold for this step, I leave them in to more easily align them to the keycaps.
Cure the resin and do any other desired clean-up or painting
Here is the link to the keycap molds I use: https://www.amazon.com/Silicone-Mechanical-Keyboard-Handmade-Computer/dp/B08WYTZLRH/ref=sr_1_1_sspa?dchild=1&keywords=keycap+mold&qid=1614615093&sr=8-1-spons&psc=1&spLa=ZW5jcnlwdGVkUXVhbGlmaWVyPUExWUMyUEVDQks1TVhZJmVuY3J5cHRlZElkPUEwNzk2OTMzMTZRUDlQUkRJVUdETiZlbmNyeXB0ZWRBZElkPUEwOTg2MzI4NUFUSjFUSk1PQk9SJndpZGdldE5hbWU9c3BfYXRmJmFjdGlvbj1jbGlja1JlZGlyZWN0JmRvTm90TG9nQ2xpY2s9dHJ1ZQ==
Similar models
thingiverse
free

Sonic Tails and Knuckles Backlit Keycaps by Panzyloaf
...etizlbmnyexb0zwrbzelkpuewotg2mzi4nufusjfusk1pqk9sjndpzgdlde5hbwu9c3bfyxrmjmfjdglvbj1jbglja1jlzglyzwn0jmrvtm90tg9nq2xpy2s9dhj1zq==
thingiverse
free

Cherry MX Red Blank Keycap
...a keycap to fit my corsair strafe keyboard, with cherry mx red key switches. i've printed and started using a couple already.
thingiverse
free

Cherry MX Keycap by Zinko55
... keycap that i designed. it only fits on cherry mx keyboards.
can be used as a template to add things to.
prints without supports
thingiverse
free

Cherry MX Red Blank Keycap Sharper Edges
...a keycap to fit my corsair strafe keyboard, with cherry mx red key switches. i've printed and started using a couple already.
thingiverse
free

Cherry MX R4 Protoss Keycap by Amarite1
...d to do a bit of cutting with a craft knife post-print to get it to fit on my corsair k95, but this may differ for your keyboard.
cg_trader
$7

KEYCAP CRYSTAL | 3D
...t please enjoy the keycap crystal gem jewelry shining decoration keycap keycaps keyboard mx cherry diy artisan resinart art other
thingiverse
free

Bender Cherry MX Artisan Keycap by Cyp12die4
...inko55 used so i changed it and now it prints well and fits perfectly on my keyboard.
hope you all like it, feel free to comment!
cults
$4

Evil Pumpkin Keycap for Cherry MX
...e:)
models are prepared for 3d printing .
i tested it on cm strom keyboard and it works perfectly!:)
3d model format: stl
cults
$4

Skull Keycap STL for Cherry MX 3D print model
...ng.
the one from the photos was made on the zortrax m200 3d printer.
i tested it on cm strom keyboard and it works perfectly!:)
cg_trader
$3

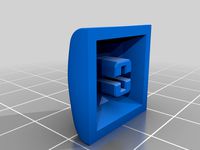
CHERRY MX KEYCAP - ESC - ESCAPE DOOR | 3D
...ign. mainly made for an sla-resin printer. esc escape key cap keycap cherry mx switch button keyboard gadgets pc laptop pc laptop
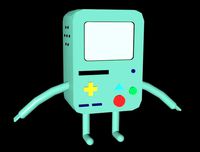
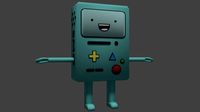
Bmo
3d_export
$5

bmo
...bmo
3dexport
bmo
3ddd
$1

BMO
... bmo , подушка
электронное устройство вмо из мультфильма adventure time.
turbosquid
$25

BMO
...bmo
turbosquid
royalty free 3d model bmo for download as obj on turbosquid: 3d models for games, architecture, videos. (1662319)
turbosquid
$6

BMO
...o
turbosquid
royalty free 3d model bmo for download as blend on turbosquid: 3d models for games, architecture, videos. (1585914)
turbosquid
$5

BMO
...bmo
turbosquid
royalty free 3d model bmo for download as obj on turbosquid: 3d models for games, architecture, videos. (1562892)
turbosquid
$5

BMO
...quid
royalty free 3d model bmo for download as blend and obj on turbosquid: 3d models for games, architecture, videos. (1664380)
3d_export
$5

bmo
...del of the charismatic character from adventure time, bmo a fun and enthusiastic talking video game console model echo in blender
turbosquid
$15

BMO
...alty free 3d model bmo for download as 3ds, obj, c4d, and fbx on turbosquid: 3d models for games, architecture, videos. (1368934)
3d_export
$20
bmo - adventure time
...bmo - adventure time
3dexport
3d modeling of bmo - adventure time character
turbosquid
$5
Adventure Time - BMO
...alty free 3d model adventure time - bmo for download as blend on turbosquid: 3d models for games, architecture, videos. (1181002)
Keycap
turbosquid
$4

Evil Pumpkin Keycap for Cherry MX
...d model evil pumpkin keycap for cherry mx for download as stl on turbosquid: 3d models for games, architecture, videos. (1251506)
3ddd
$1

Keyboard Genius LuxeMate I220
...keyboard - luxemate i220.with a compact design and stylish keycap structure; this new keyboard represents new design of beauty...
thingiverse
free
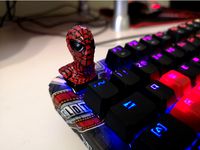
SpiderMan keycap
...spiderman keycap
thingiverse
spiderman keycap is little biger like normall keycaps
thingiverse
free

Soldier keycap
...soldier keycap
thingiverse
soldier keycap
i strat like to make all this funny keycaps ;-)
thingiverse
free
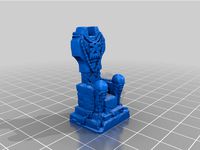
Throne keycap
...throne keycap
thingiverse
throne keycap
thingiverse
free
Artisan Keycap
...artisan keycap
thingiverse
artisan keycap
thingiverse
free
Keycap by Danotech
...keycap by danotech
thingiverse
orto keycap
thingiverse
free

Destiny Keycap
...destiny keycap
thingiverse
destiny inspired keycap.
thingiverse
free
DSA Keycaps
...dsa keycaps
thingiverse
various keycaps. wip
thingiverse
free

keycaps by Poks999
...keycaps by poks999
thingiverse
these are keycaps. mx compatible r4
Stem
design_connected
$13

Stem
...stem
designconnected
atmosphere stem computer generated 3d model.
design_connected
$16
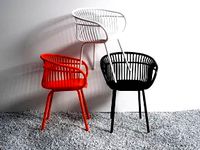
Stem Chair
...stem chair
designconnected
crassevig stem chair computer generated 3d model. designed by norguet, patrick.
3ddd
$1
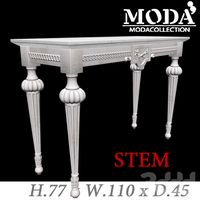
Стол MODA, Stem
... moda , консоль
стол moda, stem h 77 x w 110 x d 45cm
turbosquid
$40
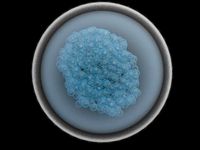
Stem Cell
... available on turbo squid, the world's leading provider of digital 3d models for visualization, films, television, and games.
turbosquid
$20

AZONIC STEM
... available on turbo squid, the world's leading provider of digital 3d models for visualization, films, television, and games.
turbosquid
$3
Bmx Stem
... available on turbo squid, the world's leading provider of digital 3d models for visualization, films, television, and games.
turbosquid
$25
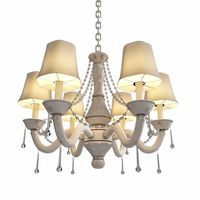
Traditional Stem Chandelier
...traditional stem chandelier for download as max, obj, and fbx on turbosquid: 3d models for games, architecture, videos. (1395975)
turbosquid
$10

Bar stool Stem
...ree 3d model bar stool stem for download as max, obj, and fbx on turbosquid: 3d models for games, architecture, videos. (1329977)
turbosquid
$6
Glass Stem Sconce
...odel glass stem sconce for download as 3ds, max, obj, and fbx on turbosquid: 3d models for games, architecture, videos. (1214923)
3d_export
$5
stem wall light
...stem wall light
3dexport
3dsmax-corona-vray
Tiny
turbosquid
$3

Tiny Mushroom
...squid
royalty free 3d model tiny mushroom for download as ma on turbosquid: 3d models for games, architecture, videos. (1562284)
turbosquid
$2
Tiny Tank
...osquid
royalty free 3d model tiny tank for download as blend on turbosquid: 3d models for games, architecture, videos. (1542044)
turbosquid
$3

Tiny Knife
...
royalty free 3d model tiny knife for download as max and fbx on turbosquid: 3d models for games, architecture, videos. (1358937)
3d_export
$5

Tiny house
...tiny house
3dexport
https://www.dock4all.com/
3d_export
free

Tiny Toy
...tiny toy
3dexport
turbosquid
$30

Tiny Tank
...lty free 3d model tiny tank for download as max, obj, and fbx on turbosquid: 3d models for games, architecture, videos. (1608730)
turbosquid
$20

Tiny houses
...lty free 3d model tiny house for download as ma, fbx, and obj on turbosquid: 3d models for games, architecture, videos. (1642651)
turbosquid
$100

Tiny boy
... available on turbo squid, the world's leading provider of digital 3d models for visualization, films, television, and games.
turbosquid
$50

Tiny Man
... available on turbo squid, the world's leading provider of digital 3d models for visualization, films, television, and games.
turbosquid
$39

Tiny House
... available on turbo squid, the world's leading provider of digital 3d models for visualization, films, television, and games.