Thingiverse

Thrustmaster Warthog (TMWH) Rotated Mount Converter (RoMoCo) by Asherao
by Thingiverse
Last crawled date: 3 years, 1 month ago
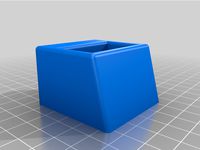
Hello and welcome to the Thrustmaster Warthog (TMWH) Rotated Converter Mount (RoMoCo)!
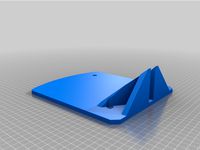
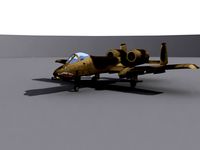
Convert your normal TMWH mount to a rotated mount to match the rotation of the F-18, A-10, or whatever you feel like. The available range of rotation is 15 to 45 degrees.
Required Materials:
1 Screw Driver
4 M4x5 bolts (the ones that came with your TMWH)
4 M4x15 bolts (15mm is the recommended minimum, depending on the thickness of your mounting surface. I used M4x20 because they were laying around.)
4 M4 nuts
Optional Materials:
1 Adjustable Wrench
The install is easy. I break down the steps so there is hopefully less confusion, if any.
WARNING: You will be dealing with electricity, circuits, and metal. In the right (wrong) conditions, you may accidently make a mistake and kill your TMWH. If you are not comfortable with handling those three things in close proximity of each other, DO NOT CONTINUE. The risk is yours to take.
WARNING: When handling the bolts in this build, make sure that they do not come into contact with any other part of the TMWH. This can be achieved by keeping the TMWH vertical at all times.
Install instructions:
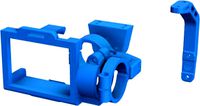
Print RoMoCo. Read all Steps before moving to Step 2. Depending on your print settings, you have about 3.5 hours to wait. :P
Unplug your TMWH.
Before mounting RoMoCo on anything, screw in the M4x5 bolts through the tapered (angled) holes. This will create the guides for the screws, making a later step easier.
Remove the M4x5 bolts.
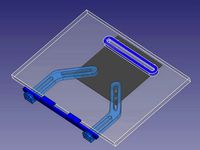
Put the M4x15 bolts through the top slots of RoMoCo .
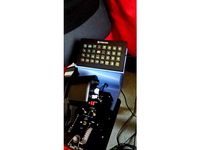
Attach the TMWH to RoMoCo . It is a tight fit. Make sure you line up the USB cord cutout with the USB cord.
Via the same holes in Step 3, screw in the 4 M4x5 bolts to secure RoMoCo to the TMWH.
Slide the 4 M4x15 bolts so that they are close to the 4 M4x5 bolts. Attach the TMWH (which should have RoMoCo attached to it) to your mount by carefully, slowly, and vertically lowering it into the mounting holes.
Use the 4 M4 nuts to LIGHTY secure the TMWH+RoMoCo to your mount.
Adjust the angle of the TMWH to your liking.
Use the 4 M4 nuts to FULLY secure the TMWH+RoMoCo to your mount. Here is where the adjustable wrench comes in handy.
Note the angle at which you mounted the TMWH.
Plug in your TMWH and make sure that it is still working.
If you desire, use the Thrustmaster TARGET software or a software of your choice to match the RoMoCo angle. If you use TARGET, I have provided a script for you. You can edit the script if you desire. If you have trouble with TARGET, please contact le google.
Enjoy!
Convert your normal TMWH mount to a rotated mount to match the rotation of the F-18, A-10, or whatever you feel like. The available range of rotation is 15 to 45 degrees.
Required Materials:
1 Screw Driver
4 M4x5 bolts (the ones that came with your TMWH)
4 M4x15 bolts (15mm is the recommended minimum, depending on the thickness of your mounting surface. I used M4x20 because they were laying around.)
4 M4 nuts
Optional Materials:
1 Adjustable Wrench
The install is easy. I break down the steps so there is hopefully less confusion, if any.
WARNING: You will be dealing with electricity, circuits, and metal. In the right (wrong) conditions, you may accidently make a mistake and kill your TMWH. If you are not comfortable with handling those three things in close proximity of each other, DO NOT CONTINUE. The risk is yours to take.
WARNING: When handling the bolts in this build, make sure that they do not come into contact with any other part of the TMWH. This can be achieved by keeping the TMWH vertical at all times.
Install instructions:
Print RoMoCo. Read all Steps before moving to Step 2. Depending on your print settings, you have about 3.5 hours to wait. :P
Unplug your TMWH.
Before mounting RoMoCo on anything, screw in the M4x5 bolts through the tapered (angled) holes. This will create the guides for the screws, making a later step easier.
Remove the M4x5 bolts.
Put the M4x15 bolts through the top slots of RoMoCo .
Attach the TMWH to RoMoCo . It is a tight fit. Make sure you line up the USB cord cutout with the USB cord.
Via the same holes in Step 3, screw in the 4 M4x5 bolts to secure RoMoCo to the TMWH.
Slide the 4 M4x15 bolts so that they are close to the 4 M4x5 bolts. Attach the TMWH (which should have RoMoCo attached to it) to your mount by carefully, slowly, and vertically lowering it into the mounting holes.
Use the 4 M4 nuts to LIGHTY secure the TMWH+RoMoCo to your mount.
Adjust the angle of the TMWH to your liking.
Use the 4 M4 nuts to FULLY secure the TMWH+RoMoCo to your mount. Here is where the adjustable wrench comes in handy.
Note the angle at which you mounted the TMWH.
Plug in your TMWH and make sure that it is still working.
If you desire, use the Thrustmaster TARGET software or a software of your choice to match the RoMoCo angle. If you use TARGET, I have provided a script for you. You can edit the script if you desire. If you have trouble with TARGET, please contact le google.
Enjoy!
Similar models
thingiverse
free
Elgato Stream Deck XL Thrustmaster Warthog TMWH Mount by Asherao
... to secure the tmwh, "mount", and baseplate
-install the "sd holder" to the mount using the m5 hardware
-done
thingiverse
free
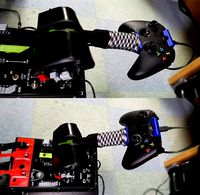
Thrustmaster Warthog (TMWH) Collective Xbox One Clip-on by Asherao
...ing the top first then slipping in the bottom (the 3d print is designed to flex to allow the bottom of the controller to slip in.
thingiverse
free

Thrustmaster Warthog (TMWH) Anti Lift Detent Cover by Asherao
...l not be able to use the tmwh idle detent
you may not be able to use detents
previous versions are included in the fusion360 file
thingiverse
free
Front mount Gimbal (2 axis) by framone
...o assemble roll and pitch arms)
2x m4x5 screws (to fix the mount to the frame)
2x motor screws to fix the roll motor to the mount
thingiverse
free

2020 Extrusion Height Adjusters/Levelers
...4 and m5 bolts may require a washer. mount on the underside of your extrusion and use bolt in threaded hole to adjust the height.
thingiverse
free
Laptop Stand for Vesa Mount by carlol
...th or longer)
as you can see in the photo, i used hex machine screws which fit into the model, but any m4 nuts/bolts should work.
thingiverse
free

Tevo Tarantula Y Carriage by xxalxx
...o attach the heatbed to the mount and use the thunbscrew
note : thumbscrew should sit on top of the nut so its easily adjustable.
thingiverse
free

Ender 5 Camera Holder by PhilippSchulz
... view in a lot of other designs here on thingiverse.
if you want to change some dimensions yourself, i attached the freecad file.
thingiverse
free

Kossel Delta Spool Holder with Hard Drive Bearing by jdharris
...n on the 2020 rail. also, please rotate the mount 180 degrees so that it will be printed with the circles indentations facing up.
thingiverse
free

Articulated Phone Mount by 1Prelude
...iameter 11.80mm)
whatever screws you want to attach to wall (mounting plate hole diameter is 3.5mm)
can use duct-tape in a pinch!
Tmwh
thingiverse
free
Thrustmaster Warthog (TMWH) Collective Xbox One Clip-on by Asherao
...ing the top first then slipping in the bottom (the 3d print is designed to flex to allow the bottom of the controller to slip in.
thingiverse
free
Thrustmaster Warthog (TMWH) Anti Lift Detent Cover by Asherao
...l not be able to use the tmwh idle detent
you may not be able to use detents
previous versions are included in the fusion360 file
thingiverse
free
Elgato Stream Deck XL Thrustmaster Warthog TMWH Mount by Asherao
... to secure the tmwh, "mount", and baseplate
-install the "sd holder" to the mount using the m5 hardware
-done
thingiverse
free

Thrustmaster Warthog (TMWH) Volair Sim Rotated Mount by Asherao
...s version has its own base that fits on a square pole that measures about 20.5mm x 20.5mm.
see pictures for install instructions.
thingiverse
free

Thrustmaster Warthog Hook and Launchbar Switches by Asherao
...to fasten the switch covers. use the two black tmwh screws to affix the plate. i printed the switch...
Asherao
thingiverse
free

Valve Index Monster Hunter Visor by Asherao
...valve index monster hunter visor by asherao
thingiverse
printed, but never mounted.
thingiverse
free

Valorant Logo by Asherao
... printer. if printing with a single color, remember to combine the models if you have to. looks nice even without the background.
thingiverse
free
Samsung TV Controller Holder by Asherao
...samsung tv controller holder by asherao
thingiverse
just a samsung tv controller holder. that's all.
thingiverse
free

Ace Combat ISAF Logo by Asherao
...ace combat isaf logo by asherao
thingiverse
printed with a manual color swap when you start to see the raised layer.
thingiverse
free

Ace Combat 4 Logo by Asherao
...ace combat 4 logo by asherao
thingiverse
printed with a manual color swap when you start to see the raised layer.
thingiverse
free

Heatblur Logo DCS by Asherao
... a manual color swap when you start to see the raised layer.
checkout heatblur, a developer for dcs - https://store.heatblur.com/
thingiverse
free

Ace Combat Razor Squadron Patch by Asherao
...ace combat razor squadron patch by asherao
thingiverse
this can be printed with either a single or dual color printer.
thingiverse
free

Mitsubishi Air Conditioning Controller Holder by Asherao
...roller holder by asherao
thingiverse
can be printed with a dual color printer or single color printer with no logo. no supports.
thingiverse
free

DCS Logo - Two More Weeks by Asherao
...dcs logo - two more weeks by asherao
thingiverse
printed with a manual color swap when you start to see the raised layer.
thingiverse
free

Spudknocker Logo by Asherao
...com/spudknocker1?s=20
this is designed for a dual color printer. you can also use a single color printer and a manual color swap.
Thrustmaster
turbosquid
free

Thrustmaster 5 - Space Craft
...ree 3d model thrustmaster 5 - space craft for download as max on turbosquid: 3d models for games, architecture, videos. (1154090)
thingiverse
free

Tète pour vis Thrustmaster T150/Head for Thrustmaster T150 screws
...tète pour vis thrustmaster t150/head for thrustmaster t150 screws
thingiverse
no summary
thingiverse
free

Thrustmaster T500RS Clamp by sechuan
...thrustmaster t500rs clamp by sechuan
thingiverse
thrustmaster wheel fixation
shaft/screw 3mm
donate paypal : uirpic@freemail.hu
thingiverse
free
Thrustmaster T16000m hotas baseplates by pernahajder
...thrustmaster t16000m hotas baseplates by pernahajder
thingiverse
baseplates for thrustmaster t16000m hotas
thingiverse
free

Thrustmaster Warthog Joystick Tailpiece by MikeTangoRomeo
...thrustmaster warthog joystick tailpiece by miketangoromeo
thingiverse
thrustmaster warthog joystick tailpiece
thingiverse
free

Gear Knob Thrustmaster TH8a by BalonekCZ
...gear knob thrustmaster th8a by balonekcz
thingiverse
gear knob thrustmaster th8a
thingiverse
free

Thrustmaster TH8A, TH8RS Shiftknob by Antongotberg
...thrustmaster th8a, th8rs shiftknob by antongotberg
thingiverse
shiftknob for thrustmaster th8a/th8rs
thingiverse
free

Thrustmaster Wheel Mount by E_Elisio
...or 8020 aluminum profile sim rig. allows you to mount thrustmaster steering wheels to your rig. requires x2 m6 screws and t-nuts.
thingiverse
free

Thrustmaster TWCS Throttle 50% detent
...thrustmaster twcs throttle 50% detent
thingiverse
50% detent for a thrustmaster twcs throttle
thingiverse
free

Thrustmaster TH8A Shifter Handle by gonzo007
...thrustmaster th8a shifter handle by gonzo007
thingiverse
different shifter handle for the thrustmaster th8a
Warthog
3d_export
$35
Warthog
...zbrush 3ds max ztool obj fbx dae 3ds stl properties : 20*20*15 production time : 1d 3hours 407 gram models are drawn with zbrush.
turbosquid
$99
a10 warthog
... available on turbo squid, the world's leading provider of digital 3d models for visualization, films, television, and games.
turbosquid
$45
A-10 Warthog
... available on turbo squid, the world's leading provider of digital 3d models for visualization, films, television, and games.
turbosquid
$5

A10 Warthog
... available on turbo squid, the world's leading provider of digital 3d models for visualization, films, television, and games.
turbosquid
$3

Cartoon Warthog
...cartoon warthog for download as blend, fbx, dae, obj, and stl on turbosquid: 3d models for games, architecture, videos. (1647875)
turbosquid
free

A 10 Warthog
... available on turbo squid, the world's leading provider of digital 3d models for visualization, films, television, and games.
3d_export
$20

A10 Warthog 3D Model
...port
a-10 war wart hog warthog 10 plane warrior military bomber airplane aircraft
a10 warthog 3d model golfmanhero 25454 3dexport
turbosquid
$25

Spaceship concept Warthog
...ceship concept warthog for download as 3ds, obj, fbx, and dae on turbosquid: 3d models for games, architecture, videos. (1443716)
turbosquid
$45

A10 Warthog LW
... available on turbo squid, the world's leading provider of digital 3d models for visualization, films, television, and games.
turbosquid
$10

Warthog 2.max
... available on turbo squid, the world's leading provider of digital 3d models for visualization, films, television, and games.
Rotated
3d_export
$5
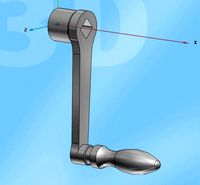
rotation handle
...rotation handle
3dexport
rotation handle
3ddd
$1
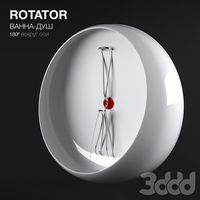
ДуШ ROTATOR
...душ rotator
3ddd
душ
душ rotator
3d_export
$5
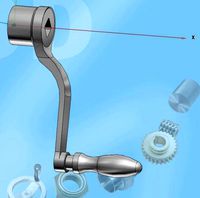
profile rotation handle
...profile rotation handle
3dexport
profile rotation handle
3d_export
$5
simple rotation handle
...simple rotation handle
3dexport
simple rotation handle
3d_export
$5
wrist rotation handle
...wrist rotation handle
3dexport
wrist rotation handle
3d_export
$5
needle rotation handle
...needle rotation handle
3dexport
needle rotation handle
3d_export
$5
heavy rotation handle
...heavy rotation handle
3dexport
heavy rotation handle
3d_export
$5

compound rotational handle
...compound rotational handle
3dexport
compound rotational handle
turbosquid
$29
rotating shelter
... available on turbo squid, the world's leading provider of digital 3d models for visualization, films, television, and games.
turbosquid
$18

Rotating Armchair
... available on turbo squid, the world's leading provider of digital 3d models for visualization, films, television, and games.
Converter
turbosquid
free
pallet converter
...d
royalty free 3d model pallet converter for download as rfa on turbosquid: 3d models for games, architecture, videos. (1285733)
3d_ocean
$85

Convertible Porsche
...agon
3d model of convertible porsche .object are grouped.rendering scene with,materials are include and detailed, with all files.
turbosquid
$5

GPU Converter
...yalty free 3d model gpu converter for download as 3ds and max on turbosquid: 3d models for games, architecture, videos. (1355494)
turbosquid
$14

Convert Sofa
... 3d model convert sofa for download as max, 3ds, fbx, and obj on turbosquid: 3d models for games, architecture, videos. (1546663)
3d_export
$15

pontiac gto convertible
...pontiac gto convertible
3dexport
pontiac gto convertible 3d model.
turbosquid
$10

Converter station
... available on turbo squid, the world's leading provider of digital 3d models for visualization, films, television, and games.
3d_ocean
$89

Audi A5 Convertible
...erman german interior interior luxury luxury sport sport vehicle vehicle
audi a5 convertible – high detailed model with interior.
3d_ocean
$55

Convertible Car
...d model of convertible car .objects are grouped.rendering scene with texture,materials are included and detailed, with all files.
3d_ocean
$89

Audi S5 Convertible
... german interior interior luxury luxury s5 s5 sport sport vehicle vehicle
audi s5 convertible – high detailed model with interior
design_connected
$27

Nomade Convertible Sofa
...ade convertible sofa
designconnected
ligne roset nomade convertible sofa computer generated 3d model. designed by gomez, didier.
Mount
3d_export
free

mounting bracket
...mounting plate is the portion of a hinge that attaches to the wood. mounting plates can be used indoors, cabinetry and furniture.
turbosquid
$2

MOUNTING
... available on turbo squid, the world's leading provider of digital 3d models for visualization, films, television, and games.
turbosquid
free

Mounts
... available on turbo squid, the world's leading provider of digital 3d models for visualization, films, television, and games.
turbosquid
free

Mount Fuji
...fuji
turbosquid
free 3d model mount fuji for download as obj on turbosquid: 3d models for games, architecture, videos. (1579977)
3d_export
$5

Headphone mount LR
...headphone mount lr
3dexport
headphone mount l+r
turbosquid
$39

Mount rainier
...quid
royalty free 3d model mount rainier for download as fbx on turbosquid: 3d models for games, architecture, videos. (1492586)
turbosquid
$5

pipe mounting
...quid
royalty free 3d model pipe mounting for download as obj on turbosquid: 3d models for games, architecture, videos. (1293744)
turbosquid
$3

Mounting Tires
...uid
royalty free 3d model mounting tires for download as fbx on turbosquid: 3d models for games, architecture, videos. (1708511)
3d_export
$5

Magnetic GoPro Mount
...pro mount
3dexport
cool magnetic mount for gopro. allows you to mount the camera on flat metal surfaces and get exclusive shots.
turbosquid
$5

Stone Mount
...ty free 3d model stone mount for download as ma, obj, and fbx on turbosquid: 3d models for games, architecture, videos. (1370306)