Thingiverse
The Matrix - Sentinel by Lalinea
by Thingiverse
Last crawled date: 3 years ago
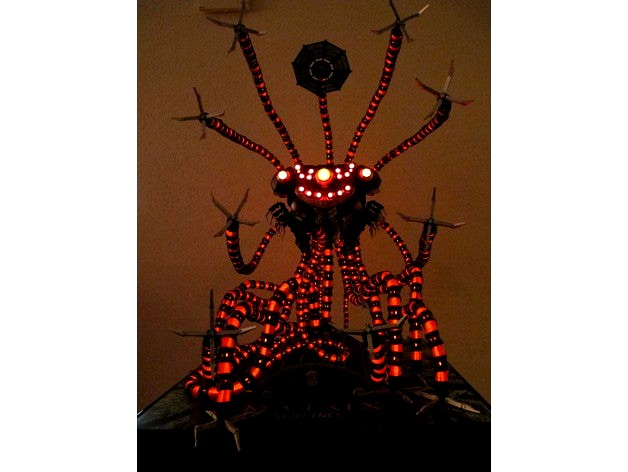
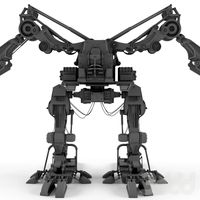
The Matrix - Sentinel
In July 2017 I got my Felix 3.1 single head printer.
With no 3-D skills or experience I started to make the sentinel.
I have read a lot and collect a hole of stl files.
After some printing test with stl files I understand de difficult of my printer.
Head-temperature/Bed-temperature, Bed-level, Extruder-distance.
I found a sentinel object of Reg Taylor (https://www.myminifactory.com/object/matrix-sentinel-fully-articulated-model-4547)
But this was not conform my Sentinel, so I look further.
Then I found another Sentinel made by Othon Reynoso (Download no longer available).
This body was better, but not suitable for 3-D printing.
I have 25 years+ experience with Adobe software, but I have no skills in 3-D.
With a lot of help on You-Tube, I could correct the body, so Simplify 3D can handle it.
The body was made for animations and games, not for 3-D printing.
It took me 1.5 months to correct the hole body, so it was watertight.
Then I have scaled the parts from Reg Taylor to my body and make some cosmetic changes (claws and communication disk).
The base plate I have made by myself and took me about 3 weeks to fulfil.
The most parts are printed in 0.2 mm without draft and support.
The smaller parts, like de hooks on his belly, are printed in 0.1 mm with draft end support.
This parts are very difficult to print.FILAMENT:
Everything is printed in PETG
The grey filament is blue/grey (2.0 kg)https://www.123-3d.nl/REAL-filament-grijs-blauw-1-75-mm-PETG-1-kg-i1556-t7388.html
PETG Red transparency (1.0 kg)ELECTRONICS:
El-wire 30 metershttps://nl.aliexpress.com/item/1M-2M-3M-5M-8M-10M-Neon-Light-Dance-Party-Decor-Lamp-Flexible-EL-Wire-Rope/32713340074.html?spm=a2g0s.9042311.0.0.N020h2
El-Wire power-supplyhttps://nl.aliexpress.com/item/220V-1-30M-EL-wire-lighting-transformer-neon-lights-driver-power-supply-EU-US-plug/32804331365.html?spm=a2g0s.9042311.0.0.N020h2
LED 3 mm: 30 pieceshttps://nl.aliexpress.com/item/20CM-12V-Wired-For-Light-Emitting-Diode-Wiring-LED-Lot-Size-3mm-Flat-Top-Color-pink/32808207966.html?spm=a2g0s.9042311.0.0.HOPcpH
LED 5 mm: 10 pieceshttps://nl.aliexpress.com/item/DSHA-20CM-12V-Wired-For-Light-Emitting-Diode-Wiring-LED-Lot-Size-5mm-Flat-Top-Color/32793684700.html?spm=a2g0s.9042311.0.0.HOPcpH
Jackplug 2.5 mm Bus: 2 pieces
Power supply for El-wire en 12 volt LED in the back of the Sentinelhttps://www.conrad.nl/nl/jackplug-25-mm-bus-inbouw-verticaal-tru-components-mono-aantal-polen-2-1571450.html
Jackplug 2.5 mm Connector: 2 pieces
Power supply for El-wire en 12 volt LED in the back of the Sentinelhttps://www.conrad.nl/nl/jackplug-25-mm-stekker-recht-conrad-components-mono-aantal-polen-2-595184.html
Tamiya Connectors male/female: 3 sets
Connecting te LED from the Head to the Body to the Back of the sentinelhttps://www.conrad.nl/nl/modelcraft-208281-accupack-stekker-accupack-bus-tamiya-verguld-1-paar-208281.htmlPAINT:
The Blue/grey filament is painted with Smoke back-light painted (black)https://www.nonpaints.com/nl/motip-backlight-spray-spuitbus-400ml-transparant?gclid=Cj0KCQiA-ebSBRC8ARIsAGuxJIr55rZpHMukB-r2xau107KZEVcNvUSCgwQ3AuuVHRL5Mn45DtoJ85caAnXSEALw_wcB
The silver parts are done (by hand) with Silver-paint from Tamiya X-11 (works great!)
These parts are stored in the folders Silver. I have painted them, because the colour of the paint is brighter than the (silver) filament.
With zero experience and this creation in five months is for me a milestone :)Software: Blender3-D Software: Simplify 3-D3-D Printer: Felix 3.1Building time: 4.5 months.Printing time: 370 hours+Total parts: 1220Size: 40 cm wide - 70 cm deep - 60 cm heigh
If there are questions about the purpose of some parts, let me know!SPECIAL ANNOUNCEMENT1)
By printing the body. I have make the construction so that this part can be printed with minimum support.
Look at the bevel in the inside of the body to position it right on the print-bed. The only support you need is by the rings where the arms come. The example is up-side-down (wrong side up).
Head: 10 hours printingBody: 42 hours printingBack: 10 hours printing.Arm part red and grey: 200 hours printing
2)
I have put one extra picture and two stl files on the site, how I mounted the Sentinel to the body.
I hope I can explane the idea whit the images.
The lighting of the arms are shut off in this picture to make a clearer site.
The small tubes on the left are the power supply for the El-wire and the 12 volt of the LED.
The small tube on the right is (extra) the communication pin who connect Neo with the Matrix.
The thick tube is the one I am talking about.
This one goes from the base wit a twirl over the full colour plate to the belly of the Sentinel.
In this tube there is a iron rod. So the total weight of the Sentinel is steady.
To keep the Sentinel in position without flipping over I made two extra tube parts.
These two part go trough de full colour plate and will be locked by a pin on the other side of the full colour plate.
This way it is impossible that the sentinel can flip to the left of the right side.
3)
The claw hinge-pins are made from 1.7 mm filament (8 mm long).
Moulded together with a solder (flat blade). Use a wooden block with a little hole (2 mm) on the edge. So you can use pressure to the pin to flatten it.
Greetings Albert
Similar models
thingiverse
free

Power supply Jomall by stoempie
...power-rocker-switch-fused-iec-320-c14-inlet-power-socket-fuse-switch-connector-plug/32679674596.html?spm=a2g0s.9042311.0.0.eddzfz
thingiverse
free

anet mount
...2.html?spm=a2g0s.9042311.0.0.4d3a4c4dornkvehttps://nl.aliexpress.com/item/4000127244547.html?spm=a2g0s.9042311.0.0.58ce4c4dtofqqx
thingiverse
free
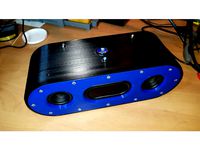
Bluetooth Speaker by arabon
...adapter/1059369926.html?spm=a2g0s.9042311.0.0.m8oxrz
18650 rechargeable battery 2 pieces and some rubber feet
good luck building!
thingiverse
free

Tunnelplan carbon support by tunnelplan
...free-shiping-4pcs-x-10mm-x-6mm-x-1000mm-high-quality-3k-carbon-fiber-plain-fabric/32348177924.html?spm=a2g0s.9042311.0.0.gapjom )
thingiverse
free

AT 3010 - AC Electric Energy Tester
...2g0s.9042311.0.0.d160b90a31zk3n) e at3010 (https://pt.aliexpress.com/item/32955859585.html?spm=a2g0s.9042311.0.0.d160b90a31zk3n).
thingiverse
free

TCS34725 Colour sensor housing by alex2801
...-lock-dupont-dupont-plug-mx2-54-straight-needle-seat-plug-terminals-connector-2p-3p/32792562812.html?spm=a2g0s.9042311.0.0.luv2qm
grabcad
free

Power Bank
... mm drill for this operation. the marking for the holes is made on the imprint of the bottom part of the box.
foto see comments.
thingiverse
free
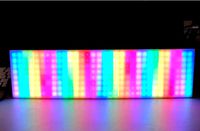
LED Matrix Housing by webfraggle
...s.9042311.0.0.1a6c4c4dbutkha
controller:https://de.aliexpress.com/item/1005001376138064.html?spm=a2g0s.9042311.0.0.1a6c4c4dbutkha
thingiverse
free
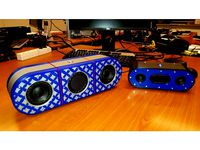
Bluetooth Speaker 2.0 by arabon
....com/item/quality-copper-dc-022b-dc-power-socket-dc-block-2-pin-wire-with-nut-5-5x2/32762835561.html?spm=a2g0s.9042311.0.0.dgxm8s
thingiverse
free

Creality Ender 3 v2 double led strip by Brammel1234
... print surface.
used the following led strip:https://nl.aliexpress.com/item/32903590385.html?spm=a2g0s.9042311.0.0.19bb4c4d1fzazl
Lalinea
thingiverse
free
lalinea-in-a-bubble by Syzguru11
...lalinea-in-a-bubble by syzguru11
thingiverse
lalinea-in-a-bubble
thingiverse
free

LaLinea 2020 by Tattooed1980
...lalinea 2020 by tattooed1980
thingiverse
lalinea is not amused of 2020 :)
just 4 fun
thingiverse
free

Lalinea by Kieras1
...lalinea by kieras1
thingiverse
if you liked just print ;)
thingiverse
free

imagine-laLinea-sparschwein by Syzguru11
...imagine-lalinea-sparschwein by syzguru11
thingiverse
imagine-lalinea-sparschwein
imagine john lemon
thingiverse
free

LaLinea rond by Syzguru11
...lalinea rond by syzguru11
thingiverse
(donations appreciated, but not necessary. my things are free and will always be).
thingiverse
free

heureka lalinea - one in a ball one not in a ball by Syzguru11
...heureka lalinea - one in a ball one not in a ball by syzguru11
thingiverse
two lalineas one in a ball one not in a ball
thingiverse
free

LaLinea - Morehappy by Syzguru11
...otherhttps://www.thingiverse.com/thing:4543638
(donations appreciated, but not necessary. my things are free and will always be).
thingiverse
free

lalinea-cut-happy by Syzguru11
...lalinea-cut-happy by syzguru11
thingiverse
(donations appreciated, but not necessary. my things are free and will always be).
thingiverse
free

LaLinea round happy by Syzguru11
...lalinea round happy by syzguru11
thingiverse
(donations appreciated, but not necessary. my things are free and will always be).
thingiverse
free

lalinea-twisted-happy - moebius by Syzguru11
...sted-happy - moebius by syzguru11
thingiverse
(donations appreciated, but not necessary. my things are free and will always be).
Sentinel
turbosquid
$15

Sentinel
... available on turbo squid, the world's leading provider of digital 3d models for visualization, films, television, and games.
turbosquid
$5

Sentinel
... available on turbo squid, the world's leading provider of digital 3d models for visualization, films, television, and games.
3d_export
$110

sentinel 3D Model
...sentinel 3d model
3dexport
seashell4
sentinel 3d model seashell4 5108 3dexport
turbosquid
$10

Rigged Sentinel
... available on turbo squid, the world's leading provider of digital 3d models for visualization, films, television, and games.
turbosquid
$1

Steam Sentinel
... available on turbo squid, the world's leading provider of digital 3d models for visualization, films, television, and games.
turbosquid
free

Sentinel Cruiser
... available on turbo squid, the world's leading provider of digital 3d models for visualization, films, television, and games.
turbosquid
$15

Resaturant -" Sentinel"
... available on turbo squid, the world's leading provider of digital 3d models for visualization, films, television, and games.
turbosquid
$9

Sentinel black coin
...royalty free 3d model sentinel black coin for download as max on turbosquid: 3d models for games, architecture, videos. (1555934)
turbosquid
$9

Sentinel gold coin
...
royalty free 3d model sentinel gold coin for download as max on turbosquid: 3d models for games, architecture, videos. (1555927)
turbosquid
$7
Sentinel Mirror by castedesign
...e 3d model sentinel mirror by castedesign for download as max on turbosquid: 3d models for games, architecture, videos. (1651635)
Matrix
3ddd
$1

Matrix
...matrix
3ddd
lumina , matrix
модель светильника matrix
3ddd
$1

Lumina Matrix
... lumina , matrix
светильник matrix doppia от фабрики lumina
3ddd
$1
MATRIX SLIM
...reesse , ванна , джакузи
treesse - matrix sleem
3ddd
$1

Люстра Lumina - Matrix
...люстра lumina - matrix
3ddd
lumina , matrix
люстра lumina - matrix
3ddd
$1

mebel MATRIX
...mebel matrix
3ddd
коллекция мебели matrix, линейка мебельной фабрики bfm. производство польша.
3ddd
$1
Светильник Lumina Matrix
...к lumina matrix
3ddd
lumina , matrix
светильник lumina matrix - максимальная детализация
design_connected
free

Matrix Terra
...matrix terra
designconnected
free 3d model of matrix terra by lumina italia designed by kaufman, yaacov.
design_connected
$11
Matrix 8
...matrix 8
designconnected
lumina italia matrix 8 computer generated 3d model. designed by kaufman, yaacov.
3ddd
$1
MATRIX by MAURO FADEL
...iproducts.com/it/prodotti/96755/matrix-poltroncina-a-slitta-con-braccioli-matrix-poltroncina-a-slitta-la-cividina.html#
3ddd
$1
APU Matrix Robot
...apu matrix robot
3ddd
робот
apu matrix robot