Thingiverse

The Dutch Windtunnel by niccolodevries
by Thingiverse
Last crawled date: 3 years, 5 months ago
This is the 3D printable (Dutch) windtunnel. Better instructions will follow, but for now the main things are:
The left side of the tunnel is called "aanzuig venturi" and consits of 8 parts which can best be printed upright.
The right side of the tunnel is called "ventilator venturi" and consits of 8 parts which can also best be printed upright.
The two middle pieces are called "middenstuk 1 & 2" and the can be printed with the grid on the buildplate.
Cable management holes are everywhere so that no cable has to been seen when you are standing in front of the tunnel.
4x 140mm fans are needed.
About 3 meter of led strip is needed (yes it also has one for underglow).
Testing parts can be mounted with the m15 thread into the "model paneel". This panel can connect to the rear of the tunnel.
Smoke can be injected two ways, with the smoke injector or just from the front of the tunnel. If you go the smoke injector way you will need 2 balbearings for the other way you will need two "afdoppers".
Testing video's: https://www.youtube.com/playlist?list=PL8t1gmmVDGynf8Ea65yWk3jgmR4cQEb9B
If you print it, please post it on reddit: https://bit.ly/3kNCbtq would love to see the results.
Similar models
thingiverse
free

ORCA 0.43 Cooling Tunnel by JackT
... with 5mm cable ties to it.
it is created of two parts, you should have a look in which orientation the print works best for you.
grabcad
free

VENTURI INJECTOR
...venturi injector
grabcad
venturi 2" for fertilizer
thingiverse
free

Y10000B2B000110 - Common Rail Parts Injector Return Oil Backflow Pipe Connector Plastic Two-way Joint for 0445 110 Series Injections by 2goat2
... detailed part - will need appropriate printer settings and orientation to printer bed to work (might need some trial and error).
thingiverse
free
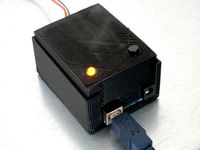
Arduino Box (parametric) by crox
...here are also two holes in the top part that i used for a led and a push-button. those can be easily commented out if not needed.
thingiverse
free
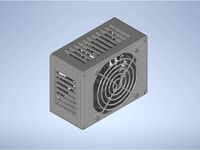
MOSFET - housing
...screws and nuts (for assembling the mosfets, fan and top)
countersunk screw (to mount the housing)
zipties (to fix the cables)
thingiverse
free

Three part respirator venturi valve for casting by JohnvanderPol
...ith acrylic resin.
the nozzle is the only one then needed to be printed.
there could be also nozzles made with different diameter
thingiverse
free
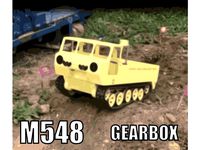
M548 (Gearbox) by jovilarroig
...printed 4 times since you need 2 pieces per gearbox.
parts
m548
chassis.
m548
wheels & suspension.
m548
body 1/3 (front).
thingiverse
free

50kg Loadcell Holder by Ledinor
...uot; and "klemme.stl" for one loadcell.
if you want you can also use these small two- three- and four-way cable canals.
3dwarehouse
free

Windtunnel
...windtunnel
3dwarehouse
example of a model windtunnel #tunnel
thingiverse
free

Venturi Injector by sgraber
...venturi injector by sgraber
thingiverse
this is a simple venturi injector for injecting air into a fluid stream.
Windtunnel
thingiverse
free
Hoover Windtunnel vacuum tube replacement clip by wayne_coots
...coots
thingiverse
the vacuum tube retaining clip to our vacuum broke. i modeled it in fusion 360, printed it and it works great.
thingiverse
free

Airfoil used for laminar air flow inside windtunnel by chiti2ran
...s giving chance to study the fundamental effects of the airflow over object in study (e.g water droplet, crystal structure , etc)
thingiverse
free

Hoover UH70120 T-Series WindTunnel Rewind Plus Hose Switch by scottmmjackson
..., switch won't release hose adequately
the spring retention cross pops off very easily when using weaker plastics
prs welcome
thingiverse
free

Windtunnel for MC_Escher_WindMill by Taco3D
...ize that fits inside the tunnel. mind a spare of 5% because the mill grows bigger when turning (and could touch the walls inside)
thingiverse
free

Hoover Windtunnel High Performance Pet Mod by wmk0100
...rew to keep it in place.note: the attachments slide up through the holder.
i used pla at 220deg c, and the build plate at 95deg c
thingiverse
free

Hoover Windtunnel 3 Bottom Cord Bracket
...built this thing, because i didn't want it to break. fingers crossed. we'll see if it's strong in the right places.
thingiverse
free

Hoover WindTunnel Wheel Axle Repair by atlcog
...oblems.
included openscad file if you want to tweak it. if you find ways to improve it, or if it saves your vacuum, let me know!
thingiverse
free

Hoover Inlet Hose Door - UH72400 WindTunnel Air by dLiuTronGuy
...s part anyways, here's a link:https://www.partswarehouse.com/hoover-door-and-spring-assembly-inlet-duct-uh724-p/440004082.htm
thingiverse
free
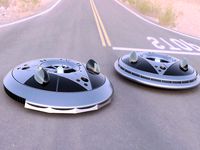
VZ-9 Avro Avrocar
...of indecision...) later life of the prototypes included nasa windtunnel test article and both test articles are now in...
Dutch
turbosquid
$35

Dutch watermill.max
... available on turbo squid, the world's leading provider of digital 3d models for visualization, films, television, and games.
turbosquid
$20

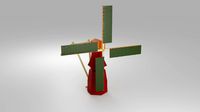
Dutch Windmill
... dutch windmill for download as blend, fbx, dae, obj, and stl on turbosquid: 3d models for games, architecture, videos. (1687819)
turbosquid
$10

Dutch cheese
... available on turbo squid, the world's leading provider of digital 3d models for visualization, films, television, and games.
turbosquid
free

Dutch Food
... available on turbo squid, the world's leading provider of digital 3d models for visualization, films, television, and games.
3d_export
$65

dutch town
...dutch town
3dexport
simple rendering of the scene file
3d_export
$65

dutch town
...dutch town
3dexport
simple rendering of the scene file
3d_export
$65

dutch town
...dutch town
3dexport
simple rendering of the scene file
3d_export
$20
dutch windmill
...dutch windmill
3dexport
there is a simple windmill for game development.
3ddd
$1

Dutch Summer - The BUX
...ельной компании dutch summer. официальное название пуфика — the bux. горшок для пуфика сделан из пластмасы, а сам кактус из кожи.
3ddd
$1
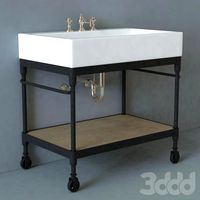
Dutch Industrial Console
... lugarno
умывальник от компании restoration hardware
со смесителем lugarno 8" widespread faucet