Thingiverse
The Butterfly: lightweight and easy head mount for LM6UU crossbars (eg. Ultimaker) by MoonCactus
by Thingiverse
Last crawled date: 4 years, 4 months ago
This is a thing in progress b/c of the way the hot ends are attached.
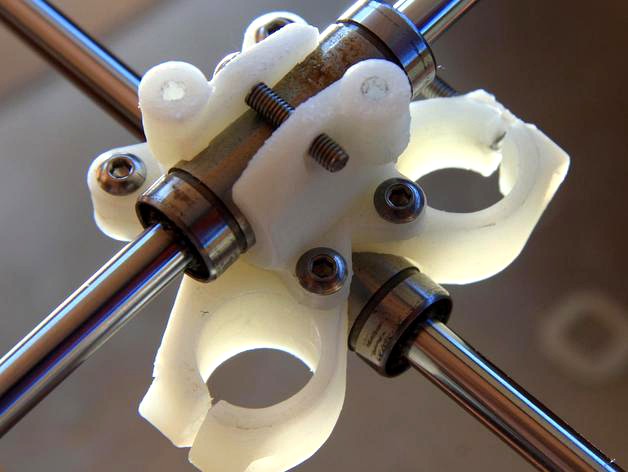
This is a generic, minimalist, extremely light, dual-head-ready, two-part only, quick head mount replacement for the ultimaker. I am using it most of the time in place of the stock mount.
It can be used like this but there is also some work/upload to be done for a better attachment to the hot ends (see the instruction for more). See, eg. the specific mount for the E3D on the last picture (http://www.thingiverse.com/thing:159987). Should work with almost any 12mm OD bushing/bearing long enough.
Once the two parts are assembled together (4 screws) it can be mounted/disassembled in about 1 minute:
2 screws for the electonics PCB on the tob
1 screw to clamp the hot end
1 screw for each bearing, done.
Check the pictures for the details and how it can be put in place without disassembling the X/Y rods.
Just swap it with my reciprocal stock-compatible mount: http://www.thingiverse.com/thing:137847
It also has provision for a dual head, even though I never tried so far. For now there is nothing beyond the couplign screws to attach a fan, I am mostly using a separate 120mm fan to blow on my plate (and it works quite well).
Check the instructions for more.