GrabCAD
TapeFix!
by GrabCAD
Last crawled date: 1 year, 11 months ago
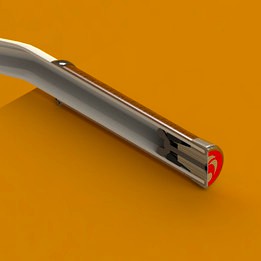
In my entry you can find a smart way of using parts from the shelf; a countersunk bolt, wing nut and a piece of rubber tubing, combined with a CNC cut piece of design.
By only mounting it into the CNC lathe twice you can make the end plug, wich makes it quick and easy to produce!
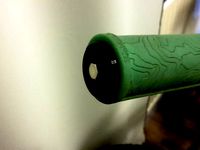
I use the 10mm overhang of the tape to fold back into the handlebar, after you've pushed the plug in, the tape has no way to go! By fastening the countersunk bolt you will force the wing nut into the rubber which will expand and make a tight fit! The good looking logo will hide the bold and finishes off the design. (You could also laser the logo directly into the plug, which leaves out the extra part, the countersunk bold can be easily hidden. In this design the logo is pressed in, it will come lose with a small screwdriver)
The second ring will press the tape against the handlebar, wich will secure it properly.
The final looks can be chosen different ofcourse , but this entry is mostly focused on the way of securing the tape at the end of the handlebar!
Replacing the tape will be a quick and easy job when using this system!
By only mounting it into the CNC lathe twice you can make the end plug, wich makes it quick and easy to produce!
I use the 10mm overhang of the tape to fold back into the handlebar, after you've pushed the plug in, the tape has no way to go! By fastening the countersunk bolt you will force the wing nut into the rubber which will expand and make a tight fit! The good looking logo will hide the bold and finishes off the design. (You could also laser the logo directly into the plug, which leaves out the extra part, the countersunk bold can be easily hidden. In this design the logo is pressed in, it will come lose with a small screwdriver)
The second ring will press the tape against the handlebar, wich will secure it properly.
The final looks can be chosen different ofcourse , but this entry is mostly focused on the way of securing the tape at the end of the handlebar!
Replacing the tape will be a quick and easy job when using this system!
Similar models
grabcad
free

2 PIECE RUBBER CAP
... by hand for a quick tape change. the fastener can work with the other size handlebar but it will require a new rubber plug size.
grabcad
free

Handlebar Plug
... wear the cap on it.
special thanks to tobias for the logo bar.
hope you like it:)
http://grabcad.com/library/handlebar-end-v2
grabcad
free

Handlebar Plug v1.02
... the same thing as in the previous model.
http://grabcad.com/library/handlebar-plug
http://grabcad.com/library/handlebar-end-v2
grabcad
free

Simply bicycle handlebar tape fixings by bogy
...s mattsson (http://grabcad.com/library/reference-handlebar)
logo by tobias mattsson (http://grabcad.com/library/sexybycycle-logo)
grabcad
free

Flyingmachine Handlebar Sheath
...en rubber or polyurethane and slips over the rubber plug. the fit coupled with the snap should secure the fastener quite tightly.
thingiverse
free

Bar end plugs by Craftysdc
... made for a road bike. the dia of the plug is 19mm and will expand to approx 22mm. you will need a 20x3mm bolt and nut to match.
grabcad
free

Flying Machine Screw Set
...t i did increase its width and sunk the set screw to give it a more finished smoother look. all pieces are able to be cnc milled.
thingiverse
free
Bike handlebar end plug by Mape
...lug for a 19mm hole.
assembly requires a m4 nut and a long enough (20mm?) m4 bolt.
the bolt is used to tighten plug in its place.
grabcad
free

Handlebar End v2
...out having to take off the plate. by turning in with your hands..
special thanks to tobias for the logo bar.
hope you like it:)
thingiverse
free

ApertureScience Logo With Insert by Gahawn
...t (by design) so you'll want to tap it in with a small rubber mallet or something. i just used the butt end of a screwdriver.