Thingiverse
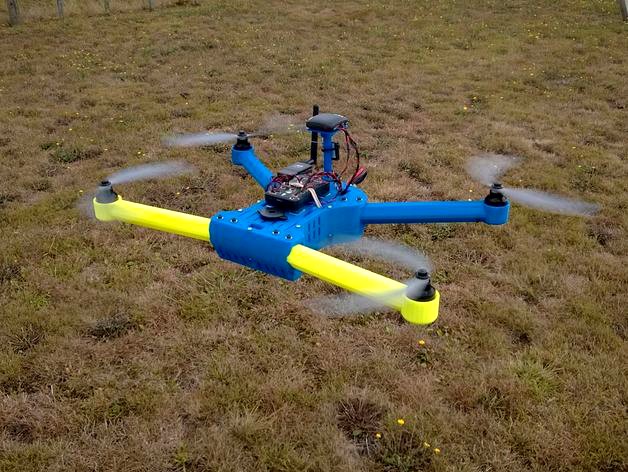
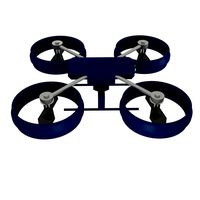
T4 Quadcopter Drone by Brendan22
by Thingiverse
Last crawled date: 3 years ago
Check out the whole "T" copter family:
TX8 Octocopter
T6 Hexacopter
T4 Quadcopter (10" props)
T4 Quadcopter Mini 315 (7-8" props)
T4 Quadcopter Mini 250 (5" props)
Tubular Crossfire 2 quadcopter
I've added a post on the forums over at DIY Drones for discussing and improving these designs.
Also, check out the T4 build overview video.
Features:
completely 3D printable (without support)
simple assembly
includes a single motor arm or optionally use the coaxial arms from the T6 and create an X8!!
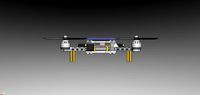
strong braced tube section arms with plenty of room to conceal motor wiring
designed for a single 3S or 4S battery located right in the center of rotation/thrust with room for up to a 6000mah 3S or 4200mah 4S battery (155 x 50 x 30mm capacity).
easy cable routing with beveled cable "tunnels" (and even a few cable tie mounts)
plenty of space to mount ESCs - concealed but still well ventilated for cooling - perfect for a 4-in-1 ESC too.
top plate is designed for the new Pixhawk flight controller from 3D Robotics - but is also fine with APM, KK2 and others
mounting holes available on the "nose" that can be used to attach things like the included Go Pro vibration mount.
RF "invisible" frame - as opposed to carbon fiber or aluminium
All-up-weight 1,011 grams (excluding battery of your choice - including 3DR 880KV motors, 4-in-1 ESC, Pixhawk with GPS and telemetry). Still flies great when loaded with another 1kg of batteries and camera gear (see video).
Sketchup file included so you can make changes to suit yourself
Background
I've been experimenting to find a strong "tubular" profile that could be printed reliably. The angled sections in these designs are 35 degrees to vertical - so well within the typical 45 degree capability of most printers. They arms only present about 11mm of flat surface to minimize obstruction to airflow.
The rest of the design are a collection of ideas that have accumulated over the past year building various quadcopters and Y6 configurations (3D printed, aluminium and bought frames).
Videos
Flight video with Tarot Gimbal and Go Pro attached
Flight video with GoPro mounted on top - no gimbal
Tubular arm versus "conventional" arm design
History
3 August 2014
Version 1.05
Just a small change to add slots to the arm motor mount holes so that 4 bolts can be used (in a 16-19mm pattern) regardless of which "corner" of the motor the wires exit.1 April 2014
Added a T4 univeral camera plate accessory as a separate thing.
22 March 2014
Version 1.04.1
No changes to any existing parts
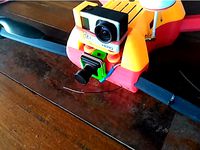
Added a vibration reducing mount for a GoPro Hero 3 - for folks who don't want to set up a full camera gimbal. I used these dampeners because I had them lying around. They removed all vibration "jello" but may be a bit too soft for aggressive flying. I think these ones would be a better option. Anyway, I've included several STLs with different hole sizes which will hopefully suit most dampeners out there (5mm, 7mm, 8.5mm). Flight video is above.15 March 2014
Version 1.04
about 12mm narrower "waist" for a small reduction in plastic/weight
additional cable tunnels at the front of the flight controller
slots in the side and rear of body.stl provide another option to cable tie accessories (eg transmitters with aerials pointing down)
small notches out of the bottom tray provide an outlet for cables to run under each arm (eg for lighting strips)
The following files have been updated:
T4Body.stl
T4TopPlate.stl
T4BottomTray.stl
I'm also adding the component weights and print time in the instructions.
8 March 2014
I flew a few different batteries today to compare. This is with my 880kv 3DR motors which is a bit over-weight as it is version 1.00 and has most of the power components from my T6 inside. I'm guessing a 1.02+ version with something like the 3DR 850kv motors would weigh at least 100 grams less with longer flight time.
The results:
3S 3500mah = 10 minutes (only used 2472 mah - old battery)
3S 6000mah = 18 minutes (used 5676 mah)
4S 4200mah = 16.5 minutes (used 4027 mah)
Version 1.03: A small update that adds two more holes to the body and top plate near the front cable tunnel. This provides a triangle of fixing points on the "nose" which could be used for "accessories" such as a simple camera mount.
7 March 2014
CRASHED HARD!! But this frame handled it well (see photo above). I printed off another arm after work, reassembled and had time for a quick test flight - all back to normal. Replacing the arm was about a 10 minute job.5 March 2014
I just noticed a hole missing at the front of the top plate. It's not required (or any real issue if missing) so I've just updated T4TopPlate.stl and the Sketchup file without changing version numbers.4 March 2014
Version 1.02: I've spent another full day drawing on this thing. The biggest parts are now 199mm long and 140mm wide. Hopefully that will squeeze onto a few more print beds out there. The arm will also fit onto that sized bed if you rotate it a bit.
I've started to version the Sketchup files and left older ones in the files if anyone prefers an earlier design.3 March 2014
Version 1.01: As requested I've put this thing on a diet. It now only requires a 140mm wide (and 220mm long) build platform so it should fit easily on a Replicator 2.
Also I've updated T4Arm.stl adding a small hole to allow a cable tie to be used for strain relief where the wires exit the motor.
TX8 Octocopter
T6 Hexacopter
T4 Quadcopter (10" props)
T4 Quadcopter Mini 315 (7-8" props)
T4 Quadcopter Mini 250 (5" props)
Tubular Crossfire 2 quadcopter
I've added a post on the forums over at DIY Drones for discussing and improving these designs.
Also, check out the T4 build overview video.
Features:
completely 3D printable (without support)
simple assembly
includes a single motor arm or optionally use the coaxial arms from the T6 and create an X8!!
strong braced tube section arms with plenty of room to conceal motor wiring
designed for a single 3S or 4S battery located right in the center of rotation/thrust with room for up to a 6000mah 3S or 4200mah 4S battery (155 x 50 x 30mm capacity).
easy cable routing with beveled cable "tunnels" (and even a few cable tie mounts)
plenty of space to mount ESCs - concealed but still well ventilated for cooling - perfect for a 4-in-1 ESC too.
top plate is designed for the new Pixhawk flight controller from 3D Robotics - but is also fine with APM, KK2 and others
mounting holes available on the "nose" that can be used to attach things like the included Go Pro vibration mount.
RF "invisible" frame - as opposed to carbon fiber or aluminium
All-up-weight 1,011 grams (excluding battery of your choice - including 3DR 880KV motors, 4-in-1 ESC, Pixhawk with GPS and telemetry). Still flies great when loaded with another 1kg of batteries and camera gear (see video).
Sketchup file included so you can make changes to suit yourself
Background
I've been experimenting to find a strong "tubular" profile that could be printed reliably. The angled sections in these designs are 35 degrees to vertical - so well within the typical 45 degree capability of most printers. They arms only present about 11mm of flat surface to minimize obstruction to airflow.
The rest of the design are a collection of ideas that have accumulated over the past year building various quadcopters and Y6 configurations (3D printed, aluminium and bought frames).
Videos
Flight video with Tarot Gimbal and Go Pro attached
Flight video with GoPro mounted on top - no gimbal
Tubular arm versus "conventional" arm design
History
3 August 2014
Version 1.05
Just a small change to add slots to the arm motor mount holes so that 4 bolts can be used (in a 16-19mm pattern) regardless of which "corner" of the motor the wires exit.1 April 2014
Added a T4 univeral camera plate accessory as a separate thing.
22 March 2014
Version 1.04.1
No changes to any existing parts
Added a vibration reducing mount for a GoPro Hero 3 - for folks who don't want to set up a full camera gimbal. I used these dampeners because I had them lying around. They removed all vibration "jello" but may be a bit too soft for aggressive flying. I think these ones would be a better option. Anyway, I've included several STLs with different hole sizes which will hopefully suit most dampeners out there (5mm, 7mm, 8.5mm). Flight video is above.15 March 2014
Version 1.04
about 12mm narrower "waist" for a small reduction in plastic/weight
additional cable tunnels at the front of the flight controller
slots in the side and rear of body.stl provide another option to cable tie accessories (eg transmitters with aerials pointing down)
small notches out of the bottom tray provide an outlet for cables to run under each arm (eg for lighting strips)
The following files have been updated:
T4Body.stl
T4TopPlate.stl
T4BottomTray.stl
I'm also adding the component weights and print time in the instructions.
8 March 2014
I flew a few different batteries today to compare. This is with my 880kv 3DR motors which is a bit over-weight as it is version 1.00 and has most of the power components from my T6 inside. I'm guessing a 1.02+ version with something like the 3DR 850kv motors would weigh at least 100 grams less with longer flight time.
The results:
3S 3500mah = 10 minutes (only used 2472 mah - old battery)
3S 6000mah = 18 minutes (used 5676 mah)
4S 4200mah = 16.5 minutes (used 4027 mah)
Version 1.03: A small update that adds two more holes to the body and top plate near the front cable tunnel. This provides a triangle of fixing points on the "nose" which could be used for "accessories" such as a simple camera mount.
7 March 2014
CRASHED HARD!! But this frame handled it well (see photo above). I printed off another arm after work, reassembled and had time for a quick test flight - all back to normal. Replacing the arm was about a 10 minute job.5 March 2014
I just noticed a hole missing at the front of the top plate. It's not required (or any real issue if missing) so I've just updated T4TopPlate.stl and the Sketchup file without changing version numbers.4 March 2014
Version 1.02: I've spent another full day drawing on this thing. The biggest parts are now 199mm long and 140mm wide. Hopefully that will squeeze onto a few more print beds out there. The arm will also fit onto that sized bed if you rotate it a bit.
I've started to version the Sketchup files and left older ones in the files if anyone prefers an earlier design.3 March 2014
Version 1.01: As requested I've put this thing on a diet. It now only requires a 140mm wide (and 220mm long) build platform so it should fit easily on a Replicator 2.
Also I've updated T4Arm.stl adding a small hole to allow a cable tie to be used for strain relief where the wires exit the motor.
Similar models
thingiverse
free

T4 Quadcopter Arm with ESC cutout by Lyweilian
...http://rctimer.com/product-911.html
tinker this at tinkercad:https://www.tinkercad.com/things/eeyw3mpfbs7-t4-quadcopter-arm-esc
thingiverse
free

T6 / Y6 hexacopter by Brendan22
...t gimbal. the feet are a bit "mad scientist" but they seem to work 8-). here's a quick video of the springy legs.
thingiverse
free

Tubular Crossfire 2 quadcopter by Brendan22
...ingy" leg stl from my t6 design. here's a quick video that shows a longer version of the springy leg design (2nd half).
thingiverse
free

T4 Quadcopter Mini 315 Drone (7-8 inch props) by Brendan22
...d the body to raise the arm sockets so there is a bit for material in the bottom of the socket - stronger to support longer arms.
thingiverse
free

TX8 Octocopter Drone (10" props) by Brendan22
...rot gimbal and go pro attached
another flight - at the river this time
tubular arm versus "conventional" arm design
thingiverse
free

T4 Quadcopter Mini 250 Drone (5 inch props) by Brendan22
...tems.
new slots in the rear of the bottom tray so cables can be threaded up the back of the t4 to suit some flight controllers.
thingiverse
free

Mini spider 250 quadcopter v3 by vpoten
... setup, 12a (or 18a) esc (ultra fast flight):
2207-2100kv or 2208-2000kv motors, 5x45 propellers, 4s 1600 35c battery.
enjoy!
thingiverse
free
T4 Quadcopter fpv camera mount by moose4621
...sing the existing mounting hole available when the gopro mount is also in use.
this allows fpv flights with or without the gopro.
thingiverse
free
Improved ventilation T4 arm by oseiler
... motors now, but with the new arms they remain cool, even when i run them at 100% over some time (clamped down on my work bench).
thingiverse
free

T4 Quadcopter Drone Modified Arm by basshound
...hat zip ties can be used to tie down esc's.
minor chamfering done to arm end to help assist with inserting into the t4 body.
Brendan22
thingiverse
free

MiniAPM case by Brendan22
...miniapm case by brendan22
thingiverse
this case is for a mini apm (ardupilot) flight controller.
thingiverse
free

GPS case (LEA 6H + Compass) by Brendan22
... case (lea 6h + compass) by brendan22
thingiverse
gps case for lea 6h + compass like this one. (it should fit many others too).
thingiverse
free

HKPilot Mega Mini Case by Brendan22
...st used a 8 small pieces of thin double sided foam tape in each corner (top and bottom) of the board to hold everything together.
thingiverse
free

T copter mini legs by Brendan22
...length options (50mm, 75mm and 100mm). the longer ones may be impractical ...but if you try them please post your comments here.
thingiverse
free

T4 accessory: universal camera plate by Brendan22
...using vibration gel and a rubber band.
here's a sample flight video and its not too bad for a very simple and quick option.
thingiverse
free

Iris Tarot gimbal adapter by Brendan22
... bottom triangle plate screws into iris using 3 @ m4 x 40mm bolts.
sketchup file is included so feel free to remix as required.
thingiverse
free

T copter springy legs by Brendan22
...ootprint to improve stability while still keeping well clear of the lower props.
files added:
tlegbent.stl
tlegbentmount.stl
thingiverse
free
Tubular Crossfire 2 quadcopter by Brendan22
...ingy" leg stl from my t6 design. here's a quick video that shows a longer version of the springy leg design (2nd half).
thingiverse
free
T6 / Y6 hexacopter by Brendan22
...t gimbal. the feet are a bit "mad scientist" but they seem to work 8-). here's a quick video of the springy legs.
T4
3ddd
free
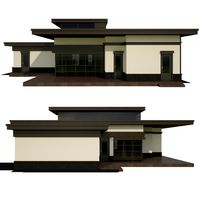
Коттедж T4
... дом , коттедж
серия коттеджей с отличными матами, текстуры в комплекте.
turbosquid
$1

mecklenburg t4 steam locomotive
... 3d model mecklenburg t4 steam locomotive for download as obj on turbosquid: 3d models for games, architecture, videos. (1707826)
turbosquid
$50

Hunting Jet Provost T4
... available on turbo squid, the world's leading provider of digital 3d models for visualization, films, television, and games.
turbosquid
$50

Hunting Jet Provost T4
... available on turbo squid, the world's leading provider of digital 3d models for visualization, films, television, and games.
3ddd
$1

раковина Vitra T4
...раковина vitra t4
3ddd
vitra
раковина без смесителя. габаритные размеры унитаза: шхгхв - 600х470х135мм (без полупьедестала)
humster3d
$75

3D model of Troller T4 2012
...y a detailed 3d model of troller t4 2012 in various file formats. all our 3d models were created maximally close to the original.
3ddd
$1

ODESD2 T4
...рованная дубом фанера, мдф, фурнитура blum tandem
размеры: ширина: 750мм, длина: 1700мм, высота: 750ммhttp://odesd2.com
turbosquid
$150

English Electric Canberra T4 Trainer
... available on turbo squid, the world's leading provider of digital 3d models for visualization, films, television, and games.
3d_export
$99

Volkswagen T4 Van 1990 to 2003 3D Model
...00 1990 1991 1992 volkswagen utility transporter t4 multivan eurovan
volkswagen t4 van 1990 to 2003 3d model squir 78546 3dexport
cg_studio
$99

Volkswagen T4 Van 1990-20033d model
....c4d .fbx .lwo .max .obj - volkswagen t4 van 1990-2003 3d model, royalty free license available, instant download after purchase.
Quadcopter
3d_export
$5
quadcopter
...quadcopter
3dexport
futuristic quadcopter design.<br>original design davidflo 77
turbosquid
$19
quadcopter
...lty free 3d model quadcopter for download as max, ma, and obj on turbosquid: 3d models for games, architecture, videos. (1591426)
turbosquid
$25
QuadCopter
... available on turbo squid, the world's leading provider of digital 3d models for visualization, films, television, and games.
3d_export
$5
Quadcopter 3D Model
...quadcopter 3d model
3dexport
quadcopter studio shaders
quadcopter 3d model vortex333 93968 3dexport
3d_export
$5
Quadcopter 3D Model
...quadcopter 3d model
3dexport
quadcopter aircraft helicopter
quadcopter 3d model greatghost 94019 3dexport
3d_export
$18
passenger quadcopter
... a multicopter is an aircraft built according to a helicopter scheme, with three or more rotors. previews rendered with redshift.
turbosquid
$159
Quadcopter Animated.
... available on turbo squid, the world's leading provider of digital 3d models for visualization, films, television, and games.
turbosquid
$19
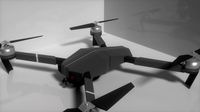
Drone Quadcopter
... available on turbo squid, the world's leading provider of digital 3d models for visualization, films, television, and games.
turbosquid
$12
Drone Quadcopter
... available on turbo squid, the world's leading provider of digital 3d models for visualization, films, television, and games.
3d_export
$29

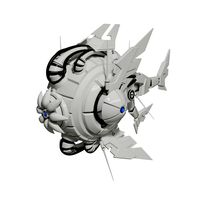
Quadcopter
...
questions about the continuation of the collection or the model can be asked here:<br>https://www.artstation.com/evgen_beg
Drone
3d_export
$12
Drones
...drones
3dexport
drones
3d_export
$5
drone
...drone
3dexport
drone
3d_export
$6
drone
...drone
3dexport
high poly model of dji phantom 4 (drone)
3d_export
$5

drone
...drone
3dexport
drone military flight, sizes are in mm, modeled in fision 360
3d_export
free
drone
...drone
3dexport
drone de uso tactico, creado en blender version 2.79
3d_export
$35
DRONE
...drone
3dexport
turkey drone alpagu kamikaze foldable wing 3ds max 2019,2020,2021,2022 vray 5.00 rendered
3d_ocean
$29
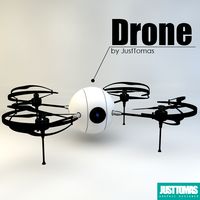
Drone
...drone camera drone electronics justtomas military parrot plane robot sci-fi spy toy vehicle
drone by justtomas .c4d r16 .obj .3ds
turbosquid
$6

Drone
...rone
turbosquid
royalty free 3d model drone for download as on turbosquid: 3d models for games, architecture, videos. (1347051)
turbosquid
free

Drone
...drone
turbosquid
free 3d model drone for download as blend on turbosquid: 3d models for games, architecture, videos. (1688993)
turbosquid
$69
Drone
...e
turbosquid
royalty free 3d model drone for download as max on turbosquid: 3d models for games, architecture, videos. (1232508)