Thingiverse
Supported shelf for USB charger with one-handed operation and easy removal/insertion by slowdowncadet
by Thingiverse
Last crawled date: 3 years, 3 months ago
What is it
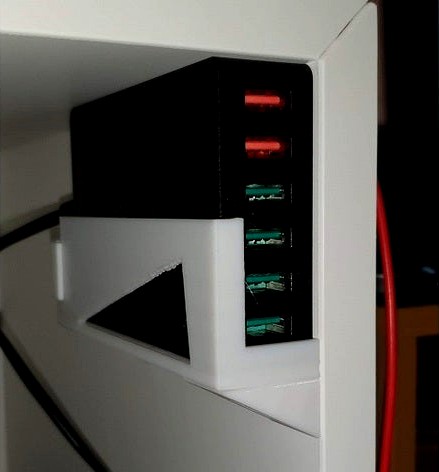
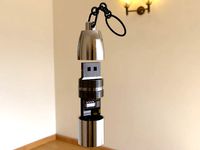
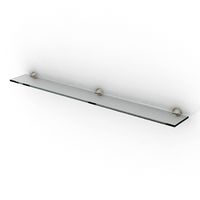
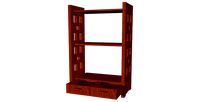
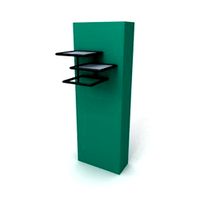
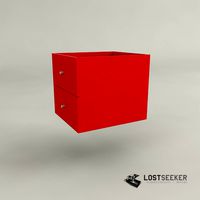
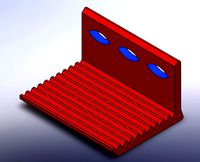
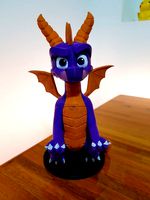
A corner shelf and bracket for mounting a USB charger inside a piece of furniture, like the corner of a bookcase or unit. That sounds super-niche but take a look at the pictures and think: yeah, I could do with something like this :-)
This was designed with a few goals:
The ports should be accessible from the front (not top/etc like some other holders on thingiverse)
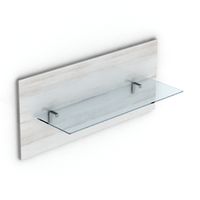
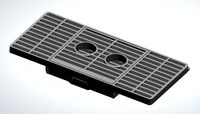
The shelf should be strong, and no ports should be blocked by the structure
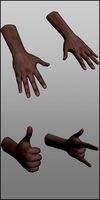
The USB charger should be held rigidly in place, so that cables can be easily pulled out or pushed in with one hand
It should be possible to remove and replace the USB charger without needing to unscrew anything from the support (so that it can taken out for travel, and then brought back and reinserted)
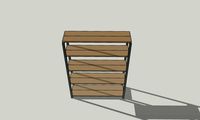
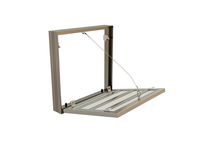
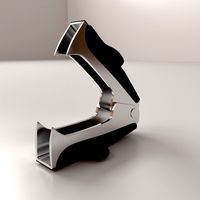
I believe I have achieved this: the shelf clips together with no screws, the only screws being the supports. The shelf is mounted into the corner of a storage unit so that the USB charger itself is pushed against the upper surface keeping it in place, and the shelf has a sturdy lip at the front to prevent forward movement, and a simple lock piece at the back to prevent backward movement. This lock piece simply slides into place in a groove in the shelf and also into a socket in the supporting wedge.
To remove the USB charger, simply unplug the power cable out the back, pull up the rear lock piece, and then slide the USB charger in reverse out the back of the shelf.
Please take a look at the video to see this in action.https://youtu.be/g_qAGNxLdkAhttps://youtu.be/uHExZCbGDzI
To mount this:
Insert the shelf into the two supporting wedges and the USB charger in-place (to ensure the top of the USB charger is pressed up against the shelf above it). Line up flush with the front of the side wall of your storage unit and screw in with two small countersunk screws
The benefit of mounting in a top corner of a shelf/storage is that it really enables the one handed operation, since the USB charger is unable to move in any direction.
The PA-T11 is almost but not quite symmetrical - it can be used just as easily upside down (in fact you can see in the photo - I've mounted this upside down, so that the power led is visible through the cutaway). So if you wanted to mount at the top-left corner of a unit, instead of top-right, that would probably work too. But the rear lock piece relies on gravity - it would not be possible to flip this upside down and mount into a bottom-left or bottom-right corner space.
Or, if you're not worried too much about the vertical movement (or are fine using two handed operation), you can mount this just about anywhere.
Printing notes
Please print the parts in the orientation provided:
Shelf: with the triangular holes flat on the printing bed
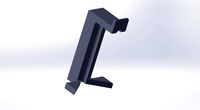
Wedge support: with the screwhole vertically
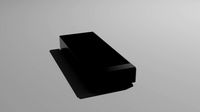
Rear lock: on its square end, with the triangular plug at the top
For the wedge support:
First, choose the right version of the wedge support to fit your screws
3mm thread diameter with approx 6mm head diameter, or
3.5mm thread diameter with approx 7mm head diameter.
Don't forget to print two wedge supports!
Be warned: I had difficulty slicing this with CURA 4.7.1 / CURA 4.8 - it wanted to insert faces inside the countersunk screw hole (basically filling up the screw hole - which would make this unusable). I found that DESELECTING the following CURA setting enabled CURA to slice this correctly:
Mesh Fixes : Union Overlapping Volumes
And even then, attempting to include two (or more) of the wedge objects in a single Cura slicing run still caused Cura to mis-slice it and block up the screw hole. So I needed to print one at a time. It's not so bad, it's a quick print.
How I made this
This is my first attempt at designing something in SketchUp that has:
clip-together parts that are easily printable without any support
countersunk holes
circles and angles and intersections of circles at an angle :-)
I'm using SketchUp Make 2017 (the one that's free for personal use) here.
I learned that creating a countersunk screw hole manually using SketchUp is hard! I'm sure there's a better easier way, using a different tool (or maybe SketchUp has some hidden options) but I basically did it the hard way: using the Circle tool, extruding and then widening at different stages, to create the shank, head, and path, and then using the Intersect Faces tool to cut this against the angled wedge face (I then needed to select the protruding parts and delete them, to complete the extruded hole).
And that wasn't even my first attempt, I tried a number of different approaches before settling on a way that worked for me.
I also learned that SketchUp seems to export broken STL when you do this :-) and I needed to use MeshMixer to clean up the results (but as noted, CURA also had difficulty slicing this, even after fixing the STL).
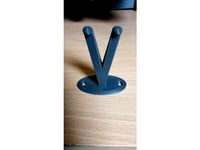
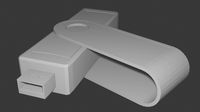
For the 'clip together' solution, I wanted to design something that could be printed with NO SUPPORTS. I wanted the shelf to be restricted from moving relative to the support wedge, but printing out a plug-and-socket would have required support, so I came up with the idea of an inverted triangular plug, mating with a triangular socket on the shelf. The shelf is printed flat so it doesn't really matter what shape that is, but the wedge support is printed on its end (due to the countersunk screw hole) and as a result, the plug must be printable end-up. The triangular plug itself is slightly flattened at the tip, which gives enough support to build subsequent layers, and the angle is high to avoid any overhang issues.
I also implemented a cutaway on the side panel of the shelf. Both the panel and the cutaway are functional: the panel prevents the USB charger from slipping out of place, and the cutaway lets me observe the power light indicator (see wireframes, and photo).
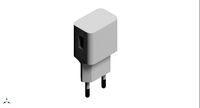
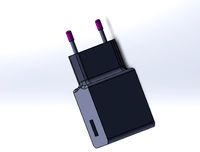
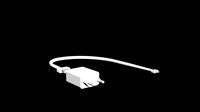
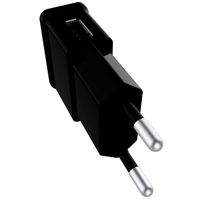
The dimensions of this are designed specifically around the USB charger I have, which is a AUKEY PA-T11 (a 6-port cabled USB charger).
Of course: you could remix this and use this for a different charger with different dimension - or any other thing, it doesn't have to be used for a USB charger!
List of updates
13 Nov 2020
I tightened the tolerances a little (0.6mm) on the overall shelf length to reduce a bit of wobble/play when plugging or unplugging usb cables.
I added a variant of the shelf support wedge with a different size countersunk screw hole (so 3mm or 3.5mm screws can be used)
A corner shelf and bracket for mounting a USB charger inside a piece of furniture, like the corner of a bookcase or unit. That sounds super-niche but take a look at the pictures and think: yeah, I could do with something like this :-)
This was designed with a few goals:
The ports should be accessible from the front (not top/etc like some other holders on thingiverse)
The shelf should be strong, and no ports should be blocked by the structure
The USB charger should be held rigidly in place, so that cables can be easily pulled out or pushed in with one hand
It should be possible to remove and replace the USB charger without needing to unscrew anything from the support (so that it can taken out for travel, and then brought back and reinserted)
I believe I have achieved this: the shelf clips together with no screws, the only screws being the supports. The shelf is mounted into the corner of a storage unit so that the USB charger itself is pushed against the upper surface keeping it in place, and the shelf has a sturdy lip at the front to prevent forward movement, and a simple lock piece at the back to prevent backward movement. This lock piece simply slides into place in a groove in the shelf and also into a socket in the supporting wedge.
To remove the USB charger, simply unplug the power cable out the back, pull up the rear lock piece, and then slide the USB charger in reverse out the back of the shelf.
Please take a look at the video to see this in action.https://youtu.be/g_qAGNxLdkAhttps://youtu.be/uHExZCbGDzI
To mount this:
Insert the shelf into the two supporting wedges and the USB charger in-place (to ensure the top of the USB charger is pressed up against the shelf above it). Line up flush with the front of the side wall of your storage unit and screw in with two small countersunk screws
The benefit of mounting in a top corner of a shelf/storage is that it really enables the one handed operation, since the USB charger is unable to move in any direction.
The PA-T11 is almost but not quite symmetrical - it can be used just as easily upside down (in fact you can see in the photo - I've mounted this upside down, so that the power led is visible through the cutaway). So if you wanted to mount at the top-left corner of a unit, instead of top-right, that would probably work too. But the rear lock piece relies on gravity - it would not be possible to flip this upside down and mount into a bottom-left or bottom-right corner space.
Or, if you're not worried too much about the vertical movement (or are fine using two handed operation), you can mount this just about anywhere.
Printing notes
Please print the parts in the orientation provided:
Shelf: with the triangular holes flat on the printing bed
Wedge support: with the screwhole vertically
Rear lock: on its square end, with the triangular plug at the top
For the wedge support:
First, choose the right version of the wedge support to fit your screws
3mm thread diameter with approx 6mm head diameter, or
3.5mm thread diameter with approx 7mm head diameter.
Don't forget to print two wedge supports!
Be warned: I had difficulty slicing this with CURA 4.7.1 / CURA 4.8 - it wanted to insert faces inside the countersunk screw hole (basically filling up the screw hole - which would make this unusable). I found that DESELECTING the following CURA setting enabled CURA to slice this correctly:
Mesh Fixes : Union Overlapping Volumes
And even then, attempting to include two (or more) of the wedge objects in a single Cura slicing run still caused Cura to mis-slice it and block up the screw hole. So I needed to print one at a time. It's not so bad, it's a quick print.
How I made this
This is my first attempt at designing something in SketchUp that has:
clip-together parts that are easily printable without any support
countersunk holes
circles and angles and intersections of circles at an angle :-)
I'm using SketchUp Make 2017 (the one that's free for personal use) here.
I learned that creating a countersunk screw hole manually using SketchUp is hard! I'm sure there's a better easier way, using a different tool (or maybe SketchUp has some hidden options) but I basically did it the hard way: using the Circle tool, extruding and then widening at different stages, to create the shank, head, and path, and then using the Intersect Faces tool to cut this against the angled wedge face (I then needed to select the protruding parts and delete them, to complete the extruded hole).
And that wasn't even my first attempt, I tried a number of different approaches before settling on a way that worked for me.
I also learned that SketchUp seems to export broken STL when you do this :-) and I needed to use MeshMixer to clean up the results (but as noted, CURA also had difficulty slicing this, even after fixing the STL).
For the 'clip together' solution, I wanted to design something that could be printed with NO SUPPORTS. I wanted the shelf to be restricted from moving relative to the support wedge, but printing out a plug-and-socket would have required support, so I came up with the idea of an inverted triangular plug, mating with a triangular socket on the shelf. The shelf is printed flat so it doesn't really matter what shape that is, but the wedge support is printed on its end (due to the countersunk screw hole) and as a result, the plug must be printable end-up. The triangular plug itself is slightly flattened at the tip, which gives enough support to build subsequent layers, and the angle is high to avoid any overhang issues.
I also implemented a cutaway on the side panel of the shelf. Both the panel and the cutaway are functional: the panel prevents the USB charger from slipping out of place, and the cutaway lets me observe the power light indicator (see wireframes, and photo).
The dimensions of this are designed specifically around the USB charger I have, which is a AUKEY PA-T11 (a 6-port cabled USB charger).
Of course: you could remix this and use this for a different charger with different dimension - or any other thing, it doesn't have to be used for a USB charger!
List of updates
13 Nov 2020
I tightened the tolerances a little (0.6mm) on the overall shelf length to reduce a bit of wobble/play when plugging or unplugging usb cables.
I added a variant of the shelf support wedge with a different size countersunk screw hole (so 3mm or 3.5mm screws can be used)
Similar models
thingiverse
free

Tronsmart U5PTA 54W USB charger case wall mount by chanwilson01
...ed tape but i just run out of the thick ones and too lazy to buy more so i added the screw holes to screw it on my pencil holder.
thingiverse
free

Subaru Forester QC3.0 QC2.0 Quick Charge Car USB by peterlee
... pcb for mounting.
i've included a step file of the pcb so if anyone wants to design their own usb charger they can the same.
thingiverse
free

Anker Power5 USB Corner Mount by RBEPrinter
...corner mount by rbeprinter
thingiverse
i made this holder for the anker power 5 usb charger to mount it in a corner of my shelf.
thingiverse
free
Universal CPAP mask hanger hook by MrAtari1040ST
...sofware for slicing, with tree support enabled. haven't tried it without, but it might be possible to print without supports.
thingiverse
free

Oral-B Vitality CrossAction wall mount by bennnil
...ole in the back and screw it onto the wall. the little knobs on top of the plate lock your charger so that it won't fall off.
thingiverse
free

Wall Mount for Sabrent 4-Port USB Hub by chip228
...39;t go anywhere. created using blender, sliced using ultimaker cura 4.5.0, printed on mp10 mini at 0.2 resolution, no supports.
thingiverse
free

Std Bike Bar End by Roxanna77
...rew. i have not printed this one, but it is based on my other ( http://www.thingiverse.com/thing:1646242 ) and should print fine.
thingiverse
free

Rounded Tesla Model S & X Wall Charger Plug Holder by Gizmotoy
...the screw holes so they don't stick out past the front face of the design.
works great (for cars delivered to the us market)!
thingiverse
free

Greenworks 24v Battery Wall Mount by VariablePenguin
...decided to just mount the battery and then plug in the charger. simple solution! it has 2 holes countersunk for 1/4" screws.
thingiverse
free

Shelf Bracket by Cadfinger
...urely fastened in place. i also angled the holes just slightly to me help get a drill in to those tight corners for easy install.

Charger
3d_export
$5
charger
...ers in battle. this is the 18th century meaning of charger, and it’s based on the verb charge and its meaning “rush into battle.”
3d_export
free
Charger
...charger
3dexport
turbosquid
$15
Charger
... available on turbo squid, the world's leading provider of digital 3d models for visualization, films, television, and games.
turbosquid
$3
Charger
...d model charger for download as skp, max, blend, stl, and obj on turbosquid: 3d models for games, architecture, videos. (1654816)
turbosquid
$1
charger
... available on turbo squid, the world's leading provider of digital 3d models for visualization, films, television, and games.
3d_export
$20

dodge charger 1972
...dodge charger 1972
3dexport
dodge charger 1972
3d_export
$20
dodge charger 1969
...dodge charger 1969
3dexport
dodge charger 1969
3d_export
free

dodge charger 1969
...dodge charger 1969
3dexport
dodge charger 1969
3d_export
$18

dodge charger
...dodge charger
3dexport
3d_export
$89
Charger 3D Model
...charger 3d model
3dexport
charger sea transopt industry 3d models
charger 3d model vitaly amurskiy 2286 3dexport
Usb
3d_ocean
$3
USB Thumbdrive
...usb thumbdrive
3docean
thumbdrive usb usb drive usb stick
this is a swivel type usb thumb drive.
3d_ocean
$5

Usb Stick
...usb stick
3docean
flash stick usb usb memory usb stick
usb stick created using 3ds max 2015 and rendered on mental ray.
3ddd
$1
USB cable
... кабель , провод
высокополигональные модели кабелей usb.
3d_ocean
$5
USB Stick
...usb stick
3docean
32gb computer memory plug plugin protection usb usb stick
an usb stick with built-in plug protection
3d_ocean
$6

USB Stick
...tick
3docean
32 gb flash ram gigabyte memory metal nand plug ram stick usb usb 3 usb stick
usb stick with texture and normal map.
turbosquid
$5

USBS
...bs
turbosquid
royalty free 3d model usbs for download as max on turbosquid: 3d models for games, architecture, videos. (1466594)
3d_export
$5
usb flash
...usb flash
3dexport
usb flash
3d_export
free
usb flash
...usb flash
3dexport
usb flash
3d_export
free
usb flash
...usb flash
3dexport
usb flash driver
3ddd
$1

usb
...usb
3ddd
флешка
флешка
Operation
3d_export
$5

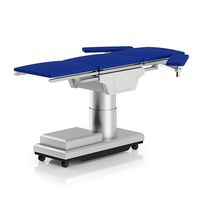
Operating table
...operating table 3dexport operation table<br>renderen in cycles<br>obj. and fbx files...
turbosquid
$49
Surgical operations:
...free 3d model surgical operations: for download as ma and obj on turbosquid: 3d models for games, architecture, videos. (1261516)
turbosquid
$15

operating chair.max
... available on turbo squid, the world's leading provider of digital 3d models for visualization, films, television, and games.
3d_ocean
$29
Operating table
...3docean bed doctor emergency equipment hospital medical merivaara mobile operation practico surgeon surgery surgical high detailed 3d model of...
3ddd
$1
Coin Operated Telescope
...perated telescope
3ddd
бинокль , телескоп
north american classic coin operated telescope
3d_export
$15
operator and
...export to game engines. easy editable models and ready for texturing. rig and animation ready. good retopology. easy file access.
3d_ocean
$20
Operating Lamp
... higher and many others. formats *.max scanline *.max vray *.max mentalray *.c4d advanced render *.c4d cinema 4d vray *.obj *.fbx
3d_ocean
$28
Operating Table
... higher and many others. formats *.max scanline *.max vray *.max mentalray *.c4d advanced render *.c4d cinema 4d vray *.obj *.fbx
cg_studio
$50
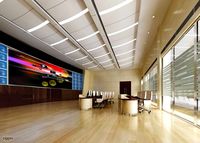
Operating room3d model
...perating room3d model
cgstudio
.max - operating room 3d model, royalty free license available, instant download after purchase.
cg_studio
$50

Operating room3d model
...perating room3d model
cgstudio
.max - operating room 3d model, royalty free license available, instant download after purchase.
Shelf
3d_ocean
$6

Shelf
...shelf
3docean
furniture shelf
a lowpoly shelf .
turbosquid
$7
Shelf
...helf, bookshelf,cafe shelf,decor, for download as max and ige on turbosquid: 3d models for games, architecture, videos. (1427685)
archibase_planet
free
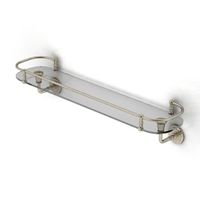
Shelf
...shelf
archibase planet
shelf rack glass shelf
shelf - 3d model (*.gsm+*.3ds) for interior 3d visualization.
archibase_planet
free
Shelf
...shelf
archibase planet
shelf rack glass shelf
shelf - 3d model (*.gsm+*.3ds) for interior 3d visualization.
3d_ocean
$3
Shelf
...shelf
3docean
shelf
a high quality shelf with high resolution texture
3d_export
$5
shelf
...shelf
3dexport
shelf
3d_export
$5

Shelf
...shelf
3dexport
shelf
archibase_planet
free
Shelf
...shelf
archibase planet
shelf shelving glass shelf
shelf 1 - 3d model (*.gsm+*.3ds) for interior 3d visualization.
archibase_planet
free
Shelf
...shelf
archibase planet
shelfs shelving bookshelf
shelf - 3d model for interior 3d visualization.
archibase_planet
free
Shelf
...shelf
archibase planet
shelf shelving bookcase
shelf - 3d model for interior 3d visualization.
Insertion
turbosquid
$10
insert a bracelet
... 3d model the link element insert for download as max and max on turbosquid: 3d models for games, architecture, videos. (1609593)
turbosquid
$56

Threaded Inserts
... available on turbo squid, the world's leading provider of digital 3d models for visualization, films, television, and games.
turbosquid
$10

Insert for eggs
... available on turbo squid, the world's leading provider of digital 3d models for visualization, films, television, and games.
3d_export
$14
drawing of needle inserting machine
...lectronic manufacturers use pin machines to help customers to insert needles, so as to obtain processing costs and obtain wealth.
turbosquid
$5
IKEA Insert drawers
... available on turbo squid, the world's leading provider of digital 3d models for visualization, films, television, and games.
turbosquid
$5

IKEA insert with door
... available on turbo squid, the world's leading provider of digital 3d models for visualization, films, television, and games.
3d_export
$5
Siemsn EQ 6 Inlet insert
...placed there without any problems. the insert is then straight for normal cups and a square insert can be removed for large cups.
turbosquid
$25
eagle insert on leather or rubber
...eagle insert on leather or rubber for download as obj and stl on turbosquid: 3d models for games, architecture, videos. (1342476)
turbosquid
$22

Fireplace Stovax - Knightsbridge Insert
... available on turbo squid, the world's leading provider of digital 3d models for visualization, films, television, and games.
turbosquid
$22

Fireplaces Stovax - Knightsbridge Insert
... available on turbo squid, the world's leading provider of digital 3d models for visualization, films, television, and games.
Handed
3d_export
$8
hand
...hand
3dexport
fantasy hand
3d_export
$5
hand
...hand
3dexport
male hand
3d_export
$5
hand
...hand
3dexport
realistic male hand
3d_export
$5
hand
...hand
3dexport
hand with nails and structure
archibase_planet
free
Hand
...hand
archibase planet
hand
hand n190111 - 3d model (*.gsm+*.3ds) for interior 3d visualization.
3ddd
$1
Hand
...hand
3ddd
hand
модель руки будды
3d_export
$5
hand
...hand
3dexport
it is my wrist of hand and this is on 3d sculpt
3d_export
$5
hand
...hand
3dexport
realistic male hand obj file
3d_export
$7
hand-006 rigged hand
...hand-006 rigged hand
3dexport
rigged right hand 3d model additional textures for pbr rendering included
3d_ocean
$6
Hand
...
this 3d models of the hands, made in 3ds max, has textures(.jpg), materials(.mat), rigged, the models in .max, fbx, obj format.
Removal
turbosquid
$15

Staple Remover
... available on turbo squid, the world's leading provider of digital 3d models for visualization, films, television, and games.
turbosquid
$10

Staple Remover
... available on turbo squid, the world's leading provider of digital 3d models for visualization, films, television, and games.
turbosquid
$1

Staple Remover
... available on turbo squid, the world's leading provider of digital 3d models for visualization, films, television, and games.
3d_export
$25

Staple Remover 3D Model
...remover office supplies pull desk paper remove workplace school work desktop vray
staple remover 3d model plutonius 7699 3dexport
turbosquid
$28
Removable Wall Hatch
... 3d model removable wall hatch for download as , fbx, and obj on turbosquid: 3d models for games, architecture, videos. (1670326)
3d_export
$15
Staple Remover 3D Model
... desktop paper accessories household tool desk workplace instrument equipment pull
staple remover 3d model firdz3d 90012 3dexport
3ddd
free
Missed Maps Remover
...
3ddd
missed maps remover
скрипт находит потерянные карты в файле и позволяет удалить их или открыть в окне редактора материалов.
turbosquid
$29

Eye remover
...bosquid
royalty free 3d model eyeremover for download as 3dm on turbosquid: 3d models for games, architecture, videos. (1695439)
3ddd
$1

Remove Note Track
...аем скрипт чтобы удалить нулевые треки,которые грузят систему при сохранении и файл начинает сохраняться снова нормально и быстро
3d_export
$6

Gas dust removal bag filter
...gas dust removal bag filter
3dexport
gas dust removal, bag filter
Easy
design_connected
$16
Easy
...easy
designconnected
sollos easy computer generated 3d model. designed by almeida, jader.
design_connected
$20
Easy
...easy
designconnected
established & sons easy armchairs computer generated 3d model. designed by ed carpenter.
3d_ocean
$1

Easy Button
... it is accurate in close-ups. you can drop this model right into any setting. the textures are included as well as links to do...
design_connected
$16
Easy Armchair
...easy armchair
designconnected
easy armchair computer generated 3d model. designed by jeanneret, pierre.
3ddd
$1
Pouf EASY
... easy
3ds max 2010.v-ray 2.40.03.file formats fbx,obj. pouf desiree 2014 easy. dimensions 100x100x45 cm.
design_connected
$18
Easy Armchair
...easy armchair
designconnected
fsm easy armchair computer generated 3d model. designed by hartmann, markus.
design_connected
$16
Easy Chair
...easy chair
designconnected
magis easy chair computer generated 3d model. designed by seymour, jerszy.
design_connected
$16

Easy Rider
...easy rider
designconnected
bulo easy rider computer generated 3d model. designed by venlet, danny.
design_connected
$11

Easy Footstool
...easy footstool
designconnected
fsm easy footstool computer generated 3d model. designed by hartmann, markus.
design_connected
$18

Doda - Easy
...doda - easy
designconnected
molteni & c doda - easy computer generated 3d model. designed by laviani, ferruccio.
Supported
turbosquid
$5
Support
... available on turbo squid, the world's leading provider of digital 3d models for visualization, films, television, and games.
3d_export
$8
Support 3D Model
...support 3d model
3dexport
support cantilever console
support 3d model tasal 73900 3dexport
3d_export
$5
phone support
...phone support
3dexport
phone
turbosquid
$12
Support bars
...squid
royalty free 3d model support bars for download as max on turbosquid: 3d models for games, architecture, videos. (1411542)
turbosquid
$8

support weights
...id
royalty free 3d model support weights for download as max on turbosquid: 3d models for games, architecture, videos. (1411538)
turbosquid
$2
headphone support
...royalty free 3d model headphone support for download as sldpr on turbosquid: 3d models for games, architecture, videos. (1357583)
turbosquid
$2

Support for flowers
...royalty free 3d model support for flowers for download as max on turbosquid: 3d models for games, architecture, videos. (1463543)
turbosquid
$14

Flower Support
...alty free 3d model flower support for download as max and obj on turbosquid: 3d models for games, architecture, videos. (1497066)
turbosquid
$5
serum support
...yalty free 3d model serum support for download as c4d and obj on turbosquid: 3d models for games, architecture, videos. (1551267)
3d_export
$10
spyro joystick support
...spyro joystick support
3dexport
joystick support of spyro dragon
One
turbosquid
$2
one plus one
... available on turbo squid, the world's leading provider of digital 3d models for visualization, films, television, and games.
3ddd
$1
One
...one
3ddd
стул
офисный стул one
3ddd
free

one
...
palazetti one ,http://palazzetti.ca/index.php/component/virtuemart/seating/armchairs-lounges/one-chair-detail?itemid=0
turbosquid
$35
One A
... available on turbo squid, the world's leading provider of digital 3d models for visualization, films, television, and games.
turbosquid
free

One
... available on turbo squid, the world's leading provider of digital 3d models for visualization, films, television, and games.
3ddd
$1
Стул One
...стул one
3ddd
one , magis
кресло magis s.p.a , one
3ddd
$1
Стул One
...стул one
3ddd
one , magis
кресло one chair (4star), magis s.p.a.
3d_export
$20
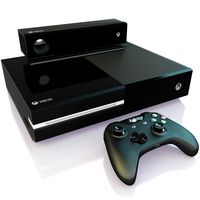
xbox one
...xbox one
3dexport
xbox one
3ddd
$1
xbox one
... консоль , джойстик
xbox one + kinect + gamepad
3ddd
free
One
...nstantin grcic
артикул ct-284 (cosmorelax.ru)
размер l36xw41xh82.5, sh 77cm
цвет черный, красный
материал алюминий
вес 2,5 кг