Thingiverse
Sunlu Filament Dryer Mod by wflack
by Thingiverse
Last crawled date: 2 years, 9 months ago
Disclaimer: Any of the mods performed are your own risk and will most likely void any warranty from the manufacturer. That said, hope this turns out well for you. Cheers.
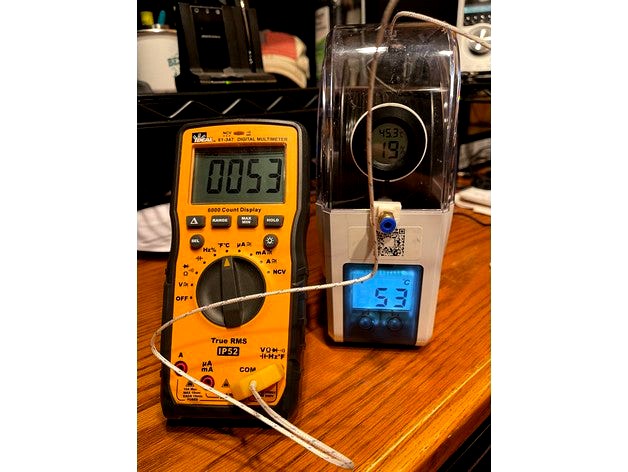
This mod adds air circulation / convection to improve the dryer's performance. The unmodified dryer was measuring roughly 35c across all three of my units when the configured for 55c. After the mod, I was measure 1 to 1 with the display temp and eventually after a few hours it would reach 55c. The meter's thermal probe was inserted into the top access port and set back roughly 40-50mm on top of a full spool of ASA filament. The humidity in the box at the start of the test was 35% and after 6 hours had reached 12% and over night dropped to 8%.
Please note this mod requires soldering a connector and shunt wire on the control board. Image provided illustrating placement and steps are included below. This mod will turn the fan on/off along with the heat plate. So when the heat plate / box is turned off so will the fan. Side note: it looks like sunlu intended on adding fan support at one point because there is a unpopulated fan socket and driver circuitry. Would have been nice if Sunlu kept the circuit active on the asic and repopulating the missing parts would have made for a solid mod, but the hack detailed below works fine and has been tested across three units for weeks.
Included in the docs are the tools, parts and steps used to reproduce the mod.
Happy Hacking,
Basic Tools Used:
[ ] Soldering Iron
[ ] Solder
[ ] Rosen Flux
[ ] Philips #1, #2
[ ] Tweezer
[ ] Drill
[ ] Drill bits sae/metric
[ ] Utility Blade / Knife
[ ] Heatgun
[ ] Scissors
[ ] Wire stripper (30/28awg - 14awg)
[ ] Small file set
[ ] Meter (Check mods for continuity and shorts)
[ ] Flush cutters
[ ] Magnification 10x (Optional but helps a lot with the finer/sensitive work)
[ ] Calipers
Examples of Tools Used:
Special Tools: These are some of the tools I used to modify the sunlu filament dryer. These are just to give you some ideas of what to expect for this project.
[ ] Used a 42mm hole saw drill bit to make hole. Examples listed below:
-- https://www.amazon.com/Rannb-1-65-Inch-Metal-Drilling-Cutter/dp/B081TSR6VZ/ref=sr_1_2?dchild=1&keywords=hole+saw+42mm&qid=1625238036&sr=8-2
-- https://www.amazon.com/Utoolmart-Bimetal-Professional-Stainless-Triangular/dp/B07VGPX8SL/ref=sr_1_9?dchild=1&keywords=hole+saw+42mm&qid=1625238100&refinements=p_85%3A2470955011%2Cp_72%3A1248909011&rnid=1248907011&rps=1&s=hi&sr=1-9
-- https://www.amazon.com/Sydien-Heavy-Adapter-Stainless-Drilling/dp/B08GSCTT8H/ref=sr_1_19?dchild=1&keywords=hole+saw+42mm&qid=1625238100&refinements=p_85%3A2470955011%2Cp_72%3A1248909011&rnid=1248907011&rps=1&s=hi&sr=1-19
[ ] Soldering Iron -- https://www.amazon.com/gp/product/B0852XJN11/ref=ppx_yo_dt_b_search_asin_title?ie=UTF8&psc=1
[ ] Solder -- https://www.amazon.com/gp/product/B07PDPTFC4/ref=ppx_yo_dt_b_search_asin_title?ie=UTF8&psc=1
[ ] Rosen -- https://www.amazon.com/gp/product/B008ZIV85A/ref=ppx_yo_dt_b_search_asin_title?ie=UTF8&psc=1
[ ] No-Clean Solder Wick -- https://www.amazon.com/gp/product/B0195UVWJ8/ref=ppx_yo_dt_b_search_asin_title?ie=UTF8&psc=1
[ ] Flat file set -- https://www.amazon.com/gp/product/B08W1MCG4J/ref=ppx_yo_dt_b_asin_title_o04_s01?ie=UTF8&psc=1
[ ] Needle file set -- https://www.amazon.com/gp/product/B084WTHG7J/ref=ppx_yo_dt_b_asin_title_o04_s00?ie=UTF8&psc=1
[ ] Butane Torch (Heatgun/Soldering) -- https://www.amazon.com/gp/product/B07M68FLLZ/ref=ppx_yo_dt_b_asin_title_o03_s00?ie=UTF8&psc=1
[ ] Wire Stripper
-- https://www.amazon.com/dp/B07WFL122J?pd_rd_i=B07WFL122J&pd_rd_w=xinUc&pf_rd_p=ee186ce0-6bf7-4893-85b9-f3368b019e0f&pd_rd_wg=0jK4C&pf_rd_r=4N9V0YE7S7EG1YAEKMQ2&pd_rd_r=69aa6ac3-07f2-4463-bcac-18d60b1c98ce
-- https://www.amazon.com/Capri-Tools-20012-Self-Adjusting-Stripper/dp/B01018CYV8/ref=sr_1_5?dchild=1&keywords=wire+stripper+self+adjusting+28awg&qid=1625239331&sr=8-5
Fan PCB Mod:
[ ] 1 x 26 awg wire to create a sung on pcb from D2 to D3 test pads. Reference pcb_mod drawing, recommend silicone jacket/insulated to handle high temp environment.
Note: This mod will turn on the blower fan when heater pad is on. Turns off the fan when powered down.https://www.amazon.com/gp/product/B073RDK4C9/ref=ppx_yo_dt_b_search_asin_title?ie=UTF8&psc=1
[ ] 1 x 2.0mm 2 pin JST socket and male cable -- https://www.amazon.com/gp/product/B01DUC1O68/ref=ppx_yo_dt_b_search_asin_title?ie=UTF8&psc=1
[ ] 1 x 2.54mm 2 pin socket female jst cable -- https://www.amazon.com/gp/product/B076JFFDWN/ref=ppx_yo_dt_b_search_asin_title?ie=UTF8&psc=1
[ ] 1 x 2.0mm 2 Pin female right angle header connector -- https://www.amazon.com/gp/product/B08263YV8C/ref=ppx_yo_dt_b_asin_title_o00_s00?ie=UTF8&psc=1
[ ] 1 x 50mm 24v blower fan -- https://www.amazon.com/gp/product/B079BPS9Q8/ref=ppx_yo_dt_b_search_asin_title?ie=UTF8&psc=1
[ ] Wire ties -- 1mm x 2.4mm x 100m -- https://www.amazon.com/AmazonBasics-Multi-Purpose-Cable-Ties-200-Piece/dp/B087MKMSDY/ref=sr_1_3?dchild=1&keywords=wire+tie+100mm&qid=1623735832&s=hi&sr=1-3
[ ] Heat shrink -- https://www.amazon.com/625pcs-Shrink-Tubing-Tubes-Ratio/dp/B07QM8249H/ref=sr_1_7_sspa?crid=20BAVJJJH9MKA&dchild=1&keywords=heat+shrink+tubing+kit&qid=1623735871&s=hi&sprefix=heat+shrink%2Ctools%2C183&sr=1-7-spons&psc=1&spLa=ZW5jcnlwdGVkUXVhbGlmaWVyPUEzNFJZU1lINk1XQ0dGJmVuY3J5cHRlZElkPUEwMjYzMDg4MkZHVVpWN0g2RktRSiZlbmNyeXB0ZWRBZElkPUEwNTc0NDgwMkc0TDU3MUxXV0dZVCZ3aWRnZXROYW1lPXNwX210ZiZhY3Rpb249Y2xpY2tSZWRpcmVjdCZkb05vdExvZ0NsaWNrPXRydWU=
[ ] 2 x M4 20mm Hex Socket Button Head Cap Screw -- https://www.amazon.com/gp/product/B08T1S89T8/ref=ppx_yo_dt_b_asin_title_o08_s00?ie=UTF8&psc=1
Thermister Mod: - Extension Cable
[ ] 1 male and female connector cable -- https://www.amazon.com/gp/product/B013JRWCBU/ref=ppx_yo_dt_b_search_asin_title?ie=UTF8&psc=1
Case Mod:
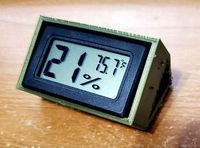
[ ] 1 x Mini Hygrometer & Thermometer -- https://www.amazon.com/gp/product/B07FCPJRFH/ref=ppx_yo_dt_b_search_asin_title?ie=UTF8&psc=1
[ ] 1 x neoprene rubber sheet for insulation -- https://www.amazon.com/gp/product/B072FB13ZV/ref=ppx_yo_dt_b_asin_title_o09_s00?ie=UTF8&psc=1
[ ] 1 x M6 PTFE Connector -- https://www.amazon.com/gp/product/B07PVVLH4Y/ref=ppx_yo_dt_b_asin_title_o07_s01?ie=UTF8&psc=1
[ ] Roll of painters tape. Like the blue/green rolls that leave no residue
Filament:
[ ] Recommend something like ASA, ABS, PC, or Nylon to handle the dryers temps. Basic profile: 25% infill, 4 walls, ironing top layers, ...
Note: the included images illustrate the goals of the steps outlined below.
[ ] 3D Print included stl files
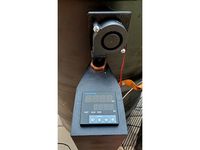
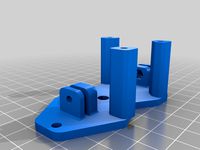
[ ] sunlu_fan_mount.stl -- Mounts 50mm blower fan and thermistor to rear of fan case.
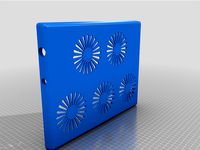
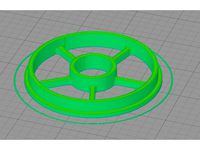
[ ] sunlu_gauge_ring.stl -- circular slip ring for mounting the hygrometer to the front of the case.
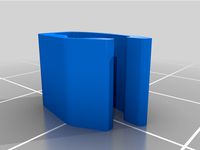
[ ] sunlu_ptfe_bracket.stl -- clip for front of case to mount ptfe connector.
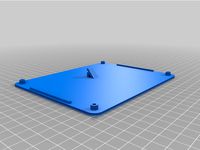
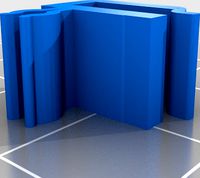
[ ] sunlu_box.stl -- **Optional: external housing to mount dryer box to various platforms. Provides extra insulation for the lower to help with heating filament. Note this print takes a significant amount of time to print and consumes a fair amount of filament.
[ ] Tear Down:
[ ] Remove upper lid from case.
[ ] Remove the filament rollers. Was able to do this by pressing out the case near where the roller bearing is seated and pulling up on the roller end.
[ ] Remove 4 screws holding down heat plate. Philips #2
[ ] Remove the tinted front panel.
-- To do this gently lift and pull back the heat plate, there are cables connected to the control board and are very short so you don't want to apply any force; just enough to expose the rectanglur slot that the front panel detent tab is inserted into. Using a flat blunt tool that will fit in the slot press down angled toward the front and the top of the panel will pop out.
-- To remove the lower part of the front panel there are two small tabs that need to be popped out of the case. To do this, with the front panel as vertical as possible, gently pull out near the base while pressing up on the bottom of the case at the corresponding corner you are trying to remove; apply gentle force where the front panel meets the case.
[ ] Remove the 4 screws holding in the control board. Philips #1
[ ] Disconnect the JST male plugs from their corresponding socket on the control board
[ ] You should now be able to remove the heat plate by pulling out the two cables from the control board housing
[ ] Remove the thermistor located inside the bottom front of the case near the control board housing. Take extreme care not to damage the thermistor, remove it by using flush cutter and cutting the supports under the thermistor. Once removed trim plastic/glue away from the thermistor; maginifcation helps a lot with this task.
[ ] Case Hygrometer Mod:
[ ] Tear off roughly 2 strips of 6 inch painters tape and evenly wrap around the front end of the clear case front to protect the front of the case while cutting the hole for the hygrometer.
[ ] Using a caliper / measurment tool mark a horizontal line 45mm up from the bottom front. Mark the center point on that line.
[ ] Step drill (small bits to larger) just under/to the hole saw drill bit size
[ ] Using the 42mm hole saw bit, with the drill in REVERSE cut through the front case. Take care to do this in bursts so as not to over heat the bit and melt the case.
[ ] Once the hole is cut take care to trim any flashing from the front and back of the hole.
[ ] Make a straight cut on the printed hygrometer slip ring and check to see if it will insert into the hole. If all is good wrap slip ring around the hygrometer near the front bezel.
[ ] Press fit the hygrometer and slip ring into the case. It shouldn't take to much force to insert the hygrometer and slip ring into the case, if it does you may have to file down the inside surface to increase the openings diameter. Hole saws tend to vary alot in size so this is going to be an interative process.
[ ] Note: if the hygrometer is reporting Farenheit you can set it to celcius by pressing a button on the back of the hygrometer.
[ ] Fan / Thermistor Bracket Mod:
[ ] Mount the blower fan to the bracket using two M4x20mm screws. The screws listed in the part_list will thread nicely into the mount holes, but with a 20mm screw there is enough exposed thread to use a M4 nut/lock-nut. The notch in the right side opening allows for hiding the fan cable so you can route it to either the left / right side using the support openings. In my builds I ran both the thermistor and fan cables down the left side.
[ ] Mount the thermistor to the brack on the left side of the blower fan. I have three dryers and there were different thermistors in all three so I designed the bracket to support the various sizes. If your thermistor is extremely you might want to cut a piece of ptfe tubing like in the provided images to mount in the bracket. I had to use various methods to support the thermistor, for the slight large one I cut a vertical slit into the ptfe tube to allow for insertion and mounting.
[ ] Control Board Mod:
[ ] Quick Note: some of the mods out there recommend splicing the fan cable into the main power, but I'm not a fan of that as it keeps the fan on 24/7 while power is supplied to the dryer. This mod takes advantage of the unpopulated fan connector on the control board. Unfortunately the circuitry for this feature is not populated and the asic appears to have this functionality disabled. But takes advantage of the driver for the heat plate to turn on/off the fan when the heater is running. This works well and when the dryer is turned off, the fan will be off as well.
[ ] Solder the 2-pin 1.25mm right-angle female socket to the unpopulated fan connector.
[ ] Solder a shut (wire) to the D2 / D3 test pad (circular exposed trace).
[ ] Clean pcb with denatured alcohol
[ ] Recommend using a meter to check for shorts and continutity on the fan and heater connector pins. Basically the F+ and H+ are shorted (share the same power source), and F- and H- will now be shorted because of the shunt. If you measure across the F+/F- or H+/H- pins they should read as open.
[ ] Fan and Thermistor Extension Cables:
[ ] Note: Fan cable will most likely have to have the pins on the male end of the extension cable swaped to match pin polarity.
[ ] Simple instructions
-- Slide roughly 25mm of heat shrink over the ends of one of the connectors
-- recommend a staggered cut of the wire pairs (take one wire of opposite color from the male and female connectors and remove approximately 6mm).
-- twist corresponding wires together, dip in flux/resin and solder
-- fold the soldered wires back in opposite directions and slide over heat shrink (after they have cooled, or heatshrink will live up to it's name)
[ ] Case Insulation Mod:
[ ] DON'T SKIP INSULATING THE CONTROL BOARD HOUSING!!! This is very important, becasue the blower is circulating hot air inside the case and the internal access points to the control housing will expose the control board to the heat and will cause a thermal shut down because of a resetable thermal fuse. The neoprene rubber protects the housing from the heat and I have tested this for over a week of continued use without issue.
[ ] Cut neoprene rubber to wrap and insulate the control board housing. Cut extra stips to pack in around the sides.
[ ] Cut slits into the neoprene rubber at the control housing access port to allow for cable ingress.
[ ] Recommended / Optional: Cut strips of neoprene rubber to insulate the back of the case above the power input.
[ ] Assembly:
[ ] If you can't remember how you took it apart, well....... have a look at the included photos
[ ] Tips: Because the wires for the heat plate are very short use an unused female socket extension cable to add some extra length. Use this to pull the wires through the access port opening in the control board housing.
Notes:
[ ] Prior to the mods, my sunlu dryer was measuring roughly 35c in top and back of the case. After the mod all regions of the case were very close to the set temp. Reference attached images.
[ ] It can take a while - hours in my case - for the dryer to reach 55c. Because of the mod and air circulation, the heat plate is actually having to actually heat up the filament spool and it takes longer to reach temp because of the thermal mass. Prior to the mod, the thermistor was reporting the heat near the plate in the closed underside of the dryer and ultimately never reaches the set temp in the case.
This mod adds air circulation / convection to improve the dryer's performance. The unmodified dryer was measuring roughly 35c across all three of my units when the configured for 55c. After the mod, I was measure 1 to 1 with the display temp and eventually after a few hours it would reach 55c. The meter's thermal probe was inserted into the top access port and set back roughly 40-50mm on top of a full spool of ASA filament. The humidity in the box at the start of the test was 35% and after 6 hours had reached 12% and over night dropped to 8%.
Please note this mod requires soldering a connector and shunt wire on the control board. Image provided illustrating placement and steps are included below. This mod will turn the fan on/off along with the heat plate. So when the heat plate / box is turned off so will the fan. Side note: it looks like sunlu intended on adding fan support at one point because there is a unpopulated fan socket and driver circuitry. Would have been nice if Sunlu kept the circuit active on the asic and repopulating the missing parts would have made for a solid mod, but the hack detailed below works fine and has been tested across three units for weeks.
Included in the docs are the tools, parts and steps used to reproduce the mod.
Happy Hacking,
Basic Tools Used:
[ ] Soldering Iron
[ ] Solder
[ ] Rosen Flux
[ ] Philips #1, #2
[ ] Tweezer
[ ] Drill
[ ] Drill bits sae/metric
[ ] Utility Blade / Knife
[ ] Heatgun
[ ] Scissors
[ ] Wire stripper (30/28awg - 14awg)
[ ] Small file set
[ ] Meter (Check mods for continuity and shorts)
[ ] Flush cutters
[ ] Magnification 10x (Optional but helps a lot with the finer/sensitive work)
[ ] Calipers
Examples of Tools Used:
Special Tools: These are some of the tools I used to modify the sunlu filament dryer. These are just to give you some ideas of what to expect for this project.
[ ] Used a 42mm hole saw drill bit to make hole. Examples listed below:
-- https://www.amazon.com/Rannb-1-65-Inch-Metal-Drilling-Cutter/dp/B081TSR6VZ/ref=sr_1_2?dchild=1&keywords=hole+saw+42mm&qid=1625238036&sr=8-2
-- https://www.amazon.com/Utoolmart-Bimetal-Professional-Stainless-Triangular/dp/B07VGPX8SL/ref=sr_1_9?dchild=1&keywords=hole+saw+42mm&qid=1625238100&refinements=p_85%3A2470955011%2Cp_72%3A1248909011&rnid=1248907011&rps=1&s=hi&sr=1-9
-- https://www.amazon.com/Sydien-Heavy-Adapter-Stainless-Drilling/dp/B08GSCTT8H/ref=sr_1_19?dchild=1&keywords=hole+saw+42mm&qid=1625238100&refinements=p_85%3A2470955011%2Cp_72%3A1248909011&rnid=1248907011&rps=1&s=hi&sr=1-19
[ ] Soldering Iron -- https://www.amazon.com/gp/product/B0852XJN11/ref=ppx_yo_dt_b_search_asin_title?ie=UTF8&psc=1
[ ] Solder -- https://www.amazon.com/gp/product/B07PDPTFC4/ref=ppx_yo_dt_b_search_asin_title?ie=UTF8&psc=1
[ ] Rosen -- https://www.amazon.com/gp/product/B008ZIV85A/ref=ppx_yo_dt_b_search_asin_title?ie=UTF8&psc=1
[ ] No-Clean Solder Wick -- https://www.amazon.com/gp/product/B0195UVWJ8/ref=ppx_yo_dt_b_search_asin_title?ie=UTF8&psc=1
[ ] Flat file set -- https://www.amazon.com/gp/product/B08W1MCG4J/ref=ppx_yo_dt_b_asin_title_o04_s01?ie=UTF8&psc=1
[ ] Needle file set -- https://www.amazon.com/gp/product/B084WTHG7J/ref=ppx_yo_dt_b_asin_title_o04_s00?ie=UTF8&psc=1
[ ] Butane Torch (Heatgun/Soldering) -- https://www.amazon.com/gp/product/B07M68FLLZ/ref=ppx_yo_dt_b_asin_title_o03_s00?ie=UTF8&psc=1
[ ] Wire Stripper
-- https://www.amazon.com/dp/B07WFL122J?pd_rd_i=B07WFL122J&pd_rd_w=xinUc&pf_rd_p=ee186ce0-6bf7-4893-85b9-f3368b019e0f&pd_rd_wg=0jK4C&pf_rd_r=4N9V0YE7S7EG1YAEKMQ2&pd_rd_r=69aa6ac3-07f2-4463-bcac-18d60b1c98ce
-- https://www.amazon.com/Capri-Tools-20012-Self-Adjusting-Stripper/dp/B01018CYV8/ref=sr_1_5?dchild=1&keywords=wire+stripper+self+adjusting+28awg&qid=1625239331&sr=8-5
Fan PCB Mod:
[ ] 1 x 26 awg wire to create a sung on pcb from D2 to D3 test pads. Reference pcb_mod drawing, recommend silicone jacket/insulated to handle high temp environment.
Note: This mod will turn on the blower fan when heater pad is on. Turns off the fan when powered down.https://www.amazon.com/gp/product/B073RDK4C9/ref=ppx_yo_dt_b_search_asin_title?ie=UTF8&psc=1
[ ] 1 x 2.0mm 2 pin JST socket and male cable -- https://www.amazon.com/gp/product/B01DUC1O68/ref=ppx_yo_dt_b_search_asin_title?ie=UTF8&psc=1
[ ] 1 x 2.54mm 2 pin socket female jst cable -- https://www.amazon.com/gp/product/B076JFFDWN/ref=ppx_yo_dt_b_search_asin_title?ie=UTF8&psc=1
[ ] 1 x 2.0mm 2 Pin female right angle header connector -- https://www.amazon.com/gp/product/B08263YV8C/ref=ppx_yo_dt_b_asin_title_o00_s00?ie=UTF8&psc=1
[ ] 1 x 50mm 24v blower fan -- https://www.amazon.com/gp/product/B079BPS9Q8/ref=ppx_yo_dt_b_search_asin_title?ie=UTF8&psc=1
[ ] Wire ties -- 1mm x 2.4mm x 100m -- https://www.amazon.com/AmazonBasics-Multi-Purpose-Cable-Ties-200-Piece/dp/B087MKMSDY/ref=sr_1_3?dchild=1&keywords=wire+tie+100mm&qid=1623735832&s=hi&sr=1-3
[ ] Heat shrink -- https://www.amazon.com/625pcs-Shrink-Tubing-Tubes-Ratio/dp/B07QM8249H/ref=sr_1_7_sspa?crid=20BAVJJJH9MKA&dchild=1&keywords=heat+shrink+tubing+kit&qid=1623735871&s=hi&sprefix=heat+shrink%2Ctools%2C183&sr=1-7-spons&psc=1&spLa=ZW5jcnlwdGVkUXVhbGlmaWVyPUEzNFJZU1lINk1XQ0dGJmVuY3J5cHRlZElkPUEwMjYzMDg4MkZHVVpWN0g2RktRSiZlbmNyeXB0ZWRBZElkPUEwNTc0NDgwMkc0TDU3MUxXV0dZVCZ3aWRnZXROYW1lPXNwX210ZiZhY3Rpb249Y2xpY2tSZWRpcmVjdCZkb05vdExvZ0NsaWNrPXRydWU=
[ ] 2 x M4 20mm Hex Socket Button Head Cap Screw -- https://www.amazon.com/gp/product/B08T1S89T8/ref=ppx_yo_dt_b_asin_title_o08_s00?ie=UTF8&psc=1
Thermister Mod: - Extension Cable
[ ] 1 male and female connector cable -- https://www.amazon.com/gp/product/B013JRWCBU/ref=ppx_yo_dt_b_search_asin_title?ie=UTF8&psc=1
Case Mod:
[ ] 1 x Mini Hygrometer & Thermometer -- https://www.amazon.com/gp/product/B07FCPJRFH/ref=ppx_yo_dt_b_search_asin_title?ie=UTF8&psc=1
[ ] 1 x neoprene rubber sheet for insulation -- https://www.amazon.com/gp/product/B072FB13ZV/ref=ppx_yo_dt_b_asin_title_o09_s00?ie=UTF8&psc=1
[ ] 1 x M6 PTFE Connector -- https://www.amazon.com/gp/product/B07PVVLH4Y/ref=ppx_yo_dt_b_asin_title_o07_s01?ie=UTF8&psc=1
[ ] Roll of painters tape. Like the blue/green rolls that leave no residue
Filament:
[ ] Recommend something like ASA, ABS, PC, or Nylon to handle the dryers temps. Basic profile: 25% infill, 4 walls, ironing top layers, ...
Note: the included images illustrate the goals of the steps outlined below.
[ ] 3D Print included stl files
[ ] sunlu_fan_mount.stl -- Mounts 50mm blower fan and thermistor to rear of fan case.
[ ] sunlu_gauge_ring.stl -- circular slip ring for mounting the hygrometer to the front of the case.
[ ] sunlu_ptfe_bracket.stl -- clip for front of case to mount ptfe connector.
[ ] sunlu_box.stl -- **Optional: external housing to mount dryer box to various platforms. Provides extra insulation for the lower to help with heating filament. Note this print takes a significant amount of time to print and consumes a fair amount of filament.
[ ] Tear Down:
[ ] Remove upper lid from case.
[ ] Remove the filament rollers. Was able to do this by pressing out the case near where the roller bearing is seated and pulling up on the roller end.
[ ] Remove 4 screws holding down heat plate. Philips #2
[ ] Remove the tinted front panel.
-- To do this gently lift and pull back the heat plate, there are cables connected to the control board and are very short so you don't want to apply any force; just enough to expose the rectanglur slot that the front panel detent tab is inserted into. Using a flat blunt tool that will fit in the slot press down angled toward the front and the top of the panel will pop out.
-- To remove the lower part of the front panel there are two small tabs that need to be popped out of the case. To do this, with the front panel as vertical as possible, gently pull out near the base while pressing up on the bottom of the case at the corresponding corner you are trying to remove; apply gentle force where the front panel meets the case.
[ ] Remove the 4 screws holding in the control board. Philips #1
[ ] Disconnect the JST male plugs from their corresponding socket on the control board
[ ] You should now be able to remove the heat plate by pulling out the two cables from the control board housing
[ ] Remove the thermistor located inside the bottom front of the case near the control board housing. Take extreme care not to damage the thermistor, remove it by using flush cutter and cutting the supports under the thermistor. Once removed trim plastic/glue away from the thermistor; maginifcation helps a lot with this task.
[ ] Case Hygrometer Mod:
[ ] Tear off roughly 2 strips of 6 inch painters tape and evenly wrap around the front end of the clear case front to protect the front of the case while cutting the hole for the hygrometer.
[ ] Using a caliper / measurment tool mark a horizontal line 45mm up from the bottom front. Mark the center point on that line.
[ ] Step drill (small bits to larger) just under/to the hole saw drill bit size
[ ] Using the 42mm hole saw bit, with the drill in REVERSE cut through the front case. Take care to do this in bursts so as not to over heat the bit and melt the case.
[ ] Once the hole is cut take care to trim any flashing from the front and back of the hole.
[ ] Make a straight cut on the printed hygrometer slip ring and check to see if it will insert into the hole. If all is good wrap slip ring around the hygrometer near the front bezel.
[ ] Press fit the hygrometer and slip ring into the case. It shouldn't take to much force to insert the hygrometer and slip ring into the case, if it does you may have to file down the inside surface to increase the openings diameter. Hole saws tend to vary alot in size so this is going to be an interative process.
[ ] Note: if the hygrometer is reporting Farenheit you can set it to celcius by pressing a button on the back of the hygrometer.
[ ] Fan / Thermistor Bracket Mod:
[ ] Mount the blower fan to the bracket using two M4x20mm screws. The screws listed in the part_list will thread nicely into the mount holes, but with a 20mm screw there is enough exposed thread to use a M4 nut/lock-nut. The notch in the right side opening allows for hiding the fan cable so you can route it to either the left / right side using the support openings. In my builds I ran both the thermistor and fan cables down the left side.
[ ] Mount the thermistor to the brack on the left side of the blower fan. I have three dryers and there were different thermistors in all three so I designed the bracket to support the various sizes. If your thermistor is extremely you might want to cut a piece of ptfe tubing like in the provided images to mount in the bracket. I had to use various methods to support the thermistor, for the slight large one I cut a vertical slit into the ptfe tube to allow for insertion and mounting.
[ ] Control Board Mod:
[ ] Quick Note: some of the mods out there recommend splicing the fan cable into the main power, but I'm not a fan of that as it keeps the fan on 24/7 while power is supplied to the dryer. This mod takes advantage of the unpopulated fan connector on the control board. Unfortunately the circuitry for this feature is not populated and the asic appears to have this functionality disabled. But takes advantage of the driver for the heat plate to turn on/off the fan when the heater is running. This works well and when the dryer is turned off, the fan will be off as well.
[ ] Solder the 2-pin 1.25mm right-angle female socket to the unpopulated fan connector.
[ ] Solder a shut (wire) to the D2 / D3 test pad (circular exposed trace).
[ ] Clean pcb with denatured alcohol
[ ] Recommend using a meter to check for shorts and continutity on the fan and heater connector pins. Basically the F+ and H+ are shorted (share the same power source), and F- and H- will now be shorted because of the shunt. If you measure across the F+/F- or H+/H- pins they should read as open.
[ ] Fan and Thermistor Extension Cables:
[ ] Note: Fan cable will most likely have to have the pins on the male end of the extension cable swaped to match pin polarity.
[ ] Simple instructions
-- Slide roughly 25mm of heat shrink over the ends of one of the connectors
-- recommend a staggered cut of the wire pairs (take one wire of opposite color from the male and female connectors and remove approximately 6mm).
-- twist corresponding wires together, dip in flux/resin and solder
-- fold the soldered wires back in opposite directions and slide over heat shrink (after they have cooled, or heatshrink will live up to it's name)
[ ] Case Insulation Mod:
[ ] DON'T SKIP INSULATING THE CONTROL BOARD HOUSING!!! This is very important, becasue the blower is circulating hot air inside the case and the internal access points to the control housing will expose the control board to the heat and will cause a thermal shut down because of a resetable thermal fuse. The neoprene rubber protects the housing from the heat and I have tested this for over a week of continued use without issue.
[ ] Cut neoprene rubber to wrap and insulate the control board housing. Cut extra stips to pack in around the sides.
[ ] Cut slits into the neoprene rubber at the control housing access port to allow for cable ingress.
[ ] Recommended / Optional: Cut strips of neoprene rubber to insulate the back of the case above the power input.
[ ] Assembly:
[ ] If you can't remember how you took it apart, well....... have a look at the included photos
[ ] Tips: Because the wires for the heat plate are very short use an unused female socket extension cable to add some extra length. Use this to pull the wires through the access port opening in the control board housing.
Notes:
[ ] Prior to the mods, my sunlu dryer was measuring roughly 35c in top and back of the case. After the mod all regions of the case were very close to the set temp. Reference attached images.
[ ] It can take a while - hours in my case - for the dryer to reach 55c. Because of the mod and air circulation, the heat plate is actually having to actually heat up the filament spool and it takes longer to reach temp because of the thermal mass. Prior to the mod, the thermistor was reporting the heat near the plate in the closed underside of the dryer and ultimately never reaches the set temp in the case.
Similar models
thingiverse
free
DEEJ Audio Controller - 5 linear sliders by Scnd_edition
...8&psc=1
optional: rubber feethttps://www.amazon.com/gp/product/b075f1hw3s/ref=ppx_yo_dt_b_search_asin_title?ie=utf8&psc=1
thingiverse
free
12 Function Deep Dish Button Box by coyoteyz13
..._title_o03_s00?ie=utf8&psc=1
https://www.amazon.com/gp/product/b07vhcb1q4/ref=ppx_yo_dt_b_search_asin_title?ie=utf8&psc=1
thingiverse
free
Hand Mixer by OM3
...e?ie=utf8&psc=1
power supplyhttps://www.amazon.com/gp/product/b01461mogq/ref=ppx_yo_dt_b_search_asin_title?ie=utf8&psc=1
thingiverse
free

Desk Fan by NebNorse
...lpages04?ie=utf8&psc=1
motor control: https://www.amazon.com/gp/product/b01cnl6imc/ref=od_aui_detailpages04?ie=utf8&psc=1
thingiverse
free
Digital Hygrometer (Humidity and Temperature) Holder by RisingEngineer11
...e following digital hygrometer:
https://www.amazon.com/gp/product/b08h7vptls/ref=ppx_yo_dt_b_search_asin_title?ie=utf8&psc=1
thingiverse
free

Tally Light by iotaxiii
...p;psc=1
pcb / solder breadboard: https://www.amazon.com/gp/product/b07zytz48n/ref=ppx_yo_dt_b_search_asin_title?ie=utf8&psc=1
thingiverse
free

Ni-MH battery case by robinmak
...ry case by robinmak
thingiverse
https://www.amazon.com/gp/product/b07yfryfw6/ref=ppx_yo_dt_b_search_asin_title?ie=utf8&psc=1
thingiverse
free
Noctua Laptop Cooling Pad for 3:2 Aspect Ratio Laptops by 3Dnate
...e?ie=utf8&psc=1
rubber feet:https://www.amazon.com/gp/product/b087h5b87m/ref=ppx_yo_dt_b_asin_title_o09_s00?ie=utf8&psc=1
thingiverse
free

Case for Raspberry Pi 4 with M.2 SSD and 40mm Fan by Hometinker12
... fan
requires m2x10mm standoffs: https://www.amazon.com/gp/product/b013zwm1f6/ref=ppx_yo_dt_b_search_asin_title?ie=utf8&psc=1
thingiverse
free
Ugly Drum Smoker PID Controller Bracket by kd5ahl
...amp;sr=8-5
pipe adapter: https://www.homedepot.com/p/everbilt-1-2-in-copper-ftg-x-mip-fitting-adapter-fitting-c6042hd12/204620308
Sunlu
thingiverse
free

box sunlu by cncbuster
...box sunlu by cncbuster
thingiverse
sunlu dryer box filament
thingiverse
free
Filament Clip (for Sunlu) by lucarossetti
...filament clip (for sunlu) by lucarossetti
thingiverse
this is a filament clip for sunlu filament
thingiverse
free

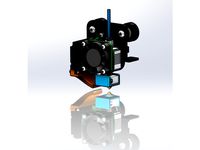
Sunlu direct extruder by masbytes
...sunlu direct extruder by masbytes
thingiverse
adapter for direct extruder for sunlu s8
thingiverse
free
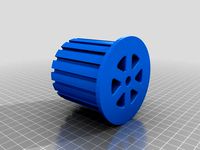
sunlu centric spool holder
...of the spool, for sunlu filaments and sunlu s8 spool holder. the diameter inside is 20mm an de out side is 71,5. its fits perfect
thingiverse
free
Filament Holder SUNLU Filament by TrisiT
...filament holder sunlu filament by trisit
thingiverse
remix for the sunlu filament rolls.
thingiverse
free

Sunlu Spool Holder
...ng:1241566
holder is 90mm wide to accommodate the larger inner diameter sunlu spools
this is tested on sulu pla & petg spools
thingiverse
free
SUNLU S8 Z-Endstop
...sunlu s8 z-endstop
thingiverse
i designed a quick and dirty solution for the horrable original z endstop holder of the sunlu s8
thingiverse
free
Smooth Fang Mount Sunlu S8
...smooth fang mount sunlu s8
thingiverse
smooth fang mount to sunlu s8 printer
thingiverse
free
SUNLU S8 Fan Duct by CalebC90
...sunlu s8 fan duct by calebc90
thingiverse
sunlu s8 fan duct and part cooling duct.
thingiverse
free
SUNLU FILAMENT by umitakin
...sunlu filament by umitakin
thingiverse
filament makarasını tutmak için hazırlanmıştır.
Dryer
archibase_planet
free
Dryer
...dryer
archibase planet
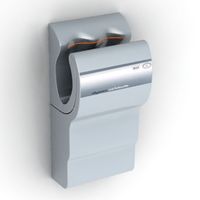
dryer hand dryer
dryer hand dryer airblade n210114 - 3d model (*.gsm+*.3ds) for interior 3d visualization.
archibase_planet
free
Dryer
...yer
archibase planet
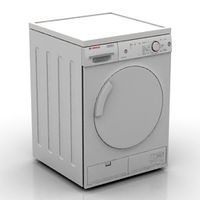
dryer washer dryer drying machine tumble dryer
dryer - 3d model (*.gsm+*.3ds) for interior 3d visualization.
archibase_planet
free

Dryer
...dryer
archibase planet
dryer hand dryer
dryer n221113 - 3d model (*.gsm+*.3ds+*.max) for interior 3d visualization.
archibase_planet
free

Dryer
...dryer
archibase planet
drying apparatus dryer
hand dryer - 3d model for interior 3d visualization.
archibase_planet
free
Dryer
...dryer
archibase planet
dryer kitchen ware
dryer - 3d model (*.gsm+*.3ds) for interior 3d visualization.
archibase_planet
free

Dryer
...dryer
archibase planet
dryer heater radiator
dryer 1 - 3d model (*.gsm+*.3ds) for interior 3d visualization.
archibase_planet
free
Dryer
...dryer
archibase planet
dryer radiator heater
dryer 2 - 3d model (*.gsm+*.3ds) for interior 3d visualization.
archibase_planet
free

Dryer
...dryer
archibase planet
dryer radiator heater
dryer towel rail n121213 - 3d model (*.gsm+*.3ds) for interior 3d visualization.
archibase_planet
free

Dryer
...rchibase planet
dryer radiator heater towel rail
dryer towel rail n241213 - 3d model (*.gsm+*.3ds) for interior 3d visualization.
archibase_planet
free

Dryer
...r towel rail radiator heater
dryer towel rail villeroy & boch n260514 - 3d model (*.gsm+*.3ds) for interior 3d visualization.
Mod
design_connected
$13

MOD. 4233 - MOD. 4234 Table Lamp
...mod. 4233 - mod. 4234 table lamp
designconnected
arcahorn mod. 4233 - mod. 4234 table lamp computer generated 3d model.
design_connected
$11

MOD.1095
...mod.1095
designconnected
mod.1095 computer generated 3d model. designed by sarfatti, gino.
3ddd
$1

fireplaces mod Spec
...fireplaces mod spec
3ddd
камин
fireplaces mod spec 180x90x125h
3ddd
free

Flos Mod. 2129
... mod
фабрика: flos
модель: mod. 2129
описание: подвесной светильник, металл, белый, черный.
сайт: www.flos.com
turbosquid
$34
Mod Lamp.c4d
... available on turbo squid, the world's leading provider of digital 3d models for visualization, films, television, and games.
turbosquid
$32

MOD A 001
... available on turbo squid, the world's leading provider of digital 3d models for visualization, films, television, and games.
turbosquid
$29

Maars Mod
... available on turbo squid, the world's leading provider of digital 3d models for visualization, films, television, and games.
turbosquid
$15

Mod 70..
... available on turbo squid, the world's leading provider of digital 3d models for visualization, films, television, and games.
turbosquid
$10

MOD Sofa
... available on turbo squid, the world's leading provider of digital 3d models for visualization, films, television, and games.
turbosquid
$1

Mod-Lite
... available on turbo squid, the world's leading provider of digital 3d models for visualization, films, television, and games.
Filament
3ddd
$1

Filament Cage
...filament cage
3ddd
лофт , filament cage
модель бра, делалась по фото!
turbosquid
$3

FILAMENT COUNTER
...d
royalty free 3d model filament counter for download as stl on turbosquid: 3d models for games, architecture, videos. (1563049)
3d_export
$5

Filament lamp 3D Model
...filament lamp 3d model
3dexport
filament lamp 3d model kevin 54161 3dexport
3d_export
$5

Filament bulb candle 3D Model
...filament bulb candle 3d model
3dexport
filament bulb-candle
filament bulb candle 3d model kevin 54163 3dexport
3d_export
$5

Filament led light bulb
...filament led light bulb
3dexport
realistic 3d model of filament light bulb with v-ray materials.
3d_export
$5

Filament led light bulb
...filament led light bulb
3dexport
realistic 3d model of filament light bulb with v-ray materials.
3d_export
$5

Filament led light bulb
...filament led light bulb
3dexport
realistic 3d model of filament light bulb with v-ray materials.
3d_export
$5

Filament led light bulb
...filament led light bulb
3dexport
realistic 3d model of filament light bulb with v-ray materials.
3d_export
$5

Filament led light bulb
...filament led light bulb
3dexport
realistic 3d model of filament light bulb with v-ray materials.
3ddd
$1

Factory filament metal shade
...factory filament metal shade
3ddd
restoration hardware
restoration hardware. 20th c. factory filament metal shade.