Thingiverse
Steampunk Tap Handle by Fuzzie
by Thingiverse
Last crawled date: 4 years, 7 months ago
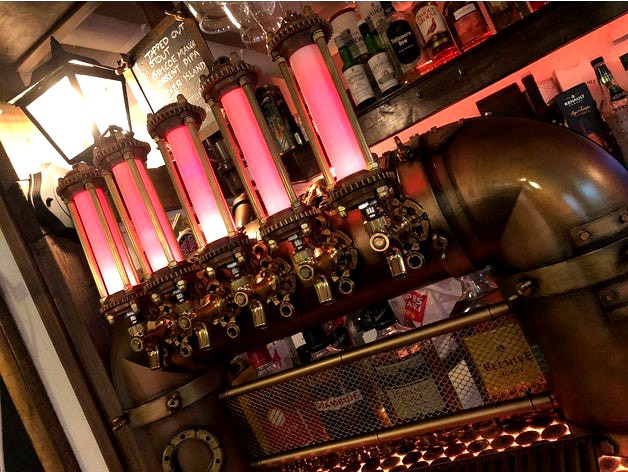
This is a multi part tap handle for standard bar tap faucets. I made this heavily Steampunk influenced for my own cellar bar.
See the full build instructions on YouTube at:
Part 1 of 2: https://youtu.be/kgojp6FMnpo
Part 2 of 2: https://youtu.be/FFZ_EaLW-IM
Bonus - Arduino Setup: https://youtu.be/fjdzSYfubyw
To make the full tap handle you will need:
3D-printed parts:
1x Top Piece
2x Middle Pieces
1x Bottom Piece
2x Cog Wheels
1x Actuator Fitting (optional for LED operated version)
1x LED strip Holder (optional for LED operated version)
Other parts:
32mm (white) plastic piping (standard WC room drain pipe at my hardware store).
8mm or 6mm threaded rod, depending on your preference finish.
Nuts & Washers
8mm brass tube (if using the 6mm threaded rod finish).
LED-strip with adhesive tape (optional for LED operated version).
Arduino or other LED driver of your choosing (optional for LED operated version).
Wires (optional for LED operated version).
6mm brass tube (optional for LED operated version).
Update 2018-10-09:
In case you want to print your central piece rather than use the 32mm plastic piping I have now included one "plain_chamber" model to accommodate that. If you want to be even more advanced I included a bonus "fusion_chamber" model as well. Have fun!
Update 2018-12-16:
I added a bonus third episode explaining how to setup and use the Arduino platform to get the LEDs up and running. Have fun!