Thingiverse
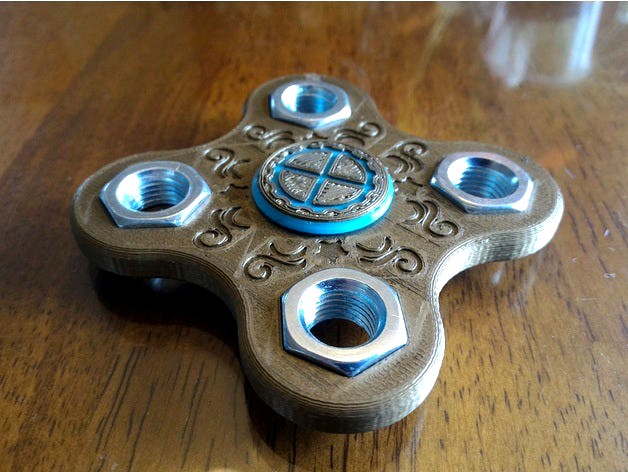
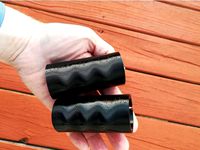
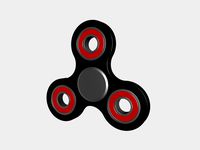
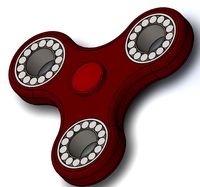
Steampunk Fidget Spinner by PlacidCat
by Thingiverse
Last crawled date: 3 years ago
An exercise in fun
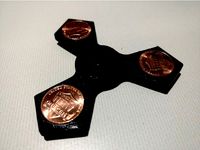
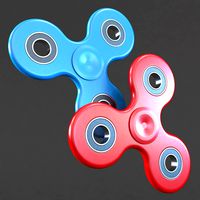
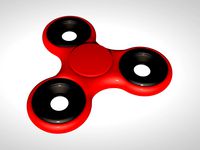
I've been designing spinners for my kids. It's been a fun experience and I enjoy exercising my creative side. After seeing the kids play with theirs for a while, I was bit with the bug - I wanted one!
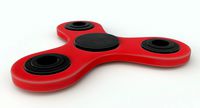
Initially, I designed a simple 4-nut spinner in translucent red filament (one of my favorite spools). Then, for my wife's and my anniversary, she bought me some FoxSmart bronze filament!
The idea of a bronze spinner immediately popped into my head. Then, I thought to myself, "How can I logically combine the bronze with a hand spinner?"
I knew what I must do...
Steampunk
In the right context, I really enjoy steampunk style. That mix of Victorian or sometimes Art Nouveau with elements of the industrial/steam age is a rather cool intersection of fantasy. It romanticizes the style of key points in history along with a "what if?" analysis of where "steam" energy might have taken us.
The style has been generalized to include clockwork mechanisms with chunky gears and the like. I think this fits more into the latter category. While I would assume some steam power could really spin one of these rather fast, I truly wouldn't recommend it on a PLA or other plastic creation. Not only could it melt your cool creation, it's just kinda not smart.
Aw, nuts.
Before I got into trapped penny spinners, I thought the idea of a nut spinner might be a good one. Nuts, while not as cheap as pennies, are far cheaper than bearings, especially if you get plain old zinc-coated nuts.
The nuts, in this case, are about 17.2mm in diameter, edge to edge. (That is, the diameter of the circle that inscribes the nut.) They give some heft without costing very much. The neat thing is they kind of fit with the whole steampunk theme. My nuts, according to my records, are 7/16" GR5 hex nuts from Home Depot and cost $0.17 each.
An advantage of nuts over pennies is that it is generally much easier to create a balanced spinner using nuts rather than pennies due to the difference in makeup of the pennies over the years.
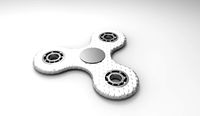
Tight fit!
I have my printer tuned in fairly well. The tolerance on the center bearing is only 0.1mm for the radius (0.2mm for the diameter). I have to actually tap my bearings in using a flat block of wood and a hammer but once they are in, they tend not to come out!
Given the variance of printers I can't guarantee your printer will yield the same results as mine. Your bearing might be too loose. Mine is snug. All I can say is you might need to play with your scaling factors should things not work the way you expect. In fact, one of my nuts was just a little bit tight, causing the spinner to crack. I used some spare filament and a rotary tool to "weld" it shut, but it did result in a little bit of a scar. Nonetheless, I like the overall outcome.
DISCLAIMER
You know the drill. You are printing something on your printer. You are responsible for what you print. Don't give spinners to kids, adults or pets who have a tendency to pull apart things and place them in your mouth. Several components of a spinner would be rather nasty to your health should one try to ingest them. Don't throw a spinner at someone - it hurts.
Use common sense. Be responsible. Have fun!
I've been designing spinners for my kids. It's been a fun experience and I enjoy exercising my creative side. After seeing the kids play with theirs for a while, I was bit with the bug - I wanted one!
Initially, I designed a simple 4-nut spinner in translucent red filament (one of my favorite spools). Then, for my wife's and my anniversary, she bought me some FoxSmart bronze filament!
The idea of a bronze spinner immediately popped into my head. Then, I thought to myself, "How can I logically combine the bronze with a hand spinner?"
I knew what I must do...
Steampunk
In the right context, I really enjoy steampunk style. That mix of Victorian or sometimes Art Nouveau with elements of the industrial/steam age is a rather cool intersection of fantasy. It romanticizes the style of key points in history along with a "what if?" analysis of where "steam" energy might have taken us.
The style has been generalized to include clockwork mechanisms with chunky gears and the like. I think this fits more into the latter category. While I would assume some steam power could really spin one of these rather fast, I truly wouldn't recommend it on a PLA or other plastic creation. Not only could it melt your cool creation, it's just kinda not smart.
Aw, nuts.
Before I got into trapped penny spinners, I thought the idea of a nut spinner might be a good one. Nuts, while not as cheap as pennies, are far cheaper than bearings, especially if you get plain old zinc-coated nuts.
The nuts, in this case, are about 17.2mm in diameter, edge to edge. (That is, the diameter of the circle that inscribes the nut.) They give some heft without costing very much. The neat thing is they kind of fit with the whole steampunk theme. My nuts, according to my records, are 7/16" GR5 hex nuts from Home Depot and cost $0.17 each.
An advantage of nuts over pennies is that it is generally much easier to create a balanced spinner using nuts rather than pennies due to the difference in makeup of the pennies over the years.
Tight fit!
I have my printer tuned in fairly well. The tolerance on the center bearing is only 0.1mm for the radius (0.2mm for the diameter). I have to actually tap my bearings in using a flat block of wood and a hammer but once they are in, they tend not to come out!
Given the variance of printers I can't guarantee your printer will yield the same results as mine. Your bearing might be too loose. Mine is snug. All I can say is you might need to play with your scaling factors should things not work the way you expect. In fact, one of my nuts was just a little bit tight, causing the spinner to crack. I used some spare filament and a rotary tool to "weld" it shut, but it did result in a little bit of a scar. Nonetheless, I like the overall outcome.
DISCLAIMER
You know the drill. You are printing something on your printer. You are responsible for what you print. Don't give spinners to kids, adults or pets who have a tendency to pull apart things and place them in your mouth. Several components of a spinner would be rather nasty to your health should one try to ingest them. Don't throw a spinner at someone - it hurts.
Use common sense. Be responsible. Have fun!
Similar models
thingiverse
free
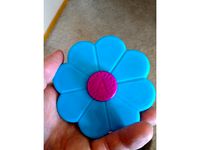
Flower Fidget Spinner by PlacidCat
...ealth should one try to ingest them. don't throw a spinner at someone - it hurts.
use common sense. be responsible. have fun!
thingiverse
free
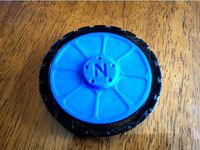
Wheel fidget spinner - complete with tire by PlacidCat
...ealth should one try to ingest them. don't throw a spinner at someone - it hurts.
use common sense. be responsible. have fun!
thingiverse
free
Tiny Fidget Spinner by techwit
...m inside diameter to fit a 4mm hole (i think my printer tolerances are a bit out). so you might need to scale it down to 90% size
thingiverse
free

Customizable Fidget Spinners by Jsut210
... comment any improvements i should make. i've only tried this with nickels so please let me know if the other coins work out!
thingiverse
free

Asymmetrical Spinner 1 by adamsd5
...ring hole, or the spinner varies in thickness, etc). this spinner was my first asymmetric spinner, and i plan to make many more.
thingiverse
free
Penny Fidget Spinner by 1Eye
...es if you want them)
update: printed one out in ninjaflex for fun. much more durable but the pennies need to be glued in place...
thingiverse
free

Gear Design, Fidget Spinner (3 barrings) by DAVE42
...also use a bit of tape to fill the gaps around the bearings.
needed parts:
1x gearspinner_v01
2x gearspinner-grip_v01
3x bearings
thingiverse
free
Small M8 Hex Nut Fidget Spinner by joshvv
...hange command programmed for the stripe. it's compatible with our nwa3d a5 and most other printers but use at your own risk!
thingiverse
free

Mini Spinner by stevepax
...find the fit is too tight or too loose, you might want to print it just slightly bigger or smaller in your slicer to make it fit.
thingiverse
free

Enclosed Penny Spinner by Precision3DPrinting
...eated for the other arms. if you can, tell your slicer to have the printer pause 6 mm up, that is where the top begins printing.
Placidcat
thingiverse
free

Building block Arrow by PlacidCat
...epresenting me, i regret i must take down my object.
my kids will still enjoy their toys, but this leaves me saddened.
god bless.
thingiverse
free
Excelvan hub for BobsCNC RP9 v2 by PlacidCat
...rcise in using a more advanced cad tool. i doubt there is any benefit in printing this over my original but it might be prettier!
thingiverse
free
Sinew vase #1 by PlacidCat
...bination with shorter layer heights.
for an example of the vase holding water, see this silly video: https://youtu.be/wcyiuxxmody
thingiverse
free
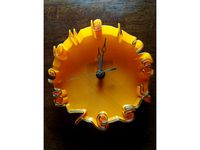
Wavy Clock by PlacidCat
... and get great filament at the same time, please visit proto-pasta using my affiliate link and get yourself some excellent htpla!
thingiverse
free
Practical doorstop by PlacidCat
... and get great filament at the same time, please visit proto-pasta using my affiliate link and get yourself some excellent htpla!
thingiverse
free
Simple wall hanger by PlacidCat
...just dial back your speed to ensure the post cools adequately as it is printed, instead of getting knocked around by the hot end.
thingiverse
free
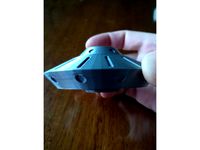
UFO Spinner! by PlacidCat
... and get great filament at the same time, please visit proto-pasta using my affiliate link and get yourself some excellent htpla!
thingiverse
free

Maze bowl by PlacidCat
...eat filament at the same time, please visit proto-pasta using my affiliate link and get yourself some excellent htpla!
god bless!
thingiverse
free
Comfort bag handle by PlacidCat
...p - it helps me out immensely! if you print one, post your make - i love seeing what people are doing with my designs!
god bless!
thingiverse
free

Monster Clips! by PlacidCat
.... i promise i will put it only towards filament or printer supplies and not basic necessities for me! ;-)
have fun and god bless!
Steampunk
3ddd
$1
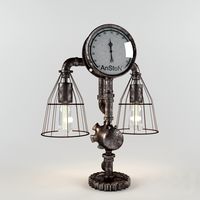
Лампа steampunk
...лампа steampunk
3ddd
steampunk
настольная лампа в стиле steampunk
3ddd
$1
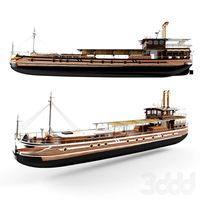
Steampunk ship
...steampunk ship
3ddd
steampunk , корабль
hd steampunk ship
size 96 mb
3d_export
$30
glass steampunk
...glass steampunk
3dexport
glass steampunk
3d_export
$16

steampunk fish
...steampunk fish
3dexport
steampunk fish for cnc
3d_export
$5
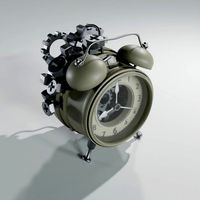
clock steampunk
...clock steampunk
3dexport
a steampunk clock to decorate
3ddd
$1

Rocket steampunk
...rocket steampunk
3ddd
ракета
rocket steampunk
3ddd
$1

Лампа steampunk
...лампа steampunk
3ddd
steampunk
настольная лампа в стиле стимпанк
3ddd
free

Лампа steampunk
...лампа steampunk
3ddd
steampunk
настольная лампа в стиле стимпанк
3d_ocean
$17
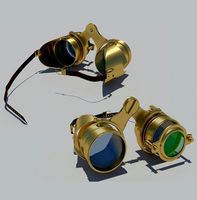
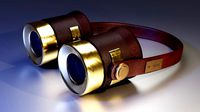
Steampunk Goggles
...bj and max 10,11 and 13 version format. materials are included and it is based on mental ray renderer. also, main file include...
3ddd
free
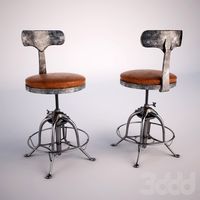
steampunk chair
...steampunk chair
3ddd
барный , steampunk
стул из interval cafe san francisco
Fidget
3d_export
$10

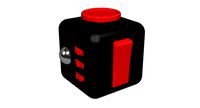
Fidget Cube
...fidget cube
3dexport
fidget cube 3d modeling<br>3d max<br>auto cad
turbosquid
free
Fidget Cube
...ube
turbosquid
free 3d model fidget cube for download as c4d on turbosquid: 3d models for games, architecture, videos. (1370283)
turbosquid
$20
fidget spinner
...uid
royalty free 3d model fidget spinner for download as c4d on turbosquid: 3d models for games, architecture, videos. (1168895)
turbosquid
$20

Fidget Spinner
...squid
royalty free 3d model fidget snner for download as c4d on turbosquid: 3d models for games, architecture, videos. (1194595)
turbosquid
$10
fidget Cube
...osquid
royalty free 3d model fidget cube for download as obj on turbosquid: 3d models for games, architecture, videos. (1173544)
turbosquid
$6

Fidget Cube
...osquid
royalty free 3d model fidget cube for download as max on turbosquid: 3d models for games, architecture, videos. (1205497)
turbosquid
$5

Fidget Spinner
...uid
royalty free 3d model fidget spinner for download as c4d on turbosquid: 3d models for games, architecture, videos. (1190870)
turbosquid
$5

Fidget spinner
...uid
royalty free 3d model fidget spinner for download as dwg on turbosquid: 3d models for games, architecture, videos. (1279860)
turbosquid
$5

Fidget Cube
...osquid
royalty free 3d model fidget cube for download as c4d on turbosquid: 3d models for games, architecture, videos. (1287742)
turbosquid
$2

Fidget cube
...quid
royalty free 3d model fidget cube for download as blend on turbosquid: 3d models for games, architecture, videos. (1488961)
Spinner
turbosquid
$5

Spinner
...turbosquid
royalty free 3d model spinner for download as max on turbosquid: 3d models for games, architecture, videos. (1190412)
turbosquid
$1
Spinner
...turbosquid
royalty free 3d model spinner for download as dwg on turbosquid: 3d models for games, architecture, videos. (1173525)
3d_export
$5
spinner toy
...spinner toy
3dexport
cool spinner toy.
turbosquid
$12
Spinner
...id
royalty free 3d model spinner for download as max and obj on turbosquid: 3d models for games, architecture, videos. (1242592)
turbosquid
$20
Spinner
...lty free 3d model spinner for download as obj, fbx, and blend on turbosquid: 3d models for games, architecture, videos. (1191800)
turbosquid
$15
spinner
...yalty free 3d model spinner for download as max, obj, and fbx on turbosquid: 3d models for games, architecture, videos. (1165932)
turbosquid
$2

Spinner
...oyalty free 3d model spinner for download as ma, obj, and fbx on turbosquid: 3d models for games, architecture, videos. (1187750)
turbosquid
free
Spinner
...lty free 3d model spinner for download as obj, fbx, and blend on turbosquid: 3d models for games, architecture, videos. (1230908)
turbosquid
$29
spinner
... free 3d model spinner for download as 3ds, obj, c4d, and fbx on turbosquid: 3d models for games, architecture, videos. (1471160)
turbosquid
$4
Spinner
...y free 3d model spinner for download as ma, max, obj, and fbx on turbosquid: 3d models for games, architecture, videos. (1201076)