Thingiverse
Star Trek Next Generation Mini Desktop Monitor by lambtor
by Thingiverse
Last crawled date: 3 years ago
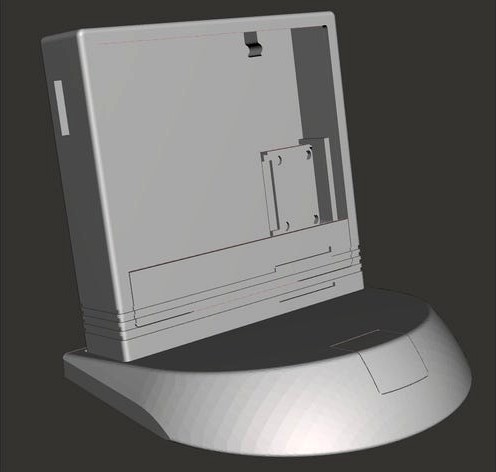
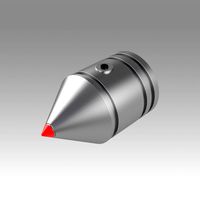
THIS PROJECT IS STILL VERY MUCH A WORK IN PROGRESS
-Even I have not fully assembled this yet.
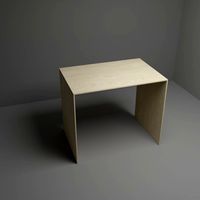
As if the pimoroni hyperpixel 4.0" square screen wasn't enough in demand. This is a rough desktop monitor model based on the one used in Star Trek: The Next Generation. This is a much smaller model than whatever they built for the show. I have wanted to build a shell for my heavily modified MagicMirror pi zero.
Magic Mirror does not install successfully using default methods for a pi zero. I followed the guide given here - https://www.linuxscrew.com/raspberry-pi-magic-mirror
I created the LCARS-ified graphics / theme myself. When I have my copy of the Magic Mirror project code finalized, I will post it to my github and link to that from here. No ETA.
Square display does not work well with the LCARS style sheet I created, as I had designed it for a 4:3 screen aspect ratio. The Screen Frame tab part allows you to see the bottom of the screen when you need it, like command prompt, etc.
Main frame is 1 or 2 pieces, with cutouts for SD card and an optional camera tray. Camera Tray cutout should fit https://www.raspberrypi.org/products/camera-module-v2/ You will need an adapter ribbon cable to connect the camera to a pi zero w. I used a no-solder header kit for pi zero to connect to the hyperpixel.
hyperpixel : https://shop.pimoroni.com/products/hyperpixel-4-square?variant=30138251444307
pi zero headers: https://shop.pimoroni.com/products/gpio-hammer-header?variant=35643241098
Base is 3 pieces - a top section, bottom panel, and a button. Button is planned to be wired to a TeensyLC to trigger display on/off by hitting the keyboard "pause" key. Inner button shelf is sized to fit a 12mm x 6mm https://www.adafruit.com/product/1119 meant to hit the mapped TeensyLC pin. Base has 2 cutouts for usb cables. I used these: https://smile.amazon.com/gp/product/B071NR19BQ
The prong that extends in from the inner ceiling of the display frame should snap onto a screw used to attach the pi zero to the hyperpixel. Use m2.5 x 8mm nuts & m2.5 screws on the lower 2 pi zero screw holes so the board tries to sit evenly against the back of the hyperpixel.
-Even I have not fully assembled this yet.
As if the pimoroni hyperpixel 4.0" square screen wasn't enough in demand. This is a rough desktop monitor model based on the one used in Star Trek: The Next Generation. This is a much smaller model than whatever they built for the show. I have wanted to build a shell for my heavily modified MagicMirror pi zero.
Magic Mirror does not install successfully using default methods for a pi zero. I followed the guide given here - https://www.linuxscrew.com/raspberry-pi-magic-mirror
I created the LCARS-ified graphics / theme myself. When I have my copy of the Magic Mirror project code finalized, I will post it to my github and link to that from here. No ETA.
Square display does not work well with the LCARS style sheet I created, as I had designed it for a 4:3 screen aspect ratio. The Screen Frame tab part allows you to see the bottom of the screen when you need it, like command prompt, etc.
Main frame is 1 or 2 pieces, with cutouts for SD card and an optional camera tray. Camera Tray cutout should fit https://www.raspberrypi.org/products/camera-module-v2/ You will need an adapter ribbon cable to connect the camera to a pi zero w. I used a no-solder header kit for pi zero to connect to the hyperpixel.
hyperpixel : https://shop.pimoroni.com/products/hyperpixel-4-square?variant=30138251444307
pi zero headers: https://shop.pimoroni.com/products/gpio-hammer-header?variant=35643241098
Base is 3 pieces - a top section, bottom panel, and a button. Button is planned to be wired to a TeensyLC to trigger display on/off by hitting the keyboard "pause" key. Inner button shelf is sized to fit a 12mm x 6mm https://www.adafruit.com/product/1119 meant to hit the mapped TeensyLC pin. Base has 2 cutouts for usb cables. I used these: https://smile.amazon.com/gp/product/B071NR19BQ
The prong that extends in from the inner ceiling of the display frame should snap onto a screw used to attach the pi zero to the hyperpixel. Use m2.5 x 8mm nuts & m2.5 screws on the lower 2 pi zero screw holes so the board tries to sit evenly against the back of the hyperpixel.
Similar models
thingiverse
free

Raspberry Pi Zero Camera case
...om https://shop.pimoroni.com/products/raspberry-pi-zero-camera-module?variant=1473069416458
i am using this as a motioneye camera
thingiverse
free

Pi^2 - PiSquare wallmount (Raspberry Pi and Hyperpixel)
...sassemble once the sd-card is in place.
raspberry pi led's may need to be masked or they may shine through the printed parts.
thingiverse
free
Pimoroni 7 color EInk display Frame by sheep_knight
...ps://shop.pimoroni.com/products/inky-impression
no additional screws required (5 in the bag : 2 for the pi zero, 3 for the frame)
thingiverse
free

case for "raspberry pi zero/zero w" with "Camera Module for Raspberry Pi Zero" by atsushi_kbt
...ducts/raspberry-pi-zero-w
camera module for raspberry pi zero
https://shop.pimoroni.com/products/raspberry-pi-zero-camera-module
thingiverse
free

Pi-Zero USB Case by azcoigreach
...e wall only to provide additional friction to clips against the inside of the bottom.
i hope this case is useful for you. enjoy.
thingiverse
free

Enclosure base for HyperPixel 4.0 Square Non-Touch and raspberry pi zero by printminion
...the extended header (or gpio header). also take care not to pull on the edges of the glass display when removing your hyperpixel.
thingiverse
free
HyperPixel 4.0 Pi 4 Case *BETA*
...for a raspberry pi 2-3 version here: https://www.thingiverse.com/thing:3153767
i've also provided the solidworks design file.
thingiverse
free

Raspberry Pi Zero case by teunnoord
...otice that in whit this case the headers and the camera connector can't be used. the case screws together using 4 m2.5 bolts.
thingiverse
free
Raspberry Pi 400 - HyperPixel 4.0 mount by jwktje
...ove all supports after printing to get a good fit on the pi. especially underneath the screen.
i used this screen and this cable
grabcad
free

Pimoroni Button SHIM
...pimoroni button shim
grabcad
5 push buttons header by pimoroni
https://shop.pimoroni.com/products/button-shim
Lambtor
thingiverse
free

Minimalist Chess Set by lambtor
...gestions are welcome.
pictures are for comparison to a standard staunton set. i have not printed all of these pieces myself yet.
thingiverse
free

Clorox plunger base handle by lambtor
...re easily, with a more reliable result.
this was printed forhttps://www.amazon.com/clorox-toilet-plunger-white-gray/dp/b00p7vw2h6
thingiverse
free

Baseball hat facemask clips by lambtor
... or attach a mask, and i wanted something i could put on / take off more easily.
please feel free to improve on this if you like.
Trek
turbosquid
$59

Trek Bicycle
... available on turbo squid, the world's leading provider of digital 3d models for visualization, films, television, and games.
turbosquid
$47

Trekking bike
... available on turbo squid, the world's leading provider of digital 3d models for visualization, films, television, and games.
3ddd
free
Ceccotti Star Trek
...
описание: кресло "star trek"
сайт: www.ceccotticollezioni.it
все subdivision.
внутри архива текстура, 3ds и max файлы.
3ddd
$1
Star Trek - Ceccotti Collezioni
...r_trek/
количество полигонов - 29 000, но стек открыт, так что turbosmooth по желанию
v-ray, corona
max 2011,2014
turbosquid
$25

Star trek The Mandalorian Knife
...e cosplay prop replica for download as max, dwg, fbx, and obj on turbosquid: 3d models for games, architecture, videos. (1607086)
3d_export
$99

Fiat 500l Trekking 2014 3D Model
...ssover allterrain offroad italian 500 italy fiat 2017 500l trekking treking
fiat 500l trekking 2014 3d model squir 71255 3dexport
cg_studio
$99
Fiat 500L Trekking 20143d model
...3ds .c4d .fbx .lwo .max .obj - fiat 500l trekking 2014 3d model, royalty free license available, instant download after purchase.
turbosquid
$25

Star Trek Planter Replica prop
...k planter replica prop for download as max, dwg, fbx, and obj on turbosquid: 3d models for games, architecture, videos. (1598563)
turbosquid
$18
Star Trek Voyager Neural Stimulator
...neural stimulator for download as max, dwg, fbx, obj, and stl on turbosquid: 3d models for games, architecture, videos. (1590142)
turbosquid
$10
Star Trek Exoscalpel Prop Replica
...lpel prop replica for download as max, dwg, fbx, obj, and stl on turbosquid: 3d models for games, architecture, videos. (1596923)
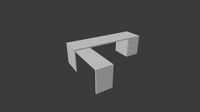
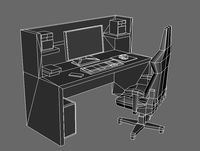
Desktop
3d_export
$5
desktop
...desktop
3dexport
full desktop
3d_export
$15

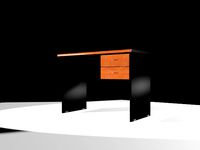
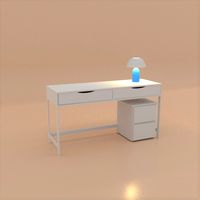
Desktop
...desktop
3dexport
desktop, monitor, system unit, backlit keyboard.
3d_export
$5
desktop
...desktop
3dexport
desktop with shelving. very convenient and practical find.
turbosquid
$5
Desktop
...turbosquid
royalty free 3d model desktop for download as jpg on turbosquid: 3d models for games, architecture, videos. (1329464)
turbosquid
$1
Desktop
...turbosquid
royalty free 3d model desktop for download as fbx on turbosquid: 3d models for games, architecture, videos. (1661325)
3d_export
$10
110x60 desktop
...110x60 desktop
3dexport
110x60 desktop
turbosquid
$20
Desktop
...lty free 3d model desktop for download as blend, fbx, and obj on turbosquid: 3d models for games, architecture, videos. (1624648)
turbosquid
$20
Desktop
...oyalty free 3d model desktop for download as ma, obj, and fbx on turbosquid: 3d models for games, architecture, videos. (1309418)
turbosquid
$15

Desktop
...yalty free 3d model desktop for download as 3ds, obj, and c4d on turbosquid: 3d models for games, architecture, videos. (1445073)
3d_export
$5
desktop
...desktop
3dexport
a desk will fit into the room
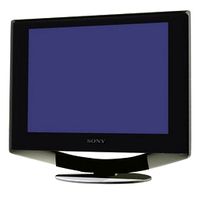
Monitor
3d_ocean
$5

Monitor
...monitor
3docean
computer desktop monitor screen
a computer monitor
3d_export
free
monitor
...monitor
3dexport
monitor
archibase_planet
free
Monitor
...monitor
archibase planet
monitor lcd monitor pc equipment
monitor - 3d model (*.gsm+*.3ds) for interior 3d visualization.
3d_export
$5
monitor
...monitor
3dexport
monitor or pc.
3d_ocean
$5
Monitor
...monitor
3docean
computer desktop monitor screen windows work
a monitor with windows desktop
archibase_planet
free

Monitor
...r
archibase planet
monitor lcd monitor pc equipment
monitor mouse n120614 - 3d model (*.gsm+*.3ds) for interior 3d visualization.
archibase_planet
free
Monitor
...archibase planet
monitor lcd monitor pc equipment
monitor samsung n090714 - 3d model (*.gsm+*.3ds) for interior 3d visualization.
archibase_planet
free
Monitor
...r pc equipment
monitor samsung 27'' led monitor 7 t27b750 n200315 - 3d model (*.gsm+*.3ds) for interior 3d visualization.
archibase_planet
free
Monitor
...monitor
archibase planet
monitor apple
monitor-apple - 3d model for interior 3d visualization.
archibase_planet
free
Monitor
...monitor
archibase planet
monitor display
monitor sony - 3d model for interior 3d visualization.
Next
3ddd
$1

Next NLS
...next nls
3ddd
next nls
3ddd
$1
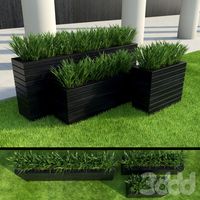
Next Grass
...next grass
3ddd
трава , горшок
next modern grass
3ddd
$1
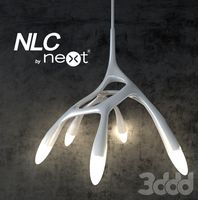
NLC by Next
... nlc
люстра nlc от производителя next.
дизайнер constantin wortmann
год выпуска 2010
арт.номер 1115998
3ddd
$1

Systempool / Next
.../ next
3ddd
systempool , смеситель
смеситель для ванны systempool next. моделил по фото.
3ddd
$1
Next / DNA
...next / dna
3ddd
next , dna
http://www.next.de/cms/en/dna-en
3ddd
$1

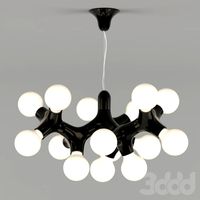
DNA Lamp by Next
...dna lamp by next
3ddd
next
подвесной светильник фабрики next.
3ddd
$1
стол компьютерный NEXT
...стол компьютерный next
3ddd
next , стол
стол компьютерный next
3ddd
free

NEXT | Liquid Light
...next | liquid light
3ddd
next
светильник
фирма: next
название: liquid light
turbosquid
$6

Cocol Next
...bosquid
royalty free 3d model cocol next for download as max on turbosquid: 3d models for games, architecture, videos. (1423416)
turbosquid
$30

Next Truck
...ty free 3d model next truck for download as max, obj, and fbx on turbosquid: 3d models for games, architecture, videos. (1274547)
Mini
turbosquid
$10

Mini Mini Luceplan
...
royalty free 3d model mini mini luceplan for download as max on turbosquid: 3d models for games, architecture, videos. (1227359)
3d_ocean
$39

Mini Cooper
...mini cooper
3docean
cabrioler cooper mini
mini cooper cabrioler
3d_export
$30

Mini lathe
...mini lathe
3dexport
mini lathe
3d_export
$5

mini mouse
...mini mouse
3dexport
mini mouse
3d_export
$5

mini house
...mini house
3dexport
mini house
3d_export
free

Mini Mecha
...mini mecha
3dexport
concept of mini mecha
3d_ocean
$20

Mini Gun
...mini gun
3docean
gatling gun gun machine gun mini gun weapon
model of a mini gatling gun.
3ddd
free

Herve mini
... кофейный , herve
http://www.mobiliavenanti.it/ru/products/hervè-mini
3d_export
$5

mini wall
...mini wall
3dexport
mini wall for living room
3d_export
$5

mini bank
...mini bank
3dexport
mini bank 3d model
Star
3ddd
$1

Rolling Stars Antic Star
...rolling stars antic star
3ddd
rolling stars , вентилятор
rolling stars antic star
turbosquid
$2

Star Shuriken (Throwing Star)
... available on turbo squid, the world's leading provider of digital 3d models for visualization, films, television, and games.
design_connected
$18
Star
...star
designconnected
helen amy murray star computer generated 3d model. designed by murray, helen amy.
3d_ocean
$2
sea star
...sea star
3docean
game star sea star space star
this model is, normally poly model. use for games screen.
3d_export
$2

star gingerbread
...star gingerbread
3dexport
"star" gingerbread in the style of the movie star wars.
turbosquid
$10

STAR
...ar
turbosquid
royalty free 3d model star for download as max on turbosquid: 3d models for games, architecture, videos. (1338162)
turbosquid
$1

Star
...ar
turbosquid
royalty free 3d model star for download as c4d on turbosquid: 3d models for games, architecture, videos. (1564546)
3d_export
$5

star sword
...star sword
3dexport
star sword
3d_export
$5

Star building
...star building
3dexport
star building
3d_export
free

ikosaedr-star
...ikosaedr-star
3dexport
ikosaedr-star
Generation
3d_export
$17
Generator
...generator
3dexport
generator
archibase_planet
free
Generator
...base planet
generator electric generator
generator electric n300715 - 3d model (*.gsm+*.3ds+*.max) for interior 3d visualization.
design_connected
$20
Generation
...generation
designconnected
knoll generation computer generated 3d model. designed by formway design.
3d_export
$8

generator
...generator
3dexport
generator - obj, 3ds, fbx.
3d_export
$7

generator
...generator
3dexport
generator extures 4k resolution, basecolor -normal -metallic -ao-roughness-height tris:3084
turbosquid
free
generator
...rator
turbosquid
free 3d model generator for download as max on turbosquid: 3d models for games, architecture, videos. (1492909)
3ddd
$1

general
...general
3ddd
генерал
turbosquid
$99

generator
...urbosquid
royalty free 3d model generator for download as ma on turbosquid: 3d models for games, architecture, videos. (1514125)
turbosquid
$20

Generator
...rbosquid
royalty free 3d model generator for download as max on turbosquid: 3d models for games, architecture, videos. (1244841)
turbosquid
$2
Generator
...rbosquid
royalty free 3d model generator for download as fbx on turbosquid: 3d models for games, architecture, videos. (1245541)