Thingiverse
Spin it Replacement - Bop It Extreme by _Isaiah_
by Thingiverse
Last crawled date: 3 years, 3 months ago
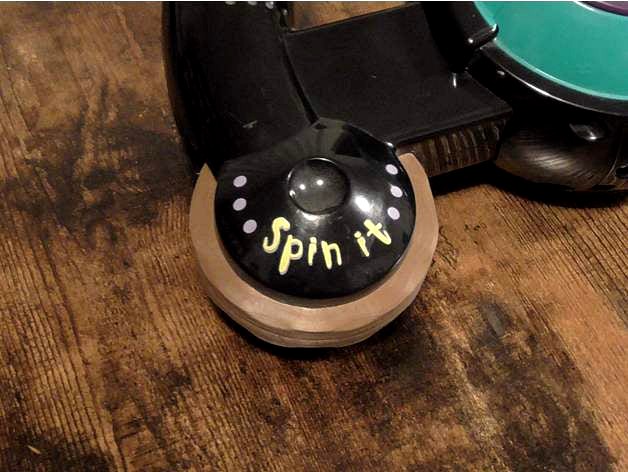
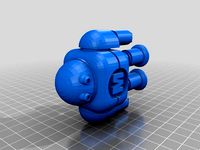
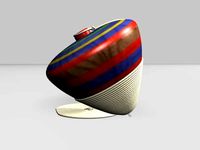
The 1998 Bop It Extreme is a fun childhood toy of mine, and the "Spin It" is my favorite part. The Spin It had been getting more wobbly and harder to spin, and finally it failed completely. I designed and printed this replacement Spin It wheel and was able to get it back up and running in no time. The wheel prints without supports in two easy to print halves which are glued together (I used cyanoacrylate Super Glue). Enjoy!
Ideally this should be printed with cherry red filament to match the original wheel, but the closest thing I had on hand was chocolate brown, so that's what I used. It looks all right, I think. Right?
I recommend removing the batteries before beginning disassembly. There are four screws holding the center together. Once those are removed the center will come apart into two halves, and the two Bop It buttons and their springs will come off. The main body is held together by eight screws. With those out the main body will come apart into two halves, with the control board and mechanism inside. The Spin It wheel is then readily accessible.
After replacing the Spin It wheel, and after making sure everything else is in its proper place, put the halves of the main body back together. At this point, before putting the screws back in, I recommend slowly turning the Spin It wheel and listening to make sure its push button on the control board is being pressed. On mine, the old wheel had been pulling harder on the arm that presses the push button than it should have been, which bent the arm so that with the replacement wheel installed it was no longer activating the push button. Fortunately I was able to bend the arm back into it's proper shape. I recommend checking this, as I suspect that this is a common occurrence as the wheel deteriorates. Once that's situated, the main body can be screwed back together, the two Bop It buttons and their springs can be put back into place (make sure the logo is right side up!), and the center halves can be slid together over them. Screw those down and slap some batteries in it, and the Bop It is ready to roll!
An added bonus of this project was that it gave me a chance to look at the Bop It's inner mechanism, which, while fairly straightforward, is interesting and rather clever.
Similar models
thingiverse
free

Adventure Force Savage Spin Replacement Stock
...ton back on, then put the shell back.
i've also included the stock mount by itself should it be useful for your own projects.
thingiverse
free

Sack truck wheel
...ess steel.
the tyre is held between the wheel-halves.
each wheel needs two ball bearings, 18mm o/d 6mm i/d which are a press fit.
thingiverse
free

iOttie touch 4 right arm by erezgur
... it when my mount arm was broken one day.
i opened the screws on the mount back and used the broken parts to model a replacement.
thingiverse
free

Sennheiser MD421 Clip Replacement by sr1200
...rns the release button is connected. push the release button in and adjust the height of the screw so that the locking button is
thingiverse
free

turbine meter by morrowwm
... together. i thought about putting flanges on the halves, but probably no benefit.
uses denise lee's nifty turbine generator.
thingiverse
free

Replacement Sights for SNES Super Scope by DiniertoDesigns
...nt and rear eyepieces together.
the two parts of the eyepiece shouldn't need any supports, but everything else probably will.
thingiverse
free

Powerseal Impulse Sealer Switch Attachment by rafirtech
...es on the arm to push in switch button.
not a part everyone needs but when you do it brings a $60 piece of hardware back to life!
thingiverse
free

10.1 HDMI TFT Screen enclosure full size by willefg
... didn't print this for obvious reasons.....
other parts are available in the original design. (push buttons and board covers)
thingiverse
free

Ender 3 (pro) filament guide wheel by andydoakley
...ts. the two halves can be glued together but the bearing is an interference push fit that hold both halves in place without glue.
thingiverse
free

Push-button switch holder by otatomo
...ther two positions.
i have created a smaller version to fit the right-front corner and the back-center.
a m3-.50 nut is required.
Isaiah
thingiverse
free

isaiah N by summer3D
...isaiah n by summer3d
thingiverse
j
thingiverse
free
Hacker Scouts - ISAIAH - Guild 005 by parachutefactory
... isaiah - guild 005 by parachutefactory
thingiverse
a kinect scan of hacker scouts member isaiah from guild #005, las vegas, nm.
thingiverse
free

Bible Scripture Isaiah 41:10 by sjej
...ur god; i will strengthen you, i will help you, i will uphold you with my righteous hand" (isaiah 41:10). please post makes.
thingiverse
free

mini by isaiahf
...mini by isaiahf
thingiverse
mini by isaiah [created on 3dtin]
thingiverse
free

iPhone X Replica by funmun
...designed with exact dimensions from apple developer. merry christmas! isaiah ...
sketchfab
$5

Bird King
...- buy royalty free 3d model by isaiah paul (@isaiah989) ...
thingiverse
free
Stand for "Myst Rocket - Remodeled" by mistic100
...the myst rocket - remodeled for 3d printing by isaiah it is designed by the original pier in the...
thingiverse
free
SW Dengar Character "Lowish Poly" by Jace1969
...sw dengar character "lowish poly" by jace1969 thingiverse hi isaiah this was all i could find in amongst my...
thingiverse
free

Friendly articulated snail with 8 different shells by Nebetbastet
...mix between two designs: the friendly articulated slug by isaiah for the body of the snail the realistic garden...
thingiverse
free

Friendly (and sleepy) Articulated Cat by Rollerpaw
...by rollerpaw thingiverse i love the joint design in isaiah 's friendly slug but unfortunately i'm afraid of slugs....
Bop
turbosquid
$80

ST TOS ROMULAN BOP
...
royalty free 3d model st tos romulan bop for download as max on turbosquid: 3d models for games, architecture, videos. (1552211)
thingiverse
free

WL BOP by Audun
...wl bop by audun
thingiverse
simple model of a wire line blow out preventer
3dbaza
$4
Offecct BOP WOOD Bar Chair (123948)
...offecct bop wood bar chair (123948)
3dbaza
offecct bop wood bar chair 3d model.
thingiverse
free

Miniature Subsea BOP Stack Kit by MDesigner423
...tack is, what it does, how the different pieces fit and work together in a basic sense, and what the functions of each piece are.
thingiverse
free

TOOFLY 5in BOP Pod by Skye_fpv
...toofly 5in bop pod by skye_fpv
thingiverse
toofly 5in bird of prey pod 4mm baseplate
thingiverse
free

Baby Bop - Barney's Friend sculpt by kazolar
...el on m&f 3d scanner, edited in blender. printed with makergear m2 out of green tpu. it's flexible, so perfect as a toy.
3dcadbrowser
free

Boeing BOP 2060
...nstrator.this 3d object can be downloaded in .max, .obj, .3ds, .fbx, .dxf, .lwo, .stl, .wrl, .ma, .dae, .x and .asc file formats.
thingiverse
free
robot by fatbaba
...robot by fatbaba thingiverse beep boop bop ...
thingiverse
free

Triceratops by Jeeeb
...a pose, and the head and tail do a bop ...
Spin
3ddd
free
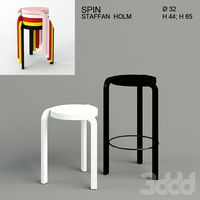
Spin
... , табурет
дизайнер staffan holmhttp://www.swedese.se/stools-and-benches/spin/
design_connected
$16
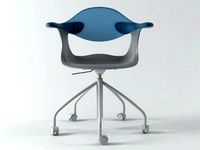
Spin
...spin
designconnected
driade spin computer generated 3d model. designed by lovegrove, ross.
design_connected
$13

Spin
...spin
designconnected
paola lenti spin computer generated 3d model. designed by lenti, paola.
design_connected
$13

Spin
...spin
designconnected
bbb emmebonacina spin computer generated 3d model. designed by barba, rené.
archibase_planet
free
Spinning rod
...g rod
archibase planet
spinning rod spinning rod fishing-rod
spinning rod - 3d model (*.gsm+*.3ds) for interior 3d visualization.
3ddd
$1

Spin / Sumatra
...n / sumatra
3ddd
spin , польша
мягкая мебель (sumatra) польская фабрика "spin"
design_connected
$13

Spin Light
...spin light
designconnected
lasvit spin light computer generated 3d model. designed by koldova, lucie.
3d_export
$5
Spinning 3D Model
...spinning 3d model
3dexport
spinning toy tromp mexican mexico mexicano wood
spinning 3d model micro4004 54359 3dexport
3ddd
$1

Paola Lenti / Spin
...paola lenti / spin
3ddd
ковер
ковер spin фабрики paola lentihttp://www.paolalenti.it/en/product/show/spin/
turbosquid
$6

spin top
...urbosquid
royalty free 3d model spin top for download as obj on turbosquid: 3d models for games, architecture, videos. (1179779)
Extreme
3d_export
$10

extreme thriller
...extreme thriller
3dexport
australia's #1 favorite ride... the extreme thriller
turbosquid
$1

Skewb Extreme
...quid
royalty free 3d model skewb extreme for download as max on turbosquid: 3d models for games, architecture, videos. (1699716)
turbosquid
$45

Apple Airport Extreme
...model apple airport extreme for download as 3ds, max, and obj on turbosquid: 3d models for games, architecture, videos. (1299458)
3d_export
$24

Suzuki Samurai Extreme Ofrroad
...suzuki samurai extreme ofrroad
3dexport
modified indian suzuki samurai extreme offroad capability
turbosquid
$49

Extreme Ops Knife
... available on turbo squid, the world's leading provider of digital 3d models for visualization, films, television, and games.
turbosquid
$49

Teti Extreme Loudspeaker
... available on turbo squid, the world's leading provider of digital 3d models for visualization, films, television, and games.
turbosquid
$6

Voice Extreme X5
... available on turbo squid, the world's leading provider of digital 3d models for visualization, films, television, and games.
turbosquid
free

Extreme Dragster Car
... available on turbo squid, the world's leading provider of digital 3d models for visualization, films, television, and games.
turbosquid
$3

Paintings Collection EXTREME NEON
...ngs collection extreme neon for download as max, c4d, and fbx on turbosquid: 3d models for games, architecture, videos. (1439544)
turbosquid
$10

Razer Lachesis Extreme Edition
... available on turbo squid, the world's leading provider of digital 3d models for visualization, films, television, and games.
Replacement
3d_export
$12

replaceable bristle
...replaceable bristle
3dexport
this is 3d printable replaceable bristle toothbrush.
3d_export
$34
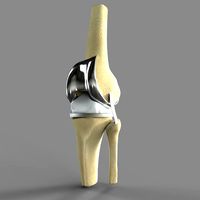
Knee Replacement
...h meets the lower leg. ... during a total knee replacement, the end of the femur bone is removed and replaced with a metal shell.
3d_export
$44
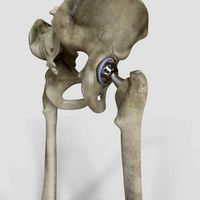
Hip Replacement
...omponents. the damaged femoral head is removed and replaced with a metal stem that is placed into the hollow center of the femur.
turbosquid
$59

Hip replacement
...el hip replacement for download as ma, c4d, lwo, lxo, and obj on turbosquid: 3d models for games, architecture, videos. (1520195)
turbosquid
$10

Module replacment station
...alty free 3d model module replacment station for download as on turbosquid: 3d models for games, architecture, videos. (1271271)
3d_export
$8
tool replacement gearbox
...tool replacement gearbox
3dexport
eccentric lifting mechanism, you can process according to available drawings.
turbosquid
$7

Globe Oil Atomizer Replacement Housing
... oil atomizer replacement housing for download as ige and stl on turbosquid: 3d models for games, architecture, videos. (1253839)
turbosquid
free

SLICE Ceramic Scapel (Replaceable Blade)
... (replaceable blade) for download as obj, fbx, blend, and dae on turbosquid: 3d models for games, architecture, videos. (1363525)
3d_export
$19
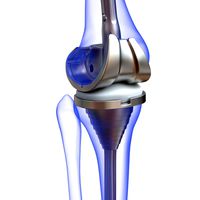
Knee Replacement Implant
...ntimeter<br>__________________________<br>poly count :<br>polygon count - 217440<br>vertex count - 108776
turbosquid
$19

(Project) Bad odor filtering sytem with support rail and pulley that assure a comfortable gel filter element replacement.
... available on turbo squid, the world's leading provider of digital 3d models for visualization, films, television, and games.