
Thingiverse
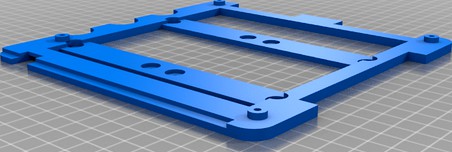
Small and stack miniITX Case by Ren_Dev
by Thingiverse
Last crawled date: 5 years, 6 months ago
Easy print miniITX Case, CPU cooler support high up to 47mm and 2x2.5" HDD/SSD.
No need sanding!
Case only for small picoATX adapter with external PSU!
Case assemble size without pad 190x190x75mm, you can be easy print at standart 200x200mm bed printer.
Power button model for 6x6x6 mm tact switches.
You can be stack this case with soft pad(stack_pad) or hard panel(case_stack_panel_no_border & case_stack panel).
For assemble need standart PC screw:
UNC 6-32 x 10 for case x4 for MB.
M3 screw for 2.5HDD/SSD.
I am print case:
MB_panel - ABS
PAD - TPU
Others - PLA
Support need only for: "Base_Case" "button"
Assemble:
install "button" with "button_mount" to "Base_Case"
install back IO panel and "UP_case" to "Base_Case"
install SSD/HDD and Motheboard to "MB_panel"
install "MB_panel" to "Base_Case"
install "DOWN_case" to "Base_Case"
install 4x"PAD" to "Base_Case" or "DOWN_case"
No need sanding!
Case only for small picoATX adapter with external PSU!
Case assemble size without pad 190x190x75mm, you can be easy print at standart 200x200mm bed printer.
Power button model for 6x6x6 mm tact switches.
You can be stack this case with soft pad(stack_pad) or hard panel(case_stack_panel_no_border & case_stack panel).
For assemble need standart PC screw:
UNC 6-32 x 10 for case x4 for MB.
M3 screw for 2.5HDD/SSD.
I am print case:
MB_panel - ABS
PAD - TPU
Others - PLA
Support need only for: "Base_Case" "button"
Assemble:
install "button" with "button_mount" to "Base_Case"
install back IO panel and "UP_case" to "Base_Case"
install SSD/HDD and Motheboard to "MB_panel"
install "MB_panel" to "Base_Case"
install "DOWN_case" to "Base_Case"
install 4x"PAD" to "Base_Case" or "DOWN_case"