Thingiverse
Sleep Box by martysweet
by Thingiverse
Last crawled date: 3 years, 3 months ago
sleep-box
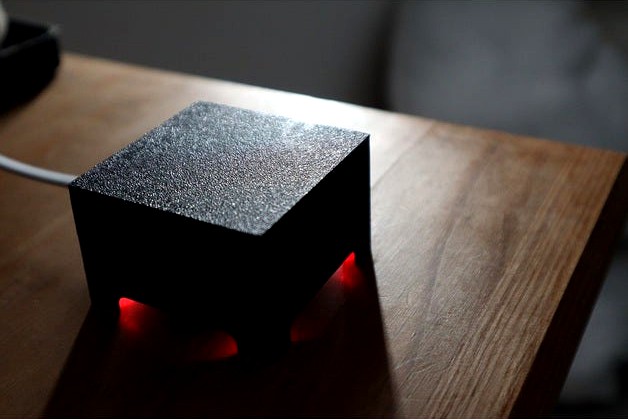
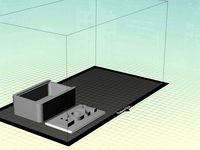
Simple Sleep Box implementation using ESP32, inspired by https://www.dezeen.com/2019/05/03/mark-zuckerberg-sleep-box-design/
Uses an ESP32 to keep track of time and turns the LEDs on for a set time every day.
Source code is available at https://github.com/martysweet/sleep-box
Components
Adafruit Huzzah32 (ADA3405) - should also be ESP8266 compatible - adjust the PIO config and pin configuration
4x LEDs - 4 was chosen, 1 for each corner but less can be used if needed
4x Resistors - chosen for brightness, for the LEDs I used, 4.7k resistors worked well
2x Self tapping screws - 2mm thread to keep the Huzzah in place when (dis)connecting the micro-USB
A short bit of wire to connect the LED grounds
(Optional) Crypton tape - Useful for soldering the eletronics in-place with minimal damage to 3D printed parts
Software Build Instructions
Use VSCode with PlatformIO Plugin
Adjust the configuration at the top of src/main.cpp as required
Adjust the PIO settings as required
Build the project and flash the chip
See https://github.com/smurf0969/WiFiConnect/issues/5 for issues with the WiFiConnect library.
Join the ESP WiFi network with your phone at http://192.168.4.1
Click Join WiFi and enter your WLAN settings
The device should now turn on the outputs as you've programmed.
Hardware Construction
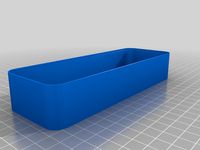
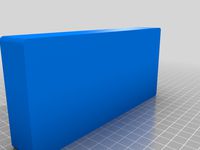
Print the STL files located in the models folder, you can optionally edit the f3d (Fusion 360) files.
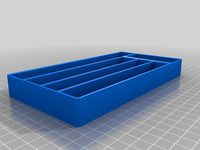
Print the two parts, platform and housing in your desired material
Use the platform to align the LEDs and place crypton tape where needed at the joins
Join the neutral LEDs legs together on each side and join a wire between the two side
Solder 4x resistors to the Adafruit (A0, A1, 12, 13)
Use an resistor off-triming to join the neutral LED wiring to the GND pin on the Adafruit
Join each LED positive leg to its own resistor (wrap the resistor wire round the LED leg for ease of soldering)
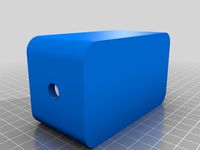
Screw the Adafruit down
Place into housing so the LEDs are visable until the stop is met on both sides
Operation
Once time is synchronized with NTP over WiFi, the ESP32 will perform timekeeping using built-in timers.
Simple Sleep Box implementation using ESP32, inspired by https://www.dezeen.com/2019/05/03/mark-zuckerberg-sleep-box-design/
Uses an ESP32 to keep track of time and turns the LEDs on for a set time every day.
Source code is available at https://github.com/martysweet/sleep-box
Components
Adafruit Huzzah32 (ADA3405) - should also be ESP8266 compatible - adjust the PIO config and pin configuration
4x LEDs - 4 was chosen, 1 for each corner but less can be used if needed
4x Resistors - chosen for brightness, for the LEDs I used, 4.7k resistors worked well
2x Self tapping screws - 2mm thread to keep the Huzzah in place when (dis)connecting the micro-USB
A short bit of wire to connect the LED grounds
(Optional) Crypton tape - Useful for soldering the eletronics in-place with minimal damage to 3D printed parts
Software Build Instructions
Use VSCode with PlatformIO Plugin
Adjust the configuration at the top of src/main.cpp as required
Adjust the PIO settings as required
Build the project and flash the chip
See https://github.com/smurf0969/WiFiConnect/issues/5 for issues with the WiFiConnect library.
Join the ESP WiFi network with your phone at http://192.168.4.1
Click Join WiFi and enter your WLAN settings
The device should now turn on the outputs as you've programmed.
Hardware Construction
Print the STL files located in the models folder, you can optionally edit the f3d (Fusion 360) files.
Print the two parts, platform and housing in your desired material
Use the platform to align the LEDs and place crypton tape where needed at the joins
Join the neutral LEDs legs together on each side and join a wire between the two side
Solder 4x resistors to the Adafruit (A0, A1, 12, 13)
Use an resistor off-triming to join the neutral LED wiring to the GND pin on the Adafruit
Join each LED positive leg to its own resistor (wrap the resistor wire round the LED leg for ease of soldering)
Screw the Adafruit down
Place into housing so the LEDs are visable until the stop is met on both sides
Operation
Once time is synchronized with NTP over WiFi, the ESP32 will perform timekeeping using built-in timers.
Similar models
thingiverse
free

Gen 5 Camaro Side Markers by JEBariffic
...arker with hot glue. cover harness and leads with hot glue. allow to cool.
press in makers into position and hold for ~ a minute.
thingiverse
free

MiniFridge - WiFi 12V ESP32 by flyinggorilla
...c components can be found on github.
github https://github.com/flyinggorilla/esp32minifridge
no warranties, use at your own risk!
thingiverse
free

Simple LED Flashlight by ALABS
...on in the square cutout in the acrylic window.
snap the window onto the enclosure.
put batteries in the battery holder and enjoy!
thingiverse
free
heat pro repman heater for preventing warping. by jamesvilleneuve
..., and the pcb acts as a good stick layer for thermal plastic. i also have a video here:http://www.youtube.com/watch?v=pdekp3ym1te
thingiverse
free

ESP32-CAM-Box-for-WashingMachine by ahrweiler
...6.htmlhttps://de.aliexpress.com/item/1005001322358029.html
code for arduino-ide:https://github.com/easytarget/esp32-cam-webserver
thingiverse
free

NeoLavaLamp - WS2813/RGB-LED Lamp using ESP32
...ou need to cut the legs of the esp to length.
software i used for the esp32: https://github.com/jasoncoon/esp32-fastled-webserver
thingiverse
free

Cup Light by Coil_B
...tion glass, it doesn't have the bcdc on the side, i will leave the bcdc off in case evilution wants to put his design on here
thingiverse
free

RGB LED Analog Clock by jackw01
...nd micro usb cable
wire
double sided tape
4x m3x20mm screws
2x m3x6mm
m3 tap (optional but recommended for tapping printed holes)
thingiverse
free

ESP32-Cam Case for Printer by Bastlwastl84
...://github.com/luc-github/esp3d/wiki/esp-32-cam
to use the dht22 you can steal it direct from the chip. pin33 (the red / blue led)
thingiverse
free

Lights for E3D V6, extruder and Toranado by cheetahkid
...ou.
i didn't add the 5mm leds, it is slightly bigger and brighter, the 3mm one are much better, i do have stl if you want it.
Sleep
thingiverse
free

sleeping by hulmerik
...sleeping by hulmerik
thingiverse
sleeping
thingiverse
free
pinoccio sleeping by Syzguru11
...pinoccio sleeping by syzguru11
thingiverse
pinoccio sleeping
thingiverse
free

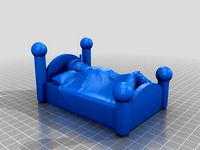
Sleeping Homer by dehammer
...sleeping homer by dehammer
thingiverse
sleeping homer
thingiverse
free
baby sleeping by leesongwoon
...baby sleeping by leesongwoon
thingiverse
baby sleeping
thingiverse
free

sleeping angel by 714902777
...sleeping angel by 714902777
thingiverse
sleep angel for scan.
thingiverse
free

kkkkkkkkkkkkkkkkkkkkk by sleepe
...kkkkkkkkkkkkkkkkkkkkk by sleepe
thingiverse
gggggggggggggggggggg
thingiverse
free

Sleeping cat by shibby21
...sleeping cat by shibby21
thingiverse
3d scanned sleeping cat.
thingiverse
free
Sleeping Dinosaur by MakerGirl404
...sleeping dinosaur by makergirl404
thingiverse
a really cute sleeping dinosaur.
thingiverse
free
Sleeping Cat by raster
...raster
thingiverse
a cat sleeping.
original artwork from here: http://www.openclipart.org/detail/38659/sleeping-cat-by-anonymous
thingiverse
free

a goodnight sleep by eddiillusion
...a goodnight sleep by eddiillusion
thingiverse
a bed to get a good night sleep
Box
thingiverse
free
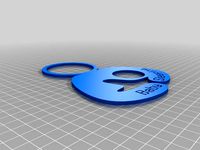
Box with 'BOX' on it by Mooffyman13
...box with 'box' on it by mooffyman13
thingiverse
a box with 'box' on it
thingiverse
free

Box
...box
thingiverse
this is a box
thingiverse
free
Boxes
...boxes
thingiverse
boxes
thingiverse
free

BOX
...box
thingiverse
box
thingiverse
free

Box in a Box by gbob1959
...ted it. i call it the box in a box.
the small box well not come out of the big box but you can roll the small box around in side.
thingiverse
free
Box
...box
thingiverse
box 1706060mm
thingiverse
free
box
...box
thingiverse
simple box
thingiverse
free

Box
...box
thingiverse
hinged box
thingiverse
free

Box
...box
thingiverse
good box!
thingiverse
free
Box
...box
thingiverse
a box to save things