Thingiverse
Single Z-Axis Brackets for Tarantula by 3ff3ction
by Thingiverse
Last crawled date: 3 years ago
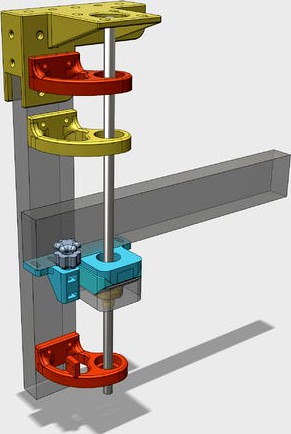
This is a Z-axis bracket setup with Z-endstop for the TEVO Tarantula 3D Printer. You only need to print both the RED Z-Axis brackets. The 'Top Z-Axis Bracket (YELLOW).stl' is for those who want to attach the Z-rod under the Z-motor bracket (like shown in example picture).
You can use the screws and nuts delivered with the printer. Parts you need to buy extra in your local hobby shop:
1x M5 nut (for the lower hole of the endstop)
1x M5 nylon nut (for the upper hole of the endstop)
1x M5 50mm bolt (with hexagon head)
2x roll bearings
Make sure your Z-axis is straight (roll it over a straight surface). Please sand the surfaces of the oldham coupler, so they all fit perfect. Don't add grease, because it will make them 'sticky'.
IMPORTANT ASSEMBLY INSTRUCTIONS:
When assembling it, you need to screw down the coupler to the z-axis first, then after all the weight is hanging on the z-axis, you screw down the coupler to the motor pin. This way no (or very little) weight will pull down on your motor and coupler spring.
The lower part of the coupler is holding the z-axis on top of the bearing, and so almost all weight is hanging on the bracket.
Similar models
thingiverse
free

Z EndStop for TEVO Tarantula by 3ff3ction
...cal hobby shop:
1x m5 nut (for the lower hole)
1x m5 nylon nut (for the upper hole)
1x m5 50mm bolt (with hexagon head)
have fun!
thingiverse
free

Bracket + Z-EndStop + Oil Drip Tray + Oldham Coupler for TEVO Tarantula by 3ff3ction
...ut (for the upper hole of the z-endstop)
1x m5 50mm bolt (with hexagon head)
have fun! and please add pictures when you made one!
thingiverse
free

TEVO Tarantula adjustable Z endstop mount by Kraemi
...6x m4 v-slot nut
6x m4 washers
normal endstop plate:
2x aditional m4x10mm screws
short endstop plate:
2x m4x16mm screws
have fun!
thingiverse
free

Z axis Screw Bracket (Tarantula Printer 2040 aluminum) by Jimmarks84
...an to create a version that holds the motor and screw that will work for both sides of the printer to support dual z axis motors.
thingiverse
free

Z Strain Relief Spacer for Nema 17 (Sapphire Pro and more) by laurienzu
...otor axes is not touching with the lead screw (if not add spacers under the coupler)
tighten the lower screw of the coupler
done!
thingiverse
free

BD's Tarantula X-Axis Motor and Idler Mounts by bdwalker1
... to adjust your z-carriages or drill new holes in the acrylic if the holes don't line up perfectly for your particular build.
thingiverse
free
Vertical X Endstop bracket for Z couplers
... m2 screws.
to install, install the bracket first without the endstop on the pekciton x motor bracket. then screw in the endstop.
thingiverse
free

Tevo Tarantula Single Motor Dual Z Axis Lower Right Bracket for Mechanical Endstop by eBoB_
...r dual z. it has a mount for the mechanical z endstop.
use thingirob's adjustable z end stop for the top half of the bracket.
thingiverse
free

Sapphire Pro Endstop Z Mount by seba1897
...vision on how z-axis endstop mpuon should look like in sapphire pro 3d printer.
you will need:
1x m3 screw
1x m3 nut
1x m3 washer
thingiverse
free

Adjustable Z endstop for Tevo Tarantula by Lollixx
...x20 screw
i took all the parts from the spares came with the printer so you should already have everything you need to mount this
3Ff3Ction
thingiverse
free

LPA Fanduct - 80-90mm Converter by 3ff3ction
...hingiverse.com/thing:1615400
this is work in progress, so i'm not saying this is a good idea to use :-) needs to be tested...
thingiverse
free

Animal Runner by 3ff3ction
.../aipfgm4bdtchttps://youtu.be/-bwr4-zwog8
(the wobble is because the wooden plate isn't flat, but that's not a problem...)
thingiverse
free

Cable Cup, Ceiling Cover by 3ff3ction
...so glue the lid to the base, without using the clips. then you need to remove the four screws if something needs to be changed...
thingiverse
free

E3D Titan Aero Socket for Tarantula by 3ff3ction
...l some holes in it), but also designed the part so it can be printed...
i will also look into attaching a fan duct and bltouch...
thingiverse
free
Z EndStop for TEVO Tarantula by 3ff3ction
...cal hobby shop:
1x m5 nut (for the lower hole)
1x m5 nylon nut (for the upper hole)
1x m5 50mm bolt (with hexagon head)
have fun!
thingiverse
free

Spoolholder Box Accessories by 3ff3ction
...bmerged. this way the bottom will be printed in the right angle... print!
hope you like it! please post pictures if you made one!
thingiverse
free

Z-Rod Oil Drip Tray by 3ff3ction
...can put a pet-cap into the hole (it fits perfectly).
(don't mind the bad print, i was experimenting with my printer speed...)
thingiverse
free

Z-endstop by Dark_Horus
...bottom piece of z endstop for tevo tarantula by 3ff3ction - http://www.thingiverse.com/thing:1443439. it has been designed to fit with...
thingiverse
free
Bracket + Z-EndStop + Oil Drip Tray + Oldham Coupler for TEVO Tarantula by 3ff3ction
...ut (for the upper hole of the z-endstop)
1x m5 50mm bolt (with hexagon head)
have fun! and please add pictures when you made one!
Tarantula
3d_ocean
$8
Tarantula
...rantula 3d model. perfect for animations or still image. textures psd and jpeg files included. modelled using autodesk maya 2011.
turbosquid
$50

tarantula
... available on turbo squid, the world's leading provider of digital 3d models for visualization, films, television, and games.
turbosquid
$45

Tarantula
... available on turbo squid, the world's leading provider of digital 3d models for visualization, films, television, and games.
3ddd
$1
Журнальный столик - tarantula
... бионика , tarantula
журнальный столик tarantula
h=600
d=2000
3d_export
$35

Tarantula
...: zbrush 3ds max ztool obj fbx dae 3ds stl properties : 20*20*8 production time : 23 hours 328 gram models are drawn with zbrush.
3d_ocean
$20

Tarantula spider
...igged, animated, uv textured. particle system for the fur. very easy to animate. a 250 frames animation is available in the pack.
turbosquid
$45

Tarantula Spider
... available on turbo squid, the world's leading provider of digital 3d models for visualization, films, television, and games.
3d_export
$5

spider tarantula
...spider tarantula
3dexport
3d model of a steppe spider for your ideas and projects.
turbosquid
$199

Spider-tarantula (Theraphosidae)
... model spider-tarantula (theraphosidae) for download as blend on turbosquid: 3d models for games, architecture, videos. (1291388)
3d_export
$20
Tarantula spider 3D Model
...t
tarantula spider insect
tarantula spider 3d model download .c4d .max .obj .fbx .ma .lwo .3ds .3dm .stl ptaxa999 113223 3dexport
Axis
3ddd
$1

Мария Axis
...
3ddd
кухня , классическая , axis
модель кухни.
3d_export
$22

Axis robot 6-axis robotic arm
...ing parts drawings, standard parts purchased parts list, can be produced directly according to the drawings, welcome to download!
3ddd
free

Versatile Axis
...ddd
nexus , плитка
http://bvtileandstone.com/ceramic-porcelain/versatile-axis/
3d_export
$19

robot 2 axis
...robot 2 axis
3dexport
robot 2 axis
turbosquid
$40

Axis R5F
... available on turbo squid, the world's leading provider of digital 3d models for visualization, films, television, and games.
turbosquid
$40

Axis S5F
... available on turbo squid, the world's leading provider of digital 3d models for visualization, films, television, and games.
turbosquid
$10

Linear Axis
... available on turbo squid, the world's leading provider of digital 3d models for visualization, films, television, and games.
3d_export
$15

drawing axis
...drawing axis
3dexport
simple rendering of the scene file
3ddd
$1

versatile axis ARC
...versatile axis arc
3ddd
versatile , плитка
versatile axis arc red dot design award
design_connected
$11

Axis Pendant Lamp
...s pendant lamp
designconnected
atelier areti axis pendant lamp computer generated 3d model. designed by kerschbaumer, gwendolyn.
Brackets
archibase_planet
free

Bracket
...bracket
archibase planet
bracket corbel holder
bracket 1 - 3d model (*.gsm+*.3ds) for interior 3d visualization.
archibase_planet
free

Bracket
...bracket
archibase planet
bracket corbel console
bracket 5 - 3d model (*.gsm+*.3ds) for interior 3d visualization.
archibase_planet
free

Bracket
...bracket
archibase planet
corbel holder bracket
bracket 6 - 3d model (*.gsm+*.3ds) for interior 3d visualization.
archibase_planet
free

Bracket
...bracket
archibase planet
bracket corbel console
bracket 8 - 3d model (*.gsm+*.3ds) for interior 3d visualization.
archibase_planet
free

Bracket
...bracket
archibase planet
bracket corbel holder
bracket n280911 - 3d model (*.gsm+*.3ds) for interior 3d visualization.
archibase_planet
free

Bracket
...bracket
archibase planet
holder corbel bracket
bracket 9 - 3d model (*.gsm+*.3ds) for interior 3d visualization.
archibase_planet
free

Bracket
...bracket
archibase planet
corbel holder bracket
bracket 10 - 3d model (*.gsm+*.3ds) for interior 3d visualization.
archibase_planet
free

Bracket
...bracket
archibase planet
corbel console bracket
bracket 11 - 3d model (*.gsm+*.3ds) for interior 3d visualization.
archibase_planet
free

Bracket
...bracket
archibase planet
holder console bracket
bracket 12 - 3d model (*.gsm+*.3ds) for interior 3d visualization.
archibase_planet
free

Bracket
...bracket
archibase planet
bracket corbel holder
bracket 13 - 3d model (*.gsm+*.3ds) for interior 3d visualization.
Z
3d_export
$5

nissan z
...nissan z
3dexport
nissan z
3ddd
$1

Vase Z
...vase z
3ddd
vase z
3ddd
$1

полотенцесушить Z
...полотенцесушить z
3ddd
полотенцесушитель
полотенцесушить z
design_connected
free

Z-Chair
...z-chair
designconnected
free 3d model of z-chair designed by karman, aleksei.
design_connected
$11

Z Lamp
...z lamp
designconnected
phillips z lamp computer generated 3d model. designed by kalff, louis.
3d_export
$5

Dragon balls z
...dragon balls z
3dexport
dragon ball z
turbosquid
$20

Fighter Z
...
turbosquid
royalty free 3d model fighter z for download as on turbosquid: 3d models for games, architecture, videos. (1292563)
turbosquid
$9

Pen Z
...pen z
turbosquid
free 3d model pen z for download as obj on turbosquid: 3d models for games, architecture, videos. (1686775)
turbosquid
free

z chair
...z chair
turbosquid
free 3d model z chair for download as max on turbosquid: 3d models for games, architecture, videos. (1410230)
turbosquid
$5

Letter Z
...urbosquid
royalty free 3d model letter z for download as max on turbosquid: 3d models for games, architecture, videos. (1408540)
Single
3d_export
$5
single sofa single chair
...single sofa single chair
3dexport
single sofa single chair 3d model
3d_export
$5

single sofa single chair
...single sofa single chair
3dexport
single sofa single chair 3d model
3d_export
$5

single fastener
...single fastener
3dexport
single fastener
3ddd
$1
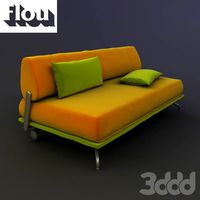
Single FLOU
... sofa , трансформер
диван-трансформер single от итальянского производителя flou
3ddd
$1
bed single
...bed single
3ddd
постельное белье
bed single 190cm*90cm
3ddd
$1

Single Flou
...single flou
3ddd
качественная моделька дивана-трансформера single flou.
3d_ocean
$9
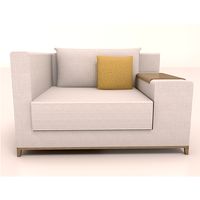
Single sofa
...le sofa
3docean
modern sofa single sofa sofa white sofa.comfortable sofa
single sofa,sofa,modern sofa,white sofa.comfortable sofa
3d_export
free

Single Knife
...single knife
3dexport
a single knife, presumably it was used as one of the throwing knives.
3d_export
free

couch - single
...couch - single
3dexport
low poly single couch with .psd file for personal customization
3d_ocean
$5
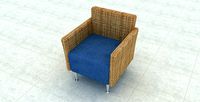
Single Sofa
...single sofa
3docean
single sofa made by fabric , wood frame & ss leg