Thingiverse
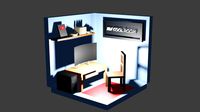
Simple Ikea Lack Enclosure (WIP) by whiteglint143
by Thingiverse
Last crawled date: 3 years ago
This is a beta design, you will need to free style some things a little bit to get this to work for you. Take my measurements with a grain of salt and MEASURE TWICE AND CUT ONCE!
I was not satisfied with the other Ikea Lack table enclosures so I set off to design my own. For me, this was a one off deal so the STL files are not 100% perfect but I received a few requests for my design anyways. I do not intend to build another one and no longer have the cad files so I will not be updating this.
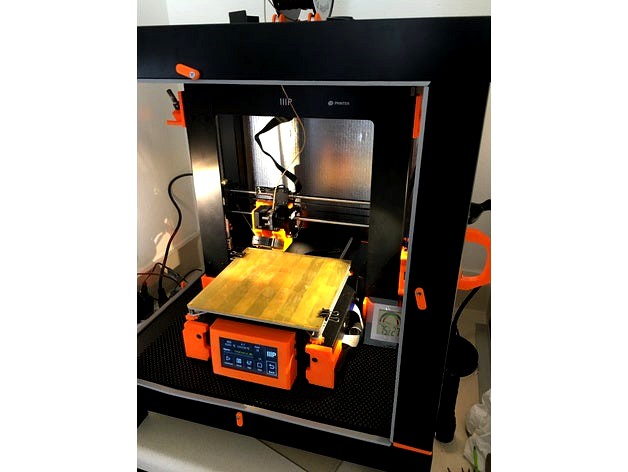
The overall performance of this enclosure might be too good. I used foam tape to seal all of the gaps and tried to minimize the amount of air to escape. With the bed set to 60C degrees and my home set to 75F, the chamber will reach 95F after about an hour. This is warm enough to cause heat creep issues that I am currently trying to resolve. It also does an excellent job at cutting the noise down.
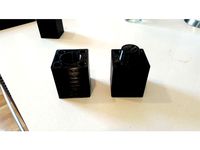
The Ikea tables are about 3" too short to fit over the wanhao i3 plus without a riser. You can print the riser but it's a waste of time and plastic in my opinion. I took the second Ikea table and cut the 3" off of each end of the legs. It is important to cut the ends off because the legs are actually hollow with end-blocks glued in. I screwed the four 3" extensions onto the uncut legs leaving the hollow side pointing down. The "EnclosureTopFoot" will plug into those legs. This allows you to pull the top of the enclosure off for what ever reason. I screwed the other 3" pieces onto the bottom of the table to raise it up. I intend to move the power supply to this area so it is not constantly in a heated chamber.
The 3 panels are just acrylic from the hardware store. These are on hinges so I can easily reach in to the enclosure and access the printer. The back is some type of fireproof aluminum foil covered cardboard from the local hardware store insulation section. I was originally going to mount a heat lamp to the back but did not have the room. The heatbed does a fine job at heating the chamber anyways. My front panel was 2" too short so I taped a second piece on :) (It was originally cut for the knock off version of the Lack table on Amazon)
The filament guide is not directly over the x axis gantry. I placed it about 6 inches back from the front edge of the chamber. I was hoping the filament path would be easier on the printer while minimizing the amount of air escaping. I suggest mounting your filament directly above the hole so it feeds straight in.
I use "The Ultimate Spool Holder" here https://www.thingiverse.com/thing:2214740 and cut the little legs off. I screwed two 1/8th inch thick pieces of plywood (acrylic would do too) to the top to act as a holder to the TUSH.
I was not satisfied with the other Ikea Lack table enclosures so I set off to design my own. For me, this was a one off deal so the STL files are not 100% perfect but I received a few requests for my design anyways. I do not intend to build another one and no longer have the cad files so I will not be updating this.
The overall performance of this enclosure might be too good. I used foam tape to seal all of the gaps and tried to minimize the amount of air to escape. With the bed set to 60C degrees and my home set to 75F, the chamber will reach 95F after about an hour. This is warm enough to cause heat creep issues that I am currently trying to resolve. It also does an excellent job at cutting the noise down.
The Ikea tables are about 3" too short to fit over the wanhao i3 plus without a riser. You can print the riser but it's a waste of time and plastic in my opinion. I took the second Ikea table and cut the 3" off of each end of the legs. It is important to cut the ends off because the legs are actually hollow with end-blocks glued in. I screwed the four 3" extensions onto the uncut legs leaving the hollow side pointing down. The "EnclosureTopFoot" will plug into those legs. This allows you to pull the top of the enclosure off for what ever reason. I screwed the other 3" pieces onto the bottom of the table to raise it up. I intend to move the power supply to this area so it is not constantly in a heated chamber.
The 3 panels are just acrylic from the hardware store. These are on hinges so I can easily reach in to the enclosure and access the printer. The back is some type of fireproof aluminum foil covered cardboard from the local hardware store insulation section. I was originally going to mount a heat lamp to the back but did not have the room. The heatbed does a fine job at heating the chamber anyways. My front panel was 2" too short so I taped a second piece on :) (It was originally cut for the knock off version of the Lack table on Amazon)
The filament guide is not directly over the x axis gantry. I placed it about 6 inches back from the front edge of the chamber. I was hoping the filament path would be easier on the printer while minimizing the amount of air escaping. I suggest mounting your filament directly above the hole so it feeds straight in.
I use "The Ultimate Spool Holder" here https://www.thingiverse.com/thing:2214740 and cut the little legs off. I screwed two 1/8th inch thick pieces of plywood (acrylic would do too) to the top to act as a holder to the TUSH.
Similar models
thingiverse
free

LACK ikea table risers by blorticus
...the other.
simple wood screws can be used to affix the tables solidly to the risers, or i used elmer's glue and a wood clamp.
thingiverse
free

Ikea Lack Enclosure - Leg Support by DesignTime3D
...or the already tapped hole. these supports will screw into the leg and the table top with the 3d printed connector in the middle.
thingiverse
free

Printer Enclosure by epps
...the closed chamber.
the chamber is heatet with the universalheater. the filamentstorage ist also heated with the universalheater.
thingiverse
free

IKEA LACK Table legstacker by Centurytt
...ikea lack table, keep an eye on that the legs are hollow. so you will need this to keep the leg in place with some screws.
cheers
thingiverse
free

Ikea lack feet by Joey_3D
...ersion has holes for screws.
v2: i found that v1 pressure fit to the legs and didn't need the screws, so i removed the mount.
thingiverse
free

Lack Enclosure Leg Extension End Cap by ctilley79
...the void. keep in mind, due to variances in the inner diameter of the hollow legs, minor sanding of the end caps may be required
thingiverse
free

Ikea Lack Enclosure (For Anet A8) by MrHaza
...e of each corner, the table can only go up.
i have not explained this very well, so please let me know if you have any questions.
thingiverse
free

Ikea Lack Leg Risers 30mm by NeutronNick
...ikea lack leg risers 30mm by neutronnick
thingiverse
30mm riser to go underneath a ikea lack table leg.
thingiverse
free
120mm Tinker-Friendly Lack Riser For Ikea Enclosure by Rhoboto
... to drill in the table / bottom of the legs. the screwdriver holes will fit a 10mm diameter shaft, which was big enough for mine.
thingiverse
free

IKEA-Lack Filament Guide by GPausH
...designed a filament guide because the table is nearly hollow and it was a pain in the ass to get the filament trough a 10mm hole.
Whiteglint143
thingiverse
free

Marble Track GCODE by whiteglint143
...marble track gcode by whiteglint143
thingiverse
grinding noise at end
thingiverse
free
Frsky D4R / X4R receiver holder / flight controller stack by whiteglint143
...a flight controller. the rx holder will need to be printed with supports, i suggest the interface support in the newer cura 3.2.1
thingiverse
free

Maker Select i3 Plus Limit Switch Bracket (WIP) by whiteglint143
...ed a quick way to adjust the distances so i used a spare ~30mm m3 screw for the z. you may need to file or sand some parts of it.
thingiverse
free

Maker Select i3 Plus LCD Holder (WIP) by whiteglint143
...duino to control the lights and power to the printer. you'll need 4 spacers and eight self tapping screws to mount the bezel.
thingiverse
free
MP Delta Bed Hole Plug (PROTOTYPE) by whiteglint143
...suggest using concentric supports for the lip with about 25-30% support density (the lip is small so a lot of support is needed).
thingiverse
free

Radian upper wing joiner by whiteglint143
... make a channel though the foam so you can plug the wires in on the top. you will never have to flip the model upside down again.
thingiverse
free

The Ultimate Spool Holder for Maker Select Mini by whiteglint143
...wist the stock steel spool holder with the thin clips. i am leaving both up to let you decide.
hardware required:
4x 608 bearings
Wip
turbosquid
free

WIP Firemoth Omnimech
... available on turbo squid, the world's leading provider of digital 3d models for visualization, films, television, and games.
3d_ocean
$85

Ford Mustang WIP
...ord mustang is an automobile manufactured by the ford motor company. the ford mustang is one of the ten cars have changed the ...
turbosquid
$49
Sci-Fi Ship Wip
... available on turbo squid, the world's leading provider of digital 3d models for visualization, films, television, and games.
3d_export
$9

Mustang Wip 2009 Logo 3D Model
... of auto transport 3d model logo emblem detailed high quality badge marque
mustang wip 2009 logo 3d model rmodeler 46465 3dexport
3d_export
$9

Mustang Wip 2010 Logo 3D Model
... of auto transport 3d model logo emblem detailed high quality badge marque
mustang wip 2010 logo 3d model rmodeler 46683 3dexport
3d_export
$89

Ford Mustang WIP 2009 3D Model
...ica usa muscle ford mustang avto car vehicle auto automobile cars 3d model
ford mustang wip 2009 3d model creatord 56249 3dexport
cg_studio
$89

Ford Mustang WIP 20093d model
....fbx .lwo .max .mb .obj .xsi - ford mustang wip 2009 3d model, royalty free license available, instant download after purchase.
3d_export
$149
Star Wars Death Star Destroyed 3D Model
...darth vader death scenice fiction base imperial destroyed build wip work in star wars death star destroyed 3d model...
3d_export
$20

ural 4320 mod a
...ural 4320 mod a 3dexport still wip keep updating<br>you can use this model for commercial purposes...
thingiverse
free
wips by dap
...wips by dap
thingiverse
sonic color>>wips
Lack
3d_export
$5

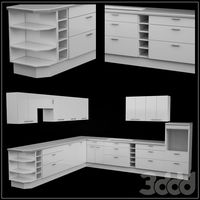
LACK LACK Coffee table white 90x55 cm IKEA
..., white, 90x55 cm ikea<br>https://www.ikea.com/ru/ru/p/lack-lakk-zhurnalnyy-stol-belyy-50449907/?ysclid=l8zshj49w6656165430
turbosquid
$4

Ikea Lack
... available on turbo squid, the world's leading provider of digital 3d models for visualization, films, television, and games.
3ddd
$1

IKEA Lack Coffee Table
... кофейный
ikea lack coffee tablehttp://www.ikea.com/gb/en/catalog/products/00104291
turbosquid
$5

IKEA Lack Table
...ack table for download as blend, blend, unitypackage, and fbx on turbosquid: 3d models for games, architecture, videos. (1623135)
turbosquid
$10

Ikea Lack Set
... available on turbo squid, the world's leading provider of digital 3d models for visualization, films, television, and games.
turbosquid
$3

IKEA Lack Library
... available on turbo squid, the world's leading provider of digital 3d models for visualization, films, television, and games.
turbosquid
$1

IKEA LACK TABLE
... available on turbo squid, the world's leading provider of digital 3d models for visualization, films, television, and games.
turbosquid
free

IKEA Lack Shelf
... available on turbo squid, the world's leading provider of digital 3d models for visualization, films, television, and games.
turbosquid
$9

Ikea Table 5 Lack
... available on turbo squid, the world's leading provider of digital 3d models for visualization, films, television, and games.
turbosquid
$5

IKEA Lack Side Table
... available on turbo squid, the world's leading provider of digital 3d models for visualization, films, television, and games.
Enclosure
3d_export
free

electrical enclosure
...l enclosure where electrical devices like (relays, contactors, busbars ) are kept in order to protect from hazardous environment.
turbosquid
$100

GPU Enclosure
...yalty free 3d model gpu enclosure for download as obj and stl on turbosquid: 3d models for games, architecture, videos. (1381061)
3d_export
$5

Electrical Enclosure
...ed. also has tower lights attaced on the top.<br>file format that are available:<br>.step<br>.obj<br>.stl
archive3d
free

Enclosure 3D Model
...closure 3d model
archive3d
shower enclosure-acquarius- 3d model for interior 3d visualization.
archive3d
free

Enclosure 3D Model
...enclosure 3d model
archive3d
shower enclosure-omega- 3d model for interior 3d visualization.
archive3d
free

Enclosure 3D Model
...enclosure 3d model
archive3d
shower enclosure-vega - 3d model for interior 3d visualization.
archive3d
free

Enclosure 3D Model
...enclosure 3d model
archive3d
shower enclosure-zenith - 3d model for interior 3d visualization.
turbosquid
$20

shower enclosure
... available on turbo squid, the world's leading provider of digital 3d models for visualization, films, television, and games.
turbosquid
$14

Dumpster Enclosure
... available on turbo squid, the world's leading provider of digital 3d models for visualization, films, television, and games.
turbosquid
$25

3d printer enclosure
... model 3d printer enclosure for download as ipt, skp, and fbx on turbosquid: 3d models for games, architecture, videos. (1634310)
Ikea
3ddd
$1
IKEA
...ikea
3ddd
ikea , стеллаж
ikea
3ddd
$1
IKEA
...ikea
3ddd
ikea
кухня ikea
3ddd
$1
IKEA
...ikea
3ddd
ikea
осторожно, тяжелая модель
ikea
3ddd
$1
IKEA
...ikea
3ddd
ikea
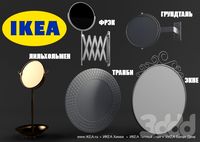
5 зеркал от ikea
3ddd
$1
IKEA
...ikea
3ddd
ikea , бойа
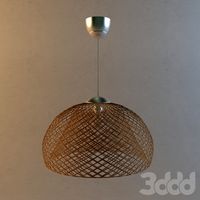
ikea светильник потолочный
3ddd
$1
IKEA
...ikea
3ddd
ikea , барный
bar stool ikea
3ddd
$1

IKEA
...ikea
3ddd
ikea , зубная щетка , косметика
ikea
3ddd
free
IKEA
...ikea
3ddd
ikea , трюмо
дамский столик ikea.
3ddd
$1
IKEA
...3ddd
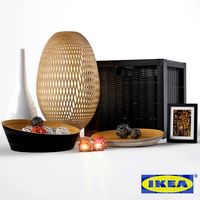
ps , декоративный набор , ikea
ikea decor
3ddd
$1

Ikea
...ikea
3ddd
ikea , lagra
модель лампы от ikea
Simple
turbosquid
$1

Simple goblet (Taca simples)
... available on turbo squid, the world's leading provider of digital 3d models for visualization, films, television, and games.
3d_export
$5
simple bench
...simple bench
3dexport
the simple bench which can be used in simple projects or video-games.
3d_export
$5
simple knob
...simple knob
3dexport
simple knob
3d_export
$5
simple handle
...simple handle
3dexport
simple handle
3d_export
$5
simple button
...simple button
3dexport
simple button
3d_export
$5

simple spindle
...simple spindle
3dexport
simple spindle
3d_export
$5

simple wheel
...simple wheel
3dexport
simple wheel
3d_export
$5
simple chair
...simple chair
3dexport
simple blue chair
3d_export
free
Simple room
...simple room
3dexport
here is a simple but beautiful room
3ddd
free
SIMPLE | Кресло
...io cianfarra , simple
производитель area declic дизайн giulio cianfarra коллекция simple