Thingiverse
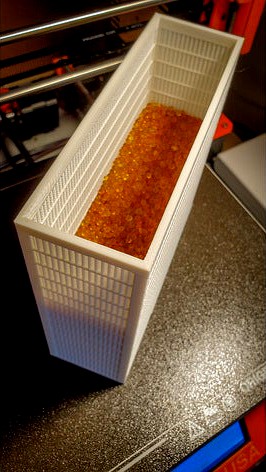
Silica Gel Tower by The_Redcoat
by Thingiverse
Last crawled date: 3 years, 3 months ago
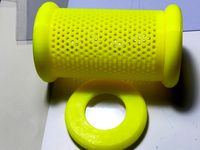
An upgrade from using upcycled gelato tubs to hold silica beads in the upper deck of my lack printer enclosure where the open spools live. This container lets the air pass through, and can withstand the re-charge temperatures of my filament dehydrator which means less lost beads & mess.
This is for advanced users only as it requires the use of (provided) slicer modifiers to make some of the model air-permeable. This technique makes the object very printable without thousands of retractions that the alternative slot-based design would require. It was also trivial to model, and the included OpenSCAD file allows you to create one in any dimensions you require.
For the container to withstand re-charge temperatures, it needs to be printed in ABS or other high glass-transition-temperature filament (PETG, ASA, PC etc.). If you recharge silica using an oven and a baking tray or something else not involving the container, then any filament works - clear transparent would be appropriate, so you can see the bead color change.
For the lid, get your first layer bed adhesion sorted out, the infill goes directly on the bed and will make a mess if you aren't calibrated when those lines don't stick. Print slooooow for that first layer, 10mm/s, and with ABS I found increasing the flow to 120% helped.
Recommended infill for the modifiers on the box is: 30% rectilinear at 0 degree rotation.
Recommended infill for the modifiers on the lid is: 30% gyroid at 0 degree rotation.
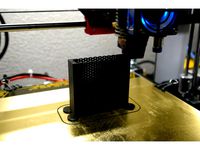
See screenshots of slicer for what 'works' looks like.
Things I thought about improving, but am too lazy to fix:
Instead of a cube, the box should have been based on the hull of four columns to give it nice rounded corners. ABS loves to try and lift those 90 degree corners off the bed.
For the lid, the modifiers could have been more advanced so the separator support bars exist only in the first 1mm, and last 1mm of layers, and the infill could run all the way along the lid for the layers between those which would have made printing slightly less complex.
This is for advanced users only as it requires the use of (provided) slicer modifiers to make some of the model air-permeable. This technique makes the object very printable without thousands of retractions that the alternative slot-based design would require. It was also trivial to model, and the included OpenSCAD file allows you to create one in any dimensions you require.
For the container to withstand re-charge temperatures, it needs to be printed in ABS or other high glass-transition-temperature filament (PETG, ASA, PC etc.). If you recharge silica using an oven and a baking tray or something else not involving the container, then any filament works - clear transparent would be appropriate, so you can see the bead color change.
For the lid, get your first layer bed adhesion sorted out, the infill goes directly on the bed and will make a mess if you aren't calibrated when those lines don't stick. Print slooooow for that first layer, 10mm/s, and with ABS I found increasing the flow to 120% helped.
Recommended infill for the modifiers on the box is: 30% rectilinear at 0 degree rotation.
Recommended infill for the modifiers on the lid is: 30% gyroid at 0 degree rotation.
See screenshots of slicer for what 'works' looks like.
Things I thought about improving, but am too lazy to fix:
Instead of a cube, the box should have been based on the hull of four columns to give it nice rounded corners. ABS loves to try and lift those 90 degree corners off the bed.
For the lid, the modifiers could have been more advanced so the separator support bars exist only in the first 1mm, and last 1mm of layers, and the infill could run all the way along the lid for the layers between those which would have made printing slightly less complex.
Similar models
thingiverse
free

Silica gel containers by Drenth_Engineering
...move the top and bottom layers to expose the 30% cubic infill and make sieve, 30% infill is enough for 3 to 4mm silica gel balls.
thingiverse
free

Modular sieve by wsreith
...rid size for your needs (e.g. 25% rectilinear)
alternatively edit the sieve plate model to punch holes at the size/shape you need
thingiverse
free

Silica Gel Container by ABH_
...screw lid. can be used for 750g filament spools with a 52 mm hole. to be filled with self-indicating silica gel 2-5 mm bead size.
thingiverse
free

Filament dryer by kometes
... filament dry. you can use aslo some silica gel.
you can use 0,6mm extrusion width to make it print faster. wall are 1,2mm thick.
thingiverse
free

Christian Cross
...ded for prusa slicer to show the ranges i mentioned.
angels tree topper can be found at https://www.thingiverse.com/thing:4052813
thingiverse
free

Round Silica Gel Container by dukk
... added a few lid files so you can print more than one lid at a time for those of you using a slicer that only supports one model.
thingiverse
free

45 Degree 3mm step bead roller / rolling die 3/4" drive axle by kirk_sim
...s
15 top solid layers
30% infill
no supports (print with larger surface on print bed)
basically trying to make a 3mm solid shell.
thingiverse
free

Silica gel container for your filaments by Soam16
...s so that you can customize them to your liking.
the total height of the container is 40mm, and it has an outer diameter of 70mm.
thingiverse
free

Repbox Silica gel container
...r 1 to 2 hours.
history:
2019-10-14 - increased lid size by 1mm so it doesn't snap when removing
2019-10-07 - initial version
thingiverse
free

Anti Moisture Silica Gel Box (container) by TORX1
...t; in cura, or the cover_thread_plus.
layer height. 0,20
wall line count. 7
top layers. 4
bottom layers. 4
infill density 35%
Redcoat
3d_export
$9

redcoat
...redcoat
3dexport
redcoat with musket 3d model.include max, fbs, obj. files.
unity_asset_store
$25

British Redcoat Soldier
...with the british redcoat soldier asset from wdallgraphics. find this & other characters options on the unity asset store.
thingiverse
free
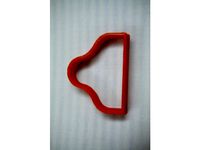
RedCoat Cookie Cutter by LetuBotV4Rex
...erse
this is a cookie cutter for a project appleseed red coat d silhouette. i used the cookie caster web site to create the stl.
cg_trader
$75

British Redcoat Soldier
... soldier
cg trader
3d model british redcoat soldier soldier war redcoat, formats include max, bip, ready for 3d animation and ot
cg_trader
$10

British Redcoat Hat
...apoleonic redcoat red 18th century low poly lowpoly character army clothing pirate hat army soldier character clothing pirate hat
cg_trader
$18

The Patriot Fathers Revenge | 3D
...movie, the patriot! comes with bnejamin martin killing a redcoat after his son, thomas was killed, and his son...
3dwarehouse
free

redcoats
...redcoats
3dwarehouse
redcoats #british_soldier #napoleonic_soldier #redcoat #soldier
3dwarehouse
free

Redcoat
...h #brittan #england #flintlock #fort #fort_edward #king_george #musket #napoleonic #revolution #soldier #war #war_of_independence
3dwarehouse
free

nepolionic war
...nepolionic war 3dwarehouse redcoats vs french #redcoat ...
3dwarehouse
free
Napoleonic Stegoceras Dinosaur cavalry
...montcalm for the tricornes. #british #cavalry #dinosaur #lance #napoleon #redcoat #stegoceras...
Silica
3d_export
$10

vray glass cup
...primary constituent of sand. soda-lime glass, containing around 70% silica accounts for around 90% of manufactured glass. the term...
3d_export
$5
filament dry box
...within the box to keep the filament dry. without silica this box will not solely keep the filament...
thingiverse
free

SAO Silica stencil
...sao silica stencil
thingiverse
silica stencil
thingiverse
free
Silica Gel Container
...silica gel container
thingiverse
silica gel container
thingiverse
free

Caja para silica gel - silica gel box by pololoz
...caja para silica gel - silica gel box by pololoz
thingiverse
caja para silica gel.
thingiverse
free
silica gel box by TK_DESIGN
...silica gel box by tk_design
thingiverse
silica gel box
thingiverse
free

Silica Gel Containers by xsgroup
...silica gel containers by xsgroup
thingiverse
silica gel containers...
thingiverse
free

Silica Gel Container by singwanlew
...silica gel container by singwanlew
thingiverse
silica gel container for center of the spool hole.
thingiverse
free

Silica Gel Box by Korgano
...fill this box with silica gel to keep your filament dry.
it features a hole in the middle which increases the surface of the box.
thingiverse
free

Silica gel case (Dreyer) by kmltbtozgl
...silica gel case (dreyer) by kmltbtozgl
thingiverse
silica gel box
Gel
archibase_planet
free
Gel
...gel
archibase planet
shaving gel shaving things
shaving gel- 3d model for interior 3d visualization.
archive3d
free

Gel 3D Model
...model
archive3d
shaving gel shaving things
shaving gel- 3d model for interior 3d visualization.
turbosquid
$5
Gel Bottle
...bosquid
royalty free 3d model gel bottle for download as c4d on turbosquid: 3d models for games, architecture, videos. (1414994)
turbosquid
$1

Shower Gel
...bosquid
royalty free 3d model shower gel for download as fbx on turbosquid: 3d models for games, architecture, videos. (1474627)
turbosquid
$19

Gel Gillette
... free 3d model gel gillette for download as max, obj, and fbx on turbosquid: 3d models for games, architecture, videos. (1557011)
turbosquid
$8

SHOWER GEL
... available on turbo squid, the world's leading provider of digital 3d models for visualization, films, television, and games.
3d_export
$10
gel dispenser
... image, with non-slip caps.<br>you can add the graphic you like and the die you need with your company logo or information.
3d_export
$5
Gel Dispenser 3D Model
...gel dispenser 3d model
3dexport
gel cream dispenser beauty cosmetics virtualz
gel dispenser 3d model virtualz 72573 3dexport
3d_export
$9

Cleansing Gel Bottle
...cleansing gel bottle
3dexport
turbosquid
$5

Blue Gel Bottle
...id
royalty free 3d model blue gel bottle for download as c4d on turbosquid: 3d models for games, architecture, videos. (1415072)
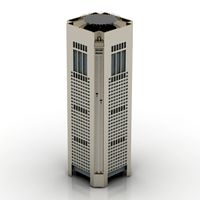
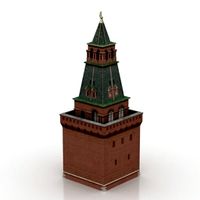
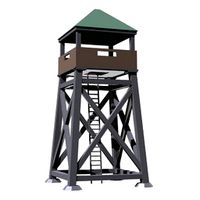
Tower
archibase_planet
free
Tower
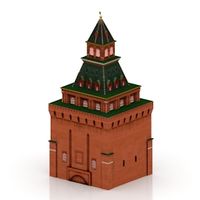
...kremlin tower spasskaya tower
tower kremlin spasskaya tower n120615 - 3d model (*.gsm+*.3ds+*.max) for exterior 3d visualization.
archibase_planet
free
Tower
...r kremlin tower petrovskaya tower
tower petrovskaya kremlin n120615 - 3d model (*.gsm+*.3ds+*.max) for exterior 3d visualization.
archibase_planet
free
Tower
...ino-eleninskaya tower
tower constantino eleninskaya kremlin n120615 - 3d model (*.gsm+*.3ds+*.max) for exterior 3d visualization.
archibase_planet
free
Tower
...tower
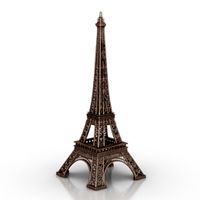
archibase planet
tower statuette eiffel tower
tower decor n180914 - 3d model (*.gsm+*.3ds) for interior 3d visualization.
archibase_planet
free
Tower
...lanet
tower construction building
tower polices post street tower n110913 - 3d model (*.gsm+*.3ds) for exterior 3d visualization.
3d_export
$5
tower
...tower
3dexport
a fortified tower with a moat.
archibase_planet
free
Tower
...tower
archibase planet
building tower construction
tower n300712 - 3d model (*.gsm+*.3ds) for exterior 3d visualization.
archibase_planet
free
Tower
...uilding kremlin construction
tower 2 vtoraya bezymyannaya kremlin n100914 - 3d model (*.gsm+*.3ds) for exterior 3d visualization.
archibase_planet
free
Tower
...tower
archibase planet
forcetower tower
forcetower - 3d model for interior 3d visualization.
archibase_planet
free
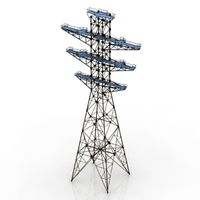
Transmission tower
...lectricity pylon lattice tower framework tower
transmission tower n121015 - 3d model (*.gsm+*.3ds) for exterior 3d visualization.