Thingiverse
Side Rail Mount Trigorilla Case ( anycubic kossel ) by ggiavelli
by Thingiverse
Last crawled date: 4 years, 4 months ago
Overview:
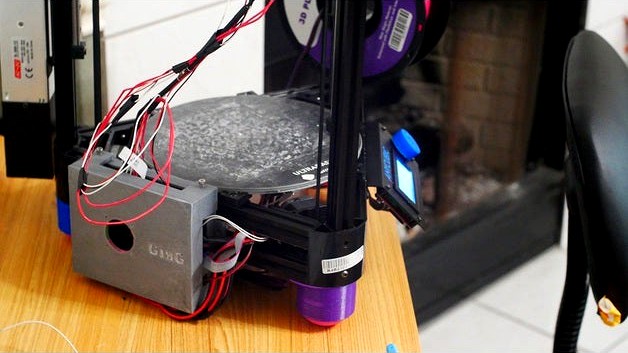
This is a case for the TriGorilla motherboard found on the anycubic Kossel Linear and linear plus. By moving it to the side rail you reduce the chance of overheating. It also includes a fan mount for a 40mmx40mmx10mm fan to reduce heat even more which is useful if you upgrade to 2208 drivers. This is especially useful if you print filaments which use a high heat on the bed like ABS.
This case has been tested and installed. It fits the MB the screw holes work well. A new version of the top and bottom are draft which add threaded screws to connect the two and a tiny space for the fan wire on the top.
Draft Version: (corrected, but not printed and installed, if you do print it give me feedback)
Trigorilla Bottom V2
Has added mount holes. Added threaded holes for top
Trigorilla Top Custom2_4
added tiny hole for fan wire to go through, added threaded holes to match bottom
Update List:
adds to holes to side to vertical mount on rail
made bottom piece slightly smaller as didnt fit before
Added wings and multiple holes to the bottom mount so you can adjust height and so mountings dont place metal under the cpu
Added more top and bottom space for wires to go in - Done
Reinforced screw holes and corrected threads - Done
Added Precision to size - Done
Added wings on bottom plate with multiple holes to adjust height - Done
Sliced off 0.6 of bottom after seeing printing error (non walls were only printing on 2nd layer) this will ensure flatness.- Done
screws from top friction hold the lower plate. 4 M5 short screws. So the outer holes on the lower plate are not needed and should be removed, but they don't cause any issues if you have that version. - DONE
Make screws thread into inner plate. done (draft)
Add small notch for fan wire to go through the front of the case - Done (draft )
TO DO / Feature Requests:
Make z groves so bottom plate slides into mb mount plate for easy install ...
To print with bottom mount into rail you will need feet, I recommend my racketball feet.
Wiring:
Wires tend to come out top side and bottom. Top for the ones going to the effector plate. Most of the rest come out the side opposite the usb connector.
Try to route the DC IN wires through the side, or the back
Fan on case should be a standard 40mm and m4 screws but you have to work the threads through manually with a screw FIRST. Fan cable connects to Fan1 connector on MB
Screws: Outer screws are M5, short (M4 for draft top and bottom with threaded holes)
MB screws are M4 short
frame hammerhead screws are whatever you want, they are not threaded holes but they can't be the shorted ones in the kit, I used 2nd shortest so they have room to catch
Printing: For a STRONGER top piece, print vertically with supports not flat to base