Thingiverse
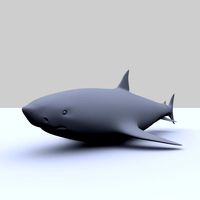
Shark Attack by BoothyBoothy
by Thingiverse
Last crawled date: 3 years, 4 months ago
I have always wanted to design some automata. This is my first outing with this genre.
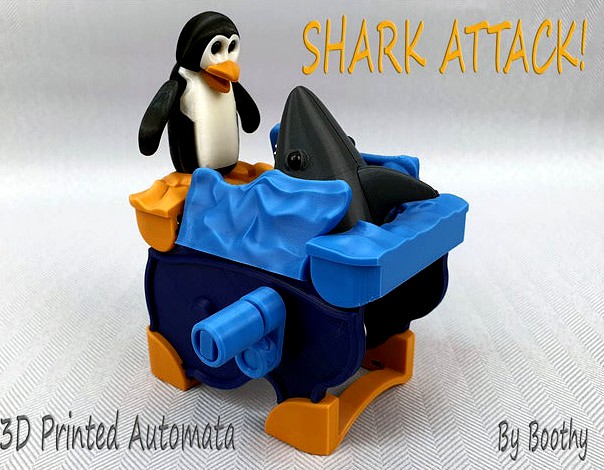
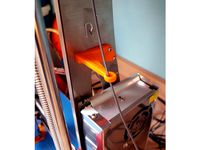
Shark Attack! 3D Printed Automata. A mild-mannered Penguin spies an object in the ocean only for a ferocious shark to lunge out of the depths looking for a meal & snapping its great white teeth!
This has been quite an extensive design engineering challenge to achieve a reliable working design with what is effectively lightweight plastic parts and relatively easy to assemble. There are quite a few components yet they are generally very small and very quick to print.
I did set out at the start of this challenge to produce something that worked and was enjoyable to produce and print. I, therefore, have prioritised towards the adventure rather than value engineering this product. That may well be a future project. I hope you enjoy the experience.
Video1: https://www.youtube.com/watch?v=n3Qxyl6_mQU
Video2: https://www.youtube.com/watch?v=NiBBfYmLVpY&t=22s
Assembly Guide Video: https://www.youtube.com/watch?v=feVB9FN1AXE
Installation Notes:
1.All parts are printable without supports. The majority of parts are printed vertically to optimise the FDM layer strength in the clip details and maximise surface print quality. Where necessary I have included some integral stability feet which will require removal with side cutters after printing. This saves using a raft and hopefully will improve print quality off the build plate.
2.To allow the articulated parts to work most effectively I would suggest a 100% infill. The denser the part the more effective they will work as a counterweight. The non-moving parts I have printed at 25 - 30 % infill.
3.I have included a parts list with infill percentages in the download.
4.Very small parts like the Shark`s Eyes I would suggest gluing for both safety and longevity of the product.
5.Nautilus Punk: If using a dual colour pause process to print side panels the colour change should be set to 3.1 mm.
6.Nautilus Punk-Please note: If using a dual colour printing process as per the uploaded images the repeatability of the clip design might be affected by the dual colour print application. It will still work but the small retention details may part over time.
Filaments Used:
1.Penguin Orange parts: Light Brown PLA by AMZ3D
2.Side Panels: Cobalt Blue by Filamentum PLA
3.White Parts: Amazon Basics Pearl White PLA
4.Black Parts: Amazon Basics Black PLA
5.Shark Body: Amazon Basics Dark Grey PLA
6.Light Blue Parts: Amazon Basics Blue PLA
7.Mechanism: Amazon Basics Silver PLA
Nautilus Punk:
Bronze Colour: Dark Rose Gold Silk PLA by Kehuashina
Silver Colour: Silver Silk PLA by ERYONE
Concentric:
1.Side Panels: Cobalt Blue PLA by Filamentum
2.Orange Feet: Light Brown PLA by AMZ3D
Deep Blue Sea:
1.Side Panels: Cobalt Blue by Filamentum PLA
2.Orange Feet: Light Brown PLA by AMZ3D
The parts can also be fully unassembled (I have provided clip release slots in most parts to aid this)so if you enjoy this product you can use the optional Theme Panel Packs to further enhance\extend the experience.
Best Boothy
Similar models
thingiverse
free

AMZ3D Filament Clip by Vlexx
...ne my self. and it works better than the other ones ive used.
made for 1.75mm filament. i suggest printing it on its side.
enjoy!
thingiverse
free

AMZ3D Hub by TropicalIgloo
...amz3d hub by tropicaligloo
thingiverse
this is a spool hub i made for the amazon amz3d filament rolls.
3dwarehouse
free

8 Fineliner in different colours
...wn and black #black #blue #brown #colour #different #fineliner #green #orange #pen #pencil #red #violet #writing_utensils #yellow
thingiverse
free

Articulated Shark / Two Color Print / Dual Extrusion by AndrewSink
...icer, merge them up, and print them out!
i printed this on a lulzbot taz 6 using the dual extruder v3 and polylite pla filament.
thingiverse
free
Lego Pant Printable as 4 Parts / Colours by KySyth
...erent colour
part of my chess set , the romans have brown show , tan flesh and
blue / red pants depending on which side they on
thingiverse
free
Ender 3 Pro V2 Compact SD Card Adapter Housing V4 by BoothyBoothy
...ue dark grey pla
amazon basics blue pla
amazon basics black pla
4.the dual colour separation height for the main body is 53.6 mm.
thingiverse
free

AMZ3D PLA spool hub by mpkottawa
...la spools. the axle hole is about 8mm. the part that goes into the spool is about 31.5mm.
edit: made a bearing insert, new file
grabcad
free

Worm Automata
...rm automata
grabcad
starting to play with different automata designs. this is the first (and most basic) one that i have built.
thingiverse
free
Clock dial for Full Tardis Clock by lukesms
...u cap, i used a nice dark blue i found on amazon as the base and for the clock as well and a blue glow in the dark pla as the cap
3dwarehouse
free

Basic Automata: Train
...cal toy) utilising a gear system to turn a train around a track. (4 hours work) #automata #basic #mechanical #mechanical_toy #toy
Boothyboothy
thingiverse
free

Bed Thumbwheel with M3 retention by BoothyBoothy
...bed thumbwheel with m3 retention by boothyboothy
thingiverse
yet another thumb wheel for a m3 bolt.
thingiverse
free

Simple Cable Hoops for the Zonestar P802QR2 by BoothyBoothy
...erse
simple thing to provide cables hoops above the motherboard to help tidy the various cables running vertically up the frame.
thingiverse
free
Filament Guides for the Zonestar P802QR2 by BoothyBoothy
...e the motherboard.
collection of all my upgrades for the zonestar at the following link:https://www.thingiverse.com/thing:2936870
thingiverse
free
PSU Cover for Zonestar P802QR2 by BoothyBoothy
...e psu more firmly.
collection of all my upgrades for the zonestar at the following link:https://www.thingiverse.com/thing:2936870
thingiverse
free

Picture frame for Mini Lithophane light Box - Simple by BoothyBoothy
...ht box from amazon
light box link: https://www.amazon.co.uk/gp/product/b0767lgtzm/ref=oh_aui_search_detailpage?ie=utf8&psc=1
thingiverse
free

Fire TV (2017) Simple Mounting Bracket by BoothyBoothy
...perhaps some cable management considered in the next version !
update:03_04_19 included hoop for cable tie to aid wire management
thingiverse
free

Tripod Bubble Level by BoothyBoothy
...the bubble vials on amazon:-
link: https://www.amazon.co.uk/gp/product/b01ir5ioru/ref=oh_aui_search_detailpage?ie=utf8&psc=1
thingiverse
free

Open Picture Frame for Lithophane Images by BoothyBoothy
...ck.
support\stand components are bonded to rear of frame. registration mark included within model to help align support brackets.
thingiverse
free

Bird Spikes for a Curved Ridge Tile by BoothyBoothy
...int. remodelled in fusion 360.
due to the curved base plate the thing is best printed with a raft and support to the build plate.
thingiverse
free

Wall Bracket for Nespresso Vertuo Capsules by BoothyBoothy
...ngs which can be used for bolting tiles together i have also included some countersunk holes for direct fixing to a door or wall.
Shark
3d_export
$5
shark
...shark
3dexport
animated shark
3d_export
$5

shark
...shark
3dexport
cute shark modeling
3d_export
$5

shark
...shark
3dexport
3d model of a shark (sculpting)
3ddd
free
Edra Shark
...edra shark
3ddd
shark , edra
диван edra shark
материалы vray
max2010, fbx, obj
turbosquid
$808

shark
...k
turbosquid
royalty free 3d model shark for download as 3ds on turbosquid: 3d models for games, architecture, videos. (1291856)
turbosquid
$40

Shark
...turbosquid
royalty free 3d model shark for download as blend on turbosquid: 3d models for games, architecture, videos. (1385567)
turbosquid
$39

Shark
...k
turbosquid
royalty free 3d model shark for download as max on turbosquid: 3d models for games, architecture, videos. (1197792)
turbosquid
$36

Shark
...k
turbosquid
royalty free 3d model shark for download as ztl on turbosquid: 3d models for games, architecture, videos. (1234052)
turbosquid
$25

shark
...k
turbosquid
royalty free 3d model shark for download as fbx on turbosquid: 3d models for games, architecture, videos. (1598411)
turbosquid
$25

Shark
...k
turbosquid
royalty free 3d model shark for download as obj on turbosquid: 3d models for games, architecture, videos. (1298866)
Attack
turbosquid
$6

Attack Helicopter
...
royalty free 3d model attack helicopter for download as obj on turbosquid: 3d models for games, architecture, videos. (1212798)
turbosquid
$10

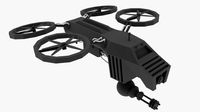
Attack Drone
...royalty free 3d model attack drone for download as ma and fbx on turbosquid: 3d models for games, architecture, videos. (1627775)
turbosquid
$10

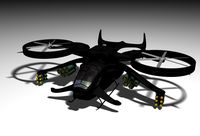
Attack Drone
...d model attack drone for download as blend, fbx, dae, and obj on turbosquid: 3d models for games, architecture, videos. (1525521)
turbosquid
$70

Attack Fighter
... available on turbo squid, the world's leading provider of digital 3d models for visualization, films, television, and games.
turbosquid
$20

Attack Drone
... available on turbo squid, the world's leading provider of digital 3d models for visualization, films, television, and games.
turbosquid
$15

Attack Bot
... available on turbo squid, the world's leading provider of digital 3d models for visualization, films, television, and games.
turbosquid
$5

Attack Helicopter
... available on turbo squid, the world's leading provider of digital 3d models for visualization, films, television, and games.
turbosquid
$1
Attack Drone
... available on turbo squid, the world's leading provider of digital 3d models for visualization, films, television, and games.
turbosquid
free

Attack on earth.max
... available on turbo squid, the world's leading provider of digital 3d models for visualization, films, television, and games.
3d_ocean
$25
Attack Ship
...ture avatar. the ship was created in c4d and has rotatable engines and props for animation purposes. the engines can either mo...