Thingiverse
Sanwa Style 4-way / 8-way Servo Restrictor Plate by retznutz
by Thingiverse
Last crawled date: 4 years, 8 months ago
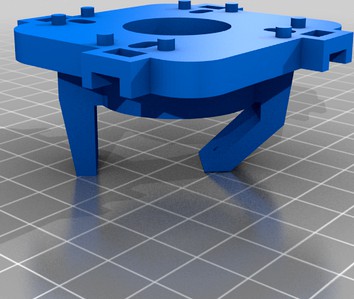
This a servo driven restrictor plate for a Sanwa style joystick to be used with RetroPie. I've uploaded 3 .stl files: a plate with pins, a plate with no pins (in case it's a little difficult to attach or you need to print without supports, and a restrictor barrel. I've also written two pieces of source code, one for an Arduino to drive the servos, and the other, in C, to allow RetroPie to switch from 4 to 8 way. You'll find all source files and the C executable in the ZIP file.
My goal for this project was to produce something to give back to the community, that is in-expensive to make and has commonly available parts.
This is a remix of https://www.thingiverse.com/thing:1984680 - thank you for great design! I had a need to use it with a Sanwa style joystick plate, and while I found others that had remixed this, they seemed to be incomplete.
You'll need a few things before you start putting this together:
An Arduino Nano (or regular one) to run the servos. https://www.amazon.com/gp/product/B07G99NNXL
The S90 servos: https://www.amazon.com/gp/product/B081ZY23V4
One Nano can drive up to 4 servos, just make sure you have a good power supply on the RaspberryPi you are running RetroPie on.
-- Start printing the restrictor and barrel :) --
To get going on the Arduino:
Unzip the JoyStick.zip
Download the Arduino IDE from https://www.arduino.cc/en/software and install it
Start up the Arduino IDE and open the file in the JoyStickIno folder from the zip file
Plug in your Nano to your USB port and configure the Arduino IDE properly to communicate with the Nano (sorry, beyond the scope of this writeup)
Upload the code to the Nano
To get going with the C code for the RaspberryPi (more in the comments of the C source file)
Make a directory in the /home/pi folder called "joy"
Upload the joy executable from the JoyStickRetroPi that you unzipped to the folder you just made (compile instruction in the source file if you want to re-compile)
Update the games.txt file with arcade games you have that are 4-way games. The controller software will always default to 8-way
Upload the games.txt file to the joy folder on the RaspberryPi
The joy executable needs to be marked executable on the system. SSH into the RaspberryPi, run "cd /home/pi/joy" and then run "chmod 777 joy"
Now you will need to edit runcommand-onstart.sh file, it runs when you start a rom and tells programs which rom you are running
In the SSH terminal you have open, type "sudo nano /opt/retropie/configs/all/runcommand-onstart.sh" - it may ask for your password
Add this line to the end of the file: /home/pi/joy/joy "$3" (quotes and alll)
8: CTRL-O to write the file, CTRL-X to exit.
For the physical part:
Screw the servo motor onto the restrictor plate with the "even" swing-arm attached to the servo (see photos)
Connect the wired from the servo to the Nano as: brown to ground pin, red to the 5V pin, and orange to pin 9, 10, 11, or 12.
Plug the USB cable from the Nano to the RaspberryPi USB port
Note: depending on the state of roation of the servo, you may want to hook everything up, start a four or eight way game and let the servo set itself to 45 or 90 degrees first, then attach the swing arm. The Nano software was a variable at the top that allows you to change the 4 and 8 way angles if needed.
You should be all set to go! If it's not working then check log files, re-read the directions, or give it a go another day :) If I forgot something, let me know and I'll update these instructions. Also, use all the source and files at your own risk!