Thingiverse

SANDBOX 2.3 HiFi Speaker by latunen
by Thingiverse
Last crawled date: 3 years, 1 month ago
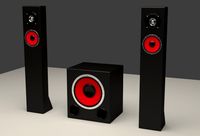
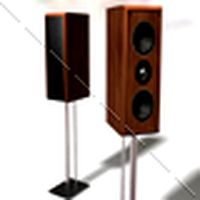
I wanted to make a nice looking HiFi grade speaker that would cost under 100 euros including all parts and needed only 1 kg PLA to print. Of course with only 1 kg plastic the speaker cabinet would be way too light to work well. The best solution was to make the cabinet walls hollow and fill it with sand. I made several different prototypes and this SANDBOX 2.3 works best for several types of elements and reflex tube lengths. The full range element makes this speaker easy to assembly and no soldering is needed.
The 2 kg sand inside the SANDBOX 2.3 speaker walls dampens vibrations and the total mass of almost 5 kg makes this speaker sound really clear and precise without loosing bass experience. This is also evident in the SPL curve which is flat and reaches really low for a 4 inch element. It is a good idea to combine HexiBox subwoofer with the SANDBOX 2.3 speaker to get extra punch for the bass. This setup can perform big sound even with a small and cheap bluetooth amplifier like the FosiAudio BT30D to which also the HexiBox is easy to connect directly.
The element I used and works great in SANDBOX 2.3 is TANG BAND W4-1320SIF 4" Bamboo Full Range Speaker. This element can be found in several online shops, I bought mine from www.soundimports.eu. I also bought the damping material there. The sand I bought from an aquarium shop and the connections, cable, screws and even damping material can be found in hardware/car part stores. The speaker cable connectors I ordered from AliExpress China where you can get them really cheap.
The best amount of the damping material is 75 - 100 grams. Printing settings I used 4 perimeters, 4 solid layers and 20% gyroid infill. It is important too use high bed temperature (60-70C) and wide brim to prevent warping. The seam I places so that it is in the bottom of the speaker. Because the body and backside parts are big the cooling fan can be set as low as 70% for better result. Only small amount of support material is needed.
If you have another type of elements then you can modify this SANDBOX design to fit your element in the face of the cabinet. You also need to calculate the length of the reflex tube which can be done easily here:
http://www.mh-audio.nl/Calculators/WVC.html
For the reflex tube length calculation you can find the needed "tuning frequency" in your element specs sheet. The inside volume of the SANDBOX 2.3 speaker is 3,85 litres but in calculation you have to minus the volume of the tube and the element. I used volume 3,6 litres and frequency 75 Hz in my calculation.
I have added several pictures of the making of the SANDBOX 2.3 speaker to get the idea how easy it is to put together just with a screwdriver and pliers. Before you start to fill the cabinet with sand remember to cover the screw holes! When you fill the cabinet knock the cabinet all the time to get the sand tighten. And after you have placed the backside part in place and secured it with screws then add more sand from the hole. You have to apply sand to the hole almost 20 times before the walls are really full. The tap to cover the hole might be tight so you can sand it or print it 1-2% smaller. If you find the outer edges of the speaker to be sharp you can use a knife or sanding paper to make them rounder.
Similar models
thingiverse
free

Bass Reflex Tube by airolympus
...ilding your own speakers. you can bolt it from outside with 4 screws. it needs a hole 37mm in front or back of the speaker cabin.
3d_ocean
$5

3-Way Speaker
...-way speaker
3docean
base reflex box hifi loud speaker music noise party sound speaker tube
a 3-way speaker with base reflex tube
thingiverse
free

Endor amplifier housing and Nomoon speaker by oOFutteOo
...just able to squeeze then down into the circles in the bottom of the case you may need to glue them down.
knap = button
låg = lid
3d_ocean
$12
Subwoofer Satellites Speaker Set
...he membranes have a nice fabric texture (see preview pictures). polycount is 91500 for one subwoofer and two satellites combined.
3dwarehouse
free
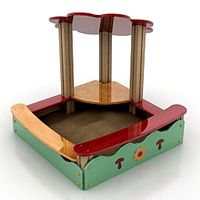
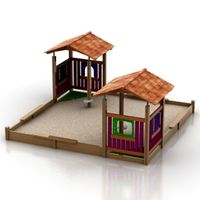
Sandbox
...sandbox
3dwarehouse
i used the sandbox tool to make a sandbox. ya! #box #castle #sand
grabcad
free

A midrange speaker cabinet
...cabinet
grabcad
a cabinet for a midrange speaker that a friend of mine bought. i have no idea if this has a model or brand name.
thingiverse
free

Computer speakers basing on 2.5-inch Peerless drivers by fimek
...ed "copper", however in fact it looks more or less like wooden. bass-reflex pipe is made of black mat filament.
cheers!
thingiverse
free
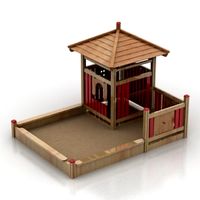
sand castle by byctrldesign
...e with sand.
after filling just remove the elements and start the next part or build a new castle.
https://youtu.be/_5o8laphdf4
thingiverse
free

40mm Speaker by ViniG
...ed to put de volume too high, which causes a great distortion. for this reasons i have the necessity of make a new smaller design
thingiverse
free

Bass reflex plug by vexus79
...ils in the upper frequencies.
scale it as you need it. the original file is for bass reflex openings bigger than 40mm up to 47mm.
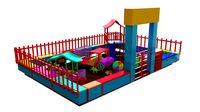
Sandbox
archibase_planet
free
Sandbox
...sandbox
archibase planet
playground sandbox
sandbox - 3d model (*.gsm+*.3ds) for interior 3d visualization.
archibase_planet
free

Sandbox
...sandbox
archibase planet
sand-box sandbox playground
sandbox - 3d model (*.gsm+*.3ds) for exterior 3d visualization.
archibase_planet
free

Sandbox
...sandbox
archibase planet
sandbox sand box sand-box
sandbox 1 - 3d model (*.gsm+*.3ds) for interior 3d visualization.
archibase_planet
free
Sandbox
...sandbox
archibase planet
sandbox sand-box sand box
sandbox 2 - 3d model (*.gsm+*.3ds) for interior 3d visualization.
archibase_planet
free
Sandbox
...sandbox
archibase planet
sandbox sand-box sand box playground
sandbox - 3d model (*.gsm+*.3ds) for exterior 3d visualization.
archibase_planet
free
Sandbox
...box
archibase planet
sandbox sand box playground sand-box
sandbox n140613 - 3d model (*.gsm+*.3ds) for exterior 3d visualization.
archibase_planet
free
Sandbox
...base planet
sandbox sand box playground sand-box
sandbox 1 lapset n210513 - 3d model (*.gsm+*.3ds) for exterior 3d visualization.
archibase_planet
free

Sandbox
...base planet
sandbox sand-box playground sand box
sandbox 2 lapset n210513 - 3d model (*.gsm+*.3ds) for exterior 3d visualization.
turbosquid
$2
Sandbox
...turbosquid
royalty free 3d model sandbox for download as max on turbosquid: 3d models for games, architecture, videos. (1489329)
turbosquid
$40
SANDBOX
...yalty free 3d model sandbox for download as c4d, fbx, and obj on turbosquid: 3d models for games, architecture, videos. (1547373)
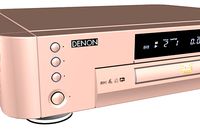
Hifi
turbosquid
$3

HiFi
... available on turbo squid, the world's leading provider of digital 3d models for visualization, films, television, and games.
turbosquid
$12

micro hifi concept
... available on turbo squid, the world's leading provider of digital 3d models for visualization, films, television, and games.
turbosquid
free

HIFI TV Board
... available on turbo squid, the world's leading provider of digital 3d models for visualization, films, television, and games.
3d_export
$9

radio hifi 2008 3D Model
... hifi 2008 3d model
3dexport
radio hifi music listen room dance hitec sono chaine
radio hifi 2008 3d model scorpiow 7692 3dexport
3d_export
$50

Speaker hifi 3D Model
...aker hifi 3d model
3dexport
speaker sound audio 3d model wood usher hi fi end home
speaker hifi 3d model cerebrate 89828 3dexport
turbosquid
$23

Corner cabinet for tv-hifi-video
... available on turbo squid, the world's leading provider of digital 3d models for visualization, films, television, and games.
turbosquid
$20
DVD or BluRay or Stereo (HIFI -Poser)
... available on turbo squid, the world's leading provider of digital 3d models for visualization, films, television, and games.
3d_export
$10

HiFi System Pack 1 3D Model
...stem pack 1 3d model
3dexport
3dsmax furniture architecture design vray electronic
hifi system pack 1 3d model hatt 3053 3dexport
turbosquid
$32

DVD or BlueRay Player - HIFI (LW version)
... available on turbo squid, the world's leading provider of digital 3d models for visualization, films, television, and games.
3d_ocean
$9

Target Audio TT2 HiFi Equipment Table
...t to house all kinds of electronics. - a subdivions surface model with clean topology - two tga textures at 4096×4096 for both...
Speaker
3d_ocean
$12
Speakers
...speakers
3docean
beautiful customizable customizable speakers
speakers 3d model
3d_ocean
$5

Speaker
...speaker
3docean
audio speaker
minimalist audio speaker for your design.
3d_export
$5
speaker
...speaker
3dexport
speaker
archibase_planet
free

Speaker
...er
archibase planet
acoustic system column speaker loud speaker
speaker 3 - 3d model (*.gsm+*.3ds) for interior 3d visualization.
archibase_planet
free

Speaker
...er
archibase planet
column speaker loud speaker acoustic system
speaker 2 - 3d model (*.gsm+*.3ds) for interior 3d visualization.
archibase_planet
free

Speaker
...er
archibase planet
loud speaker column speaker acoustic system
speaker 1 - 3d model (*.gsm+*.3ds) for interior 3d visualization.
archibase_planet
free

Speaker
...speaker
archibase planet
speaker audio
speaker din - 3d model for interior 3d visualization.
archibase_planet
free

Speakers
...speakers
archibase planet
speaker speakers audio
speakers1 - 3d model for interior 3d visualization.
3d_ocean
$6
Speaker
...speaker
3docean
3d model music sound speaker
model,3d,speaker,sound,best,music
3d_ocean
$4
Speaker
...speaker
3docean
audio computer desktop electronic headphone microphone music pc speaker speakers technology
.
3
turbosquid
$10

Mountain Bike 3 -3 of 3
...model mountain bike 3 (#3 of 3) for download as fbx and blend on turbosquid: 3d models for games, architecture, videos. (1438752)
turbosquid
$6

Rock 3-3
...urbosquid
royalty free 3d model rock 3-3 for download as obj on turbosquid: 3d models for games, architecture, videos. (1628065)
turbosquid
$29

Books 150 pieces 3-3-3
...books 150 pieces 3-3-3 for download as max, obj, fbx, and stl on turbosquid: 3d models for games, architecture, videos. (1384033)
turbosquid
$3

Genesis 3 Clothing 3
... available on turbo squid, the world's leading provider of digital 3d models for visualization, films, television, and games.
3d_export
$5

hinge 3
...hinge 3
3dexport
hinge 3
3ddd
$1

Розетка 3
...розетка 3
3ddd
розетка
розетка 3
turbosquid
$50

is-3
... available on turbo squid, the world's leading provider of digital 3d models for visualization, films, television, and games.
turbosquid
$10

Mountain Bike 3 -2 of 3
...model mountain bike 3 (#2 of 3) for download as fbx and blend on turbosquid: 3d models for games, architecture, videos. (1438750)
turbosquid
$10

Mountain Bike 1 -3 of 3
...model mountain bike 1 (#3 of 3) for download as fbx and blend on turbosquid: 3d models for games, architecture, videos. (1438743)
3d_export
$5

3 CATS
...3 cats
3dexport
3 cats pen holder
2
design_connected
$11

No 2
...no 2
designconnected
sibast no 2 computer generated 3d model. designed by sibast, helge.
turbosquid
$6

Cliff Rock 2-2
...uid
royalty free 3d model cliff rock 2-2 for download as obj on turbosquid: 3d models for games, architecture, videos. (1619161)
turbosquid
$29

Book variation 2 2
...3d model book variation 2 2 for download as max, obj, and fbx on turbosquid: 3d models for games, architecture, videos. (1366868)
turbosquid
$22

Classic baluster (2) (2)
...assic baluster (2) (2) for download as max, obj, fbx, and stl on turbosquid: 3d models for games, architecture, videos. (1483789)
turbosquid
$99

Smilodon 2 Pose 2
... available on turbo squid, the world's leading provider of digital 3d models for visualization, films, television, and games.
turbosquid
$20

Barrel Barricade 2-2
... available on turbo squid, the world's leading provider of digital 3d models for visualization, films, television, and games.
turbosquid
$6

Wall Trophy (2) (2)
... available on turbo squid, the world's leading provider of digital 3d models for visualization, films, television, and games.
turbosquid
free

Tire label 2 of 2
... available on turbo squid, the world's leading provider of digital 3d models for visualization, films, television, and games.
3ddd
$1

Кровать, 2 тумбочки, 2 светильника
...кровать, 2 тумбочки, 2 светильника
3ddd
кровать, 2 тумбочки, 2 светильника
нормальное качество
формат 3ds max
без текстур
3ddd
free

Кровать, 2 тумбочки, 2 светильника
...кровать, 2 тумбочки, 2 светильника
3ddd
кровать, 2 тумбочки, 2 светильника
нормальное качество
формат 3ds max
без текстур