Thingiverse
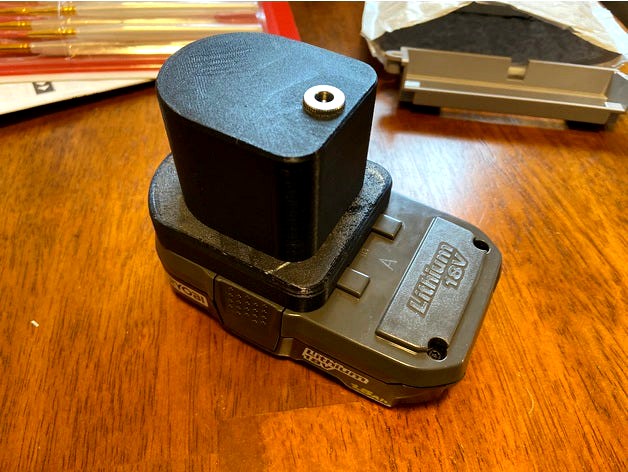
Ryobi Battery DC Power Jack
by Thingiverse
Last crawled date: 4 years, 2 months ago
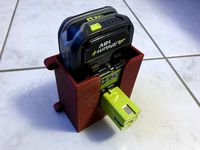
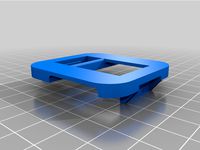
This provides a 5.5x2.5 DC power jack from a standard 18 volt Ryobi tool battery. I use it with my TS100 soldering iron.
Parts needed:
1x 5.5x2.5 barrel jack - https://www.mouser.com/ProductDetail/163-2325-E
2x AAA battery contacts: https://www.mouser.com/ProductDetail/534-204
4x 16mm M3 screws: https://www.grainger.com/product/FABORY-M3-0-50mm-Machine-Screw-31JT09
1x 2 meter 5.5x2.5 male to male power cable: https://www.ebay.com/itm/2-5mm-x-5-5mm-DC-Connector-Lead-Male-to-male-Power-Cable-50cm-1m-2m-3m-5m/382435803119
To assemble:
Solder wires to the power jack.
Insert the jack into the hole on the cover.
There isn't enough room to turn the nut inside the cover, so you'll need to slide the nut and washer in place inside, then twist the jack to screw them together. I recommend using a pair of pliers to get a good grip on it.
Solder the battery terminals to the wires from the power jack.
Slip the battery terminals onto the stem.
Slide the top of the stem into the cover. Depending on your printer, this may require a decent amount of force after you line it up. It should end up with the screw tabs of the stem flush with the bottom of the cover.
Screw the base onto the stem and cover.
Similar models
thingiverse
free
TC-421 LED dimmer terminals block cover by Napzerty
...e for toshiba power charger adapter 5.5x2.5
https://www.aliexpress.com/item/32756025862.html?spm=a2g0s.9042311.0.0.27424c4dsetryg
grabcad
free

Разъем питания PJ556 5,5х2,5 Power connector for laptop PJ556 5.5x2.5. DC Jack 5.5x2.5
...2,5 power connector for laptop pj556 5.5x2.5. dc jack 5.5x2.5
grabcad
power connector for laptop pj556 5.5x2.5. dc jack 5.5x2.5
thingiverse
free

DC Power Jack Housing
...ter soldering the wires onto the dc power jack barrel, slide it into the housing and feed the cable through the hole on the side.
thingiverse
free

Ryobi 18V dual QC3.0 USB Charger by rwagz
...upports inside.
you need full supports on the "base" to support the battery snap clips.
no support needed on the insert
thingiverse
free
Sennheiser EM 100 dual case
...h 6.3mm and xlr cables to the neutrik socket
profit
bom:
2x neutrix ncj6fi-s
1x 5,5mm x 2,1mm dc power jack
2x xlr cable to 6.3mm
thingiverse
free

Versatile Power Supply Cover/Enclosure
... the power supply into the case (the wires will be squeezed into the remaining area).
secure with m3 screws on the back and side.
grabcad
free

Ryobi Battery Variable Power Supply
... variable with xt60 and power jack. usb quick charge, dual type a, single type c.
optional top cover, for soldering iron holder.
thingiverse
free

Electric Longboard / Skateboard battery and power cover by kataklysm
...lders for mount
cable cover have hole for 20mm power switch
for assembly you need 5mm screws and nuts
https://vimeo.com/283323178
thingiverse
free

Adapter for Ryobi 18V batteries. by pwkalahar
... component kits together on ebay: https://www.ebay.com/itm/142644842015
electrical and case:https://www.ebay.com/itm/143512308636
thingiverse
free
DC Power Plug Connector Jack Screw Terminal Wire Clamp Protector / Strain Relief
...ck recommended).
make sure to pull the zip tie tightly! there's a groove in the male/female part so it doesn't stick out.
Ryobi
thingiverse
free

Ryobi Logo
...ryobi logo
thingiverse
ryobi logo
thingiverse
free

adapter ryobi
...adapter ryobi
thingiverse
suction tube adapter ryobi band saw
thingiverse
free

ryobi vertical stand by powercam
...ical stand by powercam
thingiverse
vertical support for ryobi drill tool
for:
ryobi lsd 120
ryobi lsdt 120
support not necessary
thingiverse
free

Ryobi One+ Battery Adapter
...ryobi one+ battery adapter
thingiverse
remix milwaukee m18 to ryobi battery adapter for ryobi one+ battery
thingiverse
free
RYOBI ONE+ 1,5Ah
...ryobi one+ 1,5ah
thingiverse
ryobi one+ 1,5ah
holes are made for 4mm spax wood screws.
thingiverse
free

Ryobi Connector by ethanantcaballero
...ryobi connector by ethanantcaballero
thingiverse
ryobi piece that was missing. prevents saw dust from leaving tube.
thingiverse
free

Ryobi one + battery holder
...ryobi one + battery holder
thingiverse
holder for ryobi battery
thingiverse
free

Ryobi Sander Cap by thinkb4print
...ryobi sander cap by thinkb4print
thingiverse
to store the ryobi orbit sander p411
thingiverse
free
fermoir malette ryobi by phil34
...fermoir malette ryobi by phil34
thingiverse
fermoir de valise scie sauteuse ryobi
thingiverse
free

Ryobi vacuum by raccoo
...ryobi vacuum by raccoo
thingiverse
Jack
turbosquid
$41

jack-jack
... available on turbo squid, the world's leading provider of digital 3d models for visualization, films, television, and games.
3ddd
$1

Jack daniels
...jack daniels
3ddd
бутылка , jack daniels
jack daniels
turbosquid
$20

Jack
...ck
turbosquid
royalty free 3d model jack for download as max on turbosquid: 3d models for games, architecture, videos. (1380689)
3ddd
$1

Jack Daniels
...jack daniels
3ddd
бутылка
jack daniels
3ddd
$1

Lily Jack
...y jack
3ddd
lily jack , пуф
качественная модель атаманки lily jack pt4936
130000 поликов
3d_ocean
$6
Stylish Jack Plug
...lug jack jack jacks jacks phones jack phones jack plug plug
stylish jack plug formats included: *.obj, *.c4d (r12), *.fbx, *.3ds
3d_export
free

jack daniels
...jack daniels
3dexport
whiskey, alcohol, jack, drink, sinatra
turbosquid
$40

jack
... available on turbo squid, the world's leading provider of digital 3d models for visualization, films, television, and games.
turbosquid
$7

Jack
... available on turbo squid, the world's leading provider of digital 3d models for visualization, films, television, and games.
turbosquid
$5
jack
... available on turbo squid, the world's leading provider of digital 3d models for visualization, films, television, and games.
Dc
design_connected
$27

DC 290
...dc 290
designconnected
ceccotti collezioni dc 290 computer generated 3d model. designed by de cotiis, vincenzo.
design_connected
$27

DC 300
...dc 300
designconnected
ceccotti collezioni dc 300 computer generated 3d model. designed by de cotiis, vincenzo.
design_connected
$27

DC Bed
...dc bed
designconnected
ceccotti collezioni dc bed sleep furniture computer generated 3d model. designed by vincenzo de cotiis.
turbosquid
$1

DC motor
...urbosquid
royalty free 3d model dc motor for download as 3dm on turbosquid: 3d models for games, architecture, videos. (1188219)
3ddd
$1
Ceccotti | DC
...ceccotti | dc
3ddd
ceccotti
фабрика ceccotti
turbosquid
$35
DC Skateboard
... available on turbo squid, the world's leading provider of digital 3d models for visualization, films, television, and games.
turbosquid
$13
DC Motor
...l dc motor for download as max, ige, obj, fbx, stl, and sldas on turbosquid: 3d models for games, architecture, videos. (1493908)
3ddd
free
Ceccotti / DC Bed
...://freshome.com/2009/05/12/dc-bed-by-ceccotti-collezioni/ http://www.switchmodern.com/beds/ceccotti-dc-bed.asp
3ddd
$1

Кресло CECCOTTI DC 90
...кресло ceccotti dc 90
3ddd
ceccotti
кресло ceccotti dc 90
3ddd
$1

Ceccotti Collezioni DC 90
... кресло , armchair
кресло ceccotti collezioni dc 90. размеры:850-800-406.7
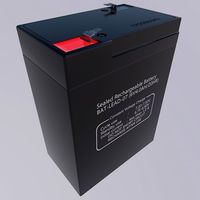
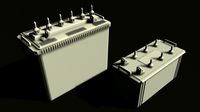
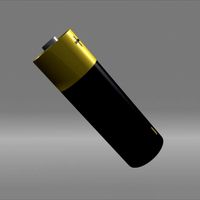
Battery
3d_ocean
$2

Battery
...battery
3docean
battery electronic
a high quality battery .
3d_export
free
battery
...battery
3dexport
battery
3d_ocean
$5
Battery
...battery
3docean
battery electronics
a classic 6 v battery, high poly with materials
3d_ocean
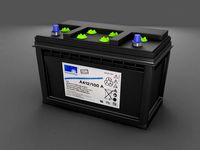
$3
Batteries
...batteries 3docean aa aaa batteries battery d electronics energy materials power subdivision uv unwrapped aa,...
3d_export
$19
Lead-acid battery storage battery lithium battery
...ttery storage battery lithium battery
3dexport
1.lead-acid battery storage battery lithium battery 2.files include 3dmax obj fbx
3d_ocean
$7

Battery Model
...battery model
3docean
big battery car battery vehicle battery
car battery, big battery, vehicle battery.
3ddd
free

battery energier
...battery energier
3ddd
battery energier , батарейка
battery energier
turbosquid
free
battery
...battery
turbosquid
free 3d model battery for download as obj on turbosquid: 3d models for games, architecture, videos. (1151676)
3d_ocean
$1
Battery Model
...lack minus plus white yellow
this is battery model is about 1000 triangles. turntable preview is smoothed version of the battery.
3d_export
$10
battery 18650
...battery 18650
3dexport
battery 18650
Power
turbosquid
$100

power
...ower
turbosquid
royalty free 3d model power for download as on turbosquid: 3d models for games, architecture, videos. (1421990)
3d_export
$5

Power
...power
3dexport
3d_export
$5

power outlets
...power outlets
3dexport
power outlets
3ddd
$1

lion power
...lion power
3ddd
лев , статуя
lion power gold sculpture
3ddd
$1

Sea Power
...
компас , море , часы
часы с компасом sea power
3ddd
free

Meridiani / Power
...power
3ddd
meridiani , круглый
стол power производитель meridiani, диаметр 120,высота 67
3d_export
$5

Power Surge
...power surge
3dexport
the power surge is a all mesh carnival ride to lower in game part count and lag
turbosquid
$8

Airport Ground Power Unit (AXA Power )
... available on turbo squid, the world's leading provider of digital 3d models for visualization, films, television, and games.
turbosquid
$50

Power Houser
...rbosquid
royalty free 3d model power houser for download as on turbosquid: 3d models for games, architecture, videos. (1333800)
3d_export
$5

power outlet
...power outlet
3dexport
power outlet<br>format file maya 2018, 3d max 2017, obj, fbx