Thingiverse
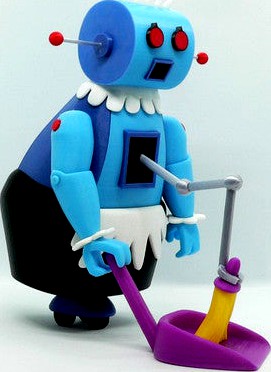
Rosie the Robot by reddadsteve
by Thingiverse
Last crawled date: 3 years, 4 months ago
Rosie the Robot, from the cartoon The Jetsons, by Hanna-Barbera.
Rosie is a robot and the maid and housekeeper of the Jetson family. She is a model XB-500, an older model, but the only one U-Rent A Maid had that Jane could afford. There is an unconfirmed rumor exists that her middle name is Uniqua and she shares the surname Jetson.
No supports are required. If you have the proper filament colors, no painting is needed.
The assembled model is 225mm tall and is in proportion to my other Jetsons models.
Enjoy!
I had issues with Thingiverse loading all the individual STL files so I created a zip instead. Thingiverse needs at lease one stl, so I create a dummy file, 'thingiverse workaround'. Please ignore that file and simply use the files in the zip.
...........................................................................................................
Print Instructions:
Supports: No
Resolution: .2mm
Infill: 10%
Notes:**
Refer to the notes below for a few helpful printing and assembly instructions.
...........................................................................................................
Building the model
Colors
Black: (Paramount3D PLA - Black)
eye_blacks (contains two pieces)
wheels (contains three pieces)
body_bottom
mouth_black
body_hole_black
..
Yellow: (Paramount3D PLA - Simpson Yellow)
broom_bottom
..
Blue: (Paramount3D PLA - Cadet Blue)
head_sides (contains two pieces)
ears (contains two pieces)
body_sides (contains two pieces)
body_hole_blue
mouth_blue
wheel_base
..
White: (Paramount3D PLA - White)
hat
apron
apron_bow
cuff_left
cuff_right
collar
..
Red: (Hatchbox PLA - True Red)
eye_reds (contains two pieces)
ear_balls (contains two pieces)
arm_bolt_reds (contains two pieces)
Purple: (Gizmo Dorks ABS - Purple)
dustpan
broom_top
..
Light Blue: (Solutech ABS - Aqua Blue)
head
body_middle
arm_lower_left
arm_lower_right
arm_upper_left
arm_upper_right
arm_bolt_blues (contains two pieces)
hand_left
hand_right
..
Silver: (Polyalchemy Elixer - Silver)
pipe_a
pipe_b
pipe_c
pipe_d
pipe_e
ear_poles (contains two pieces)
Any color: (hidden piece)
cuff_pins: (contains two pieces)
...........................................................................................................
Printing and assembly tips
Printing tips
1-No supports are required.
2-There are some pieces that may need brims, use your discretion.
I used brims on the eye_blacks, ear_balls, pipe_b, pipe_d, arm_lower_left and arm_lower_right.
3-Many left/right parts are exactly the same. STL files that end in 's' all have two pieces in them (as noted in the colors section) which fit either on the left or right side.
..
Assembly tips:
1-Take your time gluing the model together and enjoy the process. There are many pieces to this model, however none of the pieces are extra small and all the parts are easy to handle and fit in place.
2-I used E6000 sticky craft glue to put this model together. The sticky glue allows more time to position the parts than a fast drying superglue. I have 'fat fingers' and a shaky hand, so the sticky glue works out best for me.
3-If you have any confusion about the position of the pipe pieces, all those parts have the print bed side facing down or away from the front. Try and keep the completed pipe fairly straight once glued. However, there is plenty of leeway to attach it later if it is not straight.
4-Personally, I glued the model together in sections and then glued the sections together. I wound up with three main parts for the final assembly. The pipes, the dustpan/broom and the completed Rosie. The final assembly is to join those three sections together.
5-Refer to the assembly diagram in the pictures section as well as the uploaded pictures for putting the model together. The model is meant to be glued.
Do not hesitate to ask questions, feedback is essential to making better models.
Similar models
thingiverse
free

Old Hag by reddadsteve
... model together. the model is meant to be glued.
do not hesitate to ask questions, feedback is essential to making better models.
thingiverse
free

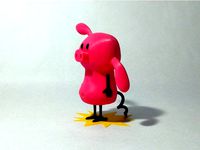
Prickle by reddadsteve
... model together. the model is meant to be glued.
do not hesitate to ask questions, feedback is essential to making better models.
thingiverse
free

Eeyore by reddadsteve
... model together. the model is meant to be glued.
do not hesitate to ask questions, feedback is essential to making better models.
thingiverse
free
Astro Jetson by reddadsteve
... model together. the model is meant to be glued.
do not hesitate to ask questions, feedback is essential to making better models.
thingiverse
free

Eyeball Father in a teacup by reddadsteve
... model together. the model is meant to be glued.
do not hesitate to ask questions, feedback is essential to making better models.
thingiverse
free
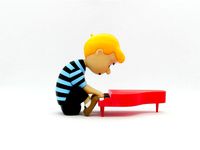
Schroeder by reddadsteve
... model together. the model is meant to be glued.
do not hesitate to ask questions, feedback is essential to making better models.
3dwarehouse
free

Rosie
...rosie
3dwarehouse
rosie the maid - jetsons #60s_cartoon #future #jetsons #robot #rosie #space
thingiverse
free
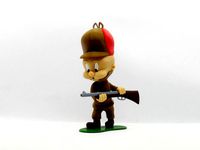
Elmer Fudd by reddadsteve
... model together. the model is meant to be glued.
do not hesitate to ask questions, feedback is essential to making better models.
thingiverse
free

Sylvester the Cat by reddadsteve
... model together. the model is meant to be glued.
do not hesitate to ask questions, feedback is essential to making better models.
thingiverse
free

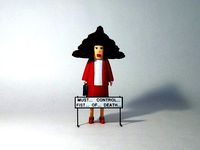
Sign for Bugs/Elmer Scene by reddadsteve
... model together. the model is meant to be glued.
do not hesitate to ask questions, feedback is essential to making better models.
Reddadsteve
thingiverse
free

Dilbert by reddadsteve
...required. if you have the right filament colors, no painting is needed.
the completed model is 225mm tall after assembly.
enjoy!
thingiverse
free

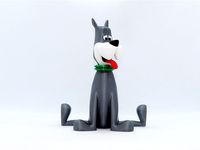
Dogbert by reddadsteve
...assembly. this model is in proportion to the dilbert, wally and pointy haired boss models that i've previously posted.
enjoy!
thingiverse
free

Hagar the Horrible by reddadsteve
...printing the pieces in the suggested colors. no supports are required.
hagar may look fierce but he is really a pussycat.
enjoy!
thingiverse
free

Rat by reddadsteve
...all after assembly. this model is in proportion to the pig and crocodile models from the comic that i've also posted.
enjoy!
thingiverse
free
Pig by reddadsteve
...tall after assembly. this model is in proportion to the pig and crocodile models from the comic that i've also posted.
enjoy!
thingiverse
free

Crocodile by reddadsteve
...tall after assembly. this model is in proportion to the pig and crocodile models from the comic that i've also posted.
enjoy!
thingiverse
free
Alice by reddadsteve
...n proportion to the dilbert, wally, pointy haired boss and dogbert models from the comic that i've previously posted.
enjoy!
thingiverse
free

Wally by reddadsteve
... is 200mm tall after assembly. this model is in proportion to the dilbert and pointy haired boss models previously posted.
enjoy!
thingiverse
free

Charlie Brown by reddadsteve
...ad luck.
no supports are required. if you have the proper filament colors, no painting is needed.
the model is 140mm tall.
enjoy!
thingiverse
free

Kermit the Frog by reddadsteve
...o supports are required. if you have the proper filament colors, no painting is needed.
the assembled model is 140mm tall.
enjoy!
Rosie
3ddd
$1

Sergio Rosi
...sergio rosi
3ddd
sergio rosi
кровать sergio rosi
3ddd
$1

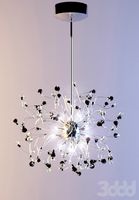
rosy angelis
... rosy angelis , тренога
торшер rosy angelis от филиппа старка
3d_export
$7

rosie jetsons
...rosie jetsons
3dexport
rosie jetsons a robot employed by the jetsons family.
turbosquid
$10

Rosie
...3d model rosie for download as ma, c4d, max, ma, fbx, and obj on turbosquid: 3d models for games, architecture, videos. (1709432)
3ddd
$1
Kolarz | Twister Rosy
...olarz | twister rosy
3ddd
kolarz , twister rosy
h 110-150 cm d 80 cm
turbosquid
$111

Rosy-3D Model
... available on turbo squid, the world's leading provider of digital 3d models for visualization, films, television, and games.
3d_export
$16

rosie the robot
...bj file included in zip file. antenna "flash" png file also included. has tris so not suitable for stl / 3d printing.
3d_export
$8

Floor lamp rosy angelis 3D Model
...sy angelis 3d model
3dexport
3d floor lamp rosy angelis philippe starck
floor lamp rosy angelis 3d model morfozavr 53621 3dexport
3d_export
$5

Laskasas Rosie Tallboy
...skasas-rosie-chest-of-drawers/20197049#&gid=1&pid=6 https://www.architonic.com/en/product/laskasas-rosie-tallboy/20197052
3d_export
$5

Laskasas Rosie Desk
...a: 6 (hotflix 2) version v-ray: 5, update 1.3 https://www.laskasas.com/en/desks/rosie-desk_p3531.html?id=515&cat=511&pc=1
Robot
3d_ocean
$20
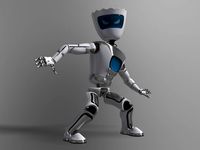
Robot
...robot
3docean
character metal robot robot robotic white
robot model for 3dsmax 2009 and greater
3d_ocean
$45
Robot
...robot
3docean
fighing machine robot
a fighting robot from the scrapyard.
3d_ocean
$18
Robot
...robot
3docean
machin robot science fiction
high poly robot.
3d_export
$7

Robot
...robot
3dexport
robot
3d_export
$5
robot
...robot
3dexport
robot
3d_export
free
Robot
...robot
3dexport
robot
turbosquid
$10
Robot/ Alien Robot
...
royalty free 3d model robot/ alien robot for download as max on turbosquid: 3d models for games, architecture, videos. (1442828)
3d_export
$5

robot
...robot
3dexport
robot in blender
3ddd
$1
robot
...robot
3ddd
робот
robot
3ddd
$1
Robot
...robot
3ddd
робот
robot