Thingiverse
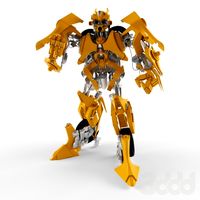
Robotic arm: arm (part 3/3) by WonderTiger
by Thingiverse
Last crawled date: 3 years, 1 month ago
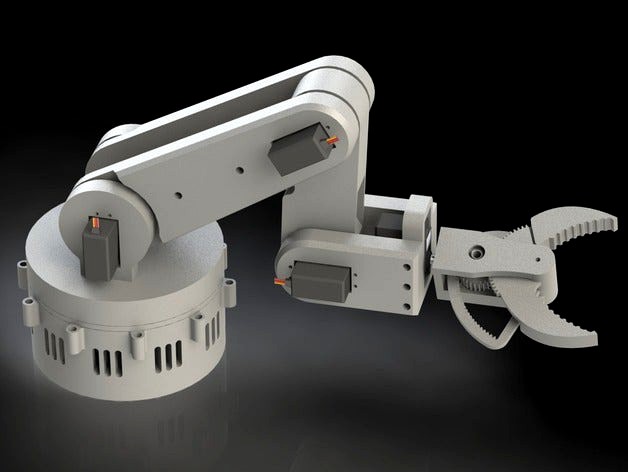
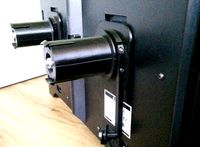
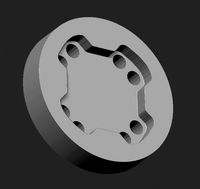
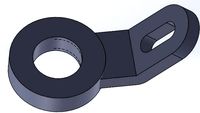
This is the third, and last, file publish of my robotic arm series. This component is the arm of the robotic arm.
The following hardware will be needed to assemble the arm:
M3 x 8mm round head(22x), 20 used to mount the servo horns (including the gripper)
M3 x 10mm round head(34x)
M3 x 63mm round head (2x)
M3 x 16mm round head (4x)
M3 nut (2x)
M4 x 16mm round head(4x)
8mm x 16mm x 5mm bearing, 688zz (2x)
The following electronic parts will be needed:
Standard size servo (5x), e.g. TowerPro MG995
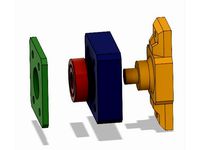
The assembly should be pretty straight forward, just follow the exploded view. Questions?? Message me!
Notes:
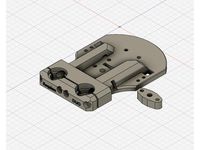
Print the base servo mount, bearing holder, center arm bearing guide, center arm bearing guide clamp and the lower arm bushing twice.
All critical holes are oversized by 0.25mm to guarantee an easy fit.
All the M3 / M4 holes are sized 2.8mm / 3.8mm in diameter. Apply some grease (not necessary, but it makes it easier) on a normal bolt and screw them in the parts with some proper tools. This should make some neat and tight threads in the plastic.
This design is not fully tested, so it might undergo some changes in the future.
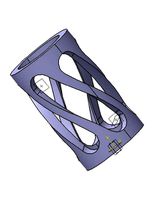
It's best to put support in round shaped overhangs, for example you should place the center arm with the circular indent face down on your print bed and then add supports. After printing you can grind down any residue of support material with a dremel tool or something similar.
The following hardware will be needed to assemble the arm:
M3 x 8mm round head(22x), 20 used to mount the servo horns (including the gripper)
M3 x 10mm round head(34x)
M3 x 63mm round head (2x)
M3 x 16mm round head (4x)
M3 nut (2x)
M4 x 16mm round head(4x)
8mm x 16mm x 5mm bearing, 688zz (2x)
The following electronic parts will be needed:
Standard size servo (5x), e.g. TowerPro MG995
The assembly should be pretty straight forward, just follow the exploded view. Questions?? Message me!
Notes:
Print the base servo mount, bearing holder, center arm bearing guide, center arm bearing guide clamp and the lower arm bushing twice.
All critical holes are oversized by 0.25mm to guarantee an easy fit.
All the M3 / M4 holes are sized 2.8mm / 3.8mm in diameter. Apply some grease (not necessary, but it makes it easier) on a normal bolt and screw them in the parts with some proper tools. This should make some neat and tight threads in the plastic.
This design is not fully tested, so it might undergo some changes in the future.
It's best to put support in round shaped overhangs, for example you should place the center arm with the circular indent face down on your print bed and then add supports. After printing you can grind down any residue of support material with a dremel tool or something similar.
Similar models
grabcad
free

Robotic Arm
...bcad.com/library/potentiometer-17/details?folder_id=6023374
solid works version 2017
if you need any help about montage ask me
thingiverse
free
Robotic arm: gripper (part 1/3) by WonderTiger
... to hammer it on the servo. once the gear sits reasonably well you could use a shorter screw so that you won't jam the servo.
thingiverse
free

Gripper robot by antonellos
...rvo drive sg90 or equivalent
2x bolts m4 18mm
3x bolts m3 16mm
4x bolts m3 10mm
2x bolts m3 26mm
4x self-tapping screws for servo
thingiverse
free

Robotic arm: turntable (part 2/3) by WonderTiger
...tating plate with the potentiometer and push the rotating plate in place.
apply some light oil or grease on the 10mm steel balls.
thingiverse
free
Requiem E3D Single/Duo Modular Remix BLTouch + MGN12C by Ron888
... m3 x 8mm
4x m3 x 20mm
nuts
2x m4
4x m3
todo:
plan to include mgn12h and stock wheels options
chimera and stock hotends
thingiverse
free
2020 profile 608ZZ rotating mount for 8mm linear slide bushing by Bloodhoundje
...er diameter : approx. 8mm / 0.31"
sc8uu 8mm aluminum linear motion ball bearing slide bushing
mounting should be a snug fit.
thingiverse
free

Spherical Quadruped Robot
...4x femur 1-2
1x head servo support
1x cross
1x battery support
4x femur 2-2
1x bottom part
1x top part
12x washer
1x guiding ring
grabcad
free

Metric Flat Head Assortment
...3 nut
m3 washer
m4 x 8mm
m4 x 12mm
m4 x 16mm
m4 x 20mm
m4 nut
m4 washer
m5 x 8mm
m5 x 12mm
m5 x 16mm
m5 x 20mm
m5 nut
m5 washer
thingiverse
free

X carriage mounted extruder filament guide by jwass
...to the bearing mount to go from your spool to the guide to keep your filament from touching your work surface an picking up dirt.
thingiverse
free
Improved Filament Mount + Guide for Flashforge Creator Pro by Zwom
...om ruthex)
1x socket screw m4 x <16mm
for installation of filament guide to filament mount
2x nut m3
2x socket screw m3 x 8mm
Wondertiger
thingiverse
free
Robotic arm: turntable (part 2/3) by WonderTiger
...tating plate with the potentiometer and push the rotating plate in place.
apply some light oil or grease on the 10mm steel balls.
thingiverse
free
Robotic arm: gripper (part 1/3) by WonderTiger
... to hammer it on the servo. once the gear sits reasonably well you could use a shorter screw so that you won't jam the servo.
Robotic
3d_ocean
$20

Robot
...robot 3docean character metal robot robot robotic white robot model for 3dsmax 2009 and...
3d_ocean
$45
Robot
...robot
3docean
fighing machine robot
a fighting robot from the scrapyard.
3d_ocean
$18
Robot
...robot
3docean
machin robot science fiction
high poly robot.
3d_export
$7

Robot
...robot
3dexport
robot
3d_export
$5
robot
...robot
3dexport
robot
3d_export
free

Robot
...robot
3dexport
robot
turbosquid
$10

Robot/ Alien Robot
...
royalty free 3d model robot/ alien robot for download as max on turbosquid: 3d models for games, architecture, videos. (1442828)
3d_export
$5

robot
...robot
3dexport
robot in blender
3ddd
$1
robot
...robot
3ddd
робот
robot
3ddd
$1

Robot
...robot
3ddd
робот
robot
Arm
archibase_planet
free
Arm
...ase planet
arm hand right hand skeleton
arm human skeleton right arm n030515 - 3d model (*.gsm+*.3ds+*.max) for 3d visualization.
3ddd
$1

arm chair
...arm chair
3ddd
arm chair , пуф
arm chair
turbosquid
$5
arm
...arm
turbosquid
royalty free 3d model arm for download as obj on turbosquid: 3d models for games, architecture, videos. (1306158)
turbosquid
free

Arm
...arm
turbosquid
free 3d model arm for download as obj and fbx on turbosquid: 3d models for games, architecture, videos. (1346955)
turbosquid
$29

Arm
...osquid
royalty free 3d model arm for download as obj and fbx on turbosquid: 3d models for games, architecture, videos. (1382436)
3d_export
$5

coat of arms
...coat of arms
3dexport
coat of arms
3ddd
$1

ARM SOFA
...arm sofa
3ddd
arm sofa
3ddd
$1

Arm chair
...arm chair
3ddd
arm chair
3ddd
$1

Arm chair
...arm chair
3ddd
угловое
arm chair
3ddd
$1
ARM CHAIR
...arm chair
3ddd
arm chair clothes
3
turbosquid
$10

Mountain Bike 3 -3 of 3
...model mountain bike 3 (#3 of 3) for download as fbx and blend on turbosquid: 3d models for games, architecture, videos. (1438752)
turbosquid
$6

Rock 3-3
...urbosquid
royalty free 3d model rock 3-3 for download as obj on turbosquid: 3d models for games, architecture, videos. (1628065)
turbosquid
$29

Books 150 pieces 3-3-3
...books 150 pieces 3-3-3 for download as max, obj, fbx, and stl on turbosquid: 3d models for games, architecture, videos. (1384033)
turbosquid
$3

Genesis 3 Clothing 3
... available on turbo squid, the world's leading provider of digital 3d models for visualization, films, television, and games.
3d_export
$5

hinge 3
...hinge 3
3dexport
hinge 3
3ddd
$1

Розетка 3
...розетка 3
3ddd
розетка
розетка 3
turbosquid
$50

is-3
... available on turbo squid, the world's leading provider of digital 3d models for visualization, films, television, and games.
turbosquid
$10

Mountain Bike 3 -2 of 3
...model mountain bike 3 (#2 of 3) for download as fbx and blend on turbosquid: 3d models for games, architecture, videos. (1438750)
turbosquid
$10

Mountain Bike 1 -3 of 3
...model mountain bike 1 (#3 of 3) for download as fbx and blend on turbosquid: 3d models for games, architecture, videos. (1438743)
3d_export
$5

3 CATS
...3 cats
3dexport
3 cats pen holder
Part
3d_export
$5
Parts
...parts
3dexport
parts
3d_export
$5
Part
...part
3dexport
part
3d_export
$5

Part
...part
3dexport
machine part
3d_export
$65

Part
...part
3dexport
simple rendering of the scene file
3d_export
$65

Part
...part
3dexport
simple rendering of the scene file
3d_export
$30

fan part
...fan part
3dexport
this is a part of fan of pedastal
3d_export
$10
machine parts
...machine parts
3dexport
3d part modeling work ,contact for 3d work
turbosquid
$59

Mechanical Part
...id
royalty free 3d model mechanical part for download as c4d on turbosquid: 3d models for games, architecture, videos. (1410833)
turbosquid
$17
Road parts
...bosquid
royalty free 3d model road parts for download as 3ds on turbosquid: 3d models for games, architecture, videos. (1192967)
turbosquid
$9

Cutter Parts
...squid
royalty free 3d model cutter parts for download as stl on turbosquid: 3d models for games, architecture, videos. (1220010)