Thingiverse
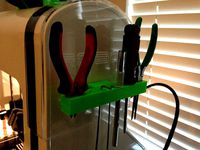
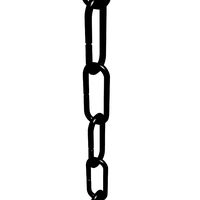
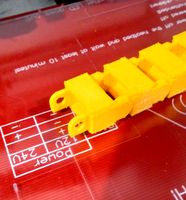
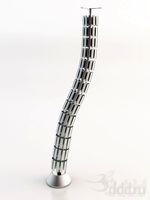
Robo3D Y Axis Cable Chain by galaxius
by Thingiverse
Last crawled date: 3 years ago
I remixed the ends to suit the smooth rod bed upgrade by tonycstech here http://www.thingiverse.com/thing:439036
EDIT: Added pillow block end for the R1 bed (untested).
EDIT: If printed in PLA some sort of under bed insulation is required if using the bed heated.
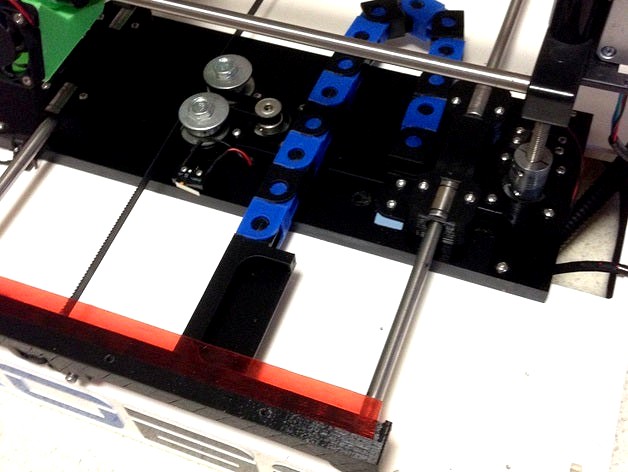
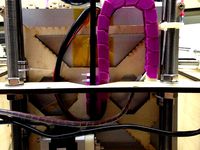
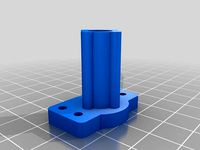
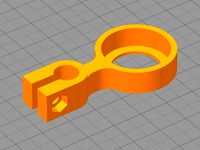
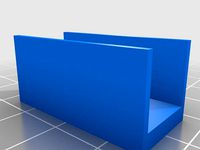
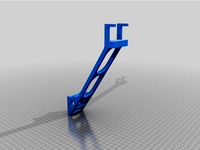
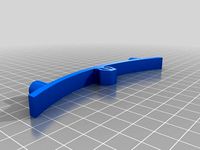
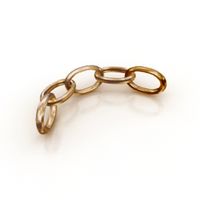
I've included the original chain link for completeness. I added an extra fixing hole for the base end to ensure it doesn't swivel, which also means it doesn't have to be mounted hard against the smooth rod bearing housing. The pillow block end's bracket is designed to mount to the underside of the Y Axis pillow block. Ensure you print enough links that the bed can move it's complete travel distance.
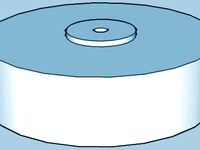
The cable hole in the base is 10mm. When you drill the hole make sure you start with a 2 or 3mm bit and work your way up to 10mm in 1-2mm increments.
Printed in PLA with 3 perimeters, 3 top/bottom layers, 20% infill, and no support.
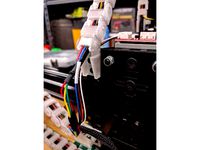
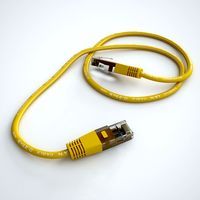
You will need 4x 6mm or 8mm M3 bolts for fixing the ends and kapton tape for re-positioning the bed wires. These are the plugs and wire I purchased, the wire I bought in red and black:http://hobbyking.com.au/hobbyking/store/__9572__Nylon_XT60_Connectors_Male_Female_5_pairs_GENUINE.htmlhttp://hobbyking.com.au/hobbyking/store/__19433__HXT_2mm_Gold_Connector_w_Protector_10pcs_set_.htmlhttp://hobbyking.com.au/hobbyking/store/__9681__Turnigy_Pure_Silicone_Wire_16AWG_1mtr_Red.htmlhttp://hobbyking.com.au/hobbyking/store/__10937__Turnigy_Pure_Silicone_Wire_24AWG_1mtr_Red.html
EDIT: Added pillow block end for the R1 bed (untested).
EDIT: If printed in PLA some sort of under bed insulation is required if using the bed heated.
I've included the original chain link for completeness. I added an extra fixing hole for the base end to ensure it doesn't swivel, which also means it doesn't have to be mounted hard against the smooth rod bearing housing. The pillow block end's bracket is designed to mount to the underside of the Y Axis pillow block. Ensure you print enough links that the bed can move it's complete travel distance.
The cable hole in the base is 10mm. When you drill the hole make sure you start with a 2 or 3mm bit and work your way up to 10mm in 1-2mm increments.
Printed in PLA with 3 perimeters, 3 top/bottom layers, 20% infill, and no support.
You will need 4x 6mm or 8mm M3 bolts for fixing the ends and kapton tape for re-positioning the bed wires. These are the plugs and wire I purchased, the wire I bought in red and black:http://hobbyking.com.au/hobbyking/store/__9572__Nylon_XT60_Connectors_Male_Female_5_pairs_GENUINE.htmlhttp://hobbyking.com.au/hobbyking/store/__19433__HXT_2mm_Gold_Connector_w_Protector_10pcs_set_.htmlhttp://hobbyking.com.au/hobbyking/store/__9681__Turnigy_Pure_Silicone_Wire_16AWG_1mtr_Red.htmlhttp://hobbyking.com.au/hobbyking/store/__10937__Turnigy_Pure_Silicone_Wire_24AWG_1mtr_Red.html
Similar models
thingiverse
free

Printrite Z Axis to Y Axis Chain Clamp Remix by 1sPiRe
...i will make a clamp for z-axis chain, and i'll also try to find a way to fix it on original y-axis end blocks if you need it.
thingiverse
free

10mm rod pillow block for mendelmax y axis by freemoore
...it says on the tin - enlarged and strengthened derivative of pieterbos' pillow block design, to accommodate 10mm linear rail.
thingiverse
free

Robo3D R1 Alternative Y Axis Pillow Block and End Caps for 10mm Smooth Rods by danzca6
...-precision-ground-10mm-x-405mm-shaft-pair/
10mm bronze bearings:http://www.ultibots.com/10mm-bronze-bearing-4-pack-a-7z41mpsb10m/
thingiverse
free

CR-10 / Tevo Tornado bed mount y-axis cable chain by carkom
...itself (also works with commercially purchased r18 chains - 10mmx20mm). pretty straightforward, let me know if you have feedback!
thingiverse
free
Cable chain buffer for 10mm threaded rod by i-make-robots
...nt the chain from ever reaching the bearing. i needed two to make it work. you can see them in the top right of the photograph.
thingiverse
free

Geeetech Aluminum Prusa i3 - Cable Chain Mounts by gsimpson2g
...tp://www.thingiverse.com/thing:11978 to easily be mounted on the geeetech aluminum prusa i3 extruder and x-axis end stop switch.
thingiverse
free

Y axis cable chain horizontal mount for Wanhao Di3 / Monoprice Maker Select v2.1 by xenz
... then this mount isn't for you.
also, the rear mount do extended the printer about 8cm in length. measure before you print !!
thingiverse
free
ACRO Laser Cable Chains by 3boysdad
... the y-axis as well as the x-axis. then print another set using the mirror tool in your slicer for the right side of the y-axis.
thingiverse
free

ormerod1 Y twist fix by appjaws
...all items are printed at the same time but i have included the scad file so that you can create individual stl files if you wish.
thingiverse
free

Anet A8 Y-Axis Cable Chain with hole by hitvan
...by hitvan
thingiverse
just added hole for cap on the y axis frame mount.
i use it with https://www.thingiverse.com/thing:2105627
Galaxius
thingiverse
free
Triton Dust Collector Bucket Hose End by galaxius
... bucket hose end by galaxius
thingiverse
this is the hose adapter for the end that connects to the triton dust collector bucket.
thingiverse
free

Vertical blind end stop by galaxius
...decided it was a good opportunity to design and print replacements. i hope someone else will find this replacement design useful.
thingiverse
free

Dog Tags for Infill by galaxius
...the photo with the numbers.)
printed in pla, 2 perimeters, 2 bottom layers, 0 top layers, infill set to the number of the tag.
thingiverse
free

Knob for the Full Graphic Smart LCD Controller by galaxius
...on't fall off. i suggest printing at 100% and do a test fit then increase from there if you need. 3% was a good guess for me.
thingiverse
free

Filament Oiler/Cleaner by galaxius
...it'll so for now. the oiler is free to slide from side to side on the wire and the wire can swing back and forward if needed.
thingiverse
free
Robo3D Z Stabiliser by galaxius
...y stock stabilisers. please comment and add photos if you use these.
printed in pla with 4 perimeters. i think my infill was 95%.
thingiverse
free
Robo3D Z Rod Constraint by galaxius
...still has to slide onto the smooth rod.
slide onto the smooth rod and adjust so the threaded z rod is verticle.
tighten the bolt.
thingiverse
free

adapter for Dremel4000 for Dremel drill Press by Galaxius by Fuintur
...0-holder-bottom but for dremel4000 instead of dremel3000. i haven't tried it yet, but i will try it and report in a few days.
thingiverse
free

Spool holder bracket for topless Robo3D by galaxius
...nd 55mm high. the robo3d cover mounting bracket is 25mm high so that leaves 30mm for mounting your uprights or whatever you like.
thingiverse
free

My S3D Process FFF File by galaxius
...use to initially test various settings before moving on to more complicated calibration prints.
i hope this proves to be useful.
Robo3D
turbosquid
$2

Robo3D Feet
... available on turbo squid, the world's leading provider of digital 3d models for visualization, films, television, and games.
thingiverse
free

Robo3d Filament Guide by sjreggel
...robo3d filament guide by sjreggel
thingiverse
robo3d filament guide, to be used with the default robo3d spool holder
thingiverse
free
Robo3D USB Support by GipsyEureka
...robo3d usb support by gipsyeureka
thingiverse
robo3d usb support.
thingiverse
free
Robo3D Camera Mount by robro
...robo3d camera mount by robro
thingiverse
mount for a logitech c270 webcamto a robo3d printer
thingiverse
free
Robo3D Tool Holder by huntergrayson
...robo3d tool holder by huntergrayson
thingiverse
an out of the way place for your tools on the robo3d printer
thingiverse
free
Robo3D Top Mount by ThorMJ
...o the robo3d.
added a version with longer posts so it clears the robo3d handle from the http://www.thingiverse.com/thing:234939
thingiverse
free

Screws' holder Robo3D by GalloEnricoDesign
...screws' holder robo3d by galloenricodesign
thingiverse
a easy support used as holder for screws' extruder
for robo3d.
thingiverse
free
ROBO3D Spool Cap by portdog77
...robo3d spool cap by portdog77
thingiverse
this is a cap i made for my robo3d to hold the filliment next to the machine.
thingiverse
free

ROBO3D OILER HOLDER by Prefab
...robo3d oiler holder by prefab
thingiverse
holds your robo3d oilers so you can always find them
thingiverse
free

robo3d feet simple version by Windpower
...robo3d feet simple version by windpower
thingiverse
robo3d feet remember to print 4.
Axis
3ddd
$1

Мария Axis
...
3ddd
кухня , классическая , axis
модель кухни.
3d_export
$22

Axis robot 6-axis robotic arm
...ing parts drawings, standard parts purchased parts list, can be produced directly according to the drawings, welcome to download!
3ddd
free

Versatile Axis
...ddd
nexus , плитка
http://bvtileandstone.com/ceramic-porcelain/versatile-axis/
3d_export
$19

robot 2 axis
...robot 2 axis
3dexport
robot 2 axis
turbosquid
$40

Axis R5F
... available on turbo squid, the world's leading provider of digital 3d models for visualization, films, television, and games.
turbosquid
$40

Axis S5F
... available on turbo squid, the world's leading provider of digital 3d models for visualization, films, television, and games.
turbosquid
$30

Axis Athlon
... available on turbo squid, the world's leading provider of digital 3d models for visualization, films, television, and games.
turbosquid
$10

Linear Axis
... available on turbo squid, the world's leading provider of digital 3d models for visualization, films, television, and games.
3d_export
$15

drawing axis
...drawing axis
3dexport
simple rendering of the scene file
3ddd
$1

versatile axis ARC
...versatile axis arc
3ddd
versatile , плитка
versatile axis arc red dot design award
Chain
archibase_planet
free
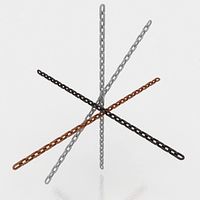
Chain
...chain
archibase planet
chain chain link chain loop
chain n020708 - 3d model (*.gsm+*.3ds) for interior 3d visualization.
3d_export
$5
chain
...chain
3dexport
3d model chain
3d_export
$5
chain
...chain
3dexport
chain. obj,fbx,blend
archibase_planet
free

Chain
...se planet
chain circuit catena
chain - archicad parametrical gdl 3d model (*.gsm). regulation of the length, curvature and angle.
archibase_planet
free
Chain
...n
archibase planet
chain circuit catena
chain - archicad parametrical gdl 3d model(*.gsm). regulation of the length and angle xyz
3d_ocean
$5

Chain
...chain
3docean
3d models chain design elements
3d models, design elements
3d_ocean
$5

Chain
...chain
3docean
3d models chain design elements
3d models, design elements
turbosquid
$10
Chain
...hain
turbosquid
royalty free 3d model chain for download as on turbosquid: 3d models for games, architecture, videos. (1329200)
turbosquid
$9
chain
...hain
turbosquid
royalty free 3d model chain for download as on turbosquid: 3d models for games, architecture, videos. (1549461)
turbosquid
$2
Chain
...hain
turbosquid
royalty free 3d model chain for download as on turbosquid: 3d models for games, architecture, videos. (1148668)
Cable
3d_export
free

Cables
...cables
3dexport
cables for your purposes
3d_export
free
cable belt for cable organization
...ze your cables in 3d printers. it will bend only to one direction. the area to put the cables per piece is aprox. 1,6cmx2,6cmx1cm
3d_ocean
$16
Ethernet Cable
...ethernet cable
3docean
cable computer electronics ethernet internet network connected
ethernet cable 3d model
3d_export
$65

cable
...cable
3dexport
simple rendering of the scene file
turbosquid
$14

Cable
...l cable for download as ma, max, fbx, 3ds, gltf, obj, and stl on turbosquid: 3d models for games, architecture, videos. (1631358)
3ddd
$1
Cable Cover
...cable cover
3ddd
кабель
vertebra passacavo - cable cover
max + vray 2.20.03
3d_export
$15
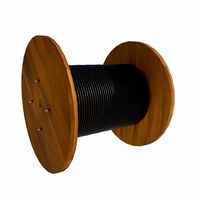
Cable reel
...without cable. textures 4k 4096x4096 targa, png, jpeg.<br>number of polygons without cable: 2896<br>with cable: 35328
3d_export
$7

short cable
...short cable
3dexport
rubber cord. very detailed. cable thickness: 2.55 mm total length: 55mm
3d_export
$5

USB CABLE
...usb cable
3dexport
turbosquid
$30
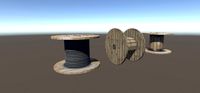
Cable Reels
...osquid
royalty free 3d model cable reels for download as fbx on turbosquid: 3d models for games, architecture, videos. (1439507)
Y
turbosquid
$1

Tetera y Galletas y Caf
... available on turbo squid, the world's leading provider of digital 3d models for visualization, films, television, and games.
3ddd
$1

Смеситель Y-CON
...смеситель y-con
3ddd
смеситель , y-con
смеситель y-con
3ddd
$1

Y-Chair
...y-chair
3ddd
tom dixon
y-chair designed by tom dixon,
3ds max + obj, corona
3ddd
$1

Y Chair compilation
....net/products/us/y-chair-sled-base
y chair swivel basehttp://www.tomdixon.net/products/us/y-chair-swivel-base
turbosquid
$190

Y-8
...y-8
turbosquid
royalty free 3d model y-8 for download as max on turbosquid: 3d models for games, architecture, videos. (1658891)
turbosquid
$7

Bench Y
...turbosquid
royalty free 3d model bench y for download as obj on turbosquid: 3d models for games, architecture, videos. (1488746)
turbosquid
$15

bonePile Y
...oyalty free 3d model bonepile y for download as blend and obj on turbosquid: 3d models for games, architecture, videos. (1546374)
turbosquid
$7

Y for Yarn
...d
royalty free 3d model y for yarn model for download as max on turbosquid: 3d models for games, architecture, videos. (1699732)
turbosquid
$2

FONT Y
...quid
royalty free 3d model font y for download as ma and obj on turbosquid: 3d models for games, architecture, videos. (1549457)
3ddd
$1

WOOD-y
...wood-y
3ddd
wooden guy