Thingiverse

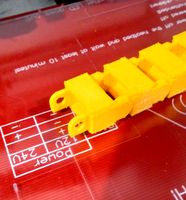
Robo3D R1 Heatbed cable upgrade by PD5DJ
by Thingiverse
Last crawled date: 3 years ago
I'm using the Robo3D R1 a couple of months now, and made 200+ prints so far working fine, until the bed temperature readout started to fail and showed 0 degrees.
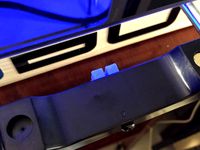
While investigating this, I noticed Robo3D used a very crappy stiff grey cable, Totally not designed for bending all the time..
Also the cable was directly glued with silicone to the Glass bed.
I removed the cable and silicone.
Since I use the printer 100% of the time for postproduction I could not wait for a decent cableguide. So I had to fix it with the parts I had laying around at that moment.
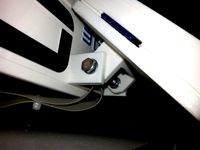
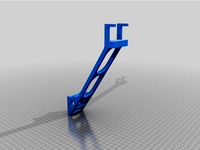
First thing my eye fel on was the Y Idler block. Secured with 1 M4 screw.
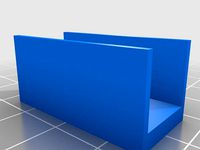
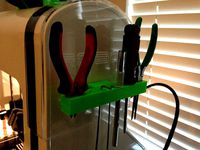
I decided to use the unused idler hole on the other side to fix a cable guide, and make a cable mesh clamp secured on the stepper plate.
I also moved the Y Endstop, just to clear up the space for the cable mesh to run freely.
For the bed wires I used silicone wire that is used in the RC scene,
That is made to flex arround.
VIDEO of the modification: http://youtu.be/v9JPC_EkF2Y
What do you need:
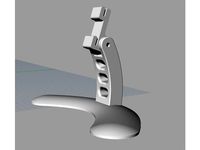
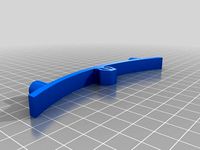
These printed parts.. prefer ABS
Cable Mesh arround 6-7mm dia.
Connector for connecting the bed wires (heater + thermistor) to the cable. (or just solder straight on).
I Used Multiplex connectors, they can handle a max load of 35amps cont. and has some extra pins for the thermistor.http://www.youtube.com/watch?v=HVe5srJrDmo
Some 14awg silcone wire (got mine from hobbyking)
Some 22awg like wire for the thermistor
While investigating this, I noticed Robo3D used a very crappy stiff grey cable, Totally not designed for bending all the time..
Also the cable was directly glued with silicone to the Glass bed.
I removed the cable and silicone.
Since I use the printer 100% of the time for postproduction I could not wait for a decent cableguide. So I had to fix it with the parts I had laying around at that moment.
First thing my eye fel on was the Y Idler block. Secured with 1 M4 screw.
I decided to use the unused idler hole on the other side to fix a cable guide, and make a cable mesh clamp secured on the stepper plate.
I also moved the Y Endstop, just to clear up the space for the cable mesh to run freely.
For the bed wires I used silicone wire that is used in the RC scene,
That is made to flex arround.
VIDEO of the modification: http://youtu.be/v9JPC_EkF2Y
What do you need:
These printed parts.. prefer ABS
Cable Mesh arround 6-7mm dia.
Connector for connecting the bed wires (heater + thermistor) to the cable. (or just solder straight on).
I Used Multiplex connectors, they can handle a max load of 35amps cont. and has some extra pins for the thermistor.http://www.youtube.com/watch?v=HVe5srJrDmo
Some 14awg silcone wire (got mine from hobbyking)
Some 22awg like wire for the thermistor
Similar models
thingiverse
free
Robo3D R1 Y Axis belt block by 3DNG
...rived with a cracked one, but luckily it came with a spare. this had to be the first 3d print to make in case the spare fails to!
thingiverse
free

Prusa DIY Clone heated bed connector holder by Gadjet0
...d mounting bracket, this means it's easier to remove the heated bed and bracket, it also has a recess to hold an m3 nut *****
thingiverse
free

Bed cable chain and heater wiring connector bracket by demigh0d
...#39;t want to be heating the whole thing when i'm printing smaller parts. with this i am able to easily switch my print beds.
thingiverse
free

Robo 3d R1 X Axis Stepper Motor Mount For Cable Chain System - Remixed Robo3d by derez
...it in yet, waiting to receive my z axis upgrade from robo 3d. i will do the cable chain and the z axis upgrade at the same time.
thingiverse
free

Anet A8 Bed connector for wire-chain
...is leveled with the rest.
if you like my design and want to make a donation to support me, my paypal is: paypal.me/dennisheijmans
thingiverse
free

Geeetech Y-Axis cable strain clamp by Soadyheid
...te. i've included the freecad .fcstd file to allow you to change the self tapper diameter as required.
the clamp works fine!
thingiverse
free

Silicone Auto Nozzle Cleaner by Taumelscheibe
...holder is also a strain relief for the heatbed cable.
the freecad files are included so you can modify the parts for your printer
thingiverse
free

Robo3D Geckotek Bed Parts by NorCAL3D
... the mosfet is inserted and secured with (4) m3 nylon nuts. the 4 screw heads are barely noticeable at the back half of the case.
thingiverse
free

Tevo Tarantula Lower Bed Cable Chain Adapter by jthomeo
... the bed wiring with silicon wires for better flexibility. would recomend. added a picture of the printer finished with the mods.
thingiverse
free

Cable guard for X52 HOTAS by thatdude902
...s the connector. the only issue might be if saitek used different sources for that wire and there are different shapes out there.
Pd5Dj
thingiverse
free
SimBox - Stand by PD5DJ
...r all simboxes
remind you will need to print the new backplates of the boxes!
needed: 1x m4x30mm bolt, 1x m4 washer and 1x m4 nut
thingiverse
free

Dipole Bracket for wire dipoles by PD5DJ
...e bracket for wire dipoles by pd5dj
thingiverse
wire dipole bracket for 300ohm and 450ohm twinlead..
screws needed are m4 type..
thingiverse
free

Mendelmax 1.5 Smart Graphics LCD Case by PD5DJ
...mendelmax 1.5 smart graphics lcd case by pd5dj
thingiverse
special design for the smart graphics lcd for mendelmax 1.5
thingiverse
free

Frsky X10 - Switch & Gimbal protectors by PD5DJ
...dj
thingiverse
8 different x10(s) gimbal & switch protectors
long sticks
short sticks
hinged and no hinged
spaced protectors
thingiverse
free

Frsky Horus X12S Gimbal Protectors by PD5DJ
... x12s
v1. gimbal protector with hooks for elastic band
v2. gimbal protector without hooks
v3. seperate left and right protectors.
thingiverse
free

Mix of krakow_marcin's PolarPro Filter case, somewhat more grip by PD5DJ
...case, somewhat more grip by pd5dj
thingiverse
i have remixed this case because i wanted somewhat more grip on the box to open it
thingiverse
free

Frsky X20 - Switch & Gimbal protector by PD5DJ
...e for short sticks and one for somewhat longer sticks.
need for any other type, please let me know i will be glad to help you out
thingiverse
free

Mavic PolarPro Filter box by PD5DJ
...detail and max strenght on the hinges.
the hole diameter of the hinges is 1mm.
--------- 6 filters case is coming soon! ---------
thingiverse
free
Tilt Bracket for i.e. RepRap LCD's or universal use by PD5DJ
...d in conjunction with a reprap (g)lcd, or universal use.
bolts for the tilting are m5, and the bracket fixing screw holes are 4mm
thingiverse
free
Mavic PolarPro 6 Filter box by PD5DJ
..., with a layer height of 100 microns.
this for max detail and max strenght on the hinges.
the hole diameter of the hinges is 1mm.
Robo3D
turbosquid
$2

Robo3D Feet
... available on turbo squid, the world's leading provider of digital 3d models for visualization, films, television, and games.
thingiverse
free

Robo3d Filament Guide by sjreggel
...robo3d filament guide by sjreggel
thingiverse
robo3d filament guide, to be used with the default robo3d spool holder
thingiverse
free
Robo3D USB Support by GipsyEureka
...robo3d usb support by gipsyeureka
thingiverse
robo3d usb support.
thingiverse
free
Robo3D Camera Mount by robro
...robo3d camera mount by robro
thingiverse
mount for a logitech c270 webcamto a robo3d printer
thingiverse
free
Robo3D Tool Holder by huntergrayson
...robo3d tool holder by huntergrayson
thingiverse
an out of the way place for your tools on the robo3d printer
thingiverse
free
Robo3D Top Mount by ThorMJ
...o the robo3d.
added a version with longer posts so it clears the robo3d handle from the http://www.thingiverse.com/thing:234939
thingiverse
free

Screws' holder Robo3D by GalloEnricoDesign
...screws' holder robo3d by galloenricodesign
thingiverse
a easy support used as holder for screws' extruder
for robo3d.
thingiverse
free
ROBO3D Spool Cap by portdog77
...robo3d spool cap by portdog77
thingiverse
this is a cap i made for my robo3d to hold the filliment next to the machine.
thingiverse
free

ROBO3D OILER HOLDER by Prefab
...robo3d oiler holder by prefab
thingiverse
holds your robo3d oilers so you can always find them
thingiverse
free

robo3d feet simple version by Windpower
...robo3d feet simple version by windpower
thingiverse
robo3d feet remember to print 4.
Heatbed
thingiverse
free

HeatBed by moreken
...heatbed by moreken
thingiverse
heatbed for my printer3d "moredelta"
thingiverse
free

heatbed (double heatbed) holder by Vo_Van_163
... bigger size than work desk. this holder - is good solution for me/ and also this is a good solution for double hotbed regulation
thingiverse
free
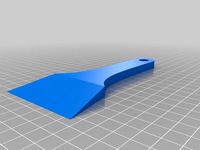
Heatbed Spatula by Brabus453
... spatula by brabus453
thingiverse
heatbed spatula
this is a simple spatula to scrape the heatbed from the first layer residues.
thingiverse
free
Heatbed Mount for round Heatbeds by OliverReinecke
...y bottom board to fix the heatbed-mount. but of coursse there are lots of alternatives to do this... its up to you. hope it helps
thingiverse
free
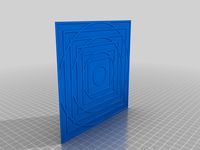
Heatbed plane test
...eds ... this simple object allows to see where the bonding of the object and the flatness of the heatbed might not be optimal ...
thingiverse
free
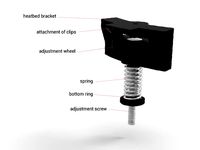
Heatbed Knob by Sp0nge
...heatbed knob by sp0nge
thingiverse
craftbot plus heatbed knob
print it in abs and put a nut inside.
thingiverse
free

Heatbed cable cover
... the heatbed when i placing the pei sheet.
so i designed this small cover, it clips right down over the +/- screws on the heatbed
thingiverse
free

Heatbed Mosfet controller by oscar_diciomma
...heatbed mosfet controller by oscar_diciomma
thingiverse
heatbed mosfet controller
thingiverse
free

Parametric Heatbed Clamp by verglor
...y verglor
thingiverse
minimalistic heatbed clamps that do not get in way of nozzle.
can be customized for any heatbed thickness.
thingiverse
free

Heatbed support
...ail
heatbed size 328mm
use m5x10 with washers or m5x8 for the 20x20 profile
m4 for heatbed
can be use with wells of 45mm of diam.
R1
turbosquid
$10

R1
... available on turbo squid, the world's leading provider of digital 3d models for visualization, films, television, and games.
turbosquid
$10

R1
... available on turbo squid, the world's leading provider of digital 3d models for visualization, films, television, and games.
turbosquid
$15

chair r1
...urbosquid
royalty free 3d model chair r1 for download as max on turbosquid: 3d models for games, architecture, videos. (1282574)
3ddd
free
r1
...r1
3ddd
кольцо , ювелирное украшение
кольцо, сделано в свободное от работы время )
3d_ocean
$5

R1 rim
... tire tuner tuning tyre vehicle wheel
a r1 rim modeled to specs. for more car-related objects, please do visit my profile. enjoy!
turbosquid
$5
R1 Rocket
... available on turbo squid, the world's leading provider of digital 3d models for visualization, films, television, and games.
3d_export
$59

praga r1
...s for the minimum operational crew, the praga r1 offers the ultimate race-winning motorsport technology in an affordable package.
turbosquid
$80
R1 Astromech Droid
... free 3d model r1 astromech droid for download as obj and lxo on turbosquid: 3d models for games, architecture, videos. (1180592)
turbosquid
$49

Yamaha R1 2006
... available on turbo squid, the world's leading provider of digital 3d models for visualization, films, television, and games.
turbosquid
free

GHAANON R1.blend
... available on turbo squid, the world's leading provider of digital 3d models for visualization, films, television, and games.
Upgrade
turbosquid
$15

Upgraded Glock
...e 3d model upgraded glock for download as obj, fbx, and blend on turbosquid: 3d models for games, architecture, videos. (1185950)
3ddd
$1

Calligaris / UPGRADE
...calligaris / upgrade
3ddd
calligaris
c материалом
3d_export
free

cz upgrade
...cz upgrade
3dexport
https://www.buymeacoffee.com/mestrezen3d https://linktr.ee/mestrezen3
turbosquid
$80

Custer Tank upgrade
... available on turbo squid, the world's leading provider of digital 3d models for visualization, films, television, and games.
turbosquid
$39

Domestos 1 upgrade
... available on turbo squid, the world's leading provider of digital 3d models for visualization, films, television, and games.
3d_export
$10

Upgraded tea cup
...upgraded tea cup
3dexport
a cup with an unusual design and a unique shape for a more enjoyable tea experience
3d_export
$8

dixy outlander classic style upgraded poplar wood lounge chair
...utlander classic style upgraded poplar wood lounge chair
3dexport
dixy outlander classic style upgraded poplar wood lounge chair
turbosquid
free

AK-12 + Upgrades low-poly 3D model
...ow-poly 3d model for download as fbx, blend, and unitypackage on turbosquid: 3d models for games, architecture, videos. (1501145)
evermotion
$700

Upgrade from V-ray 1.5 to 3.5 for 3ds max
...here is no need to purchase a new dongle - your current dongles will be reprogrammed to carry v-ray 3. evermotion 3d models shop.
evermotion
$300

Upgrade from V-Ray 2.0 to V-ray 3.5 for 3ds Max
... interface (gui) for editing settings on one machine and one render node for rendering on one machine. evermotion 3d models shop.
Cable
3d_export
free

Cables
...cables
3dexport
cables for your purposes
3d_export
free
cable belt for cable organization
...ze your cables in 3d printers. it will bend only to one direction. the area to put the cables per piece is aprox. 1,6cmx2,6cmx1cm
3d_ocean
$16

Ethernet Cable
...ethernet cable
3docean
cable computer electronics ethernet internet network connected
ethernet cable 3d model
3d_export
$65

cable
...cable
3dexport
simple rendering of the scene file
turbosquid
$14

Cable
...l cable for download as ma, max, fbx, 3ds, gltf, obj, and stl on turbosquid: 3d models for games, architecture, videos. (1631358)
3ddd
$1
Cable Cover
...cable cover
3ddd
кабель
vertebra passacavo - cable cover
max + vray 2.20.03
3d_export
$15
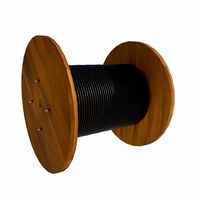
Cable reel
...without cable. textures 4k 4096x4096 targa, png, jpeg.<br>number of polygons without cable: 2896<br>with cable: 35328
3d_export
$7

short cable
...short cable
3dexport
rubber cord. very detailed. cable thickness: 2.55 mm total length: 55mm
3d_export
$5

USB CABLE
...usb cable
3dexport
turbosquid
$30
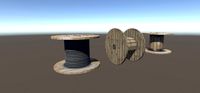
Cable Reels
...osquid
royalty free 3d model cable reels for download as fbx on turbosquid: 3d models for games, architecture, videos. (1439507)